50 Chevy 3100
ALL BUILDS

1950 · Phase 1 rebuild

PHASE 1 COMPLETE

50 Chevy 3100

1950
OWNER, LIBERTY HILL TX
PHASE 1 COMPLETED JULY 2022

§ 01

THE BRIEF

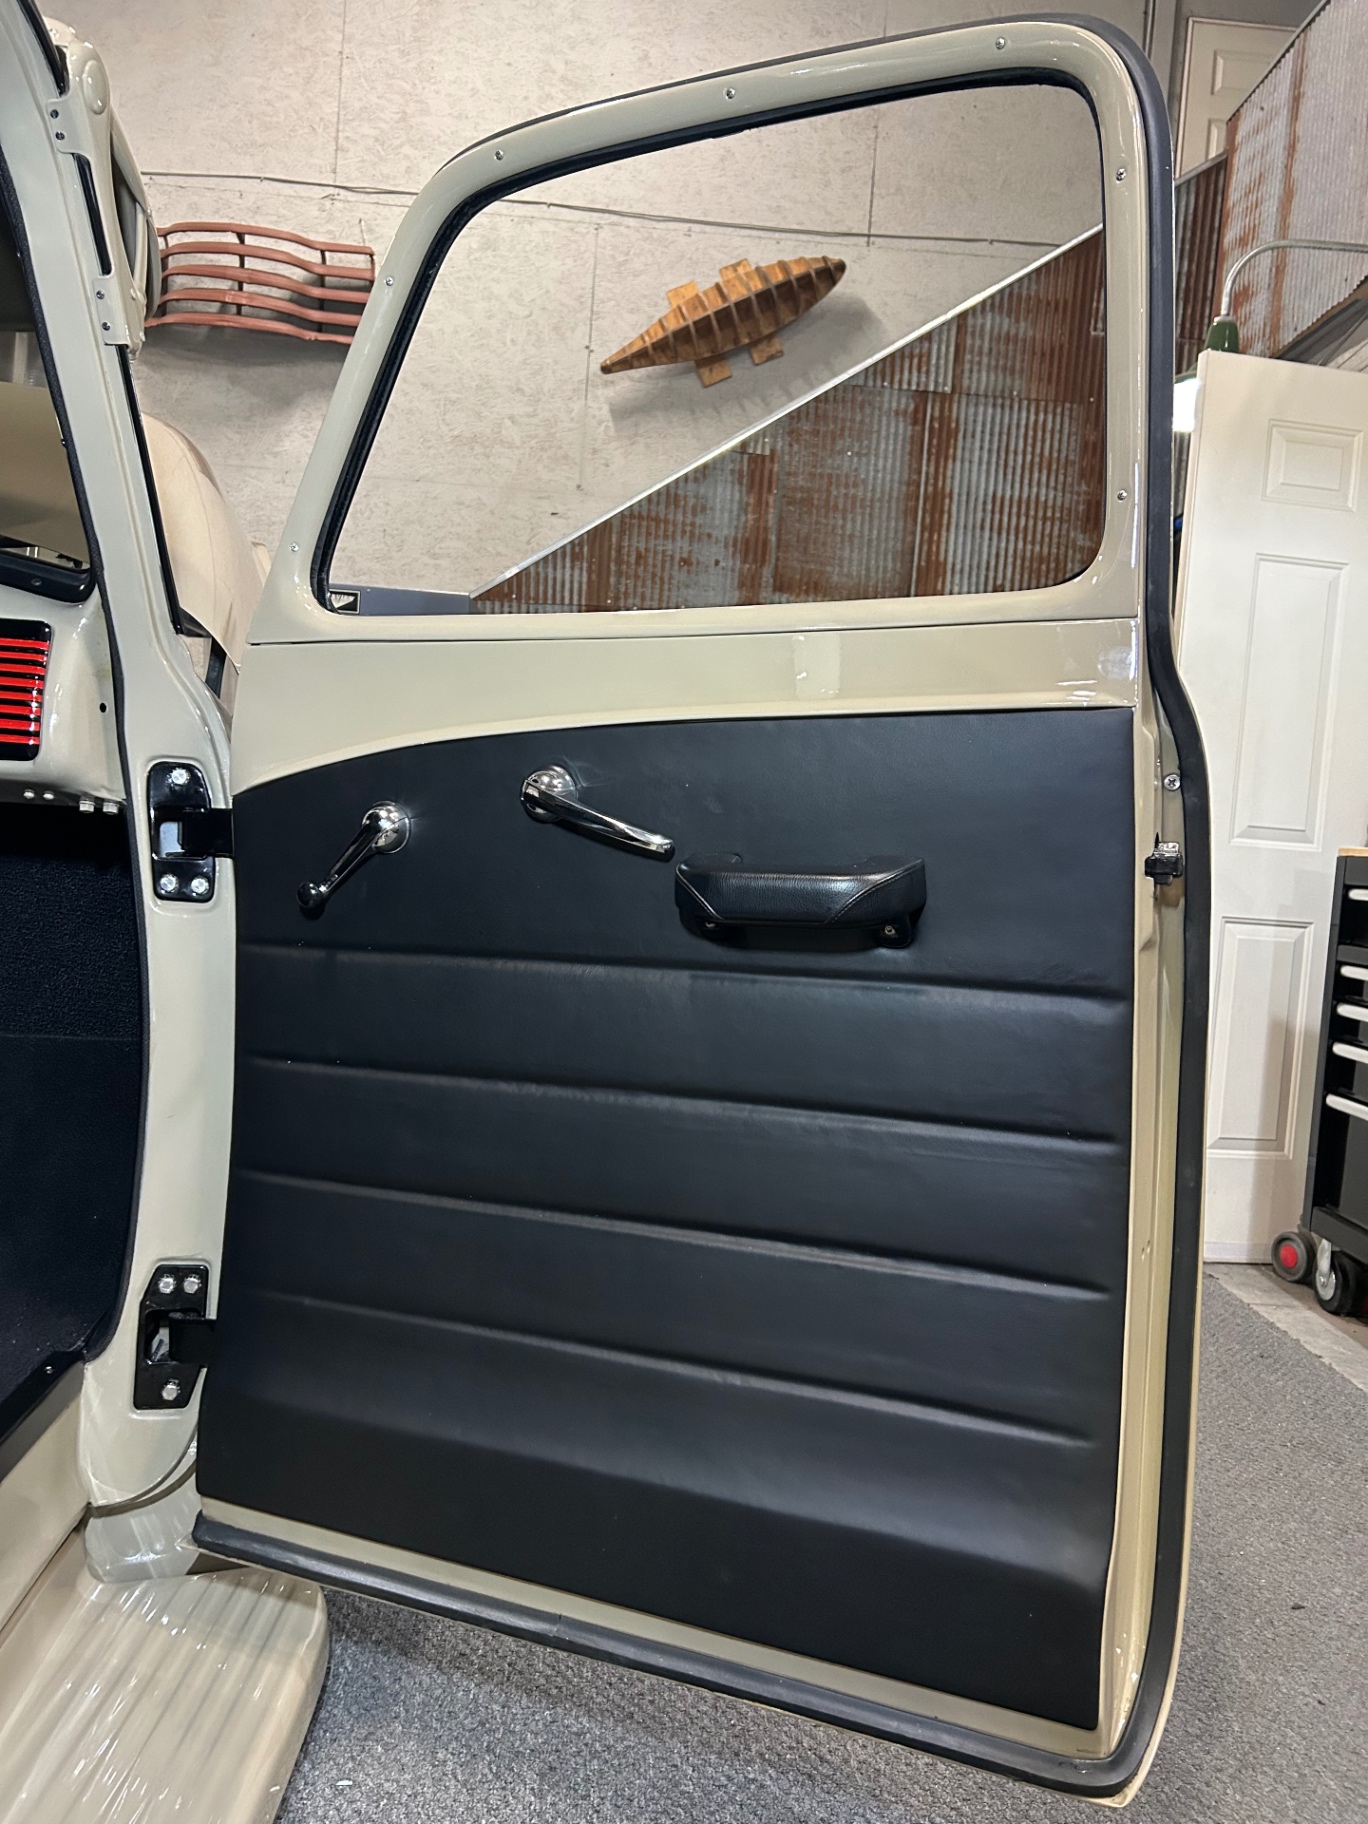
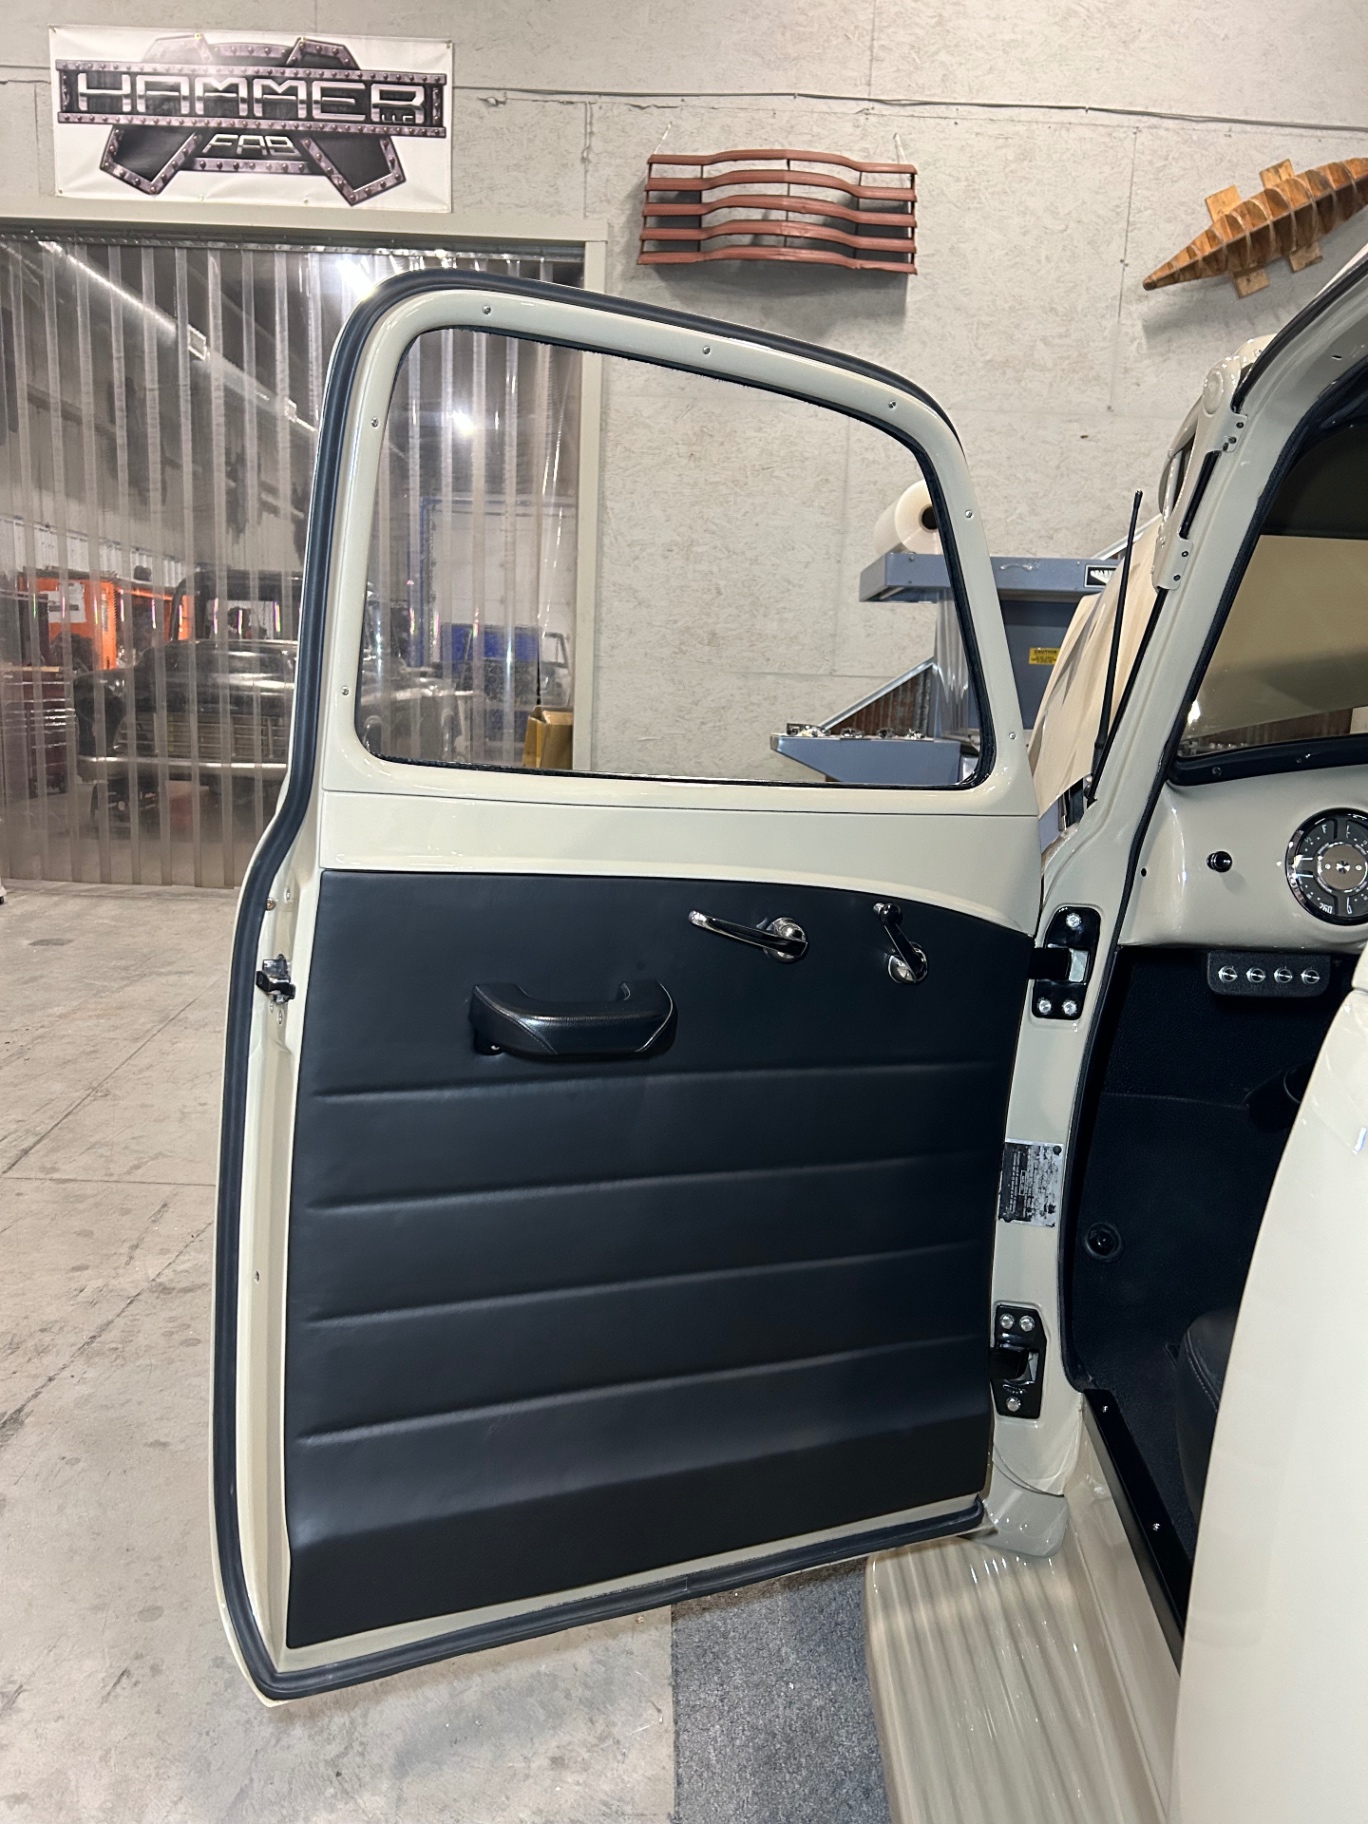
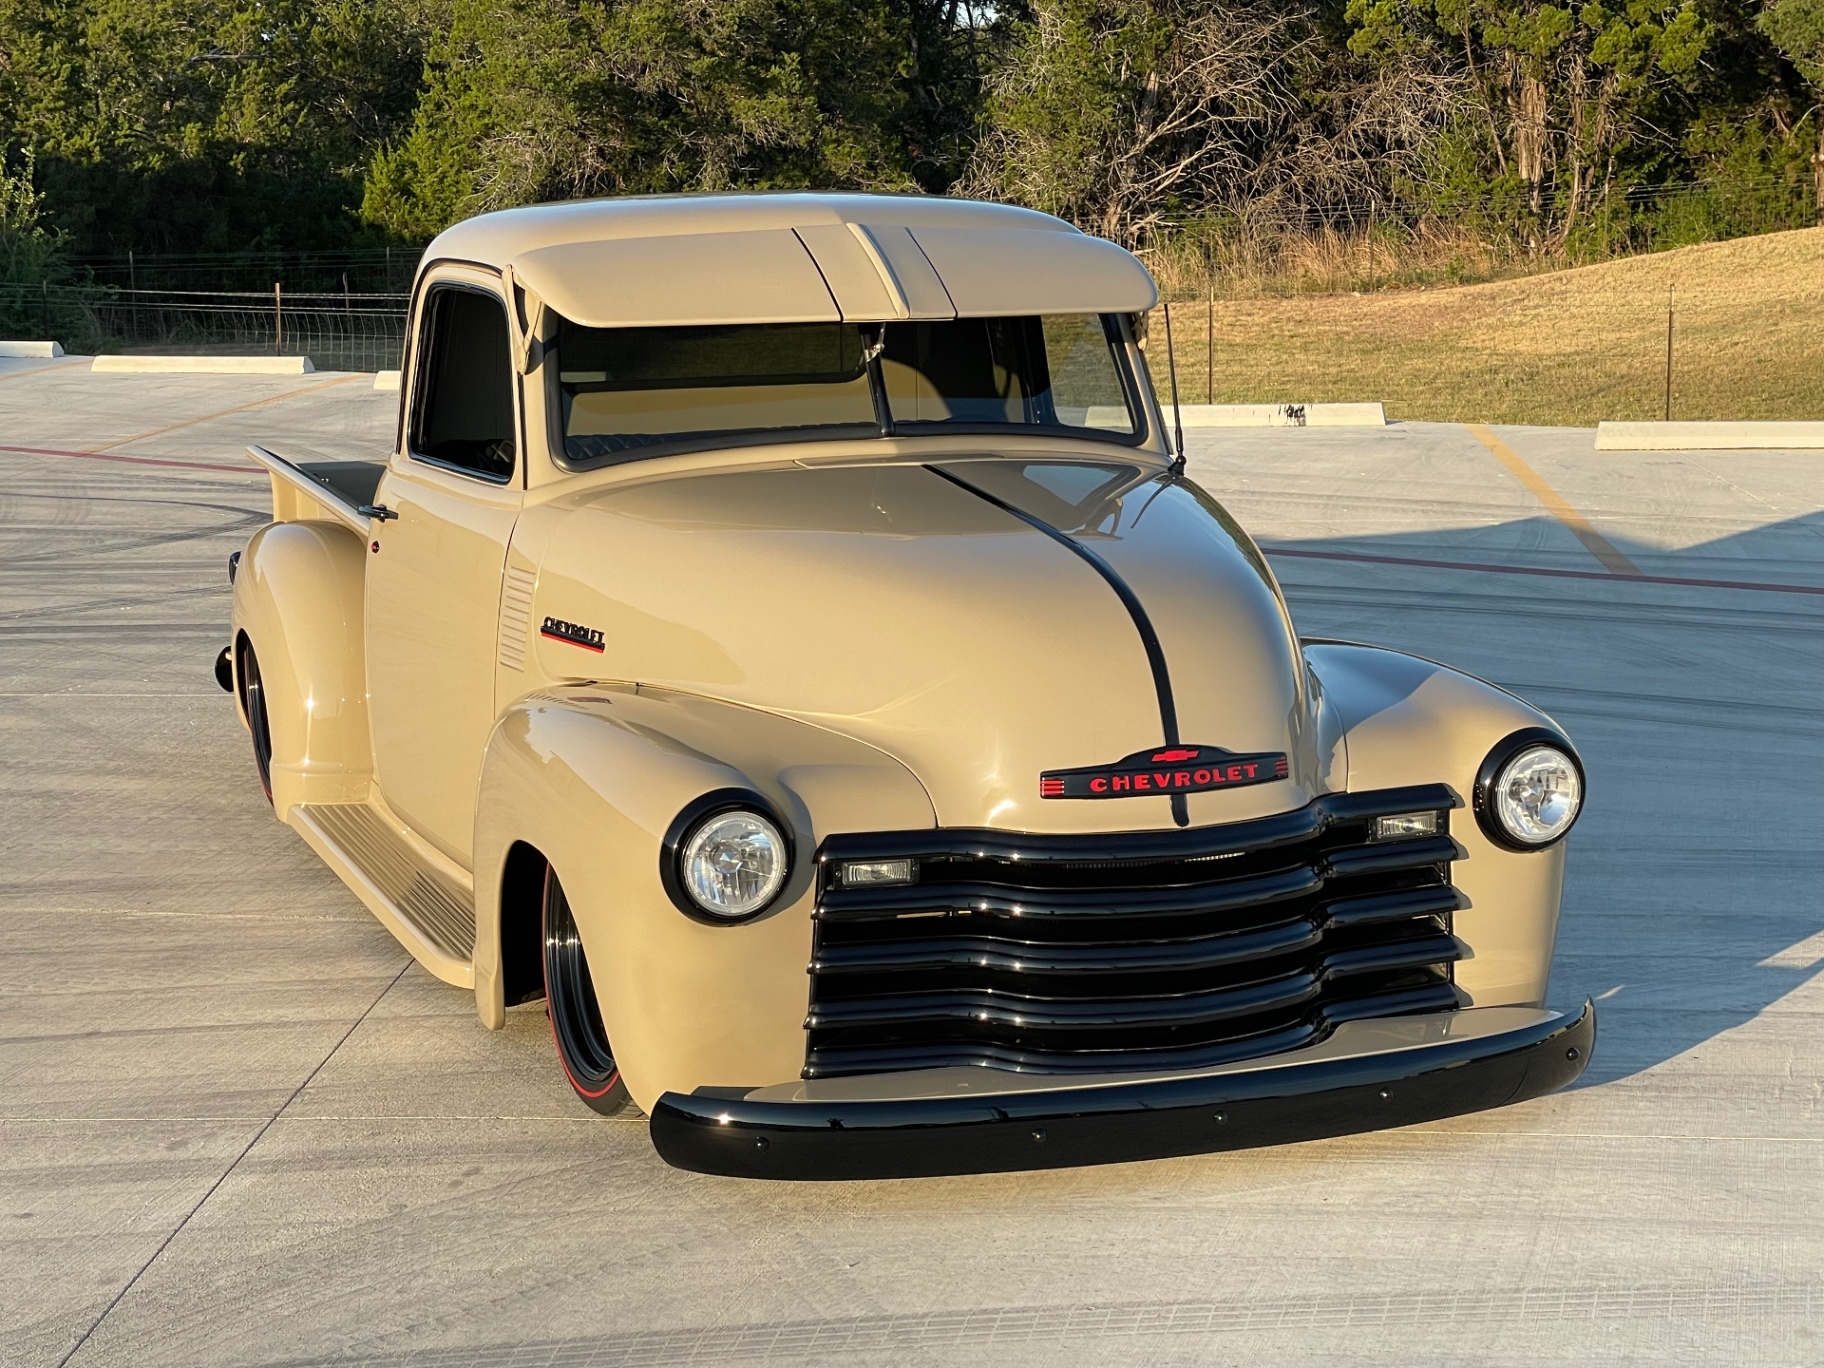
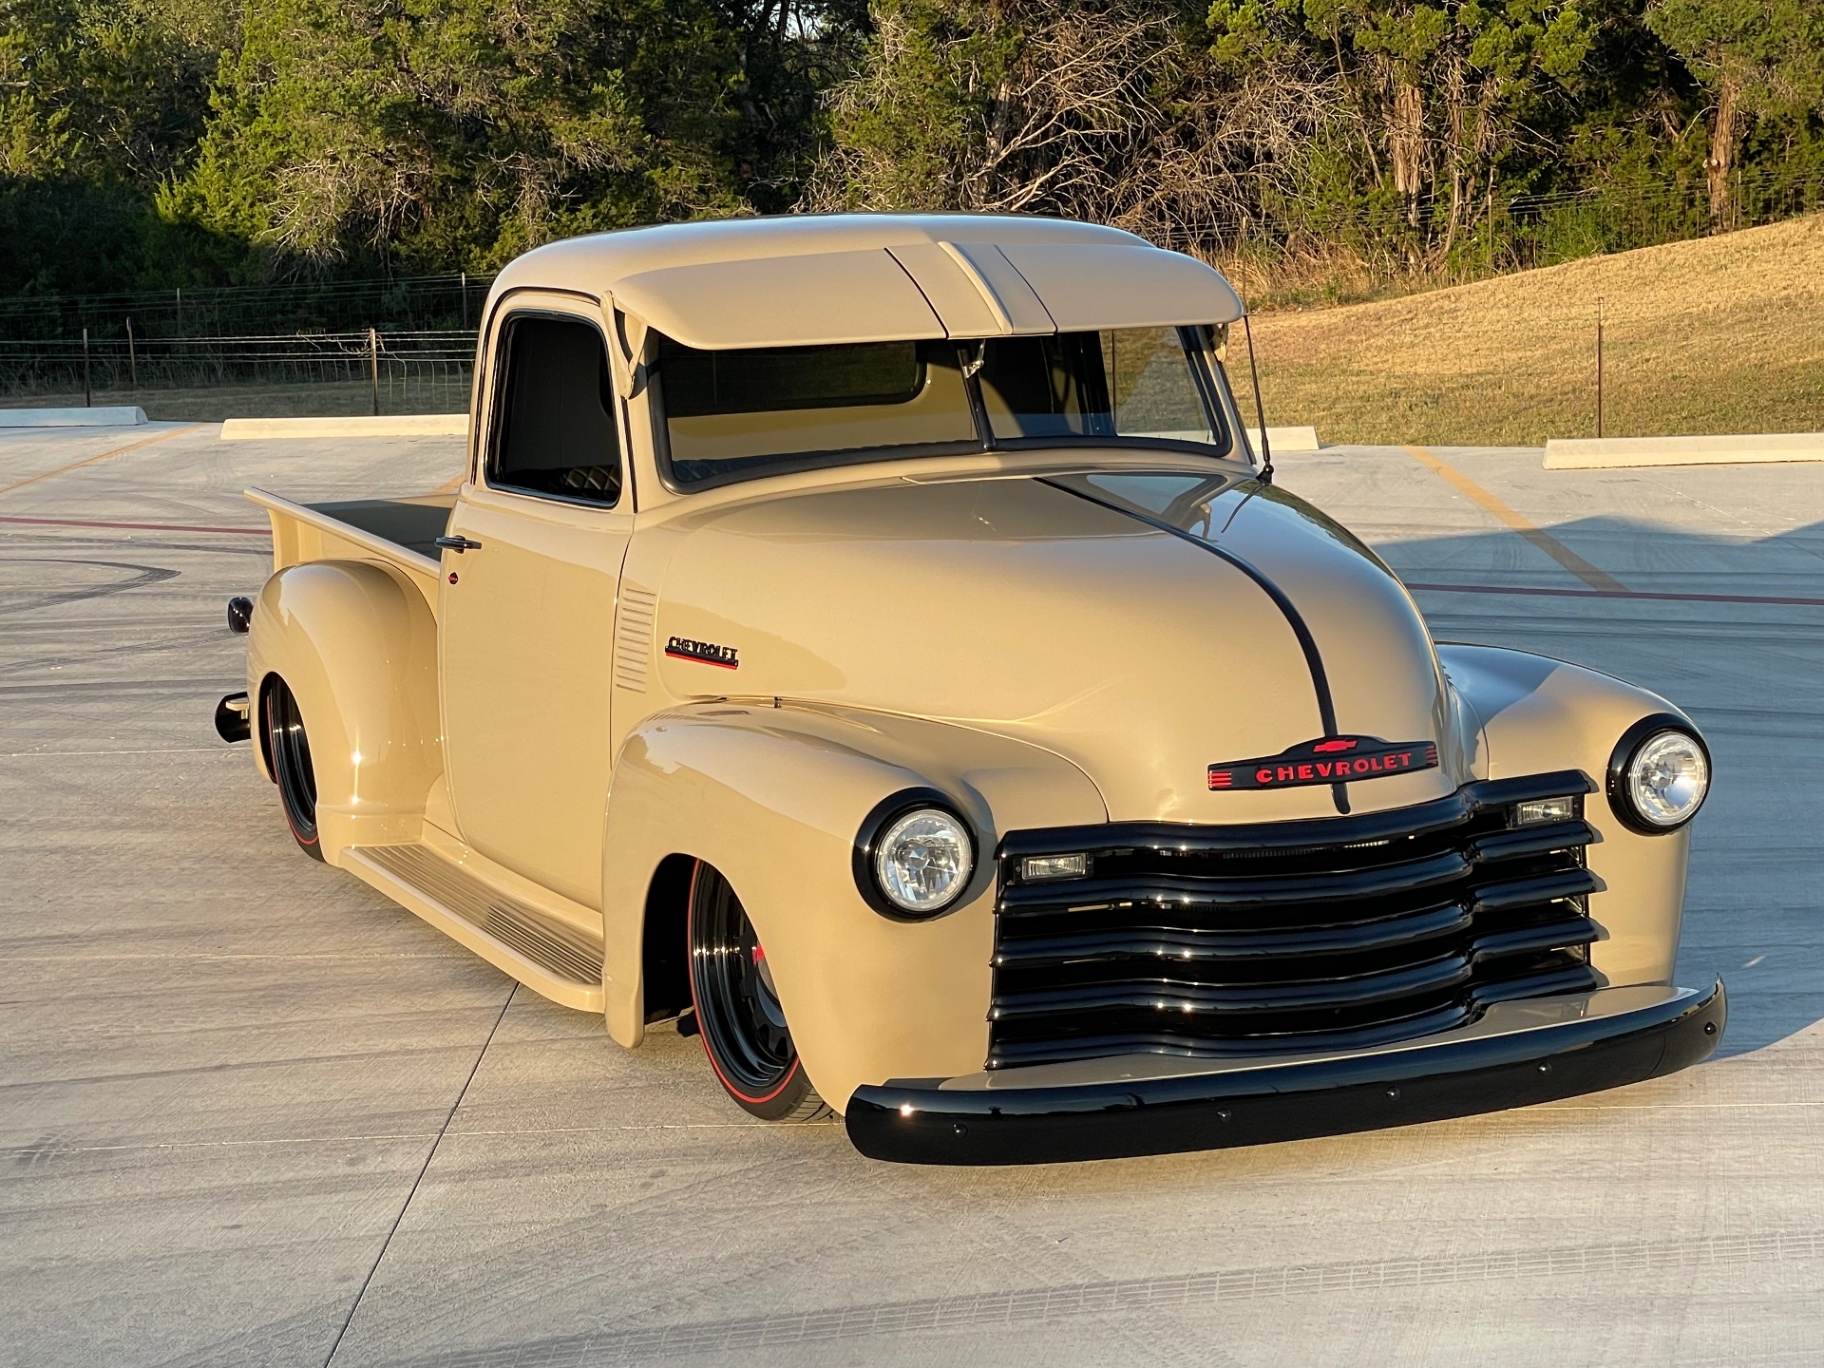
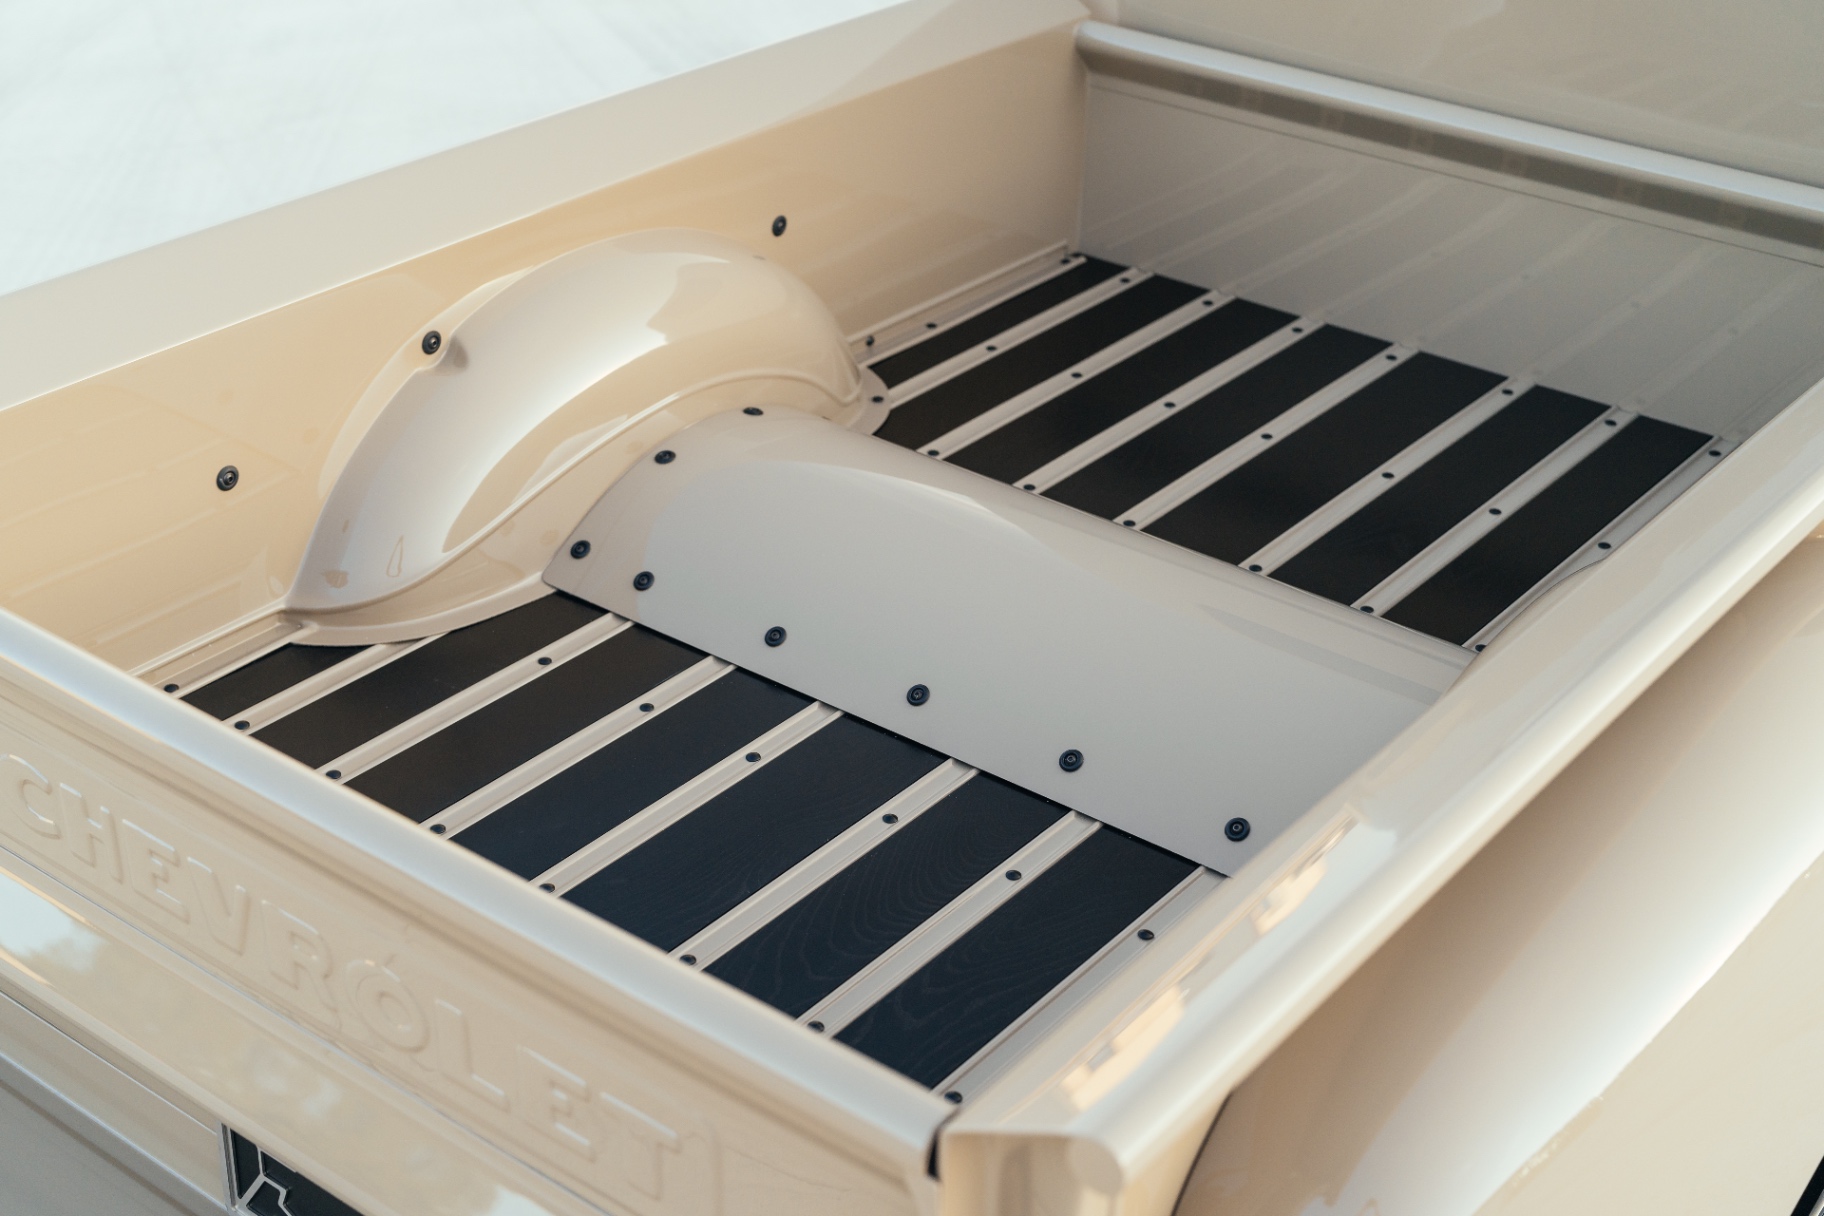
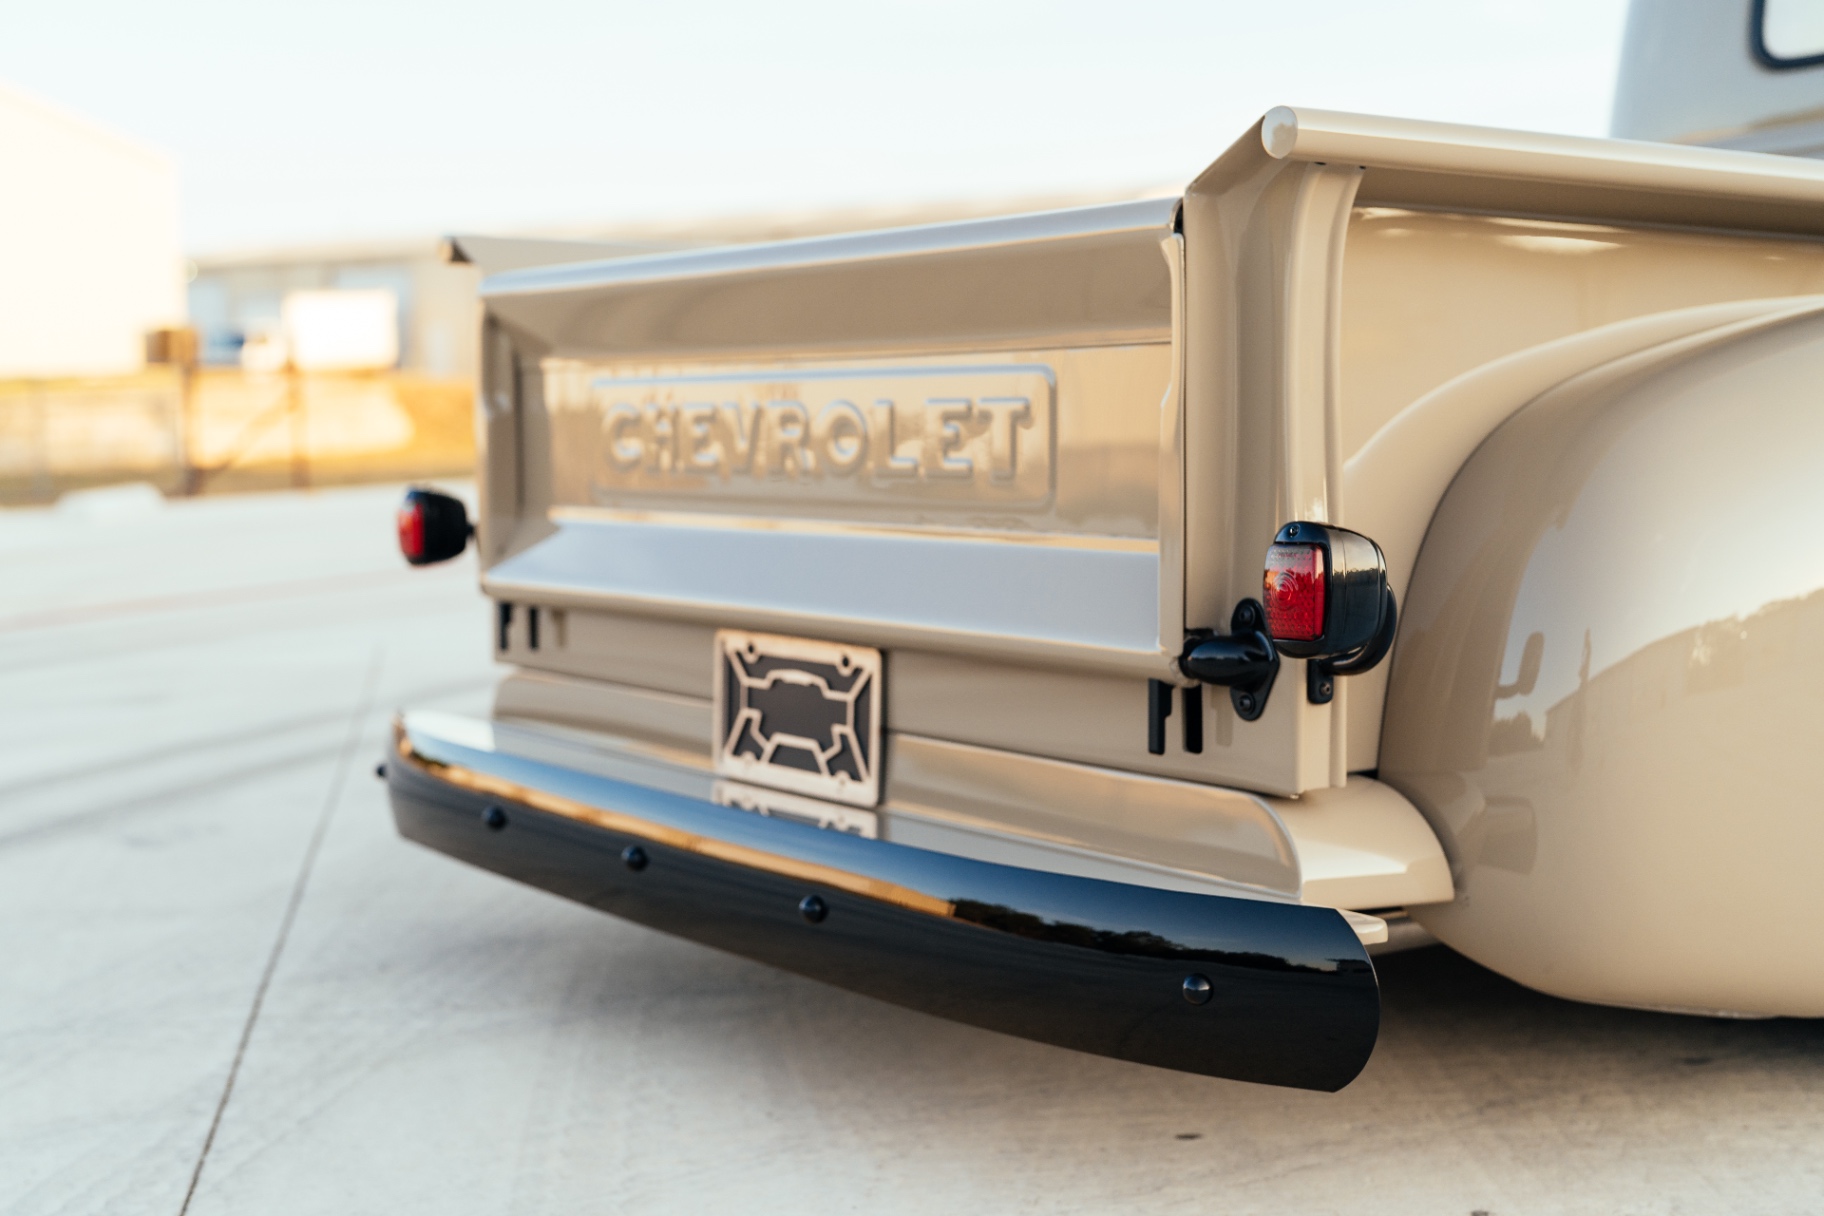
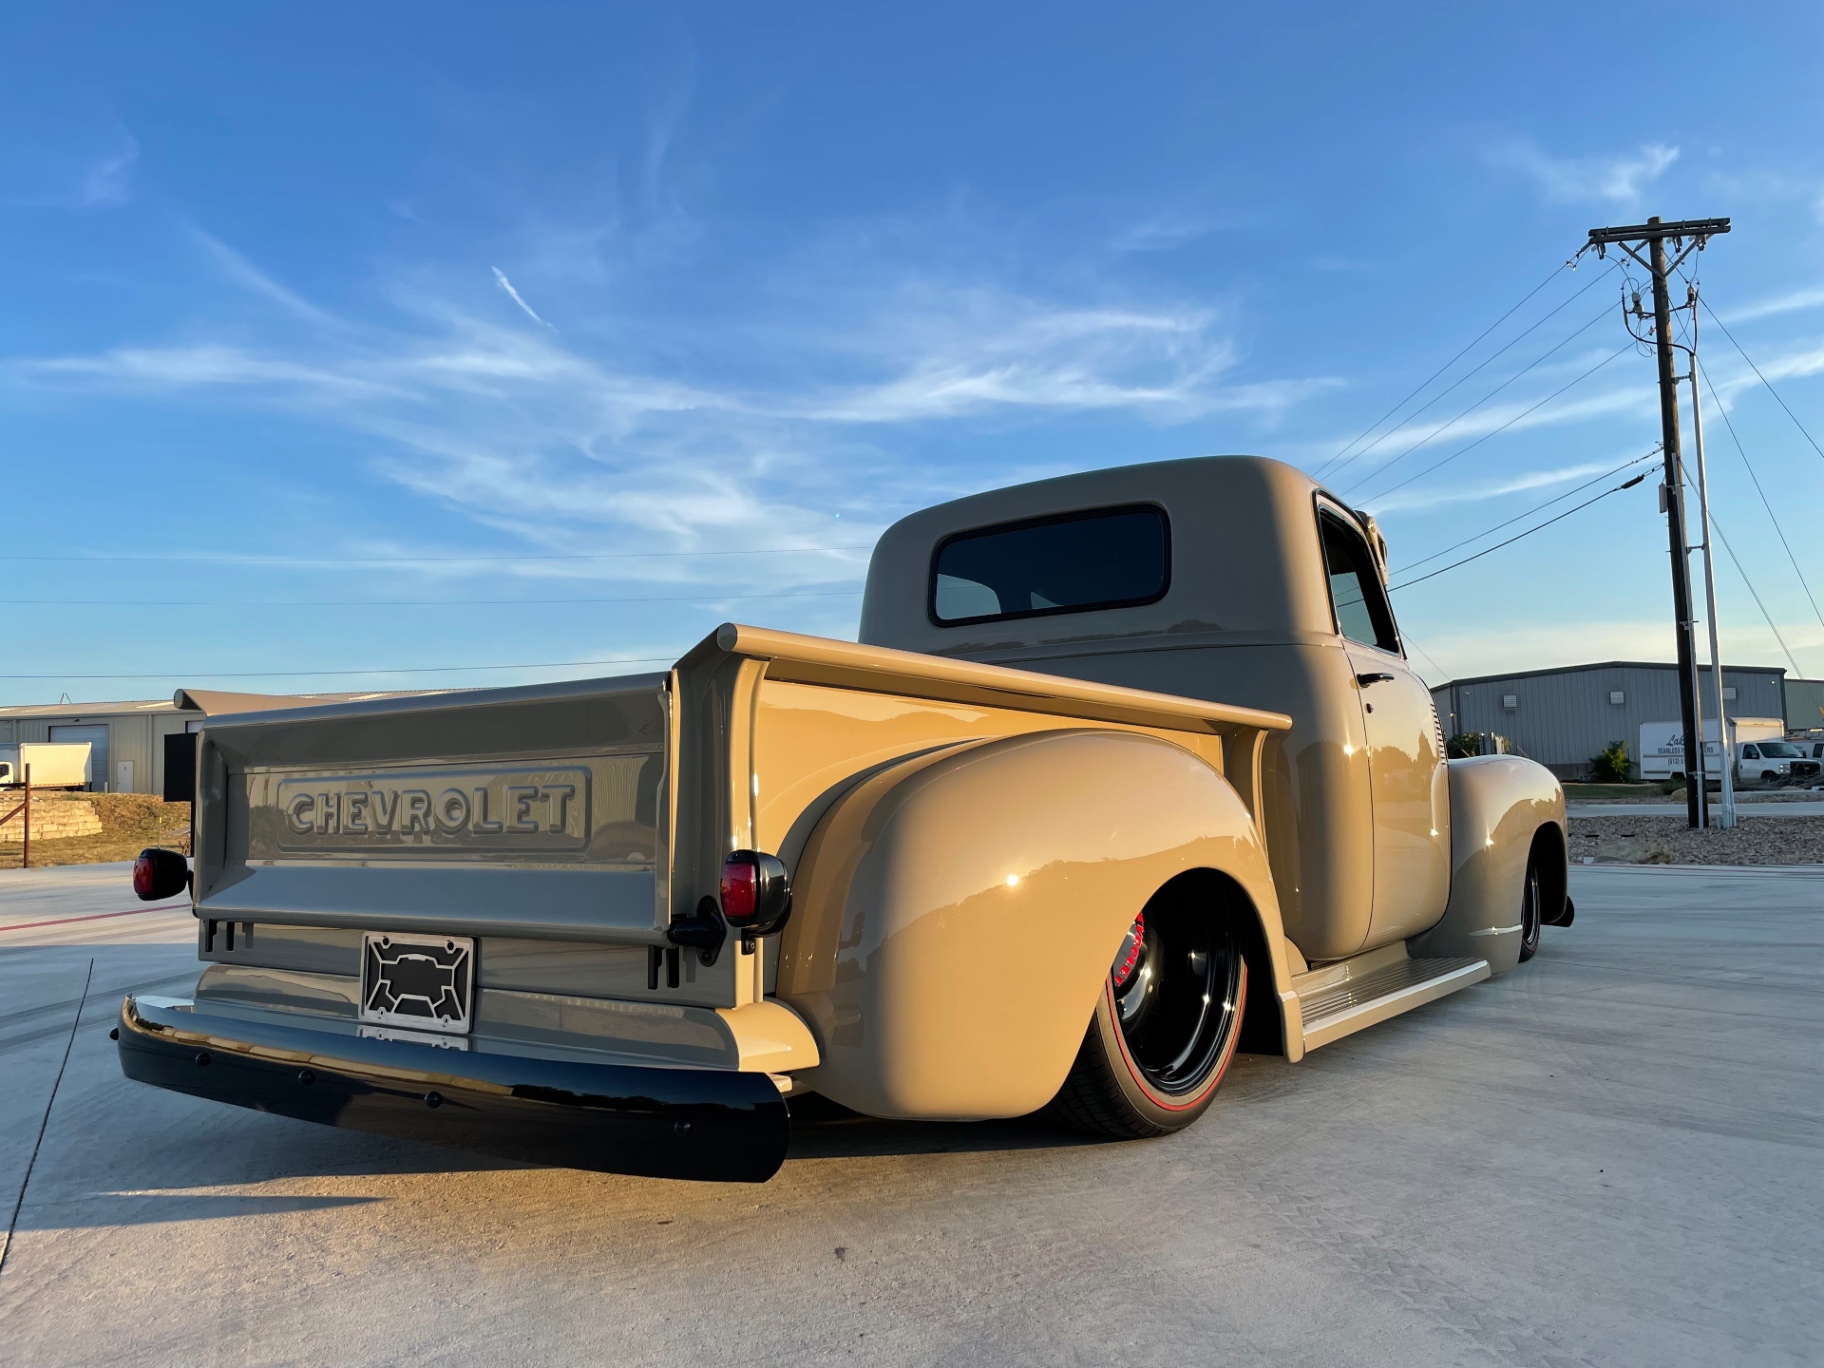
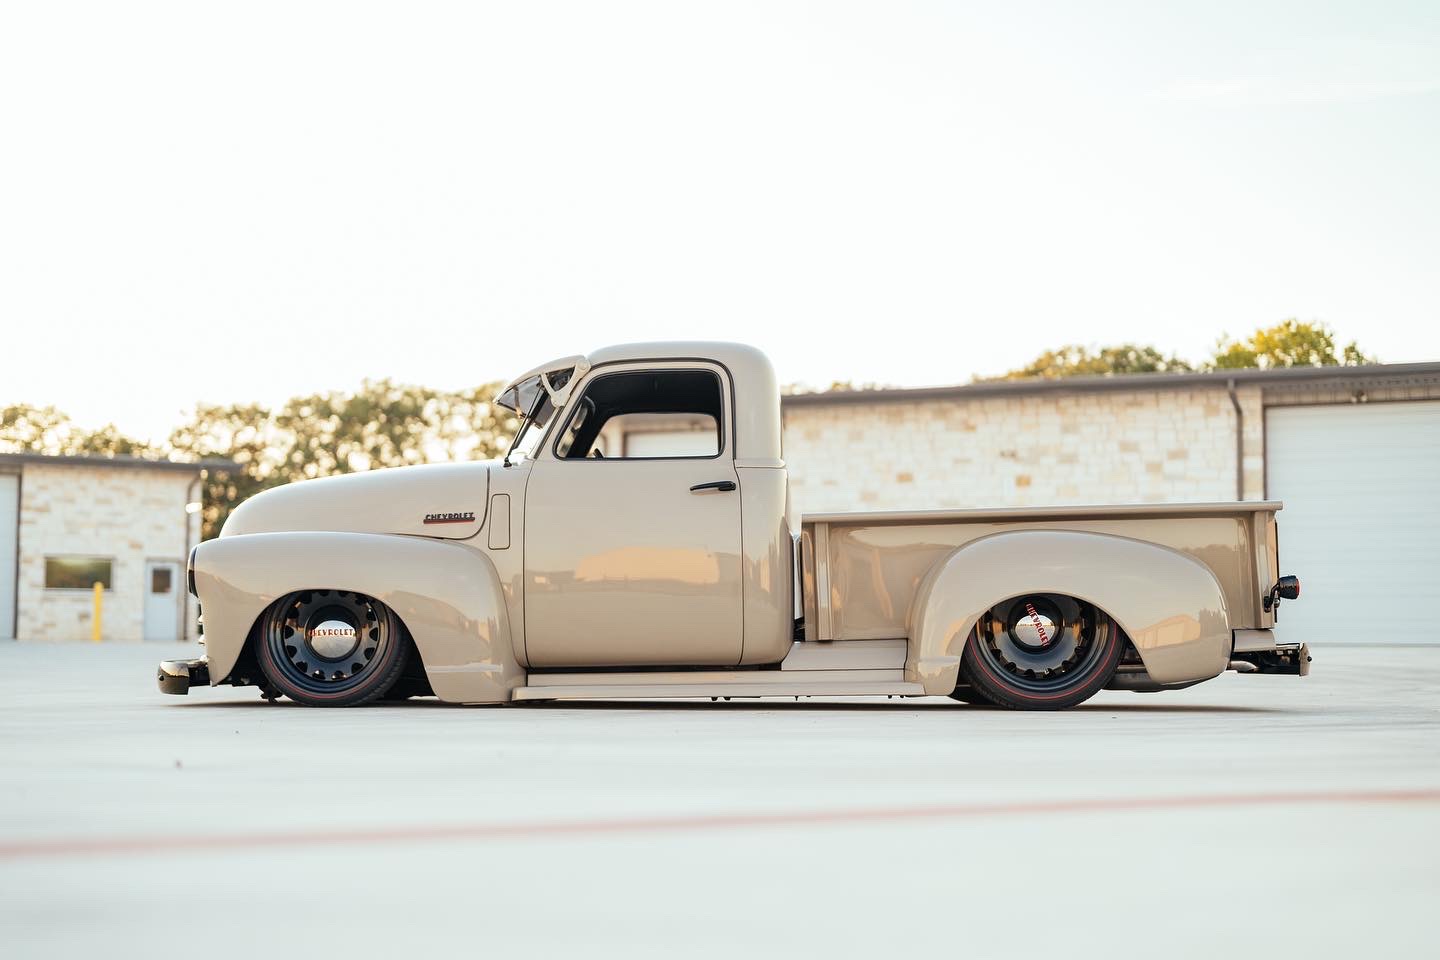
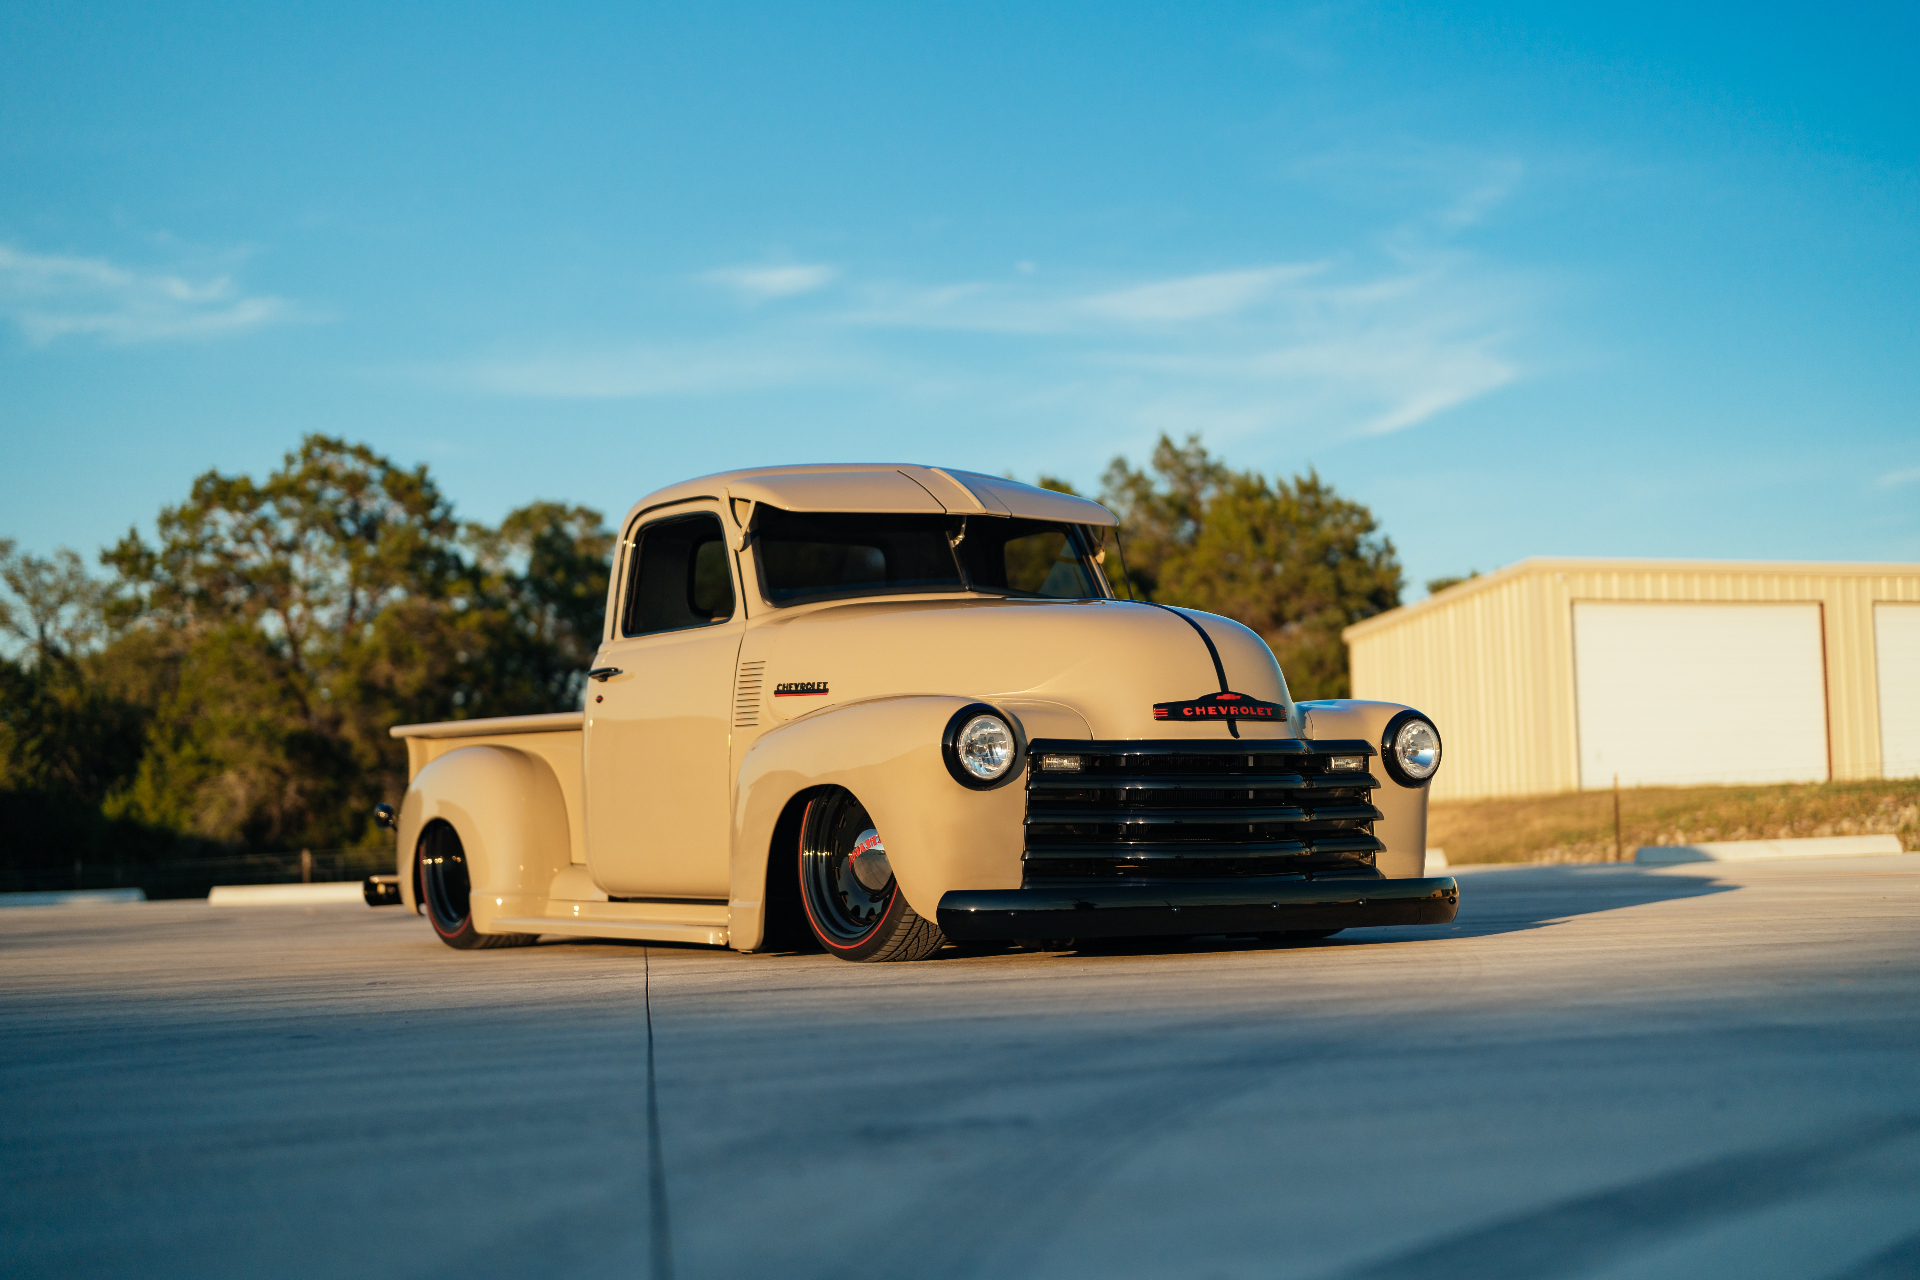
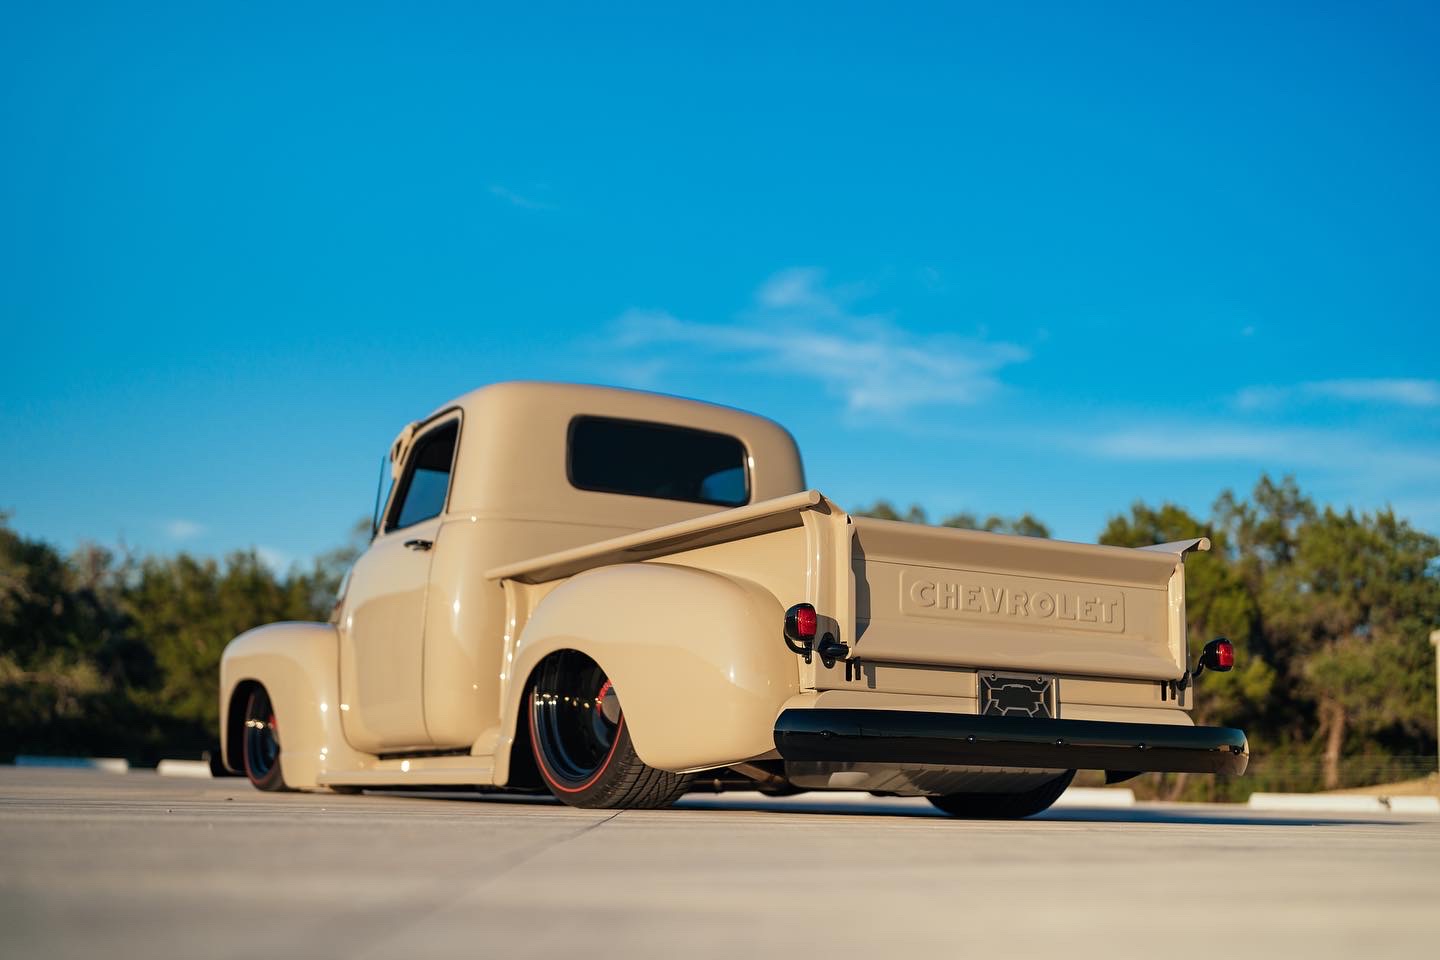
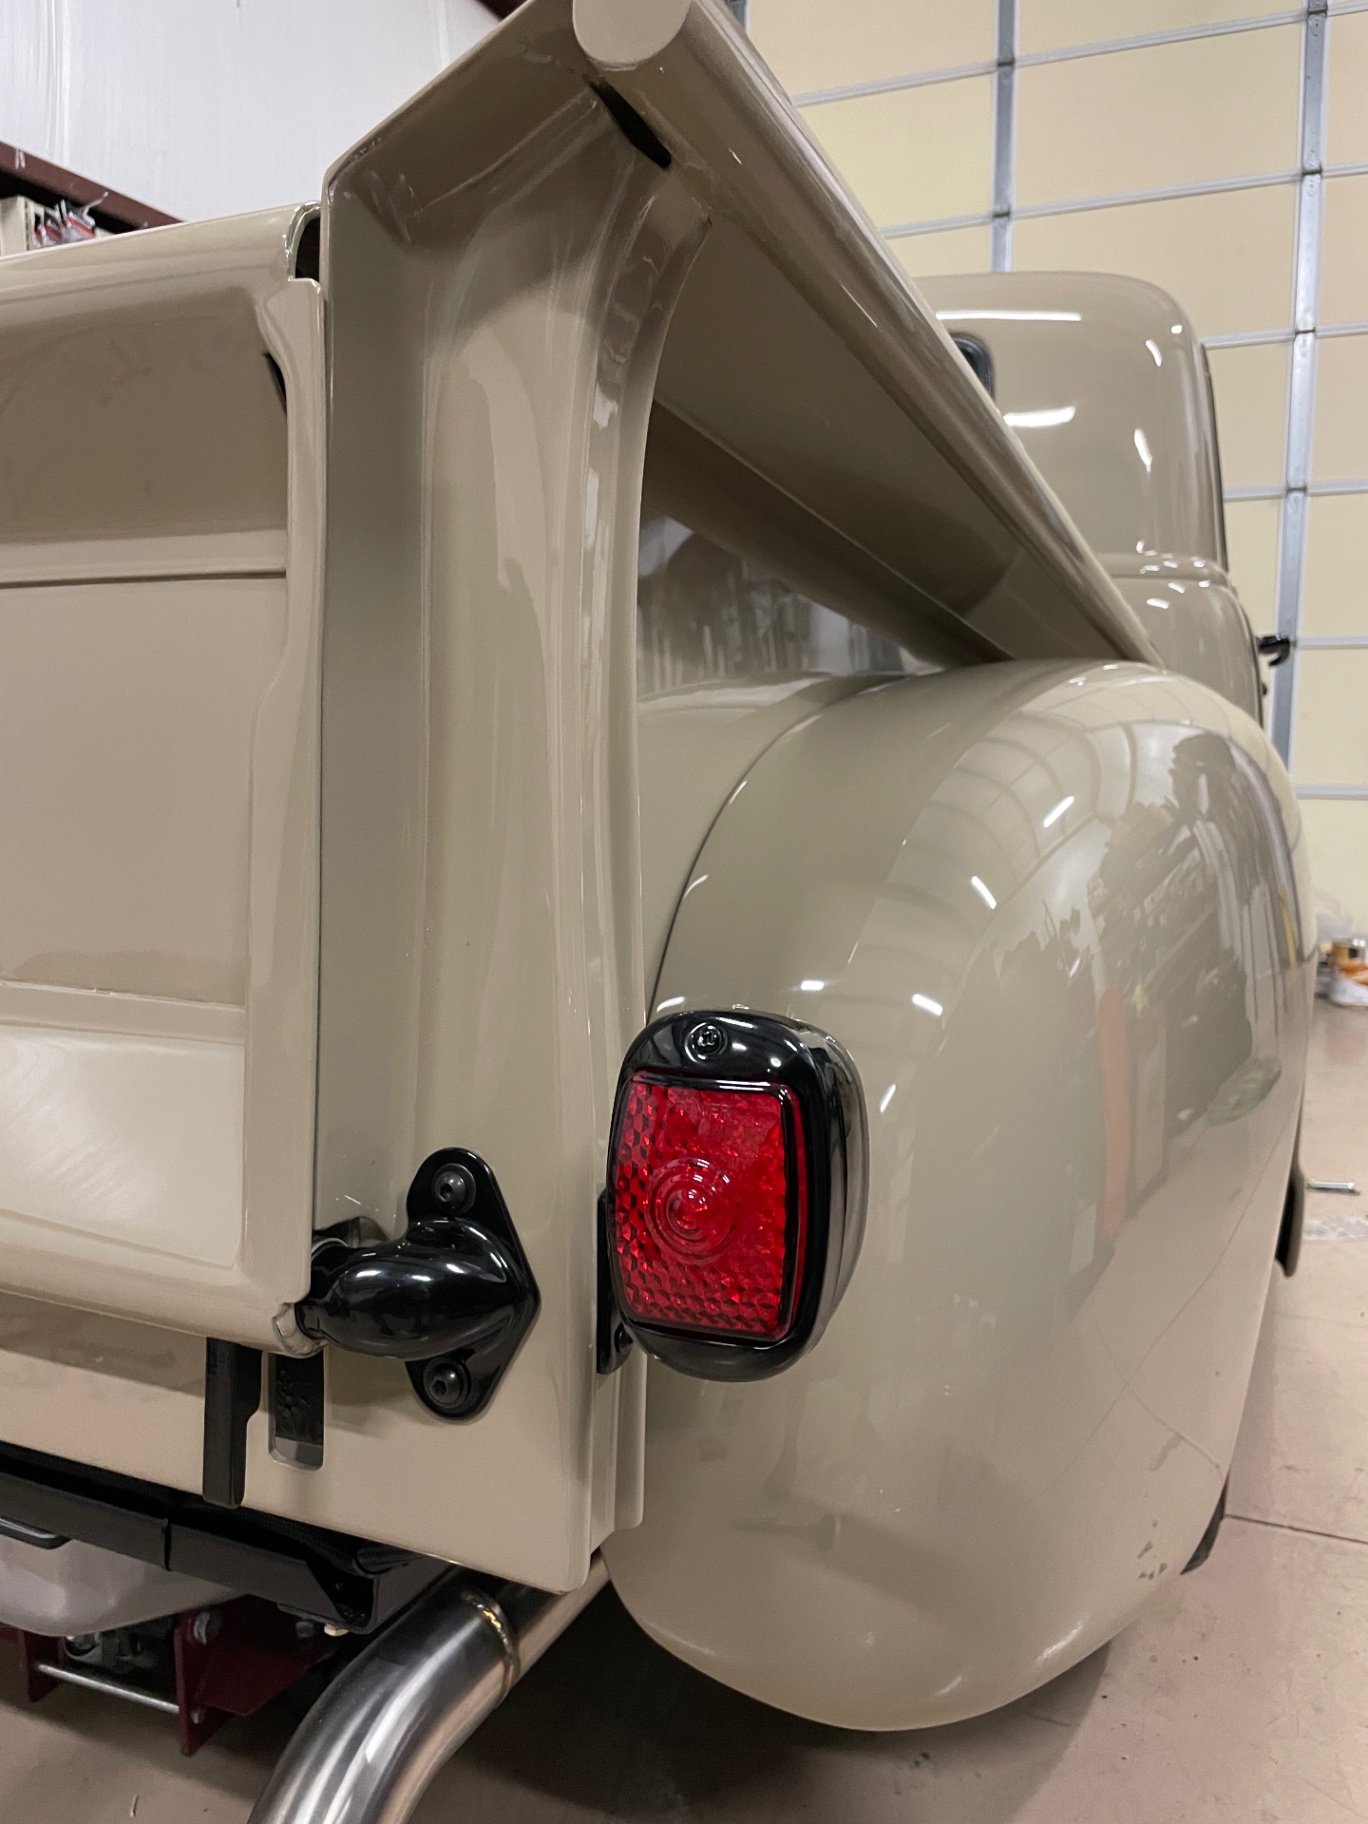
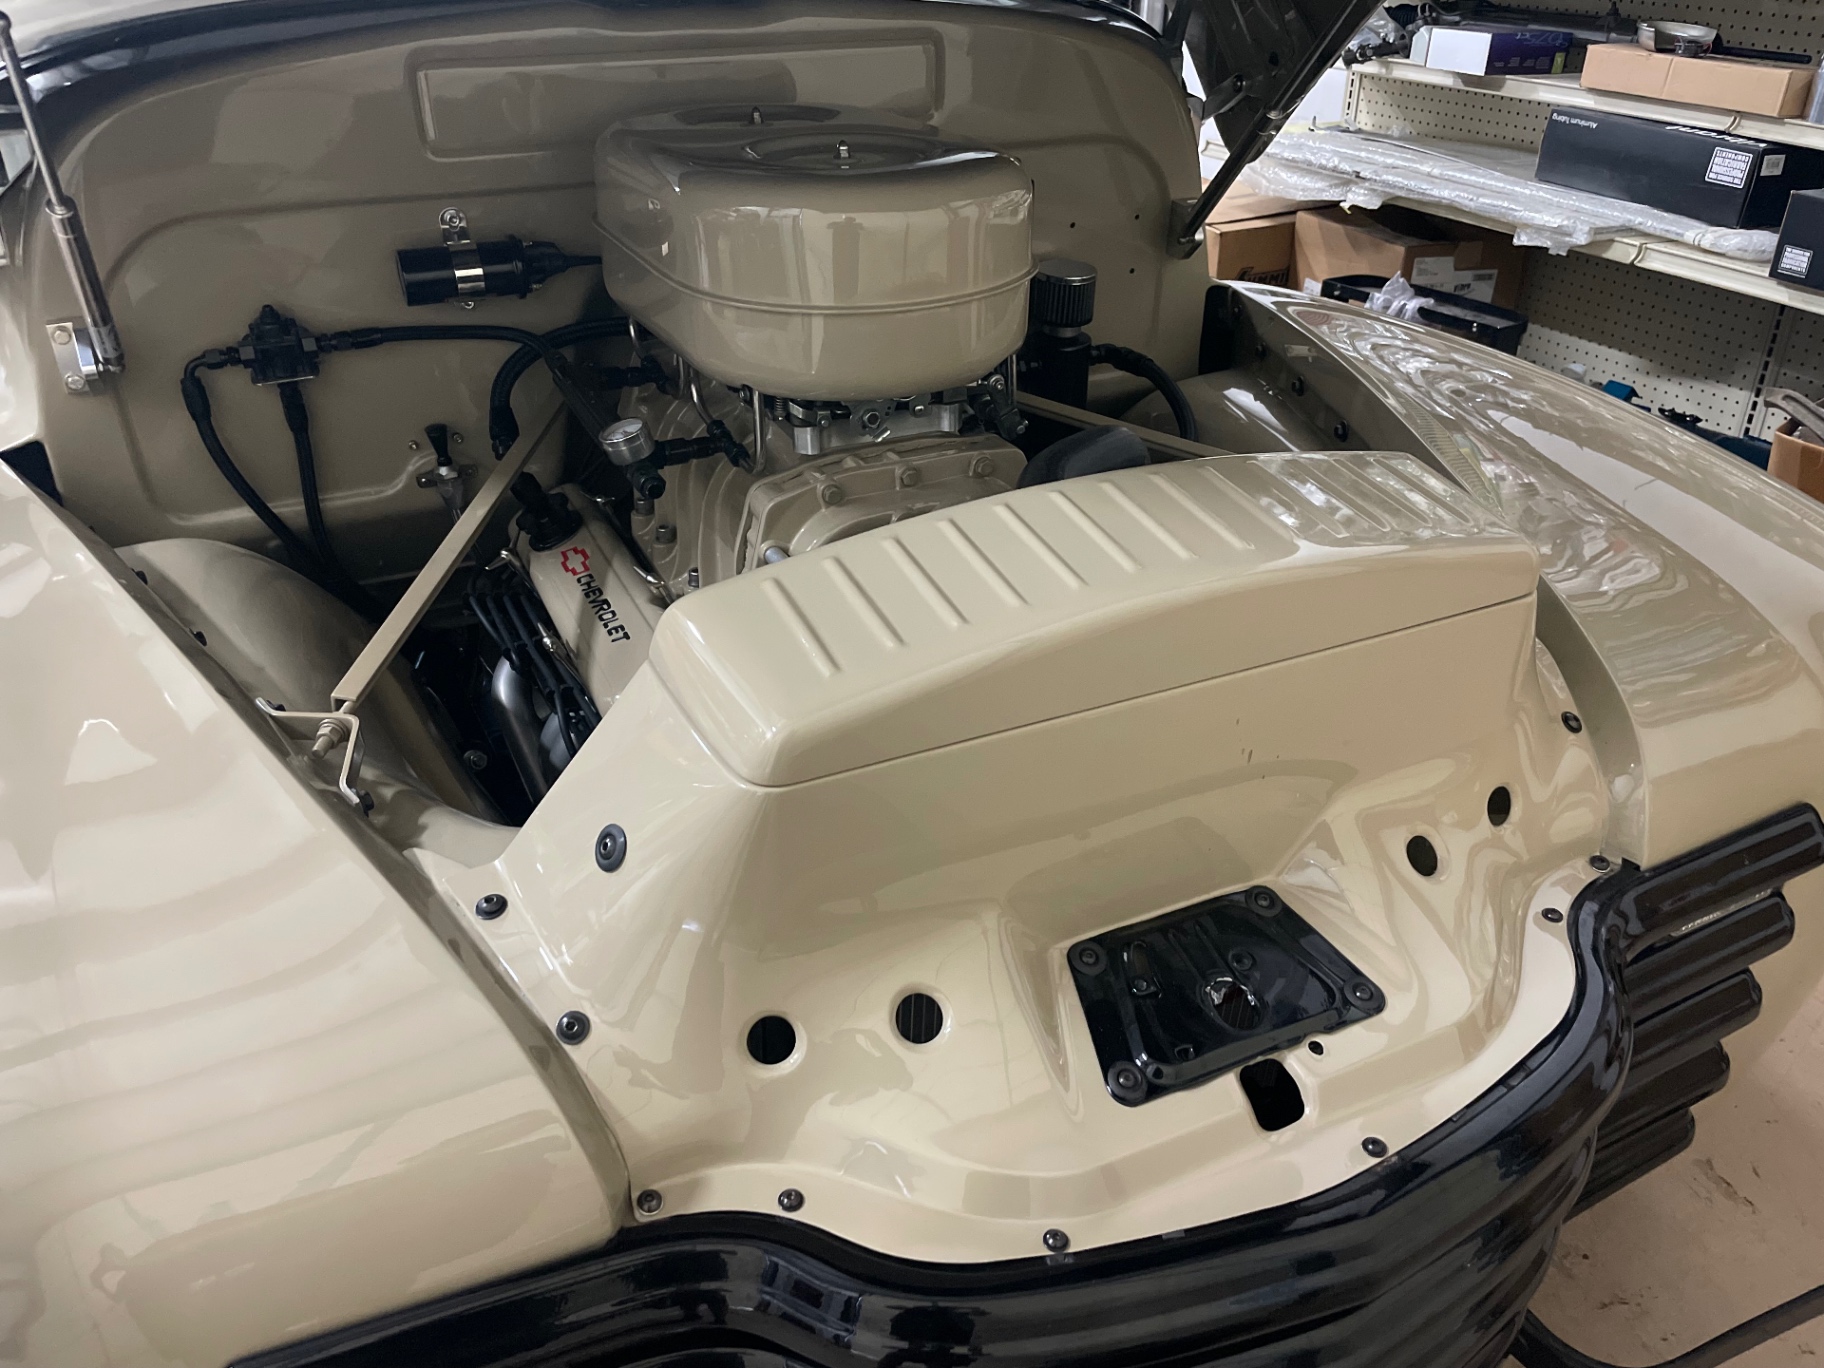
M. Tabb brought his 1950 Chevrolet 3100 to Hammer Fab with a laundry list of problems — odd color combinations, a poor stance, and inferior chassis components that were actively failing. Phase 1 of the build turned into a full mechanical, structural, and cosmetic overhaul. Up front we built custom tubular control arms. Out back we fabricated a custom rear frame step notch with a triangulated four-link and installed air ride at all four corners. A custom stainless 2.5" exhaust was routed under the frame. Inside, we rebuilt almost everything short of the diamond-stitched bench the owner supplied — custom door panels, a custom center console, Dakota Digital gauges, and a cleaner dash layout. Under the hood got a fabricated air cleaner, a fabricated radiator cover, and a new PWR aluminum radiator with electric fan. We fully welded the bed box together, then body-worked and painted the bed, rear fenders, running boards, tailgate, and bumpers. Custom rear tail light stems were designed and fabricated, Bel Air inner wheel tubs were installed, and the custom black bed floor was retrofit along with our popular Hammer Fab tailgate stops that eliminate the bed chains. The truck rolls on 18/20" Detroit Steel Wheels wrapped in Diamond Back Classic redline tires. Phase 1 was completed in July 2022 and the truck has since won numerous local shows. In 2024 we came back for Phase 2 and rebuilt the door panels — fabricated metal uppers and form-fit fiberglass lowers wrapped in black leather, attached with hidden magnets for razor-thin edges.

§ 02 — Note from the shop

"Came in tired and mismatched. Left slammed, straight, and finished with the details a '50 3100 deserves."

Owner's word

DELIVERED · VERIFIED

Outstanding craftsmanship and attention to detail. The quality of the work is second to none, and the finished truck exceeded every expectation I had. I highly recommend him to anyone wanting a custom build done right.

M. Tabb

OWNER, '50 CHEVROLET 3100

§ 03 — Build journal

The updates.

A living log of every meaningful moment on this build — new photos, short notes, and the milestones worth marking.

8 UPDATES · 3 MILESTONES

Milestones

  1. JUL 15, 2022Phase 1 complete — out in the Texas sun
  2. JUL 25, 2022Finished — Texas sun on the tan and black
  3. JUN 15, 2024Interior phase 2 — hand-built thin door panels, leather and magnets

UPDATE 08 / 08

Jan 20, 2022

FABRICATION

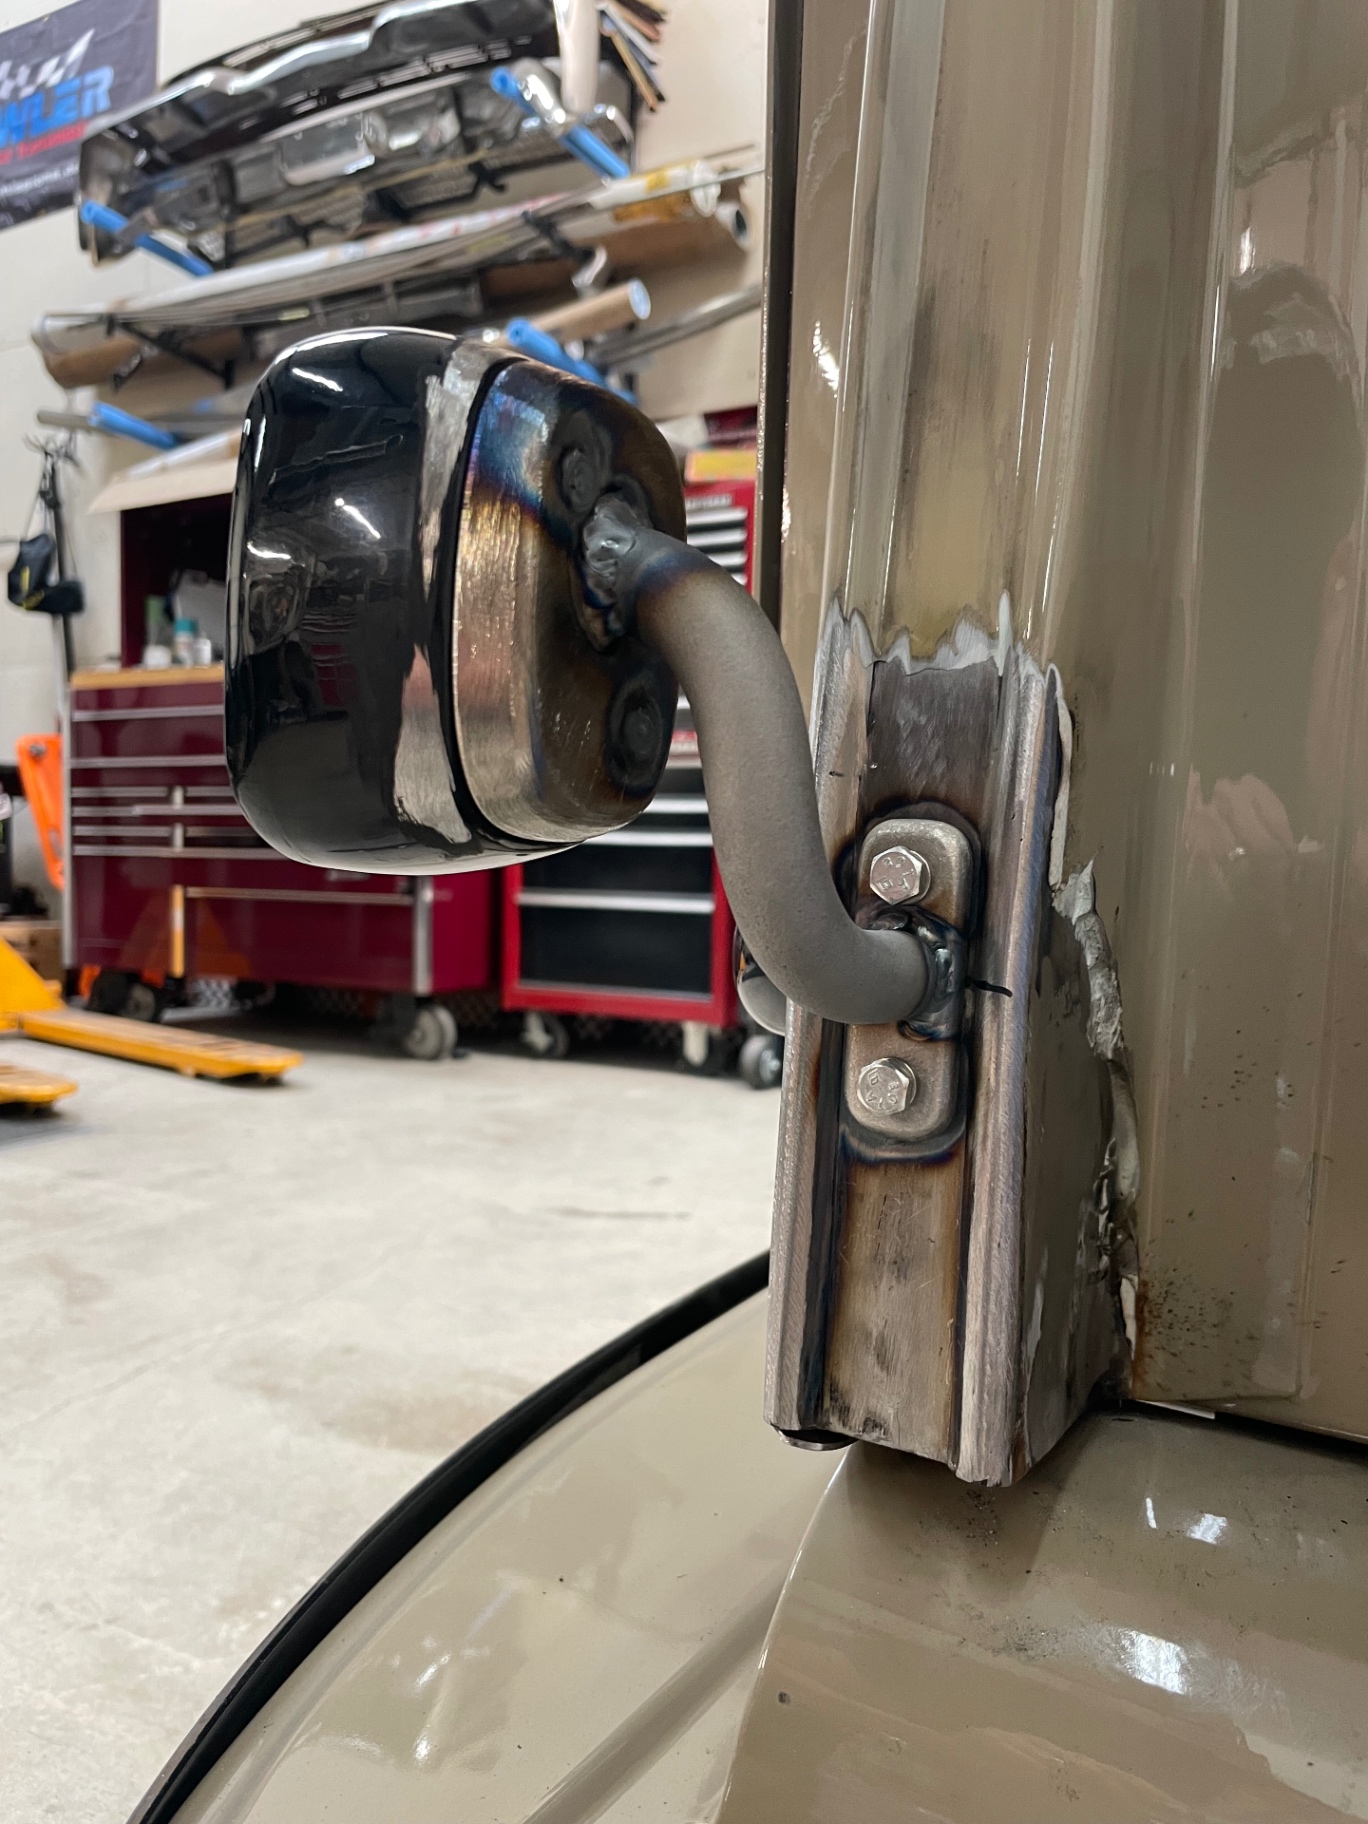
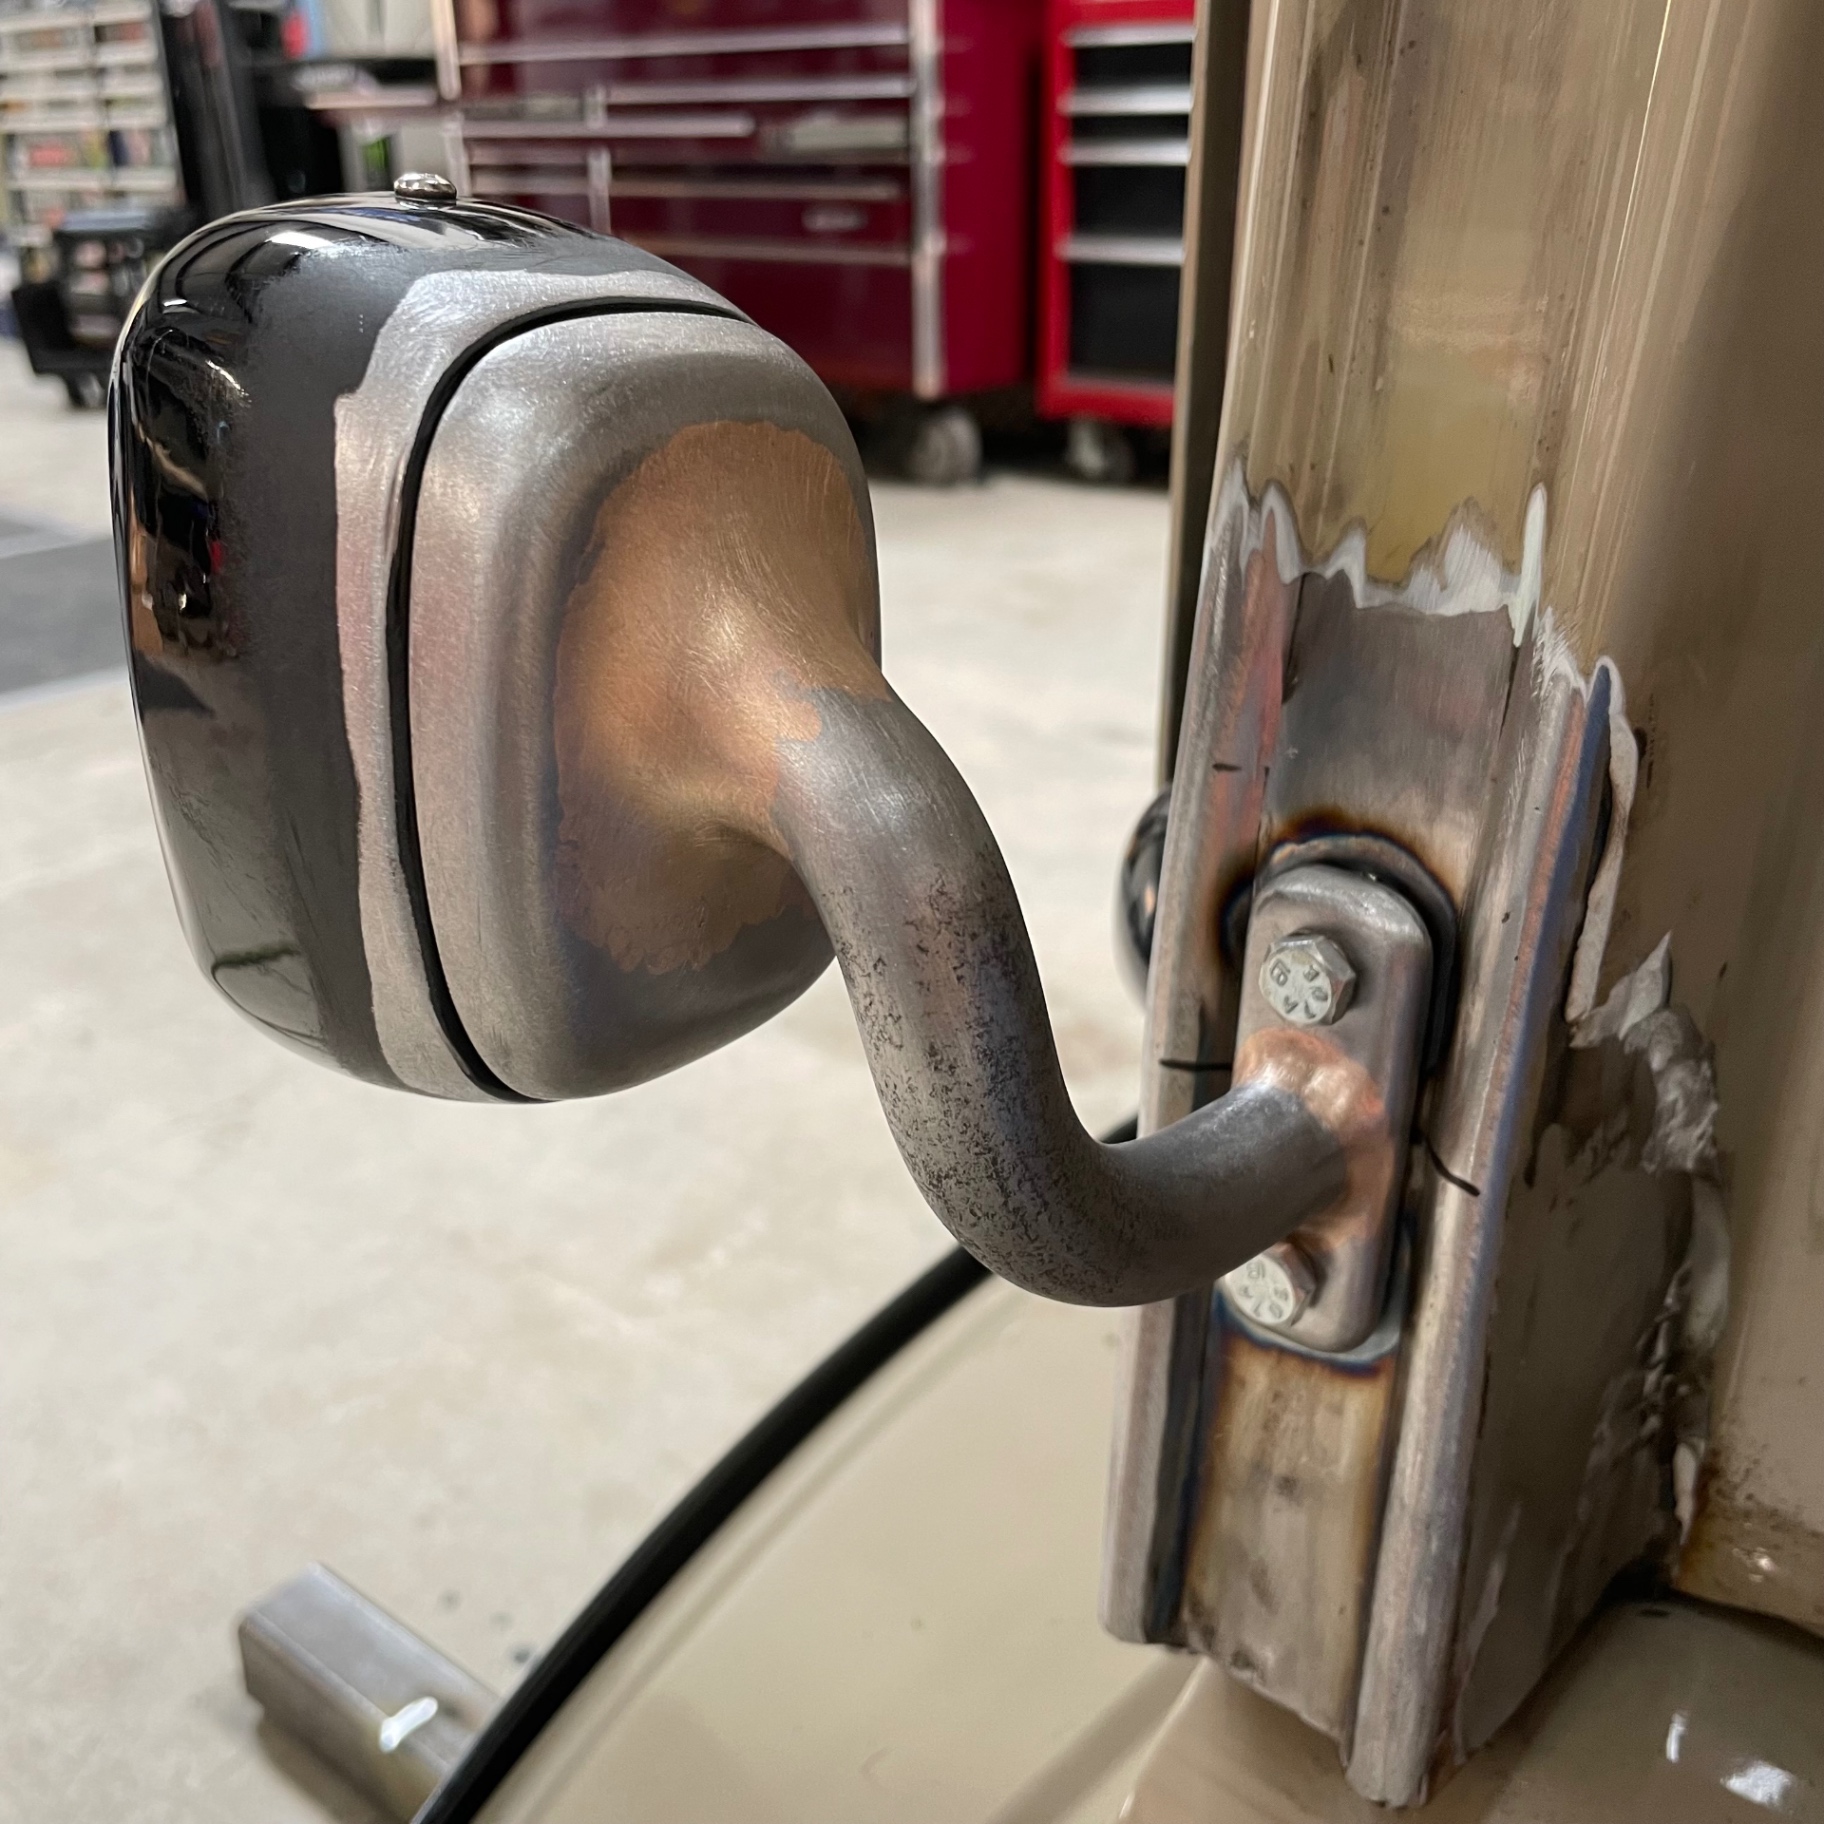
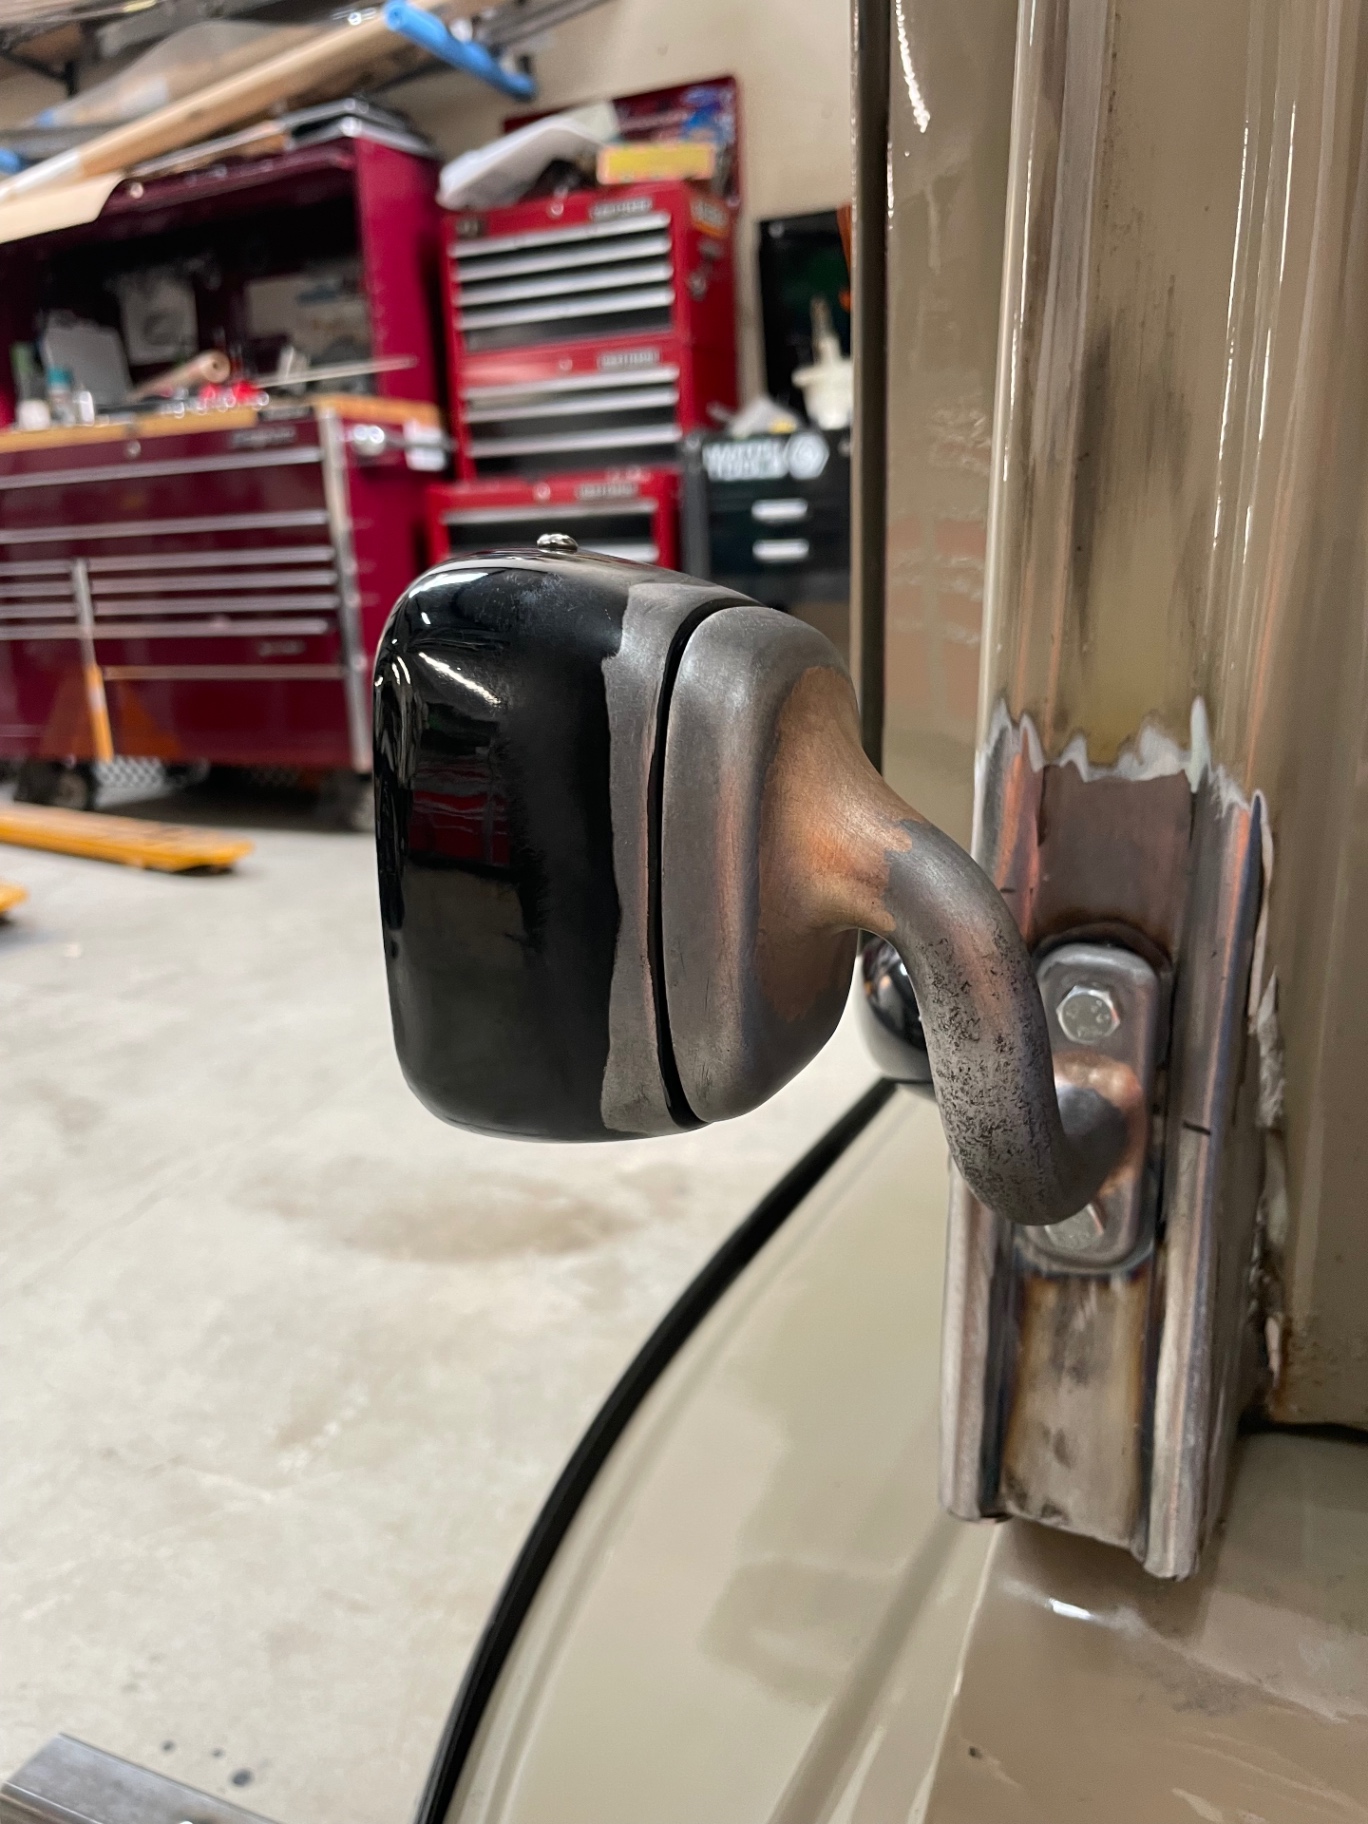
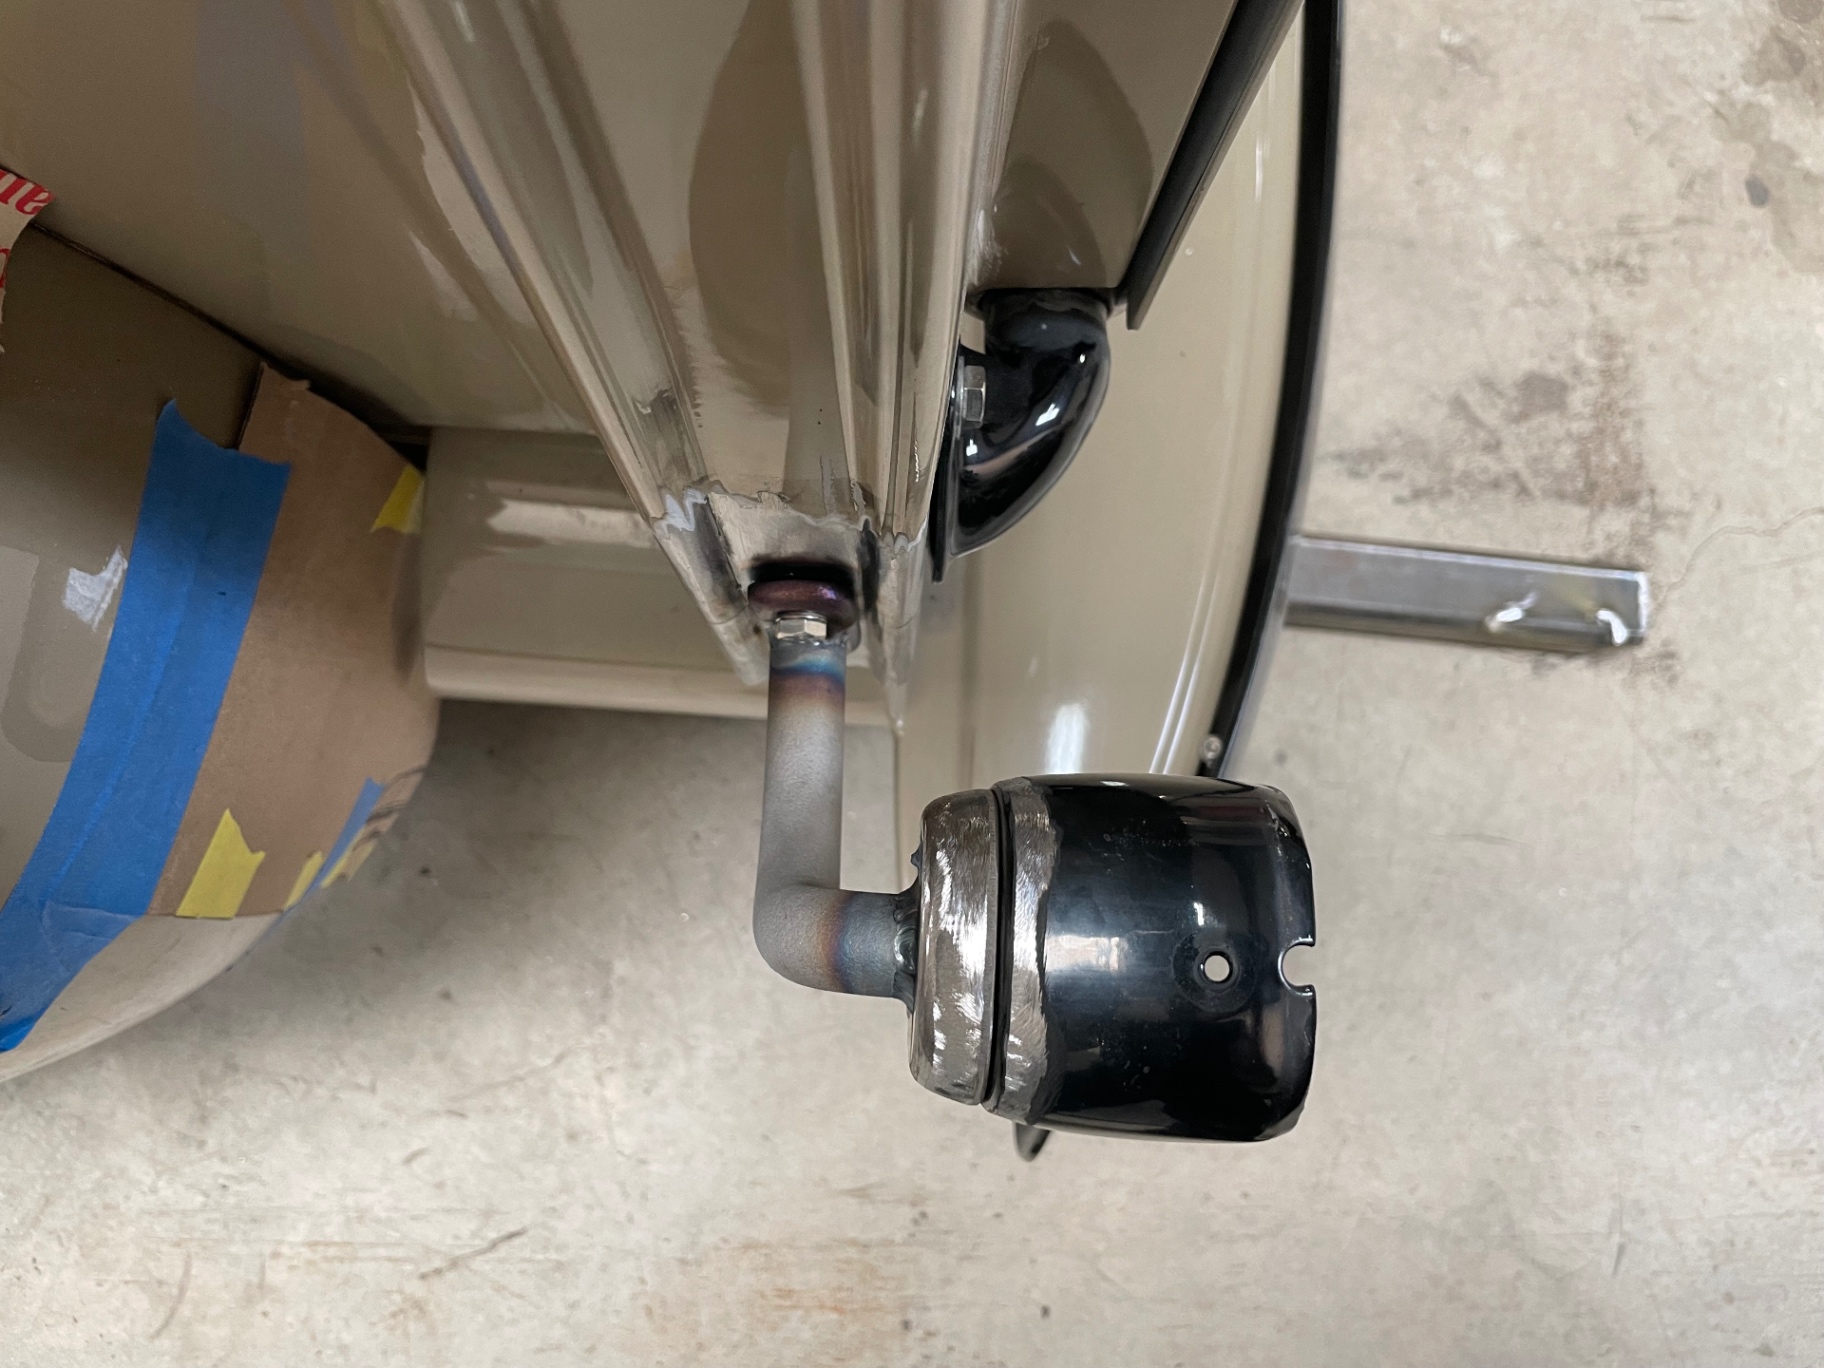
Bed metalwork — tubs, tailgate latches, tail light stems

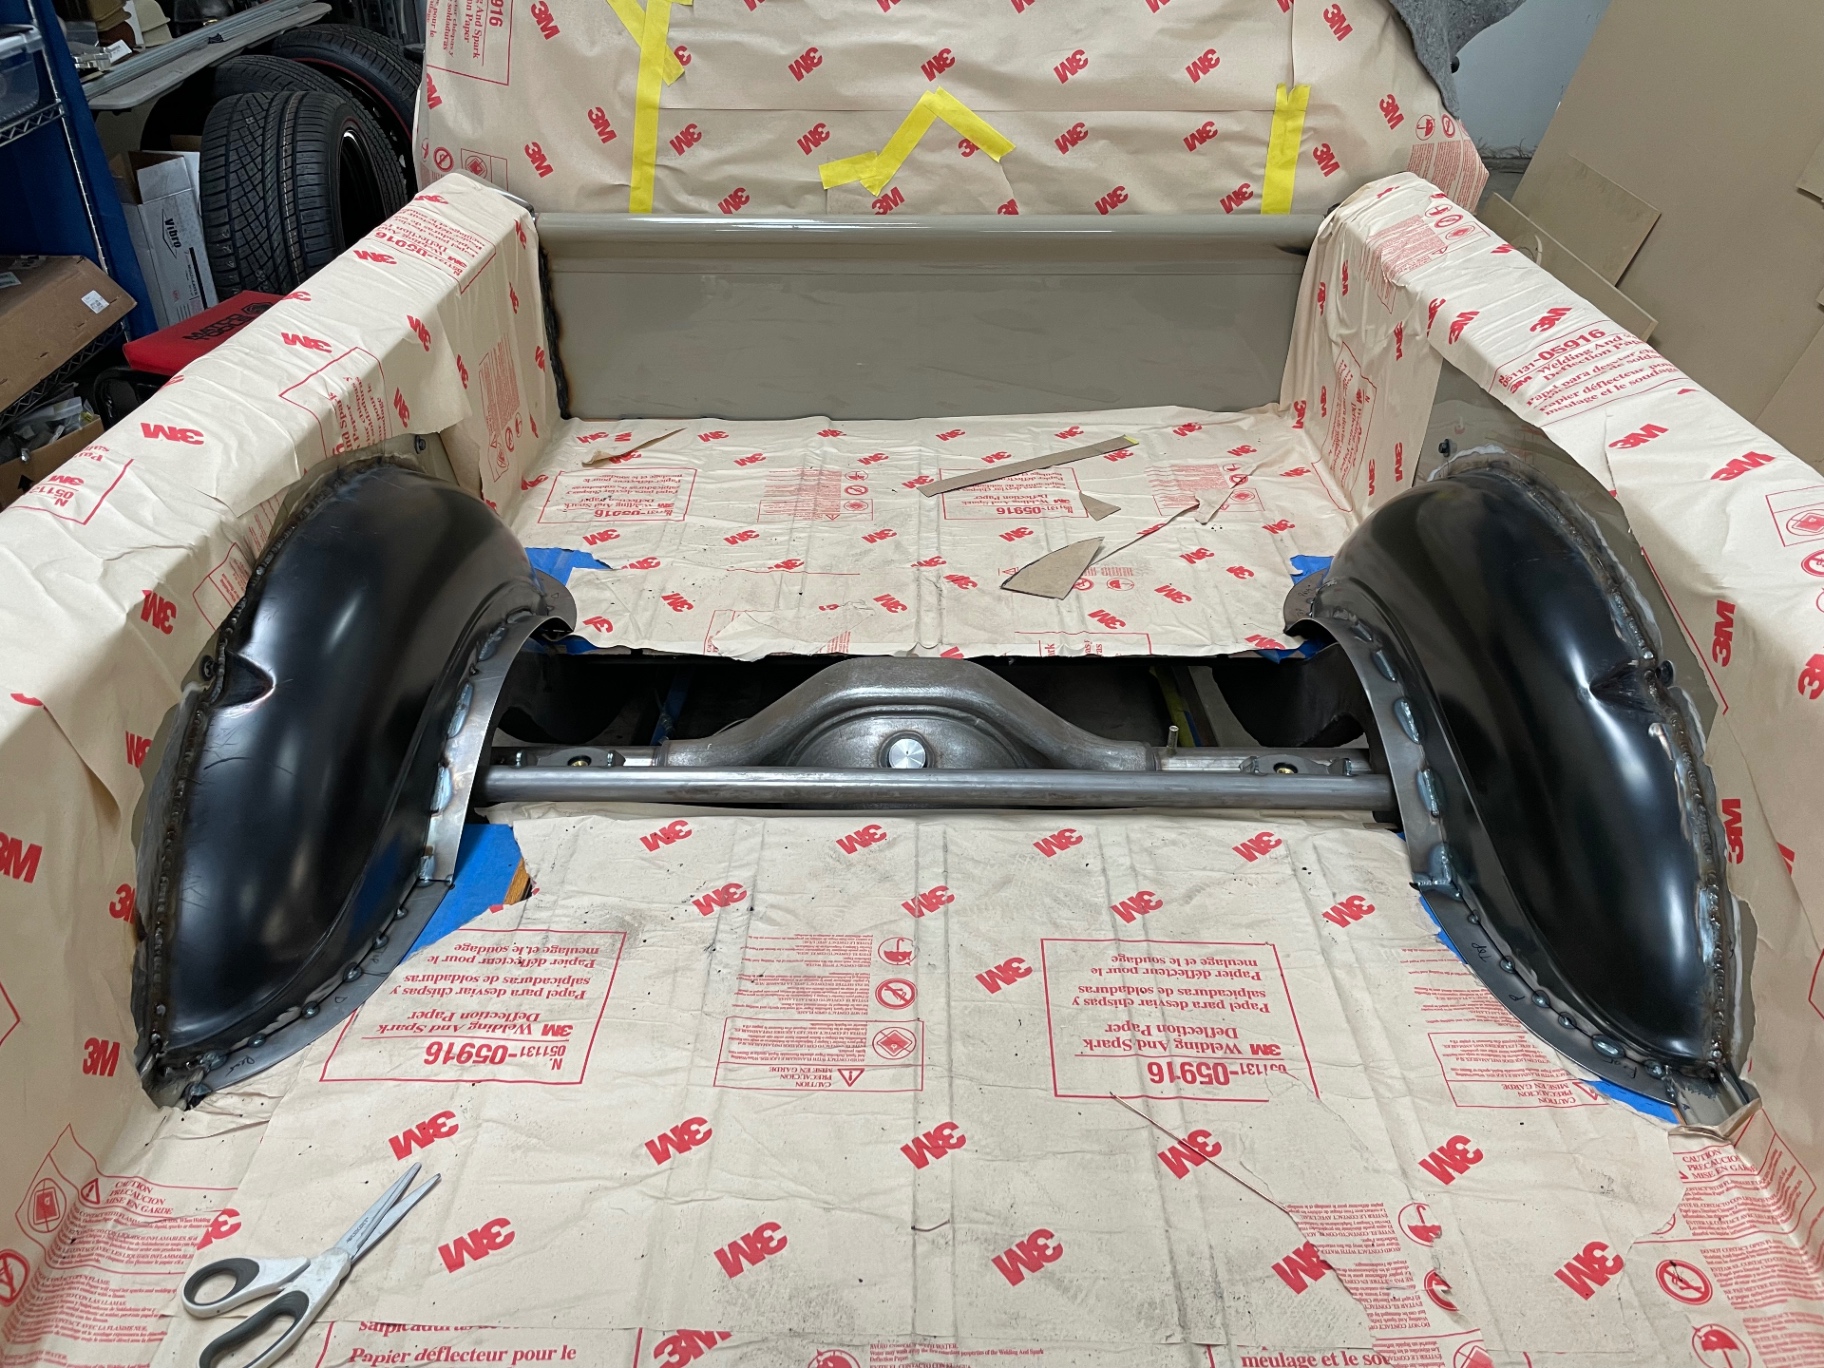
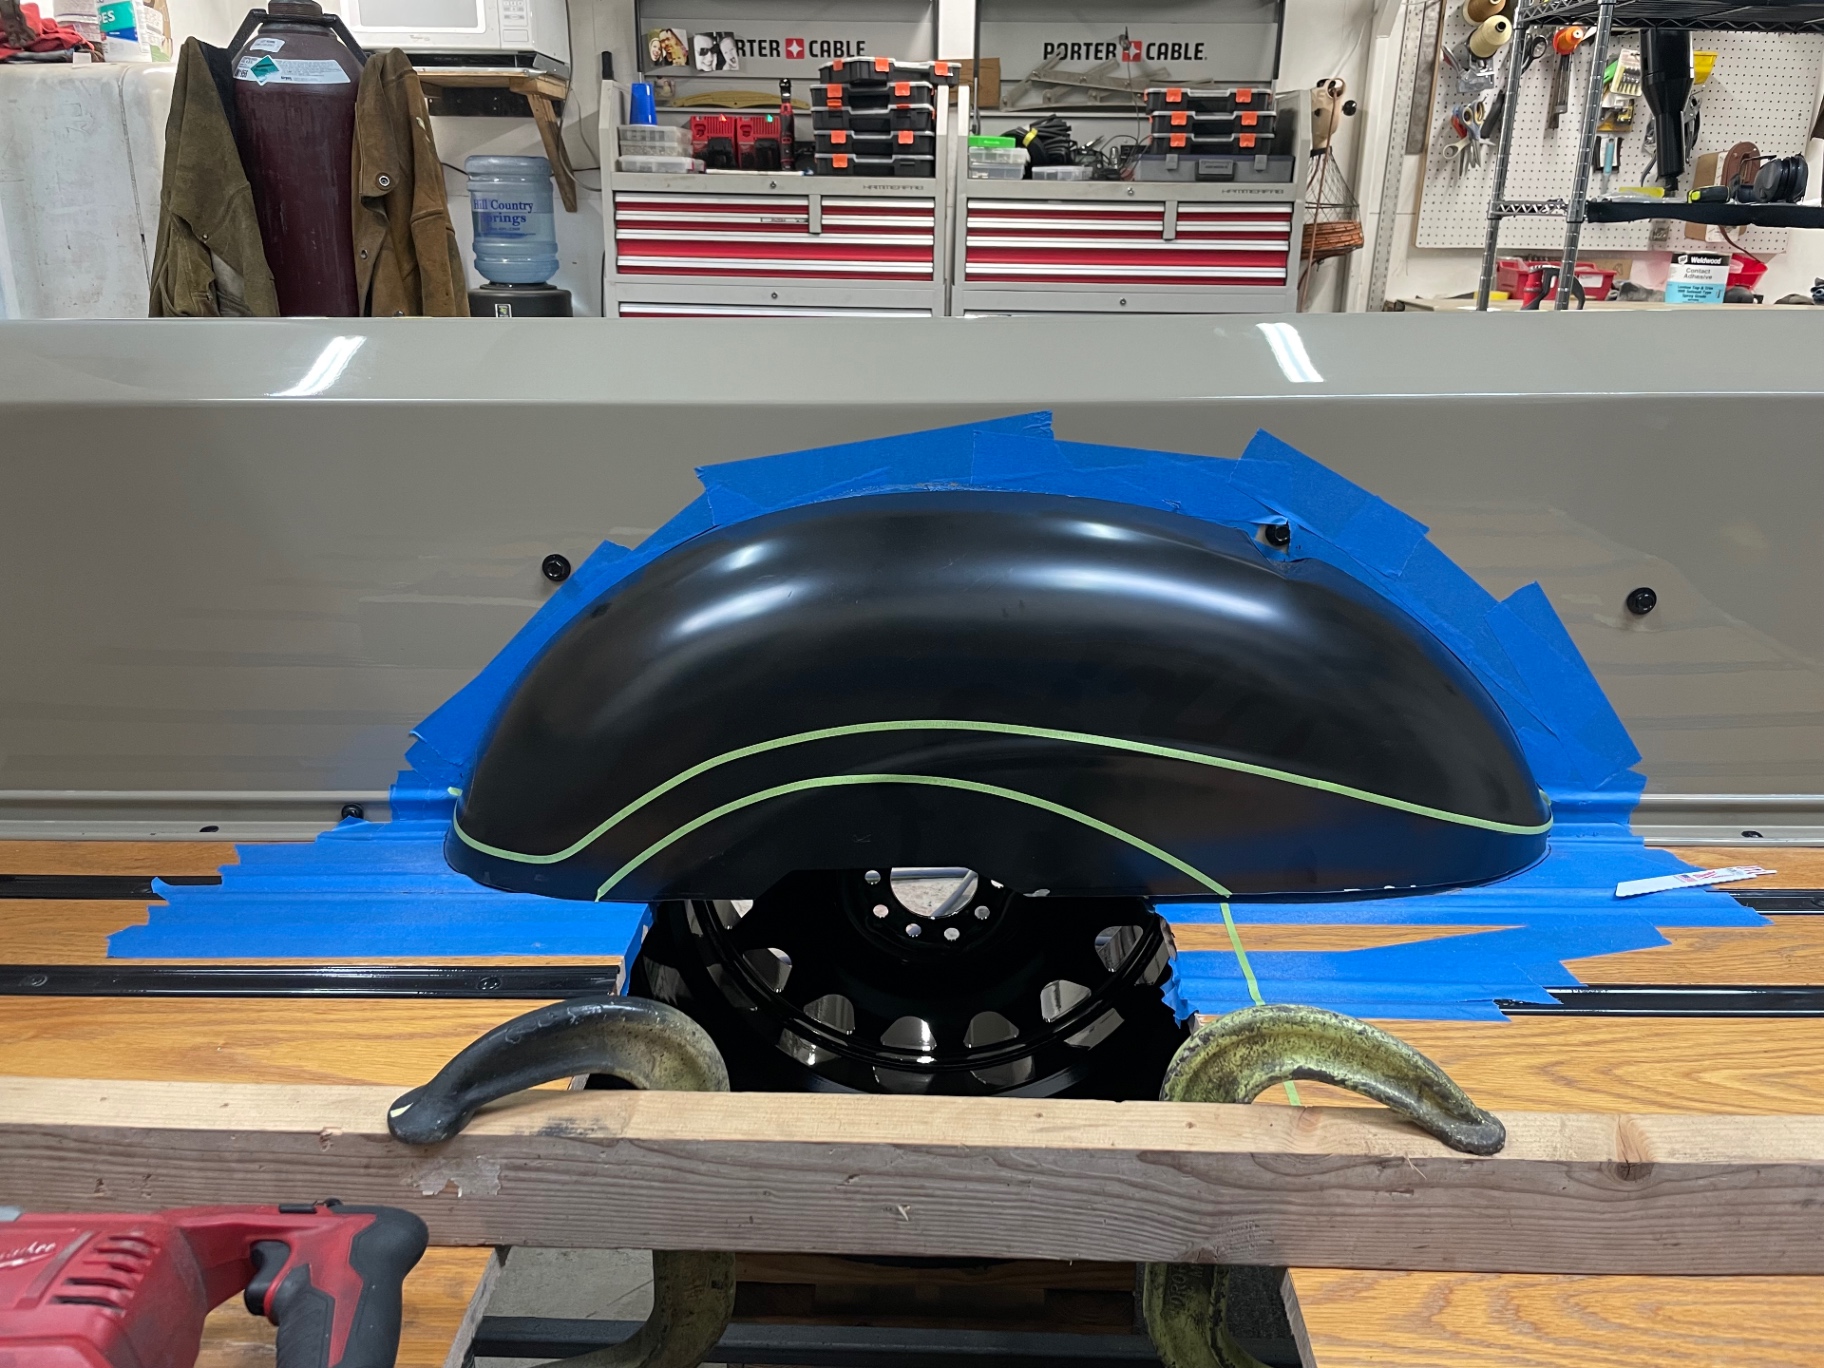
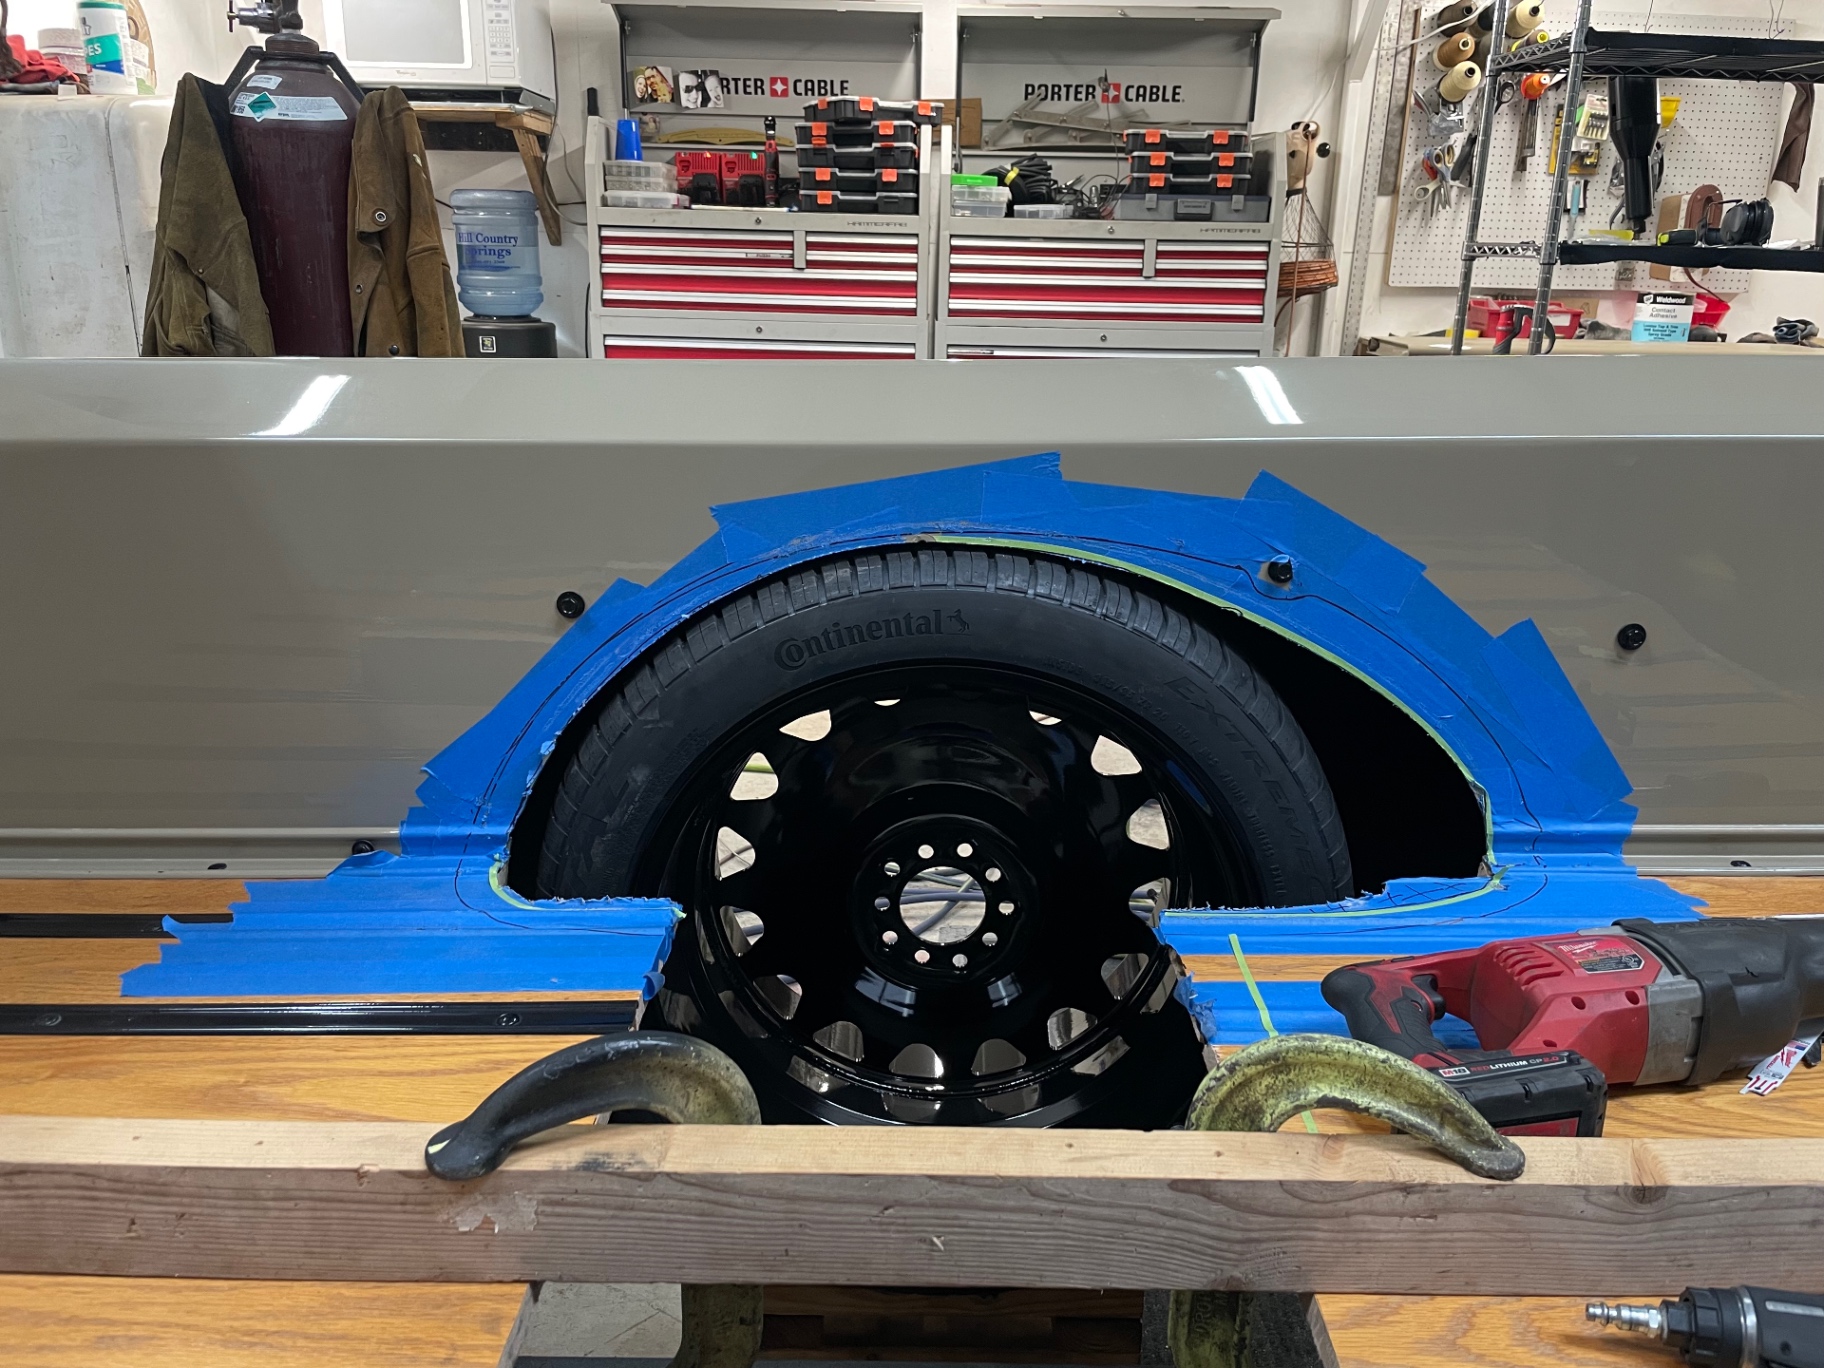
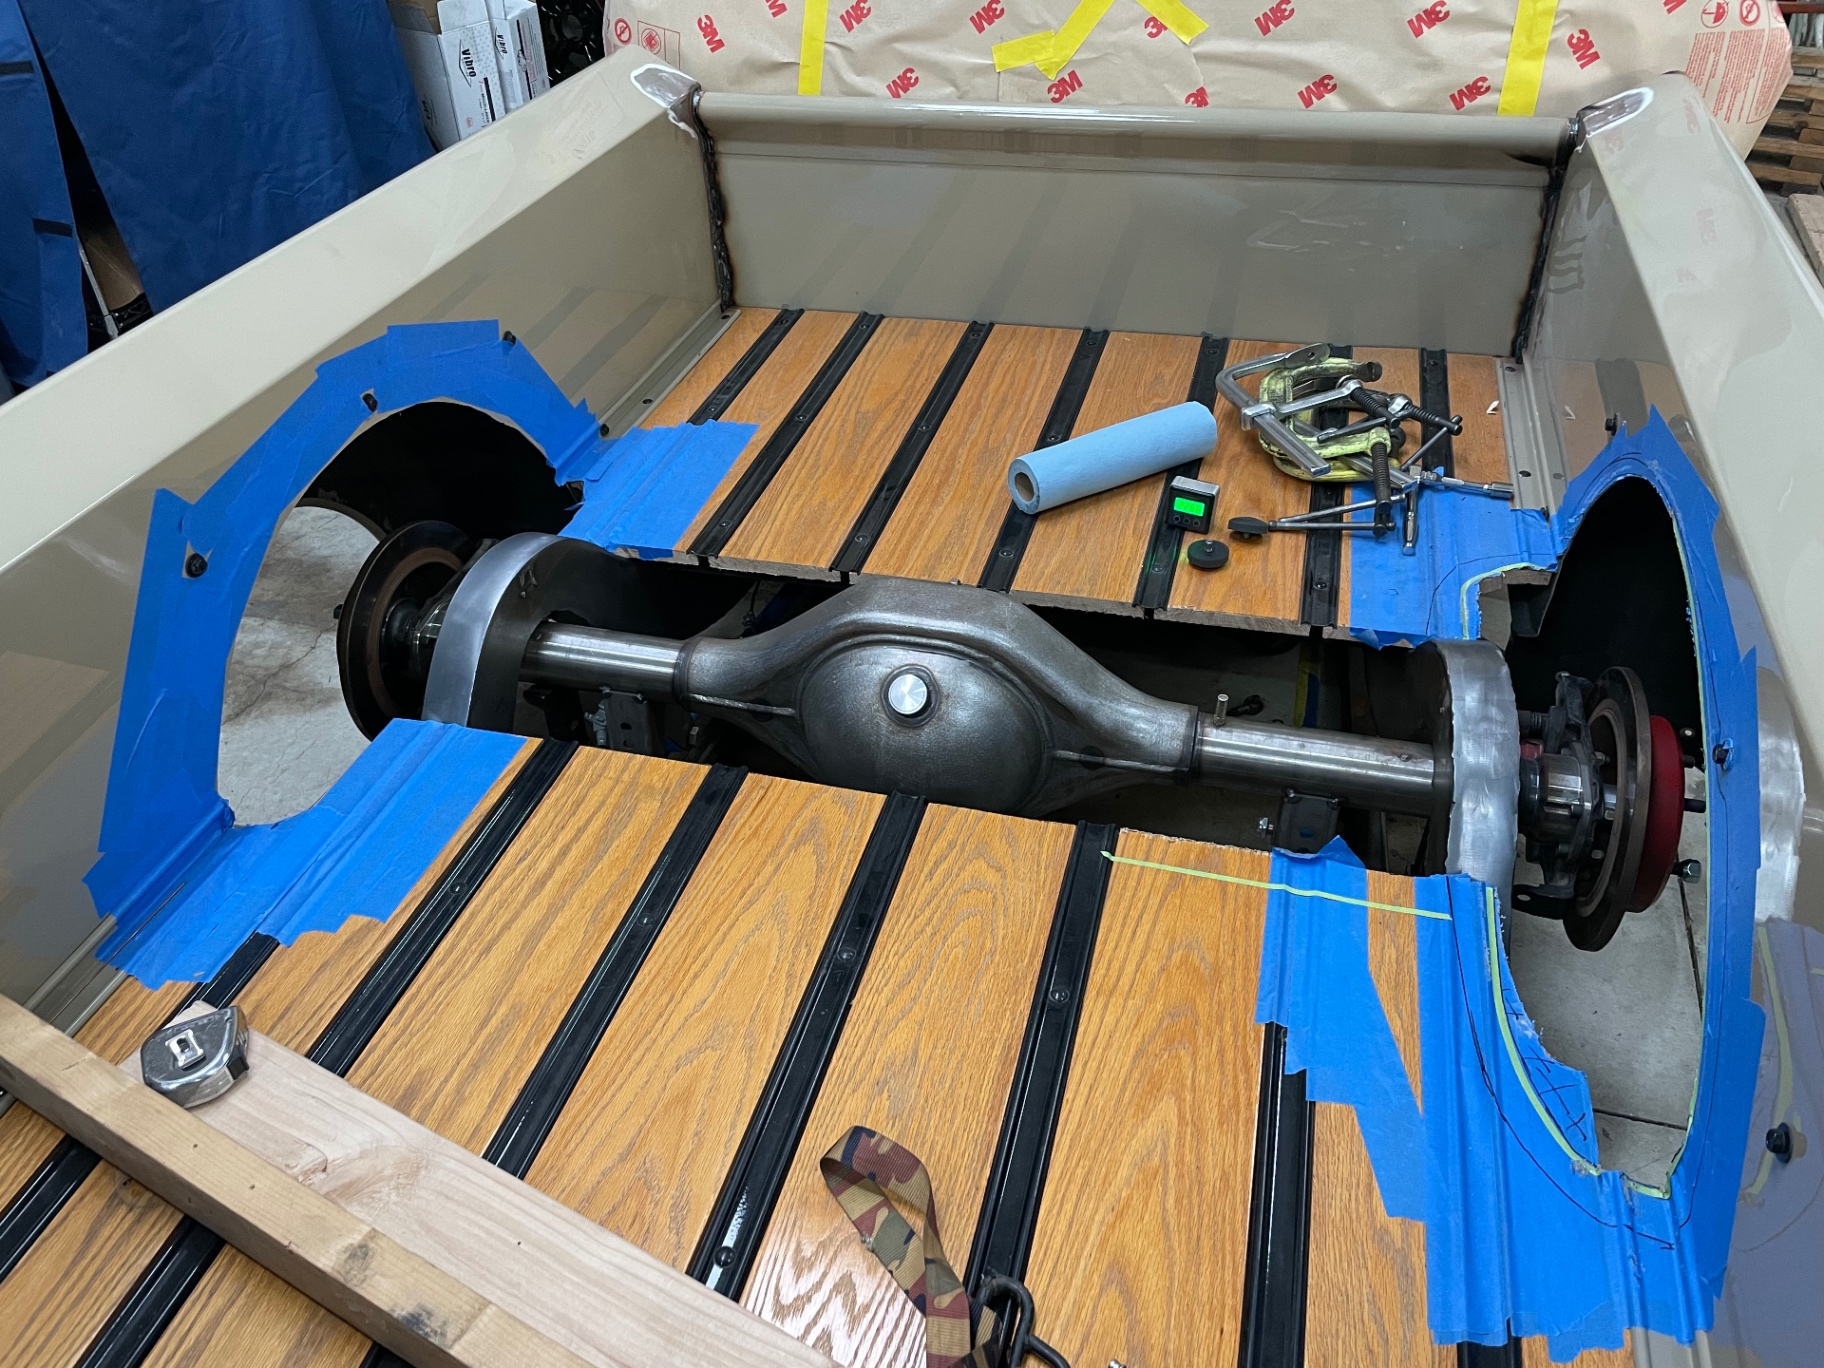
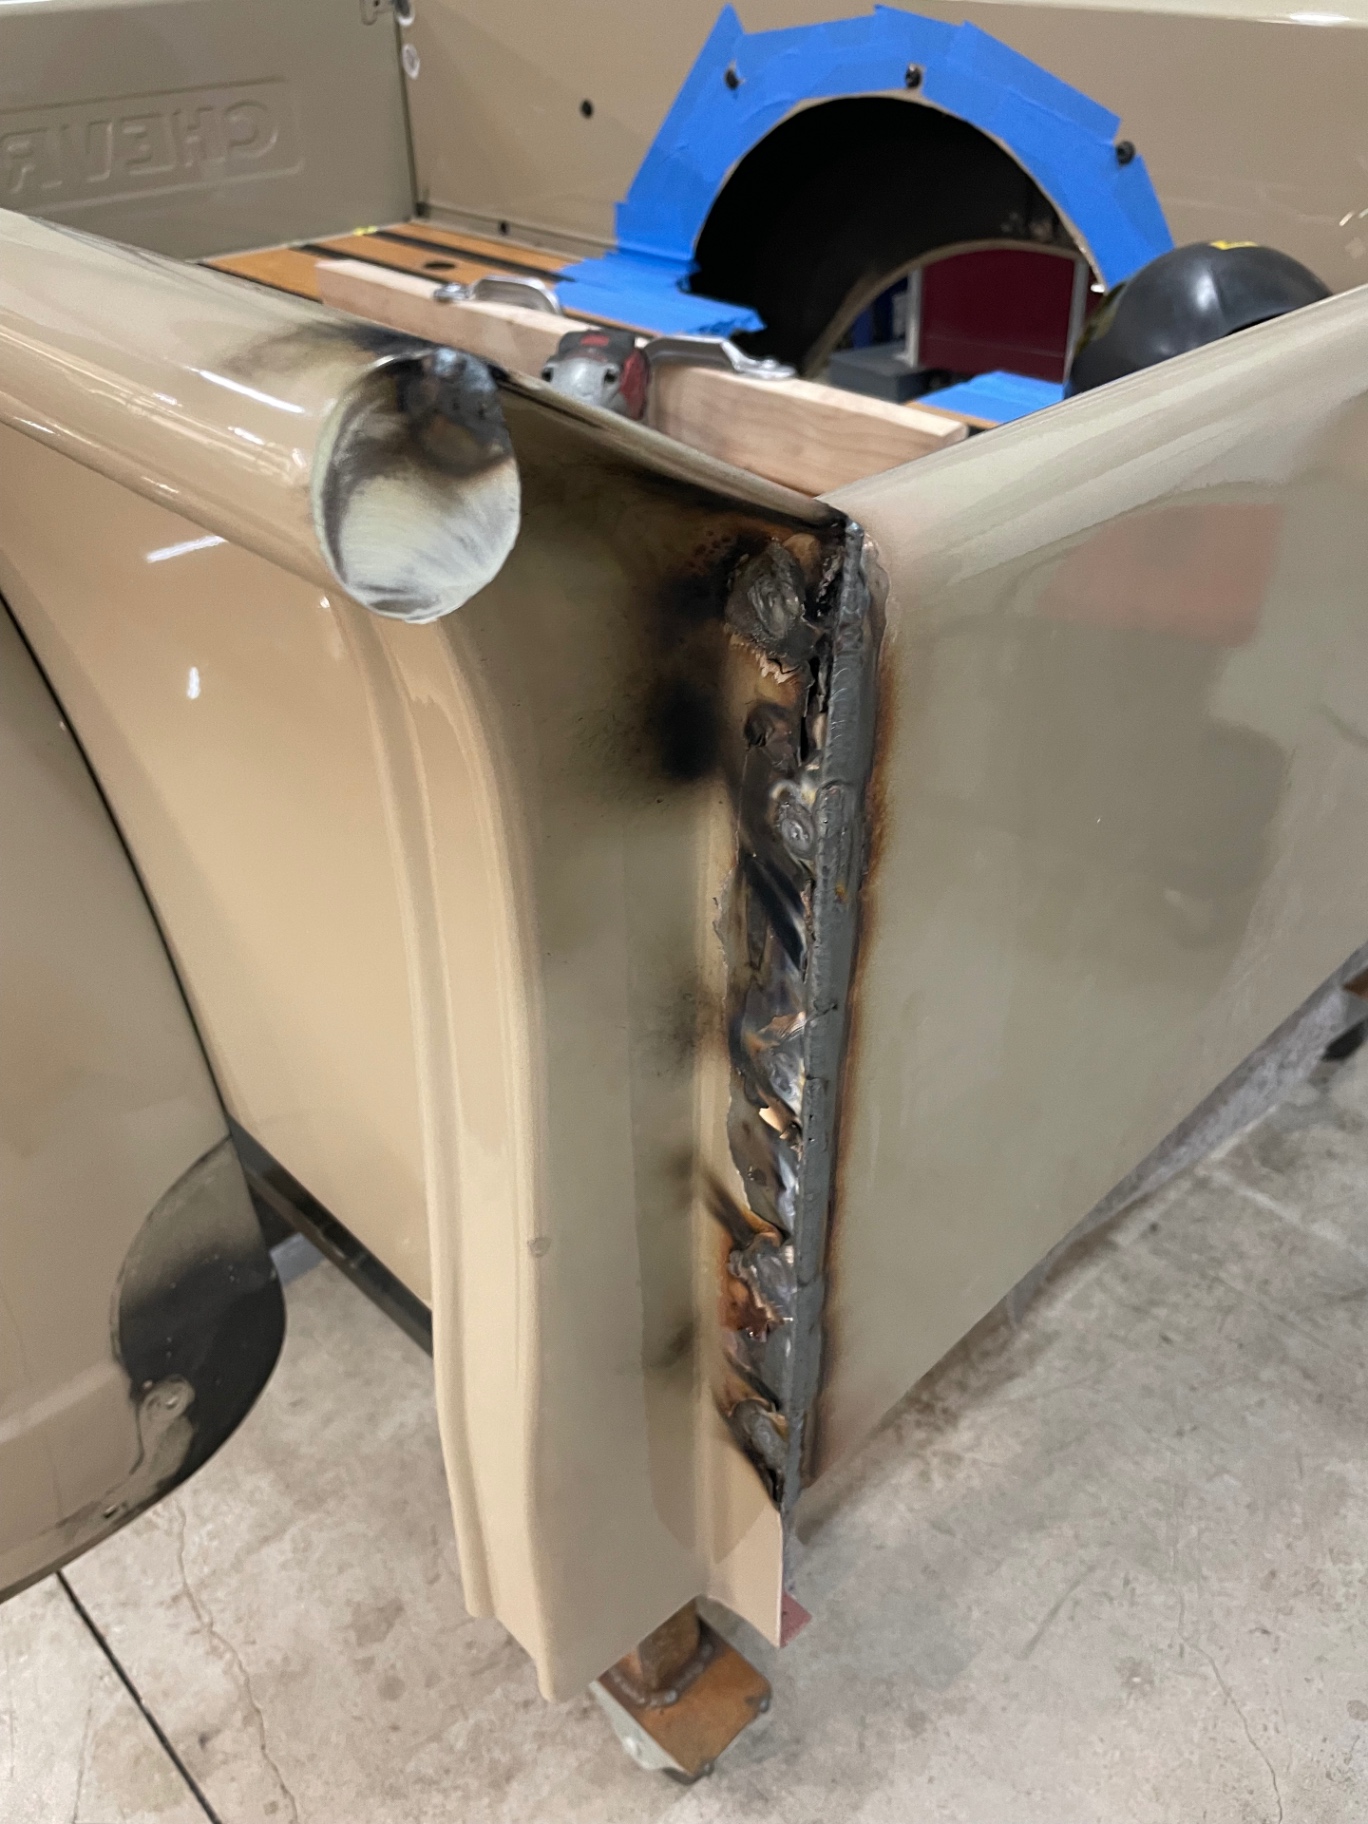
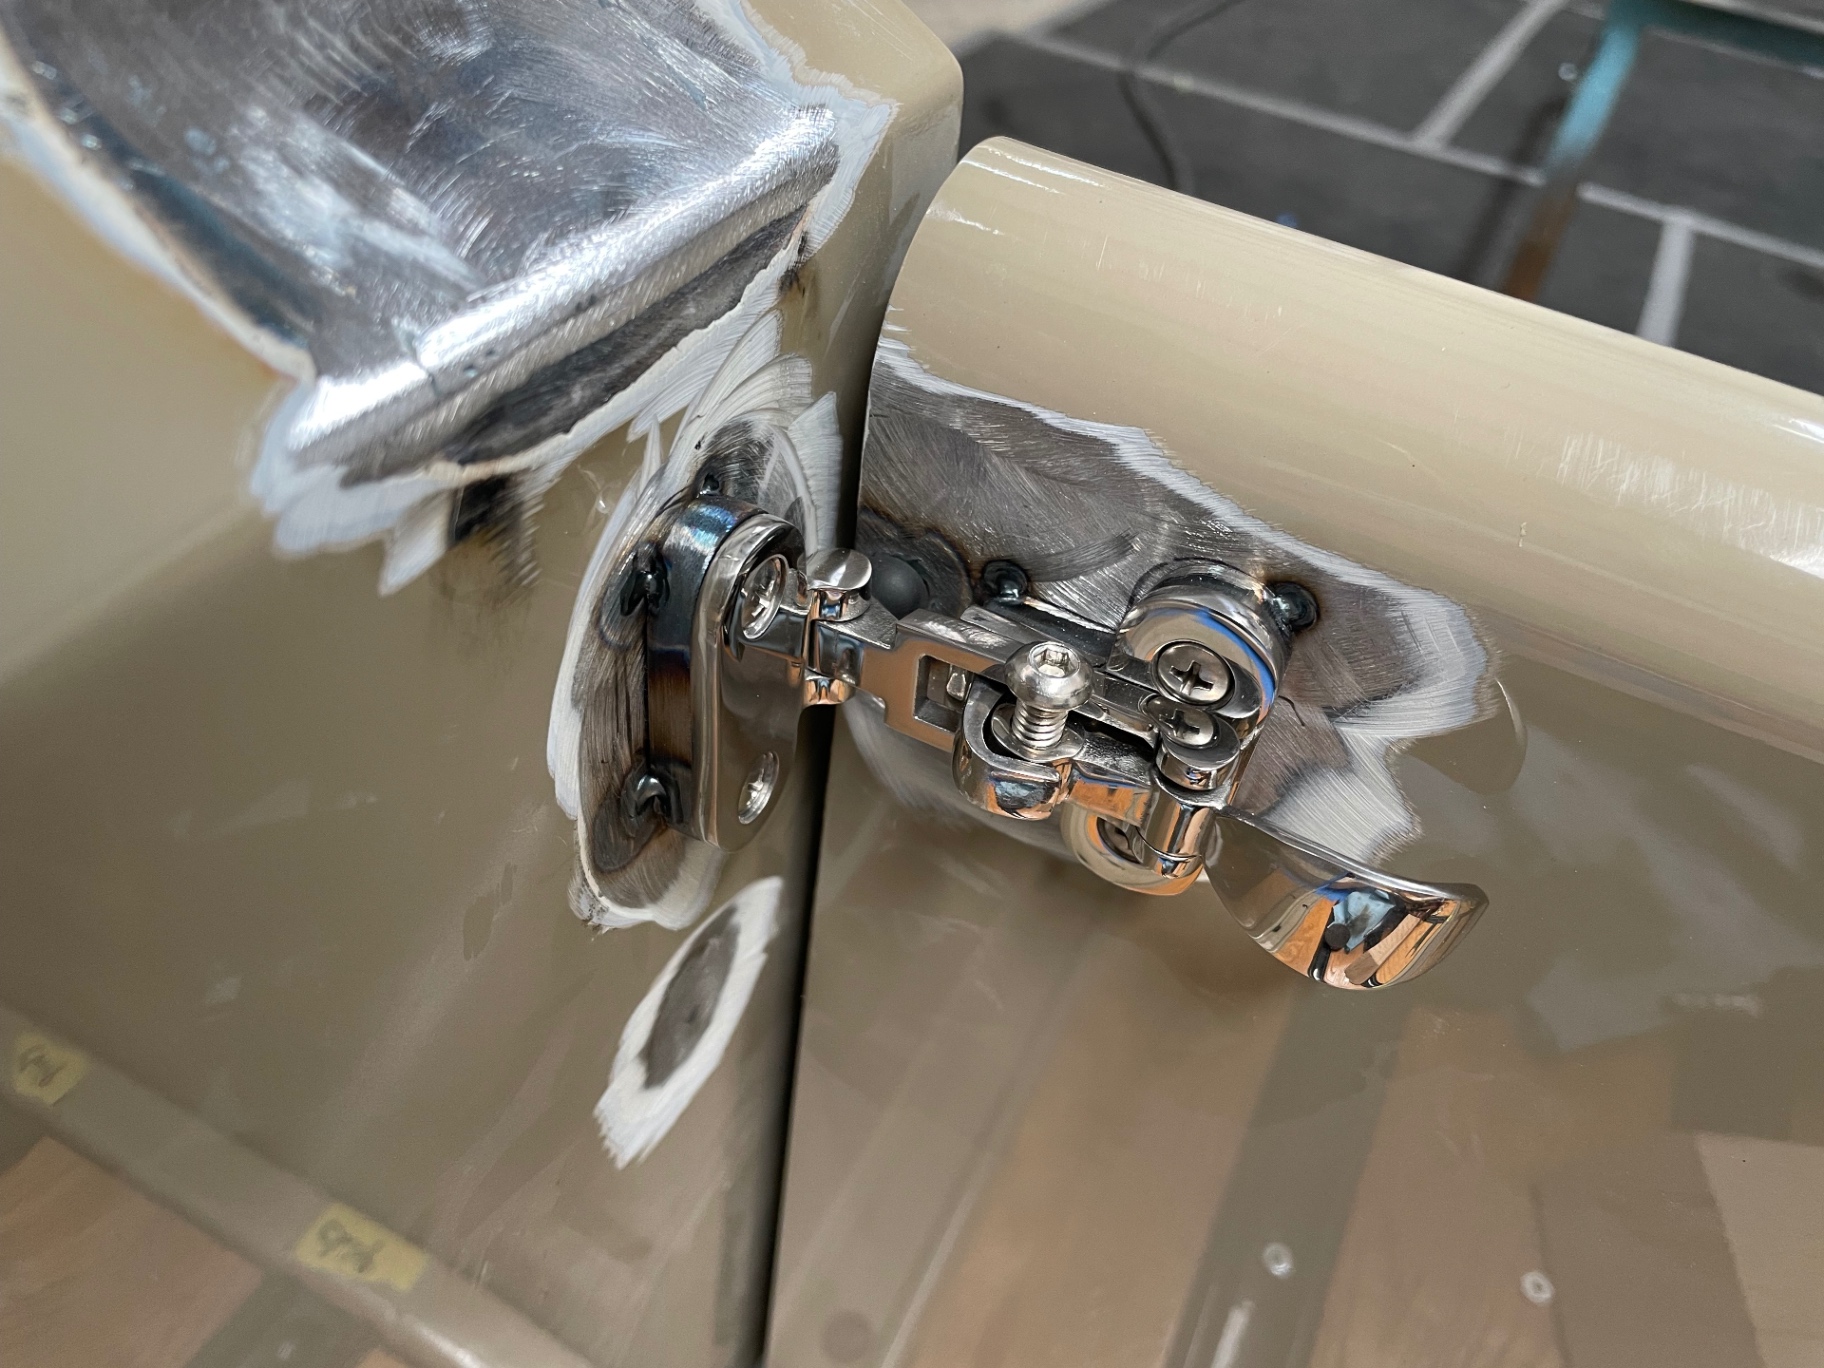
Deep in the bed rework. Bel Air inner wheel tubs getting modified and welded in around the new rear axle, bed floor cut for axle clearance, and the bed box fully welded together. Custom stainless tailgate latches replace the factory hardware. Anti-spark welding paper is masking every delicate painted surface so nothing gets scorched while we stitch. Also fabricated the custom tail light pedestal stems — wires route through the center of each stem for a clean, hidden run out to the housings.

Bel Air inner wheel tubs stitched in — anti-spark paper masking the painted bed.J001
Bel Air inner wheel tubs stitched in — anti-spark paper masking the painted bed.
Tub mockup with fender panel taped off before final weld-in.J002
Tub mockup with fender panel taped off before final weld-in.
Wheel and tire clearance check through the finished tub opening.J003
Wheel and tire clearance check through the finished tub opening.
Bed floor cut for axle clearance — rear end dropped in for final fitment.J004
Bed floor cut for axle clearance — rear end dropped in for final fitment.
Bed box seams welded solid before body work.J005
Bed box seams welded solid before body work.
Custom stainless tailgate latch mocked in place.J006
Custom stainless tailgate latch mocked in place.
Tail light pedestal stem tacked to the bed — wires route through the center of the tube.J007
Tail light pedestal stem tacked to the bed — wires route through the center of the tube.
Stem-to-housing detail — hidden wire pass-through.J008
Stem-to-housing detail — hidden wire pass-through.
Second stem after fit-up — heat colors from the final weld.J009
Second stem after fit-up — heat colors from the final weld.
Underside view — stem exits cleanly out of the bed floor.J010
Underside view — stem exits cleanly out of the bed floor.

UPDATE 07 / 08

May 15, 2022

ASSEMBLY

Sheet metal in color, chassis parts back from coating, RTX gauges lit

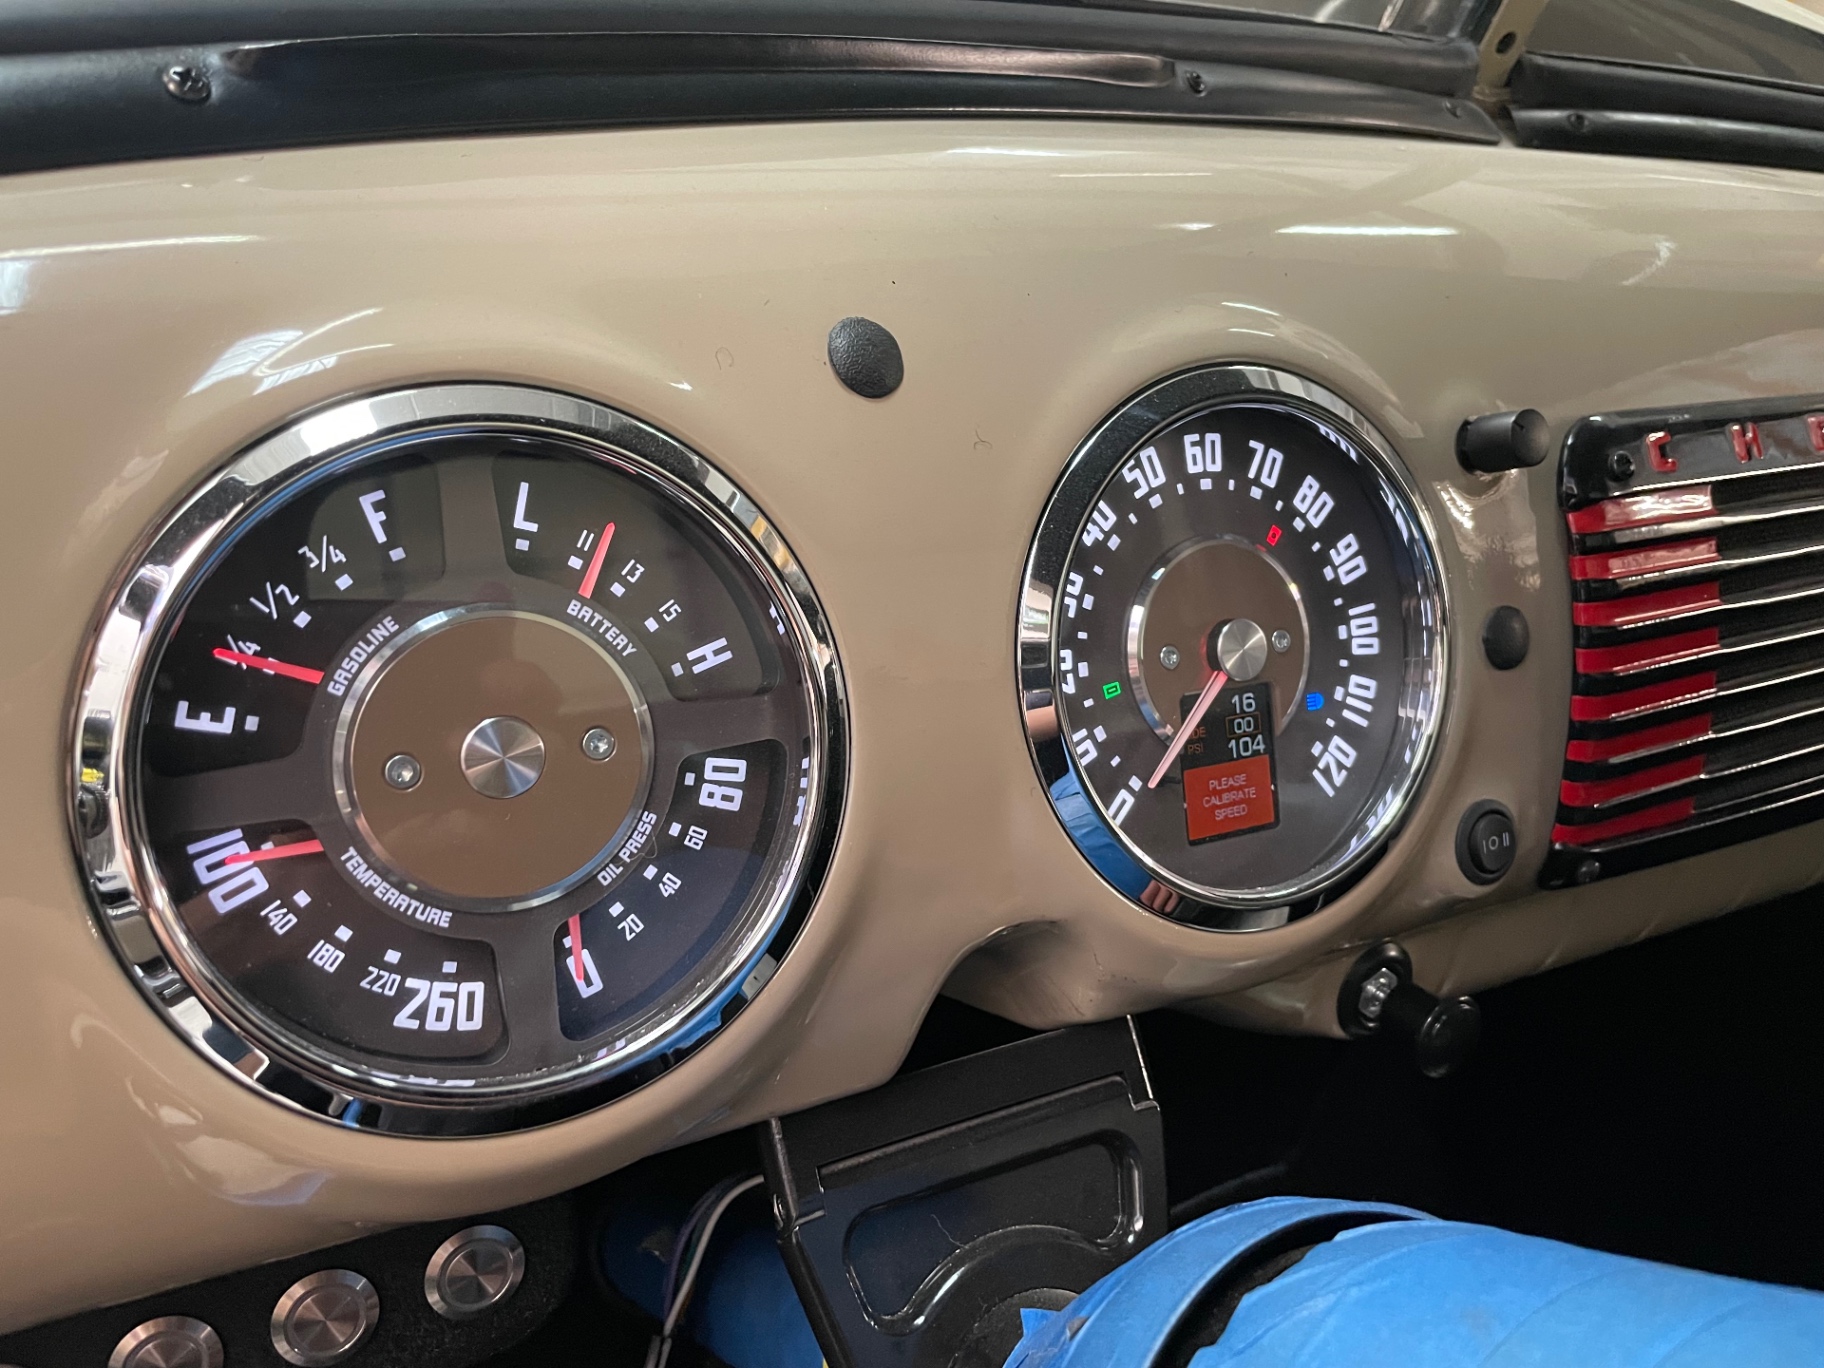
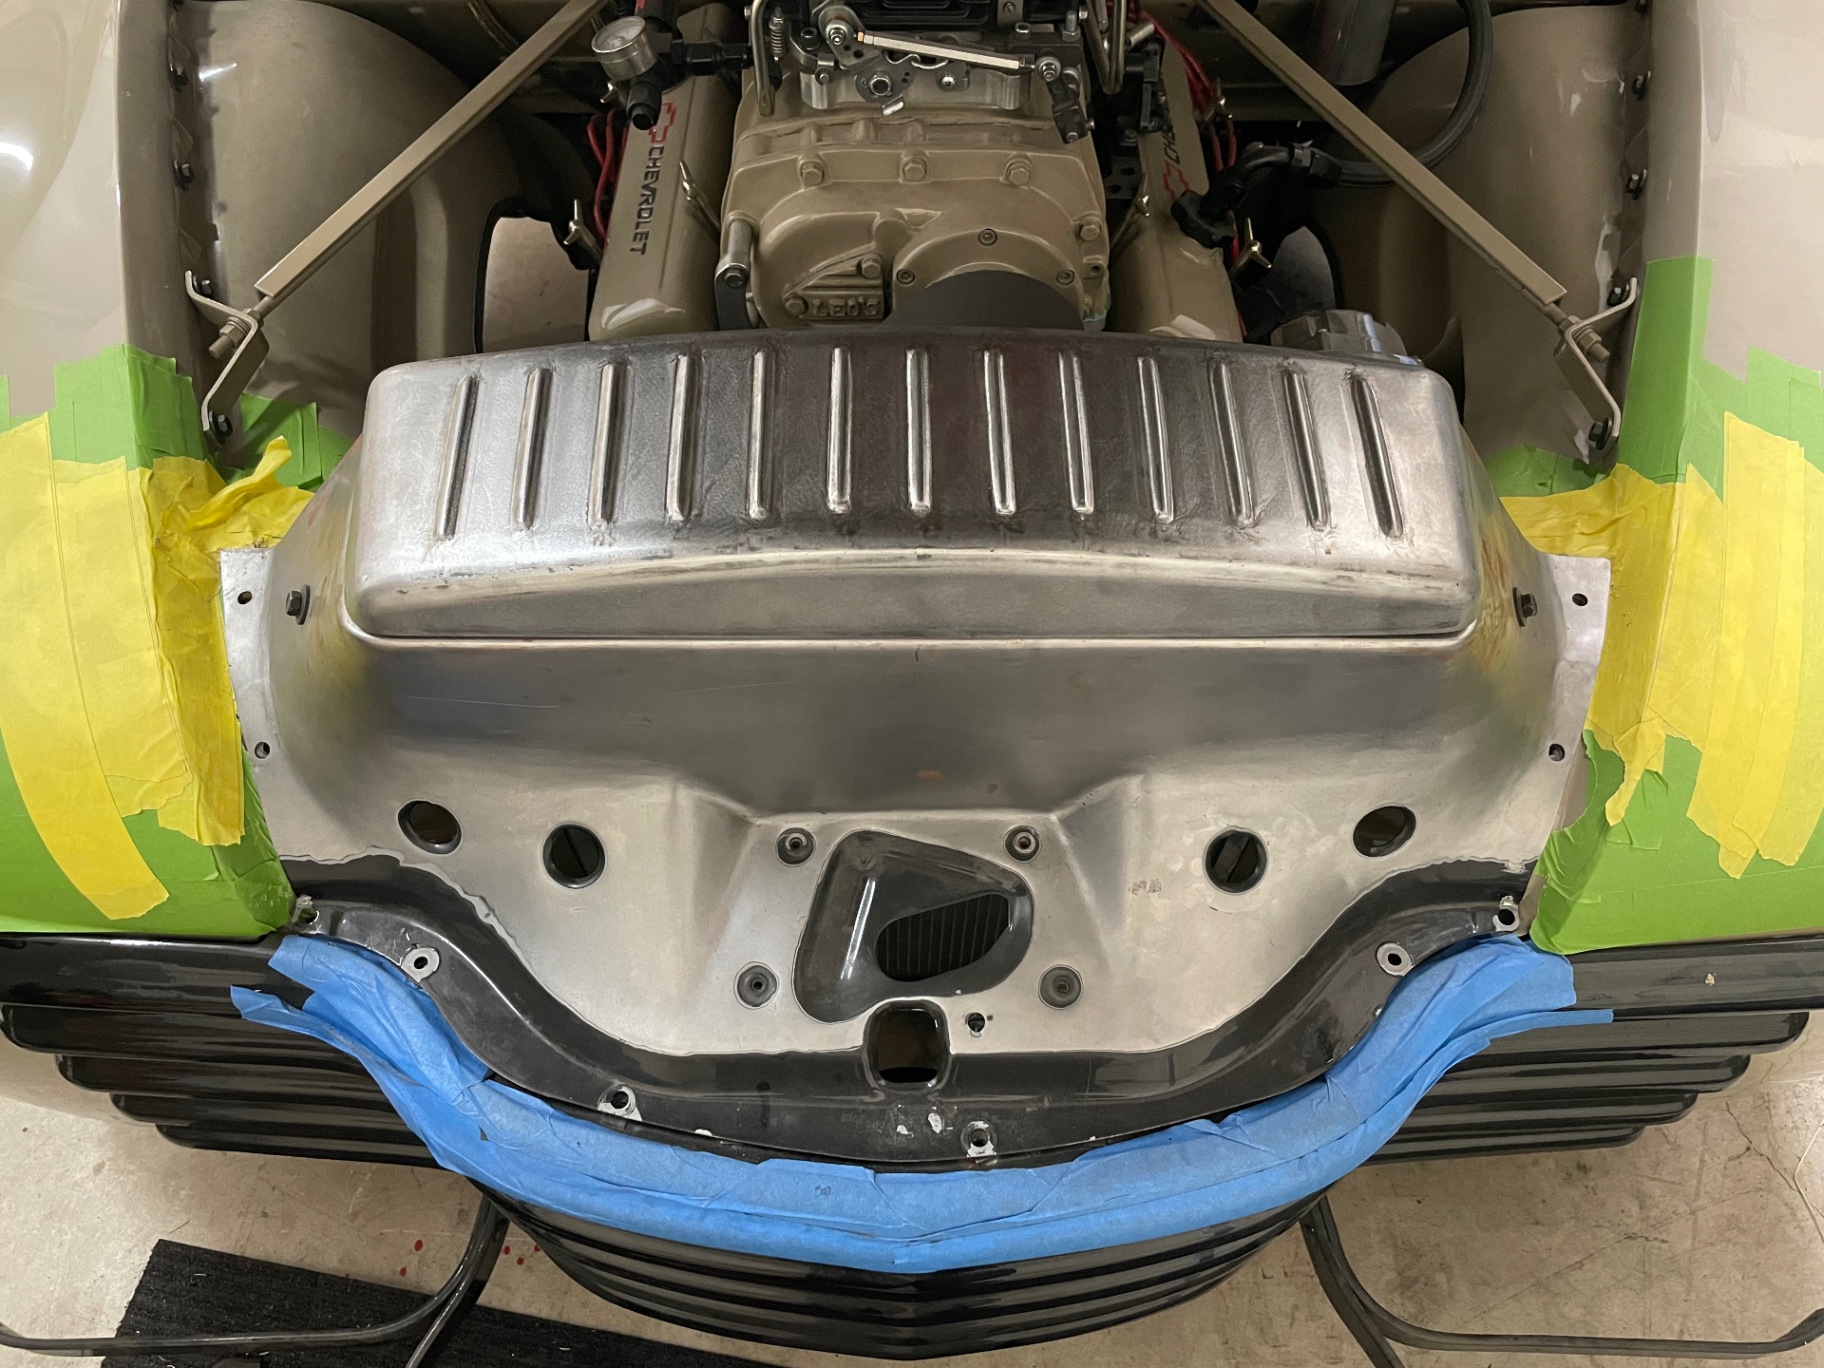
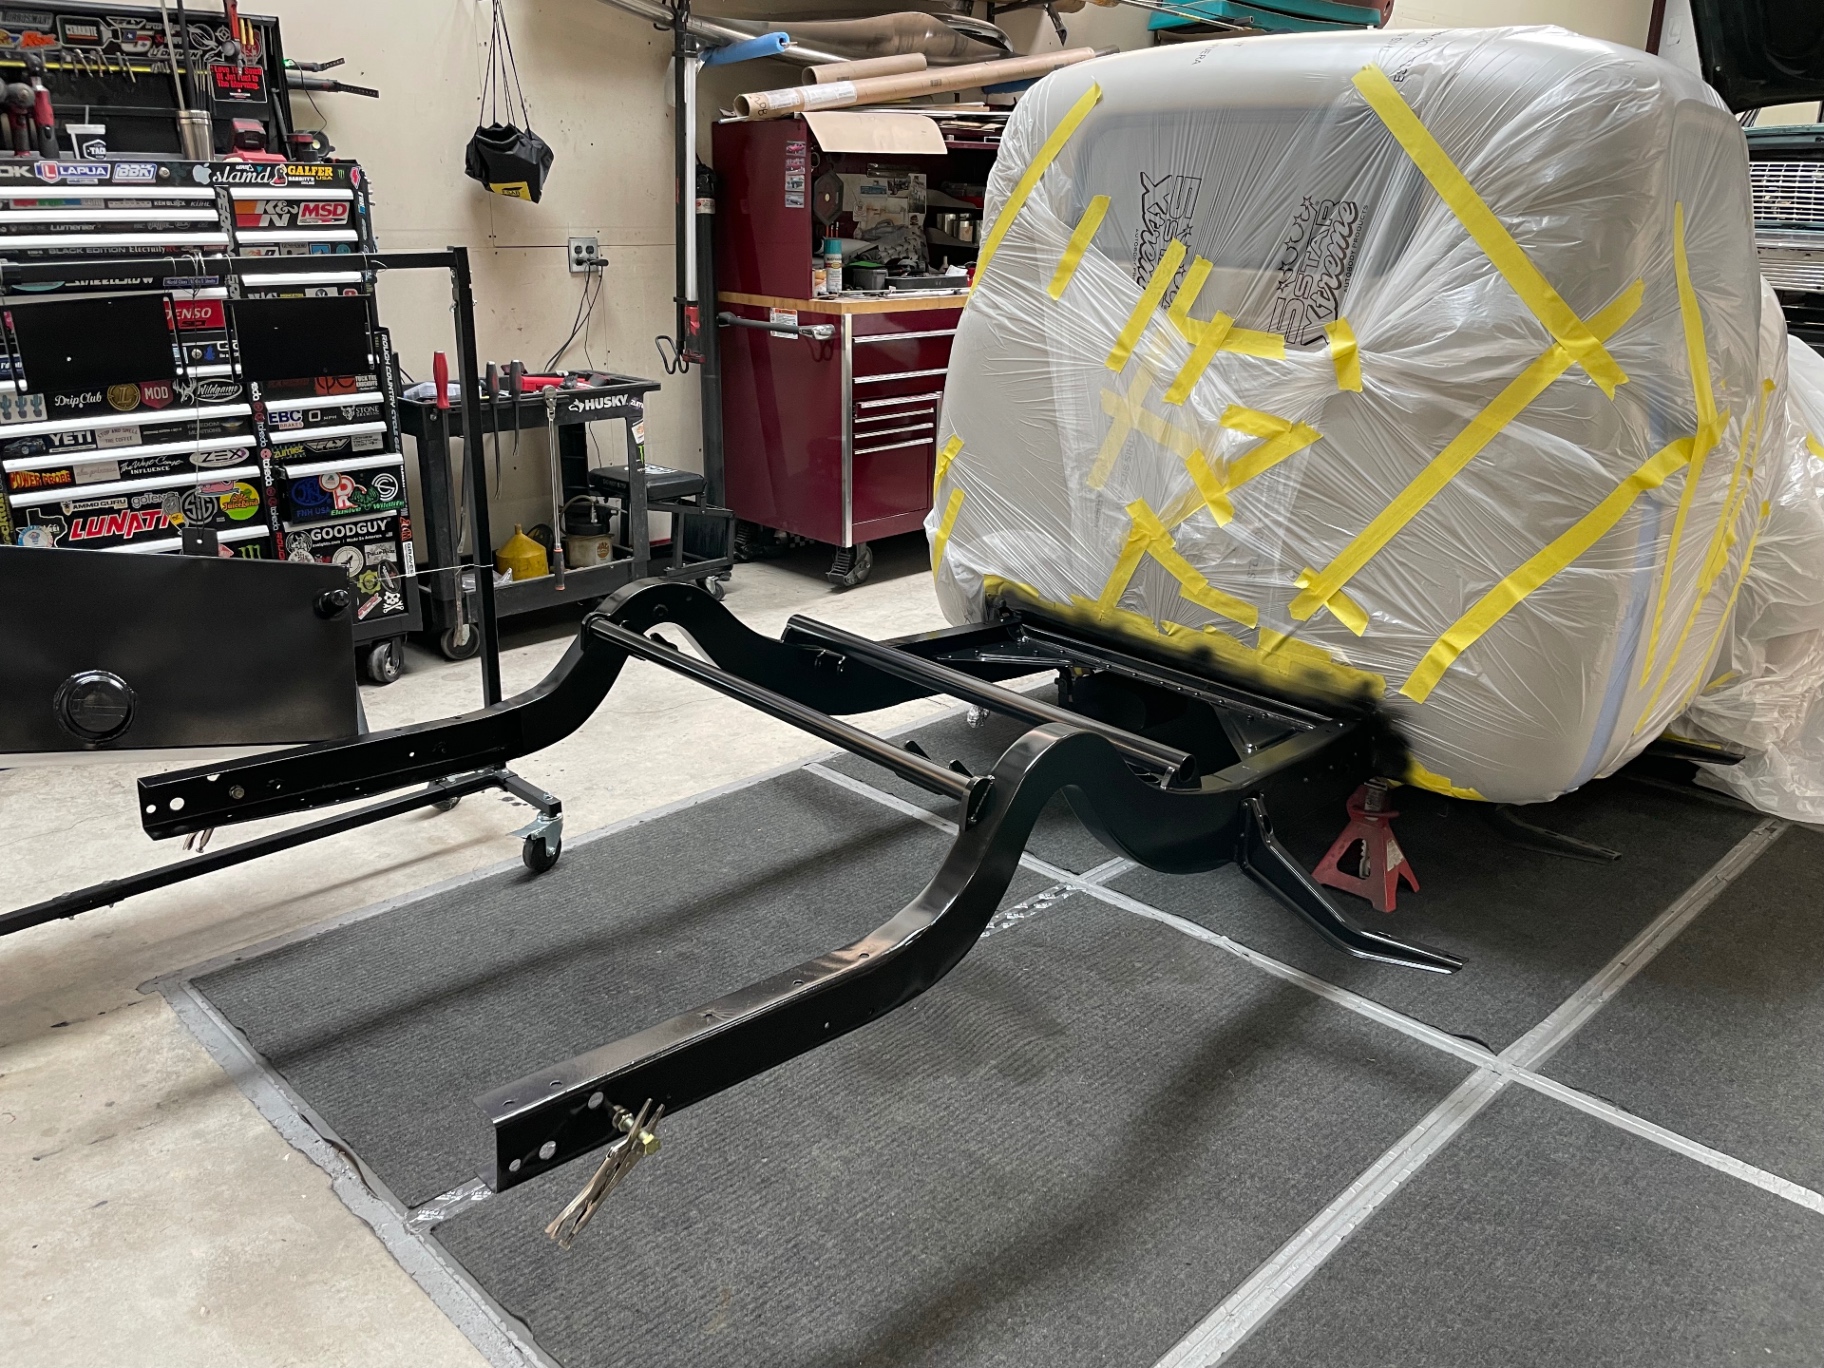
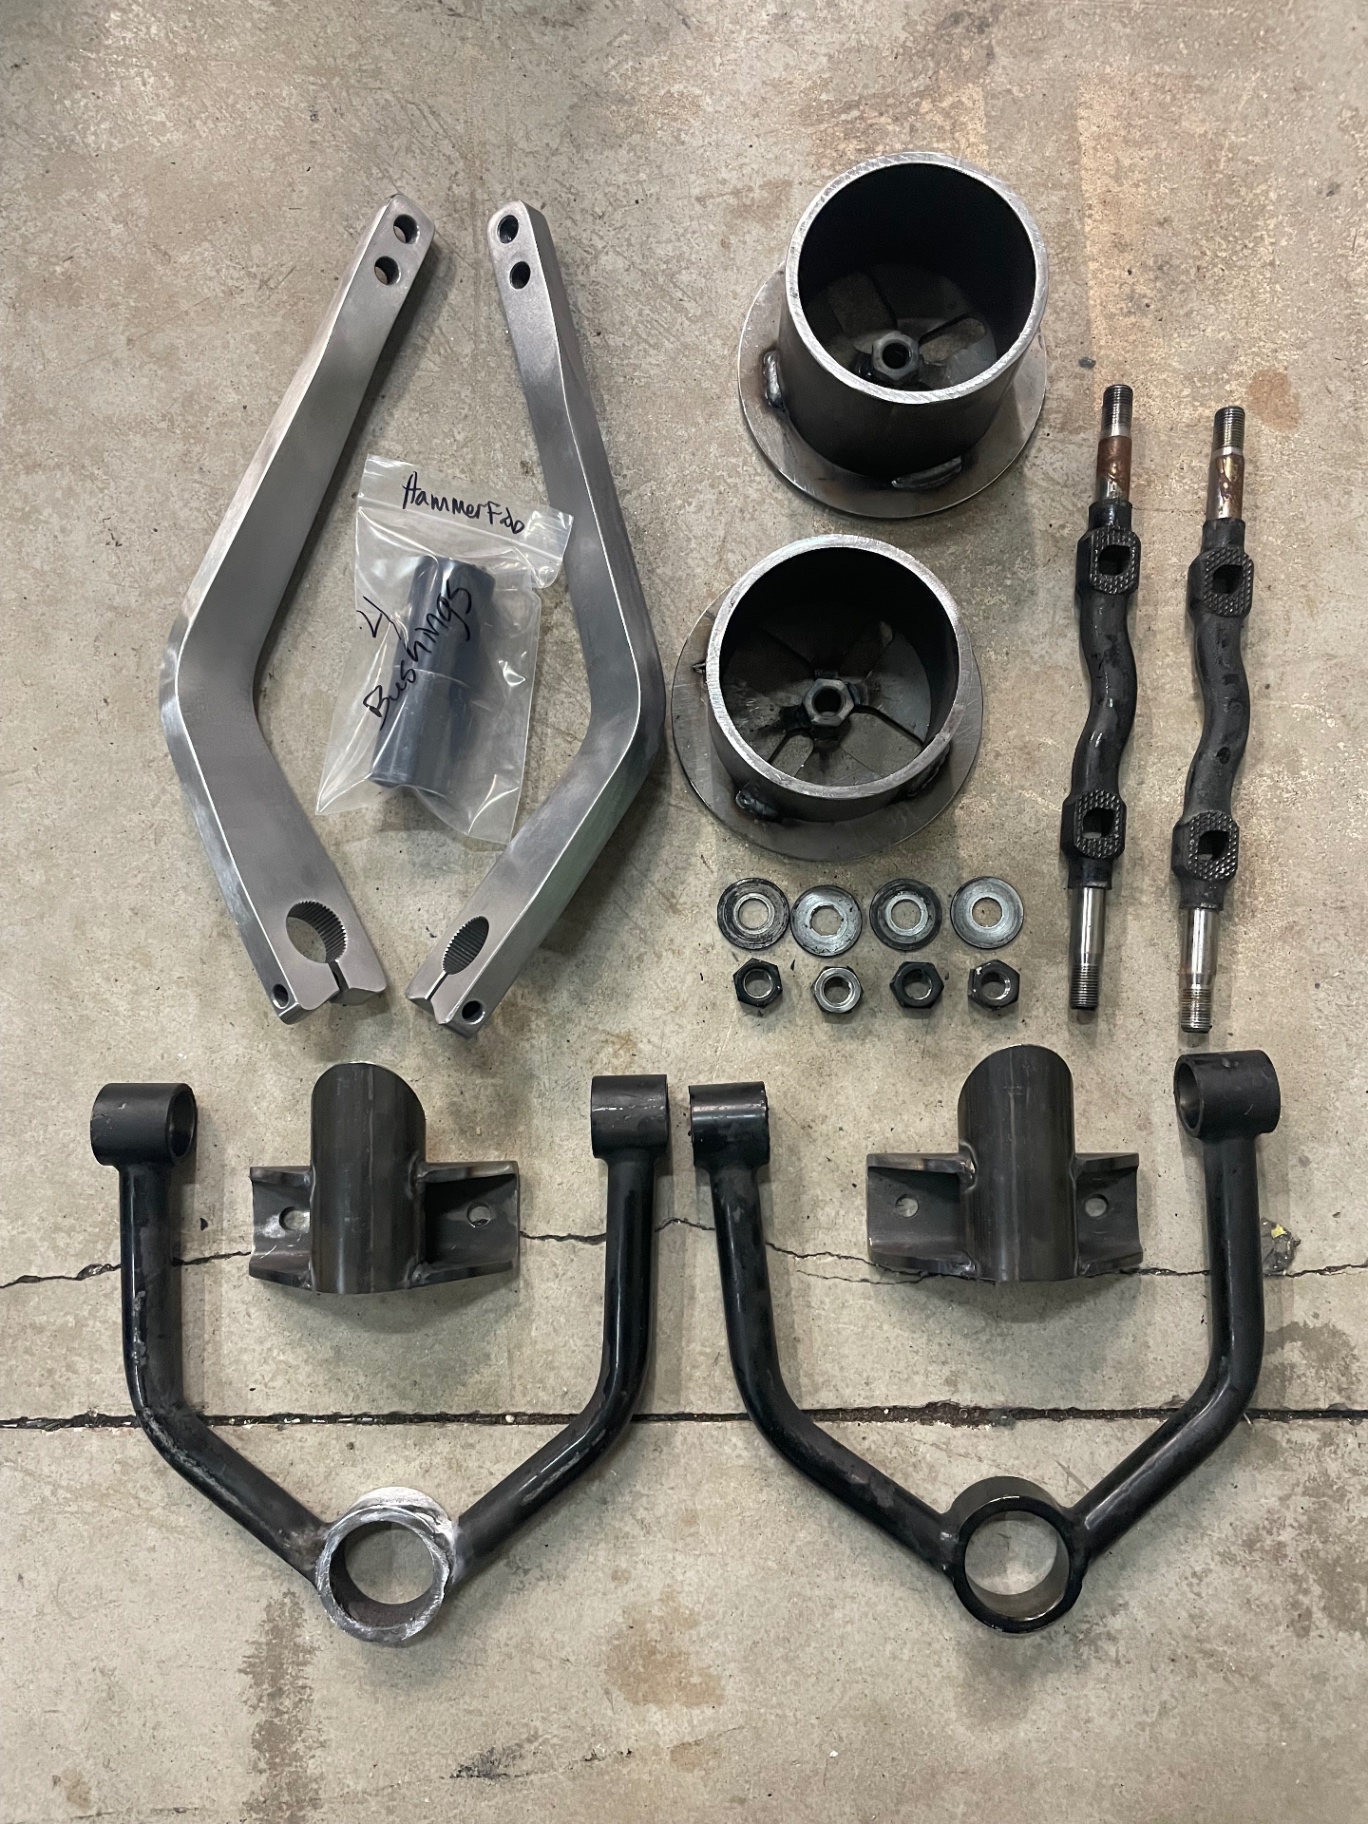
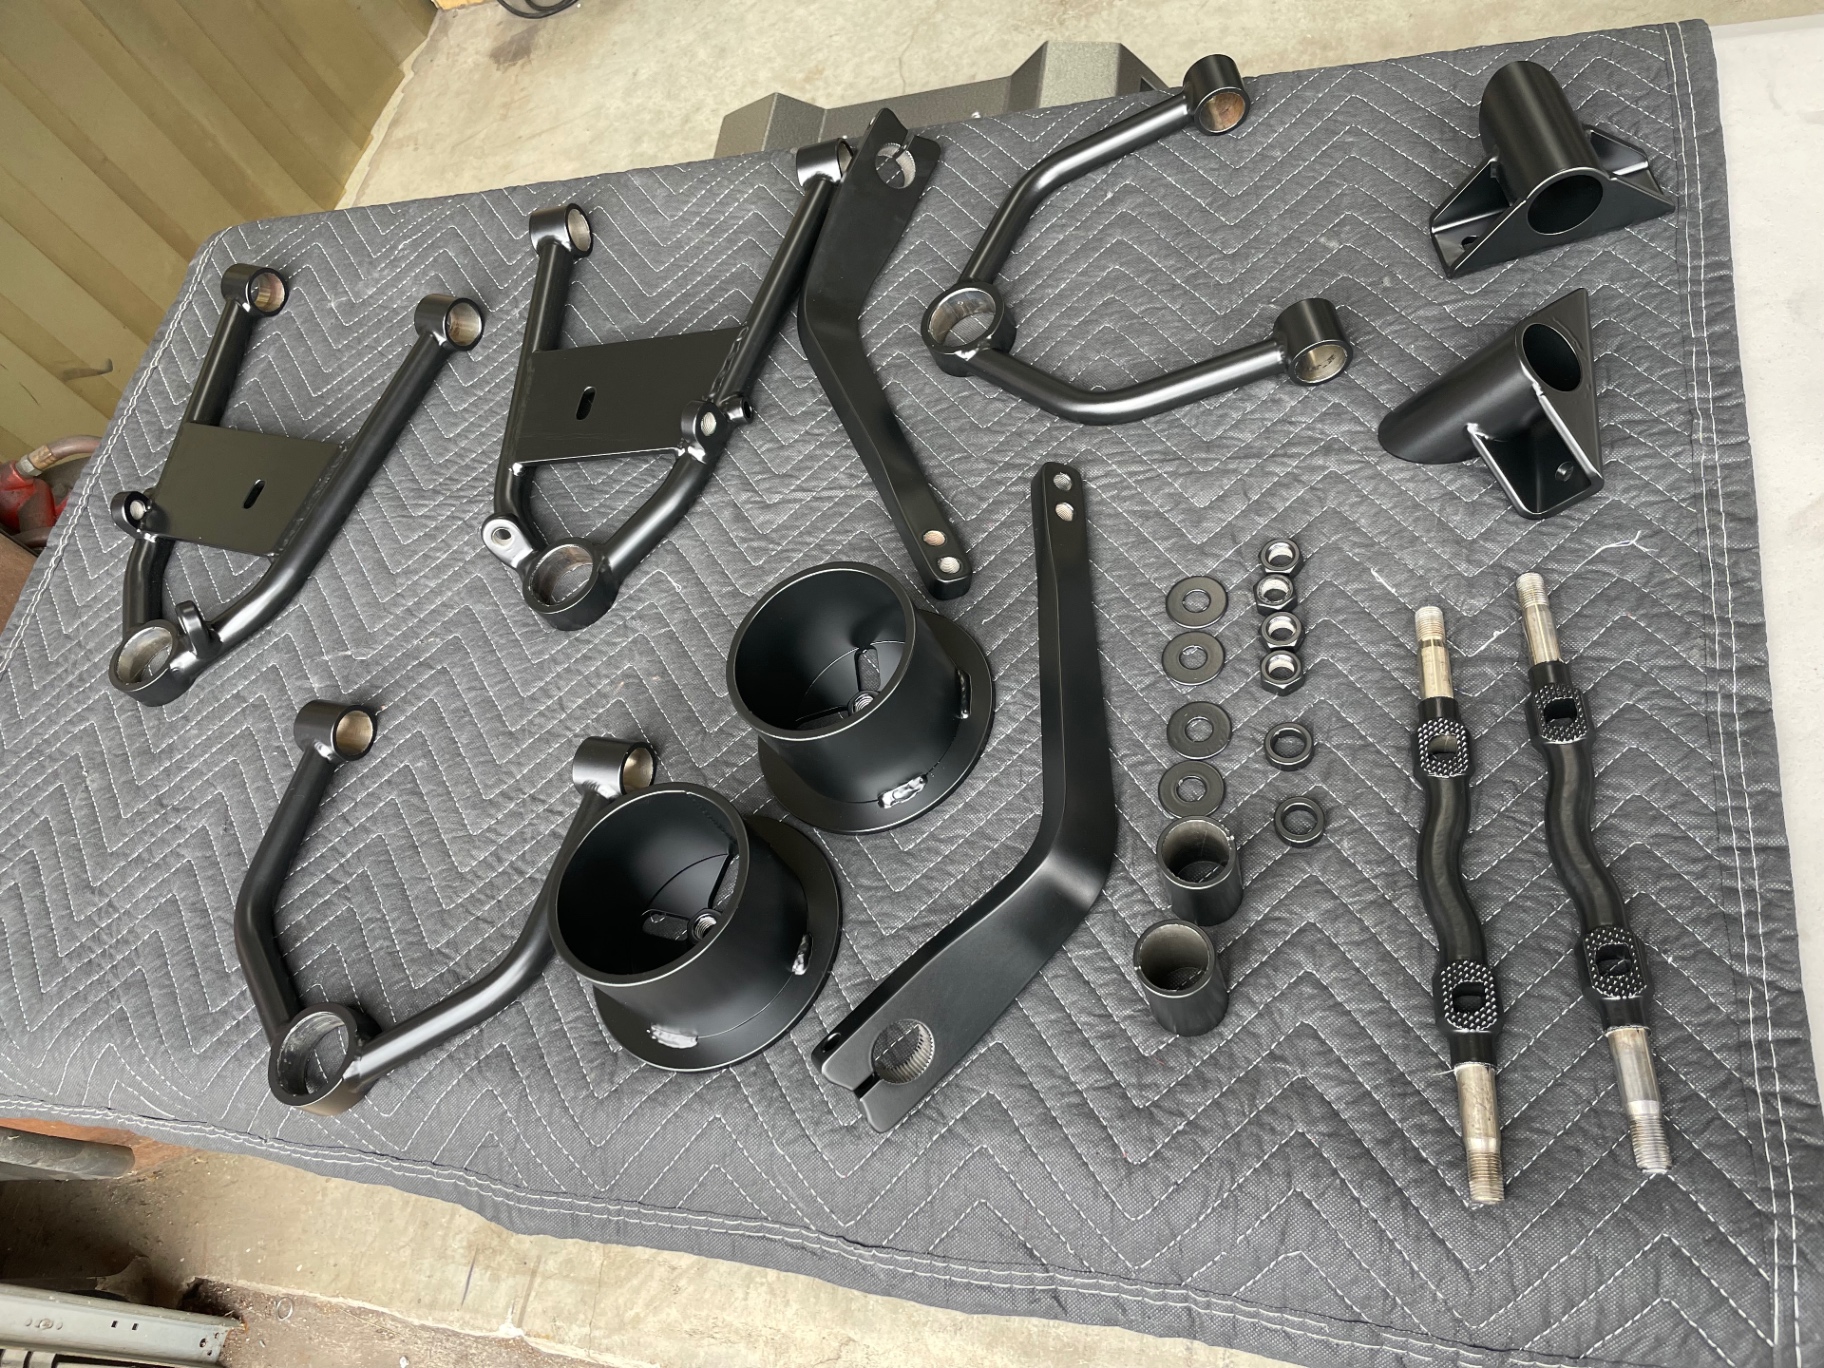
May brought the truck out of raw metal and into paint. Bed box sprayed in sealer then laid down in the final tan base — inner tubs, floor, and outer sides all shot together for a seamless finish. Fabricated radiator cover fit up in the engine bay to tidy the transition from grille to cab. Out back, the frame got a custom rear step notch built in for axle travel on air. Front suspension components came back from powder coat — control arms, spindles, coil-over cups, and hardware laid out and ready for assembly next to the bare-metal 'before' set. Inside, the Dakota Digital RTX gauge cluster woke up for the first time — modern data behind vintage-look faces.

Dakota Digital RTX gauges powered up — vintage face, modern brain.J011
Dakota Digital RTX gauges powered up — vintage face, modern brain.
Fabricated radiator cover fit-up — bridging grille to firewall over the small block.J012
Fabricated radiator cover fit-up — bridging grille to firewall over the small block.
Rear frame step notch built in for axle clearance on air ride.J013
Rear frame step notch built in for axle clearance on air ride.
Front suspension parts before coating — raw arms, spindles, and cups.J014
Front suspension parts before coating — raw arms, spindles, and cups.
Same parts back from powder — satin black, ready to assemble.J015
Same parts back from powder — satin black, ready to assemble.
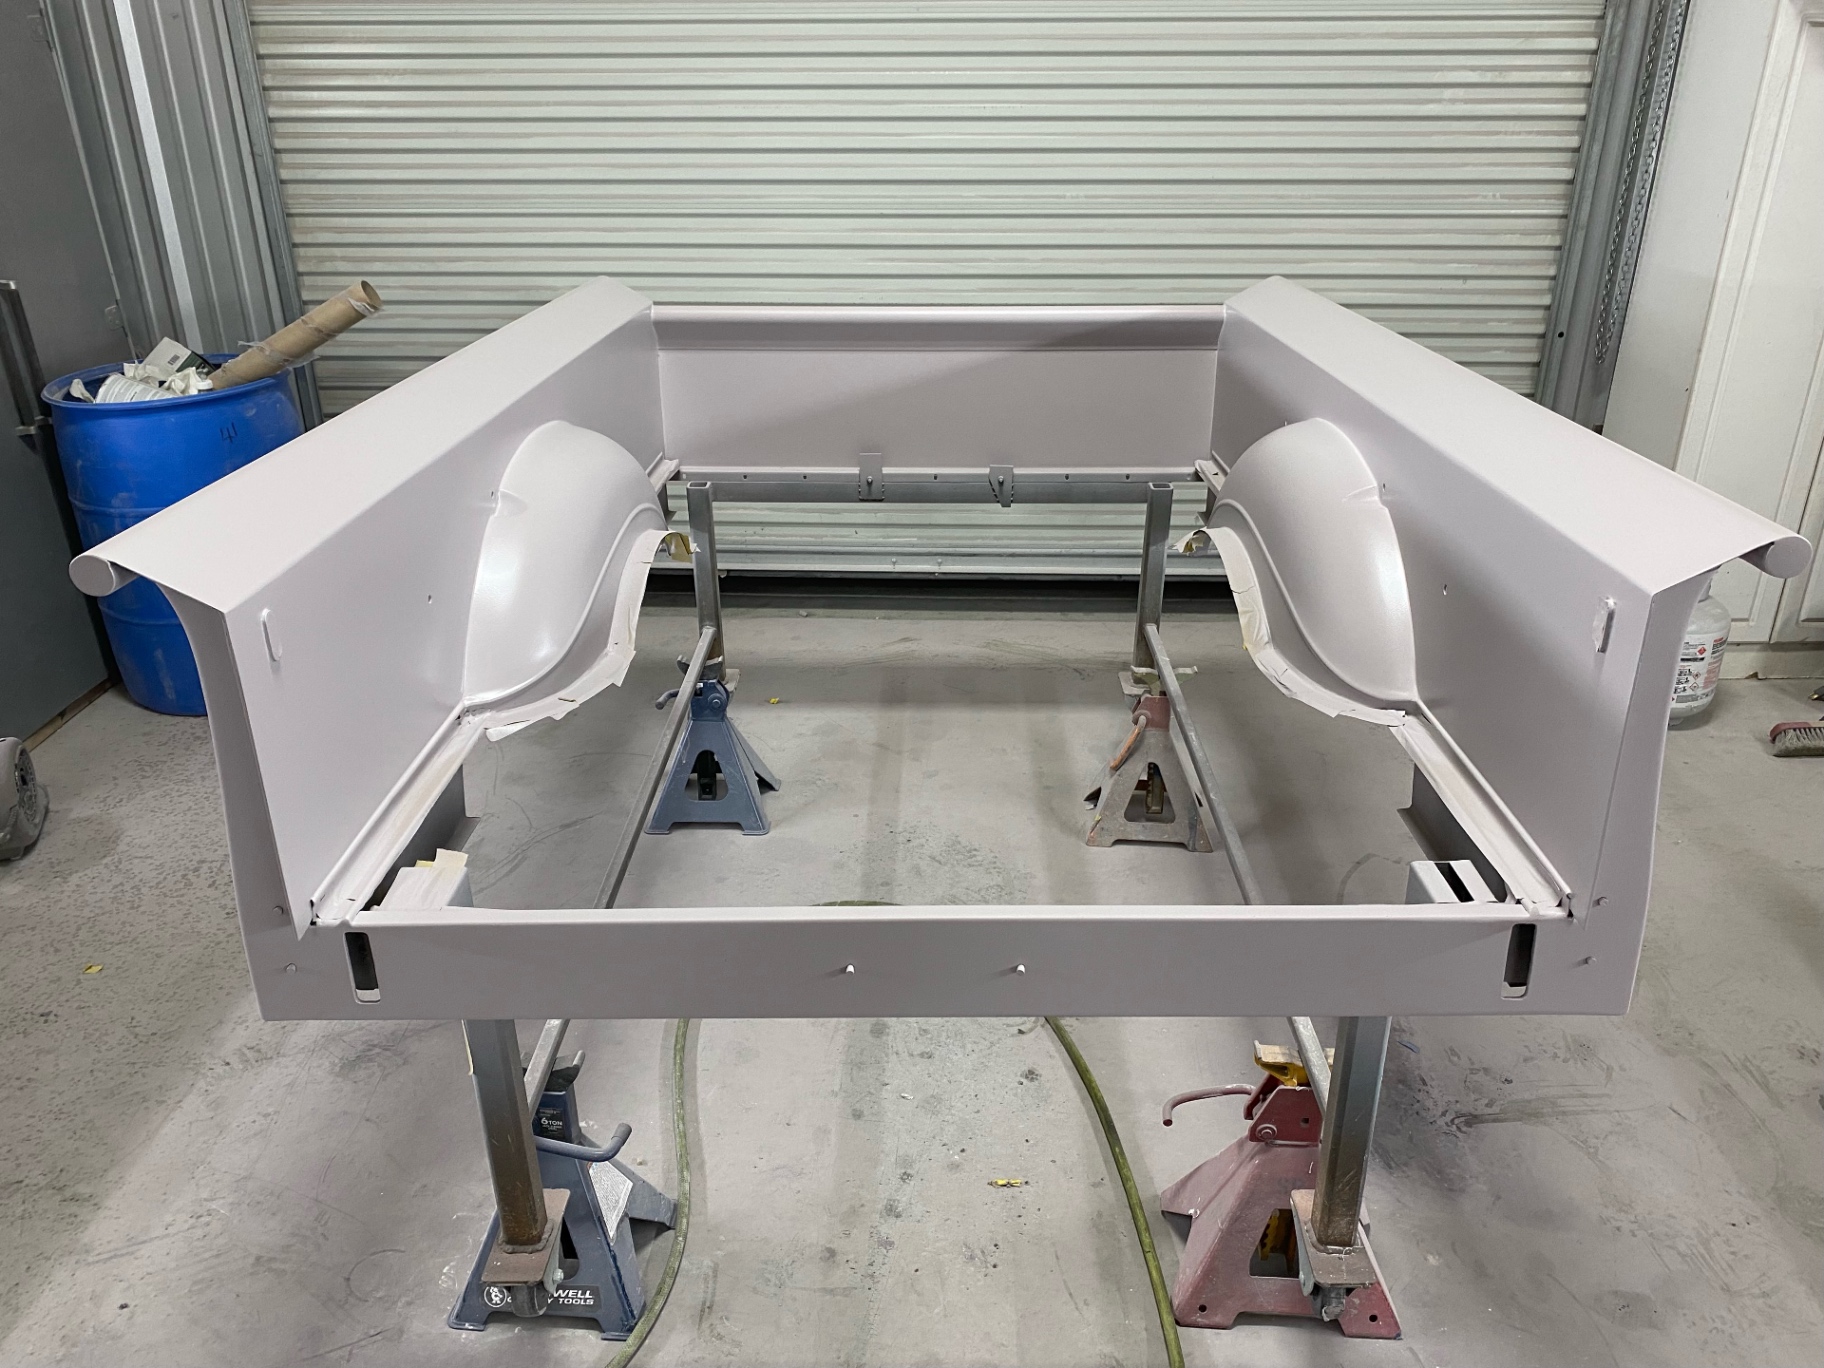
Bed box in sealer — inner tubs, floor, and sides shot as one unit.J016
Bed box in sealer — inner tubs, floor, and sides shot as one unit.
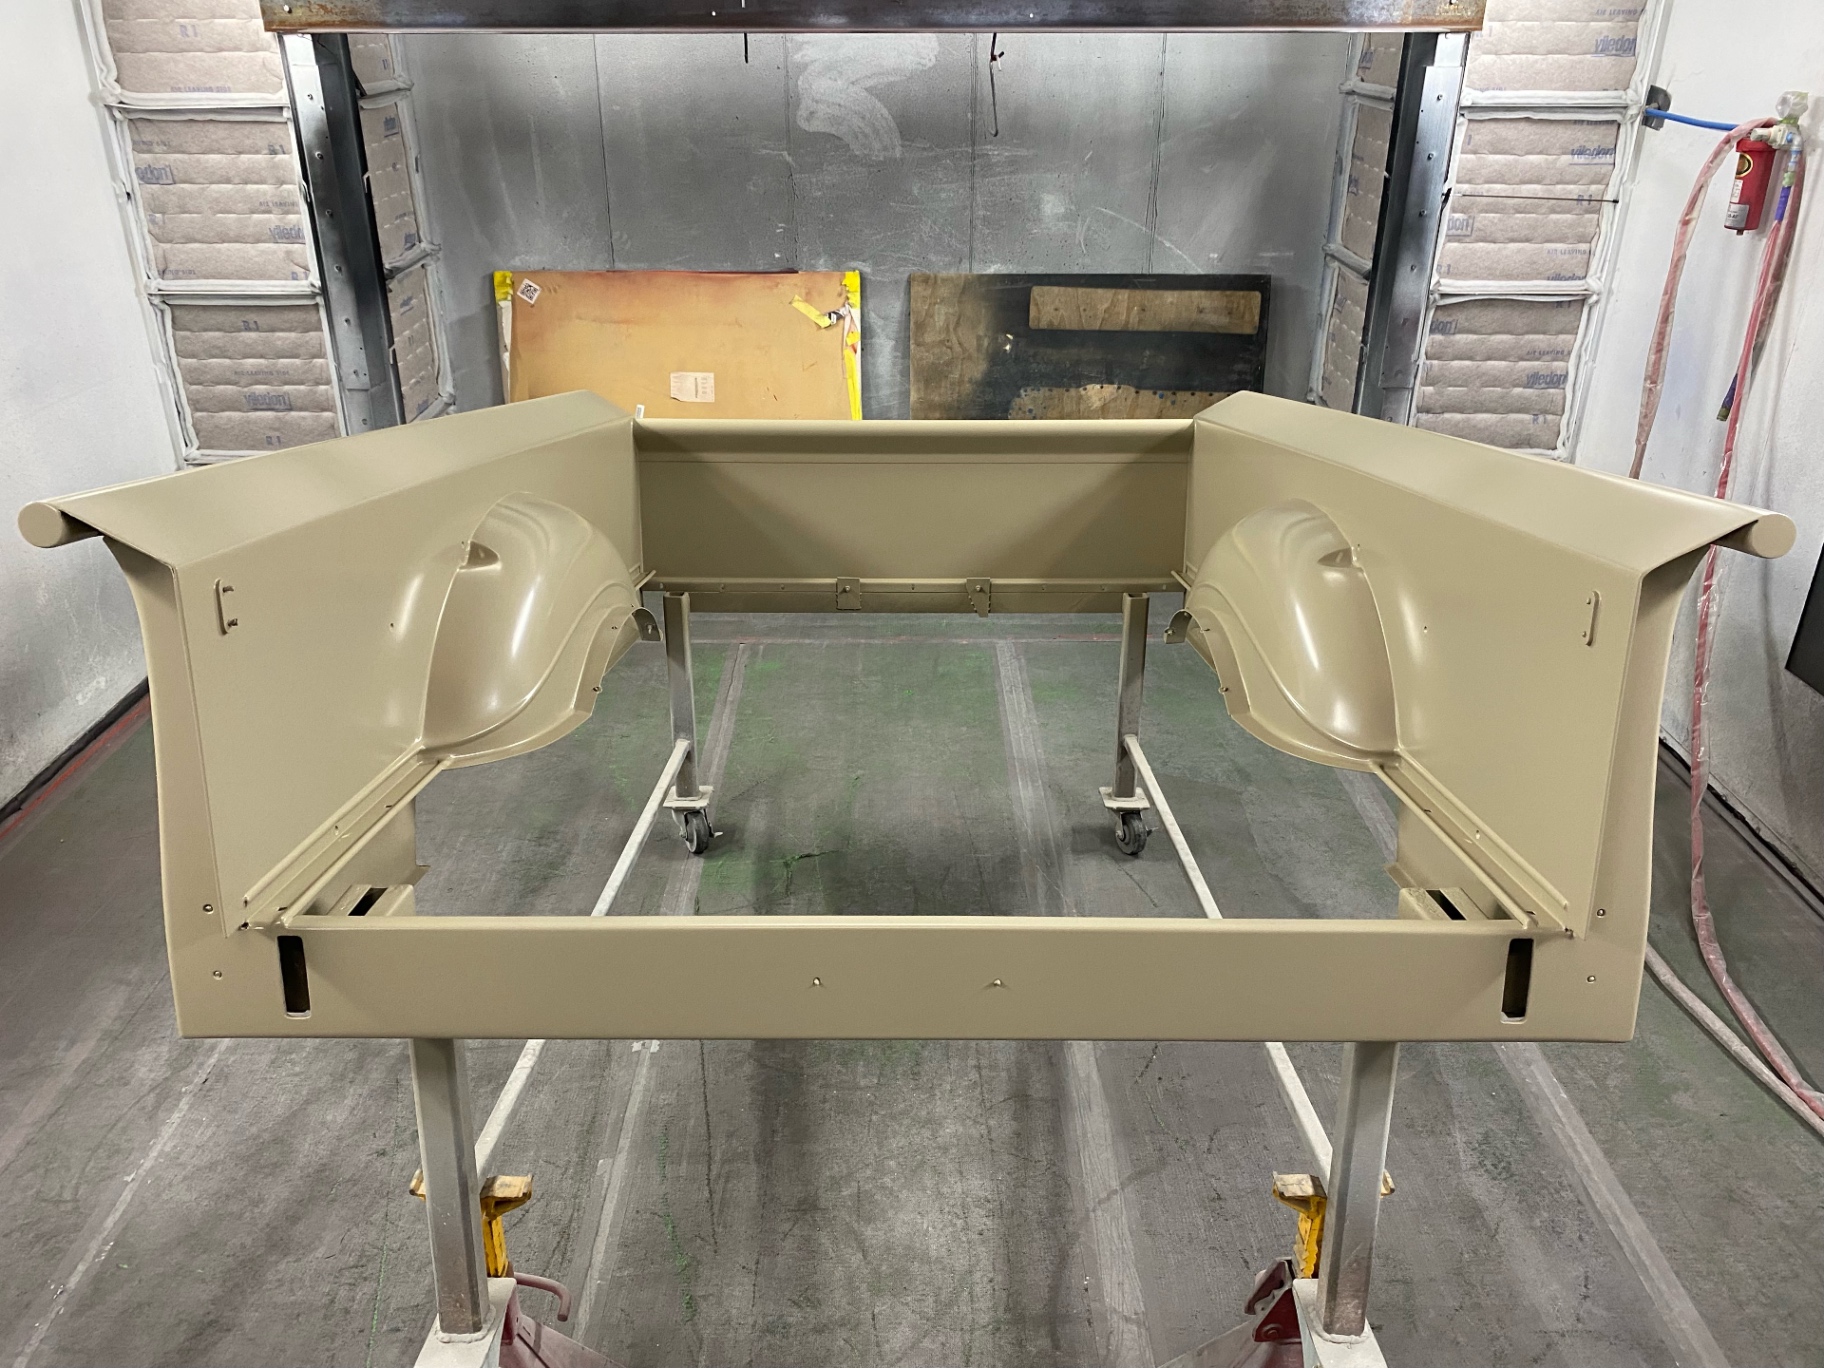
Bed after the first base coat — color starting to show.J017
Bed after the first base coat — color starting to show.
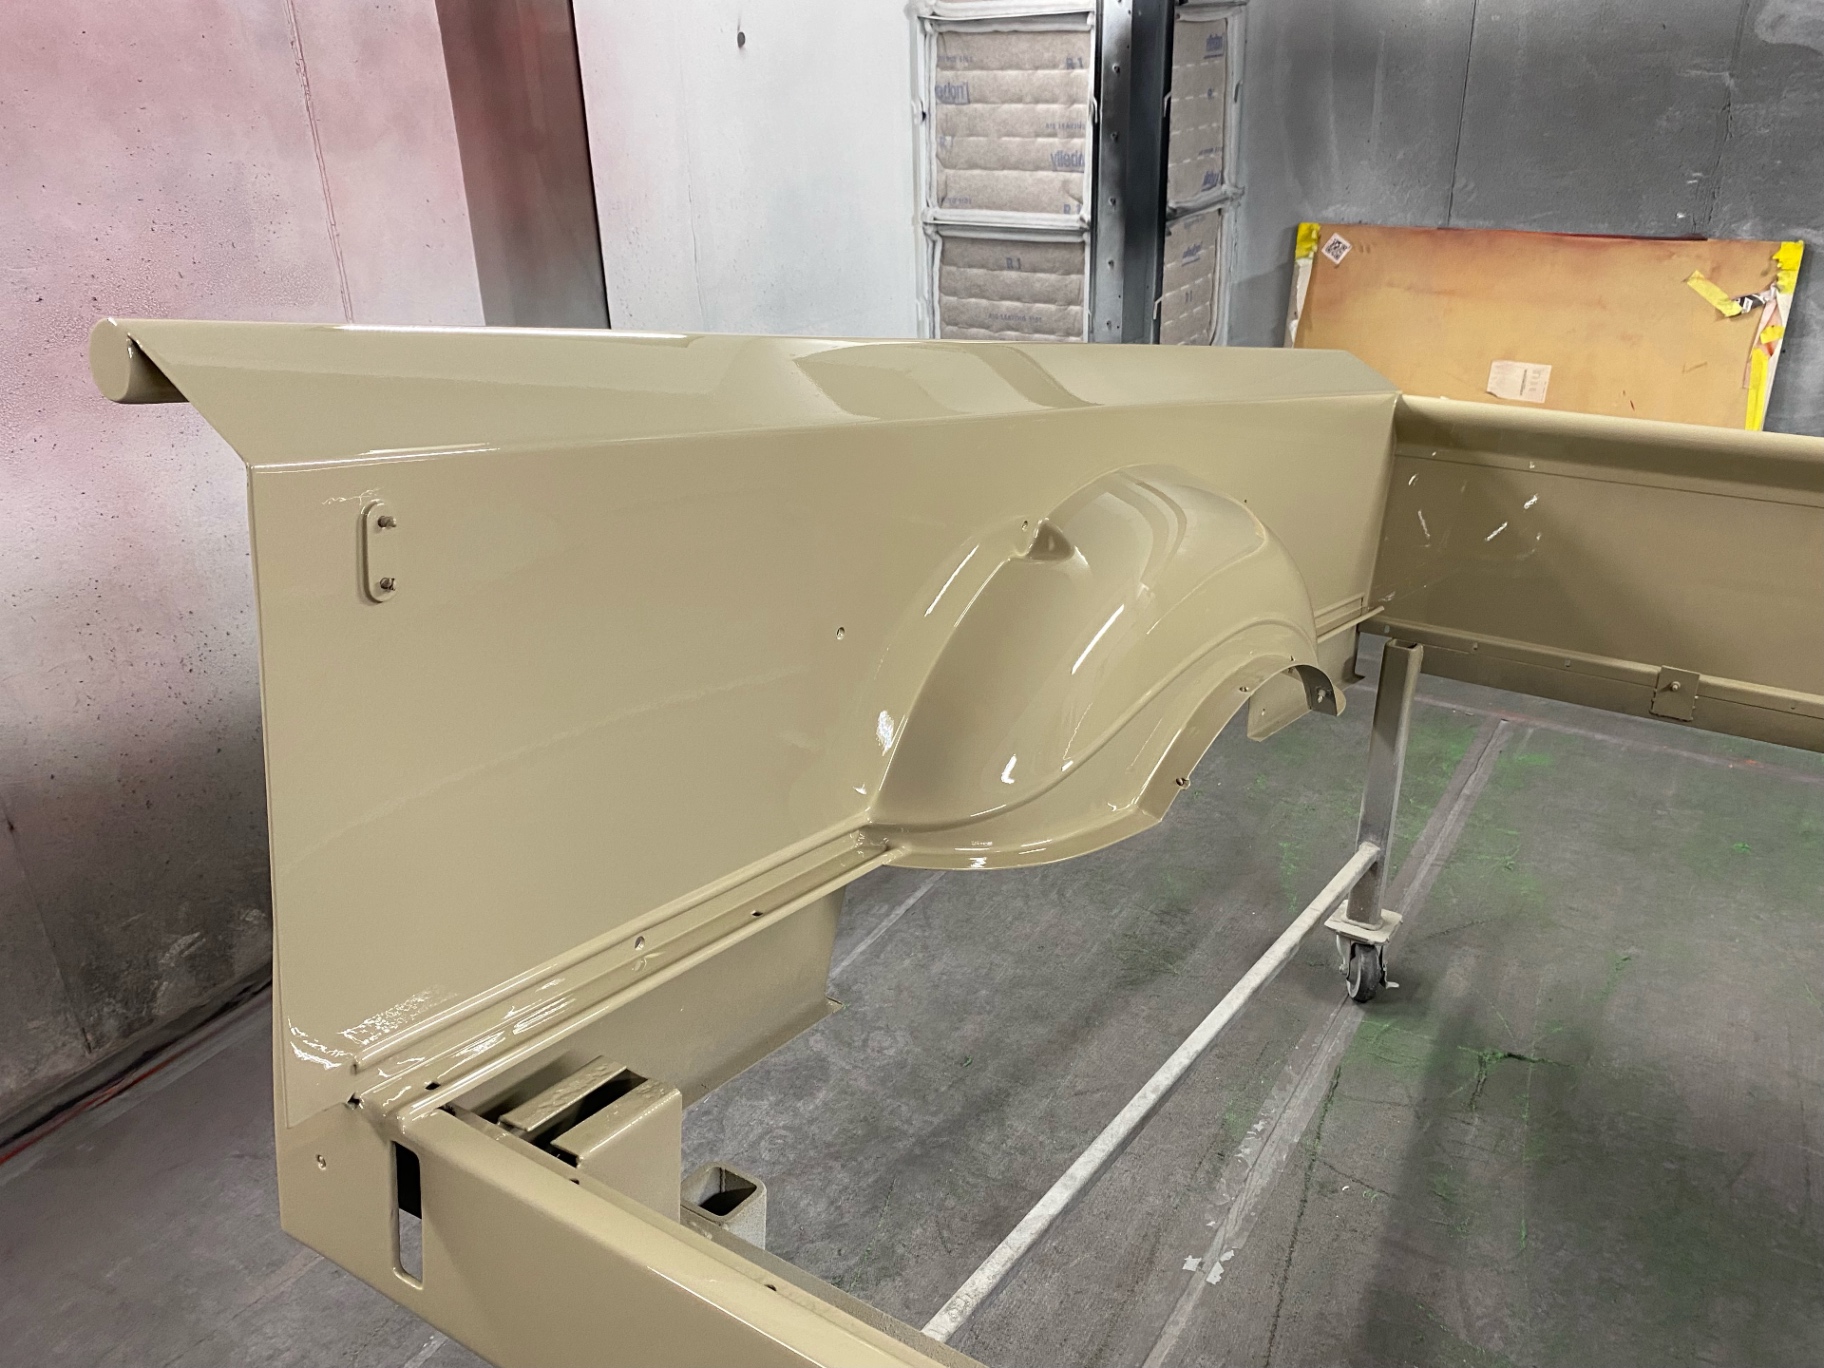
Driver-side bed panel — high-build gloss over the tub and rocker.J018
Driver-side bed panel — high-build gloss over the tub and rocker.
Passenger-side bed panel — matching finish, reflections telling the story.J019
Passenger-side bed panel — matching finish, reflections telling the story.
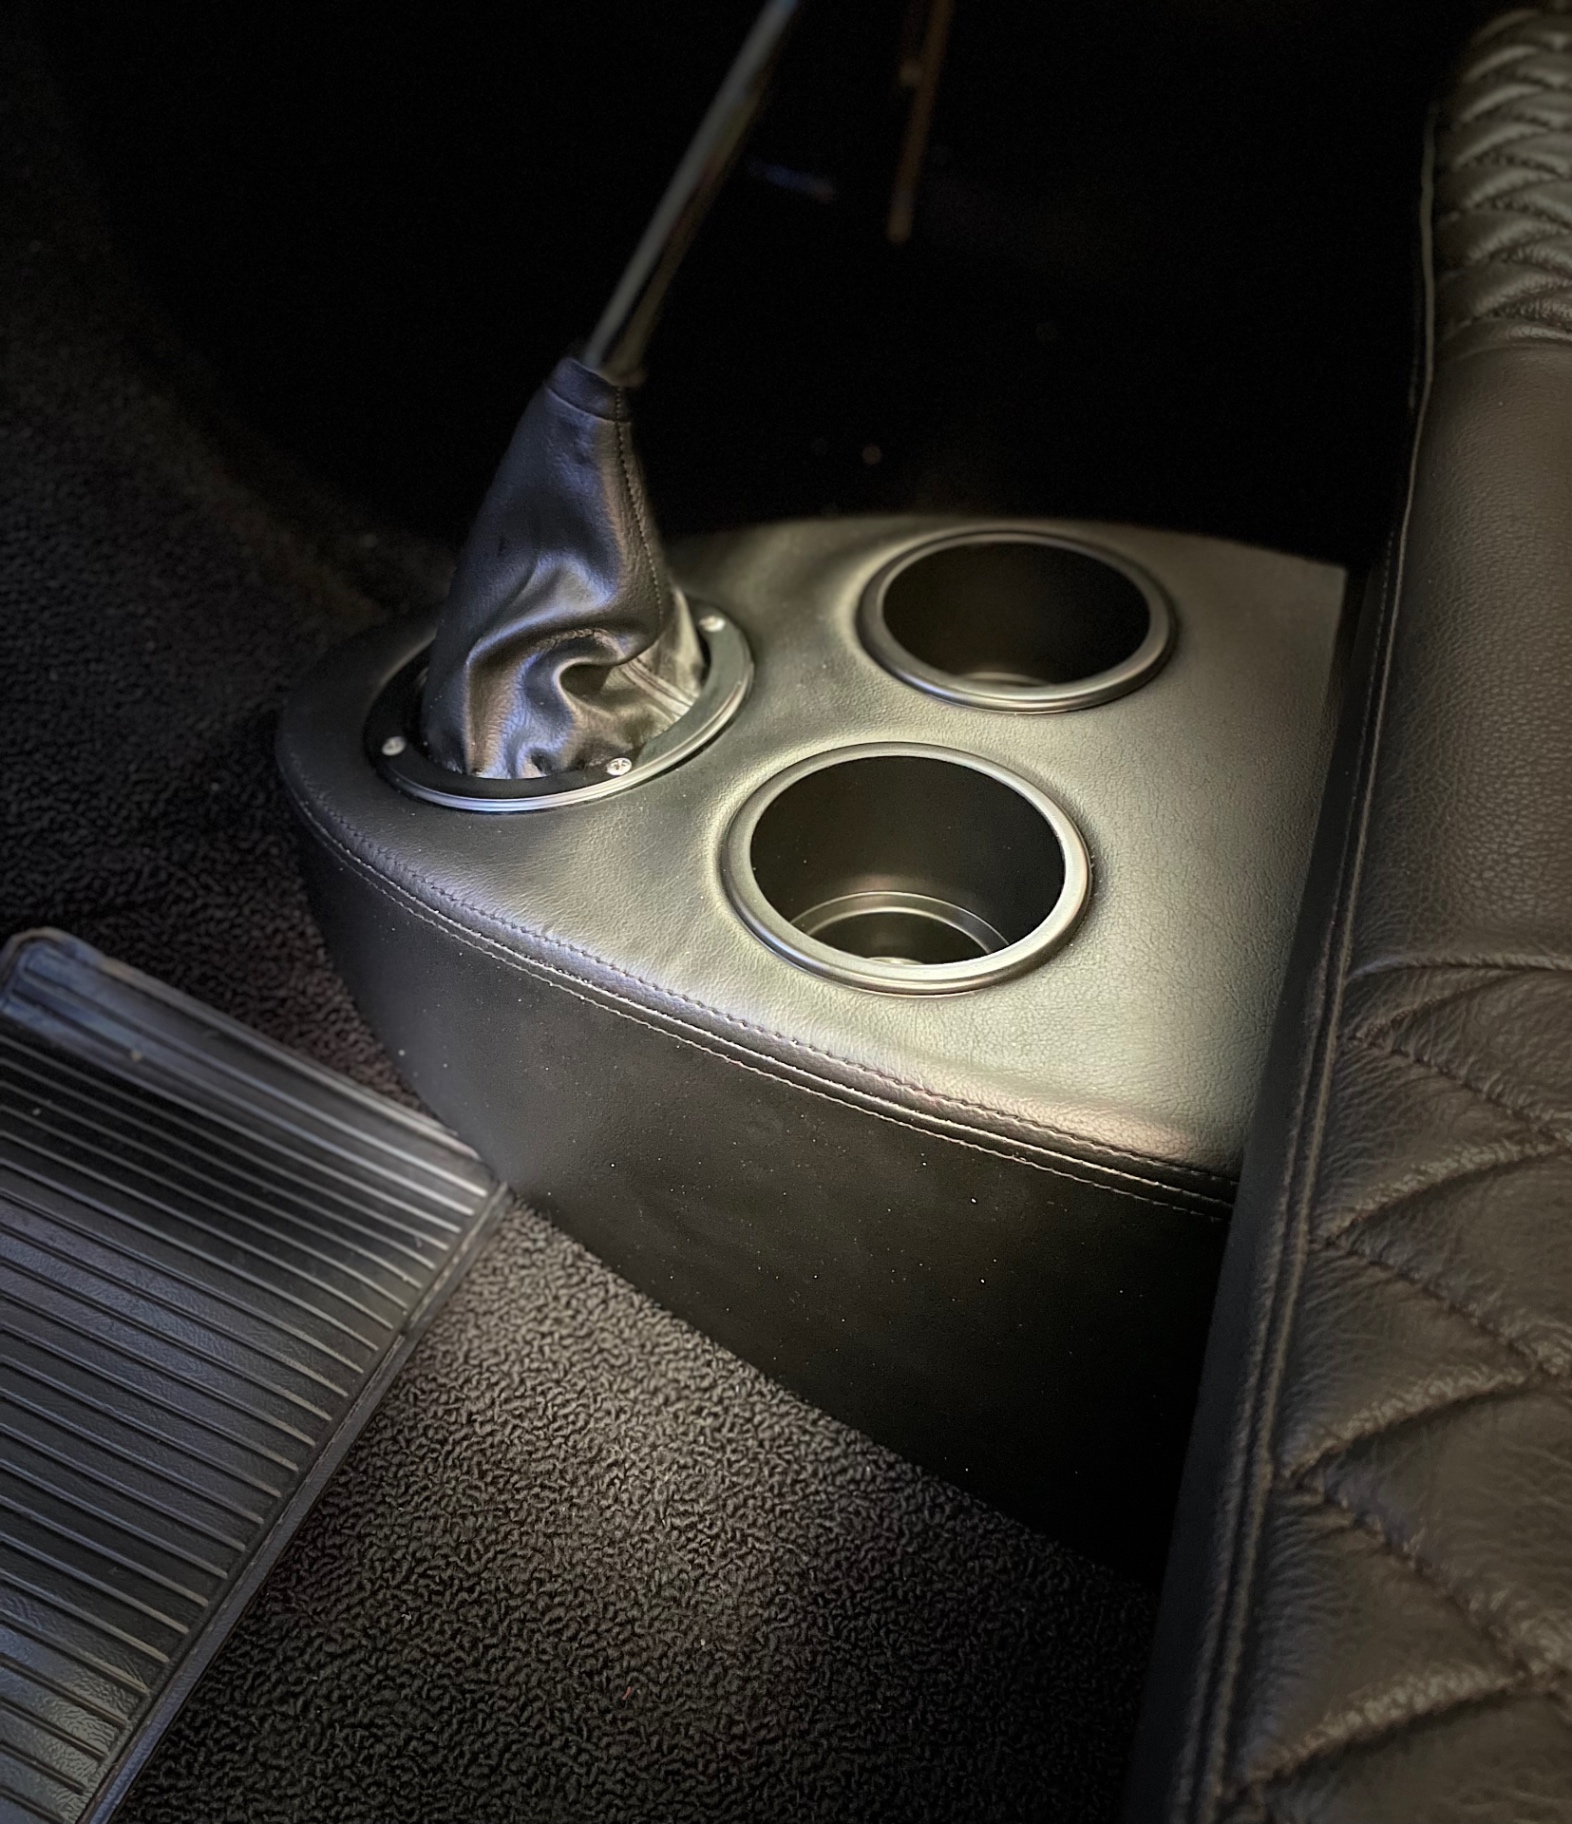
Custom leather console — cup holders and shifter boot trimmed to match the interior.J020
Custom leather console — cup holders and shifter boot trimmed to match the interior.

UPDATE 06 / 08

Jun 15, 2022

BODYWORK

Panels in high-build primer — blocked and ready for base

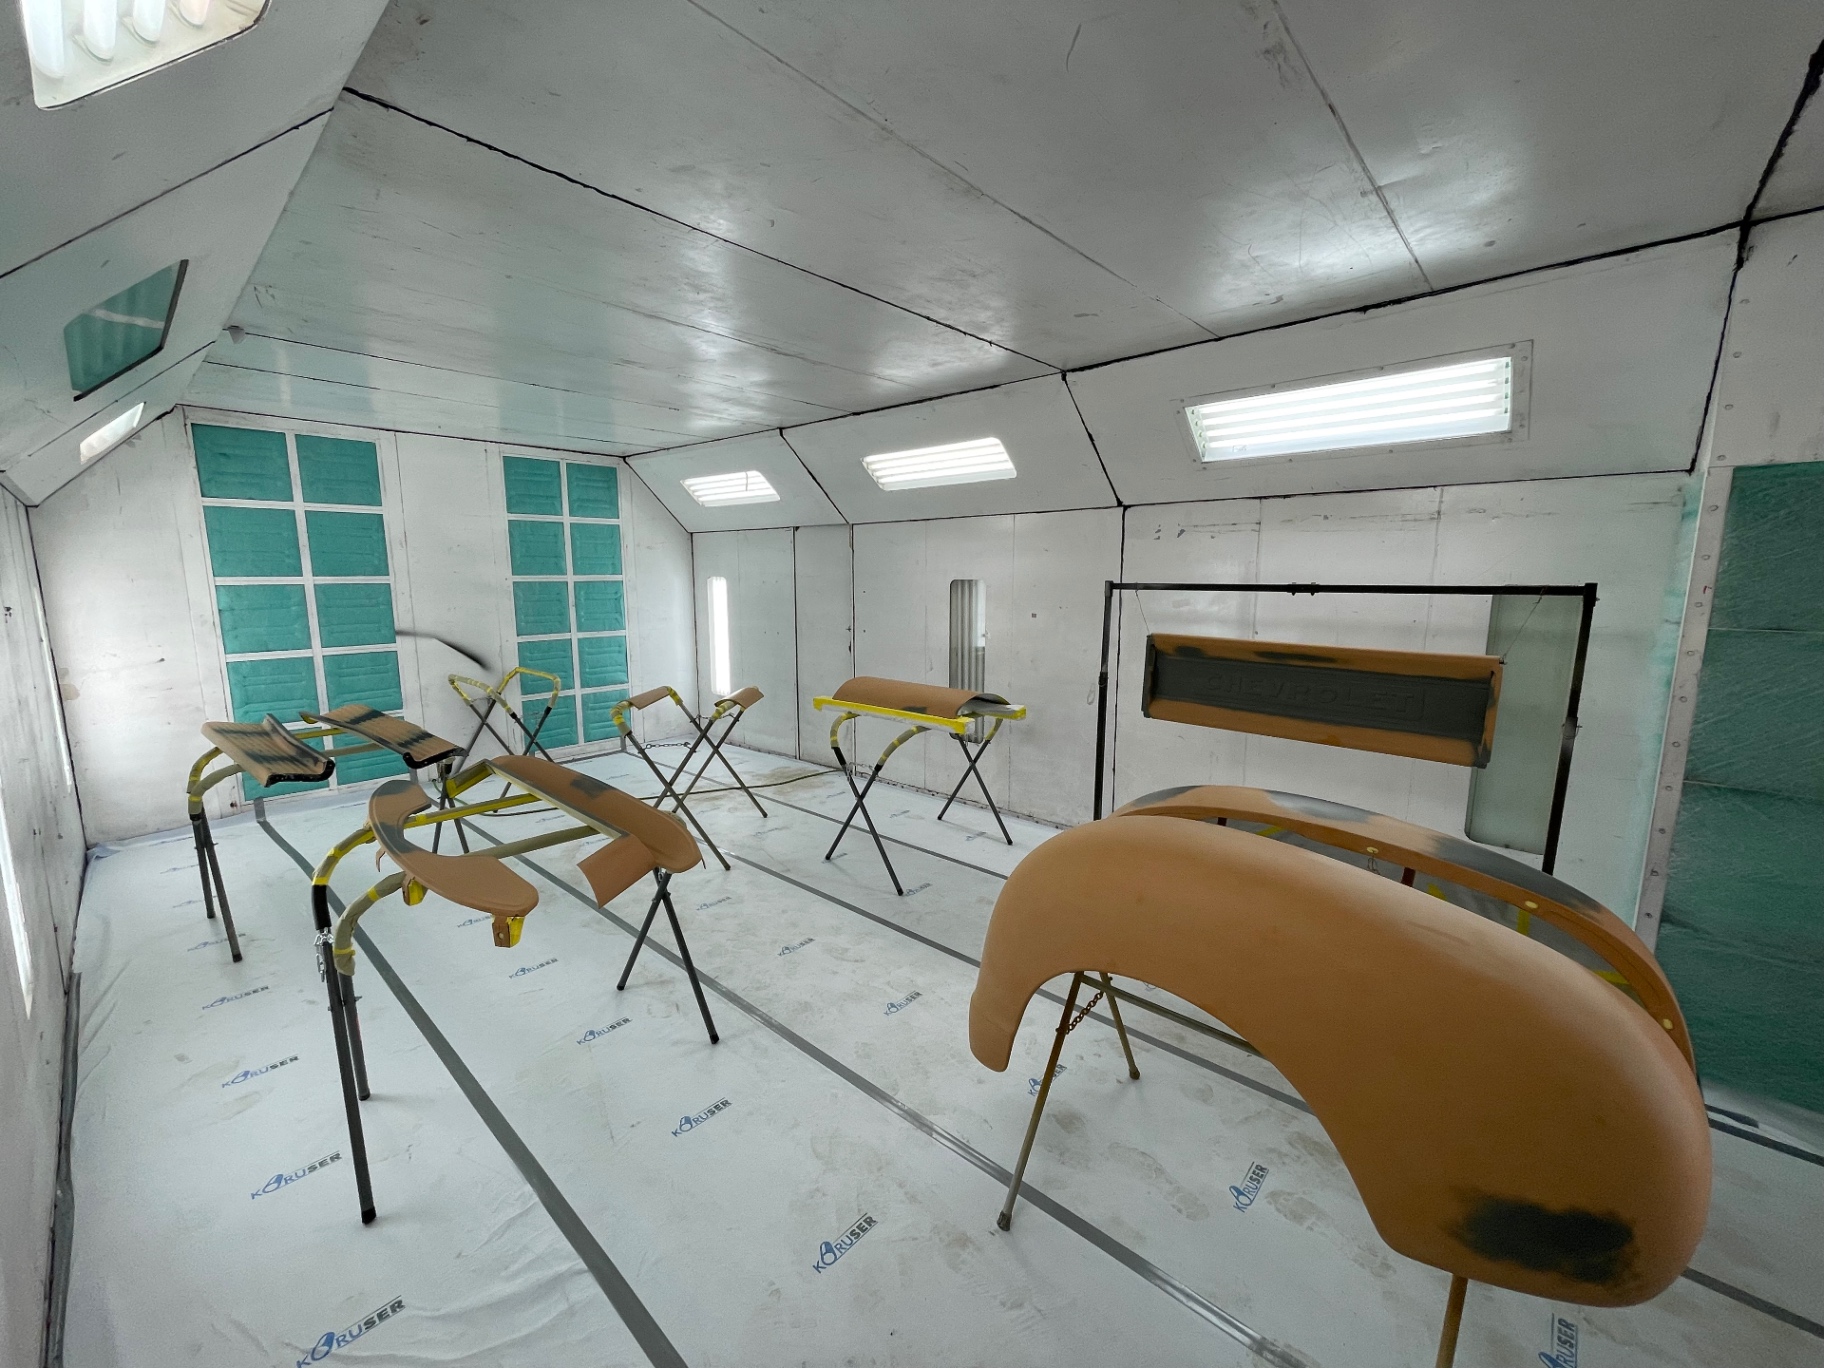
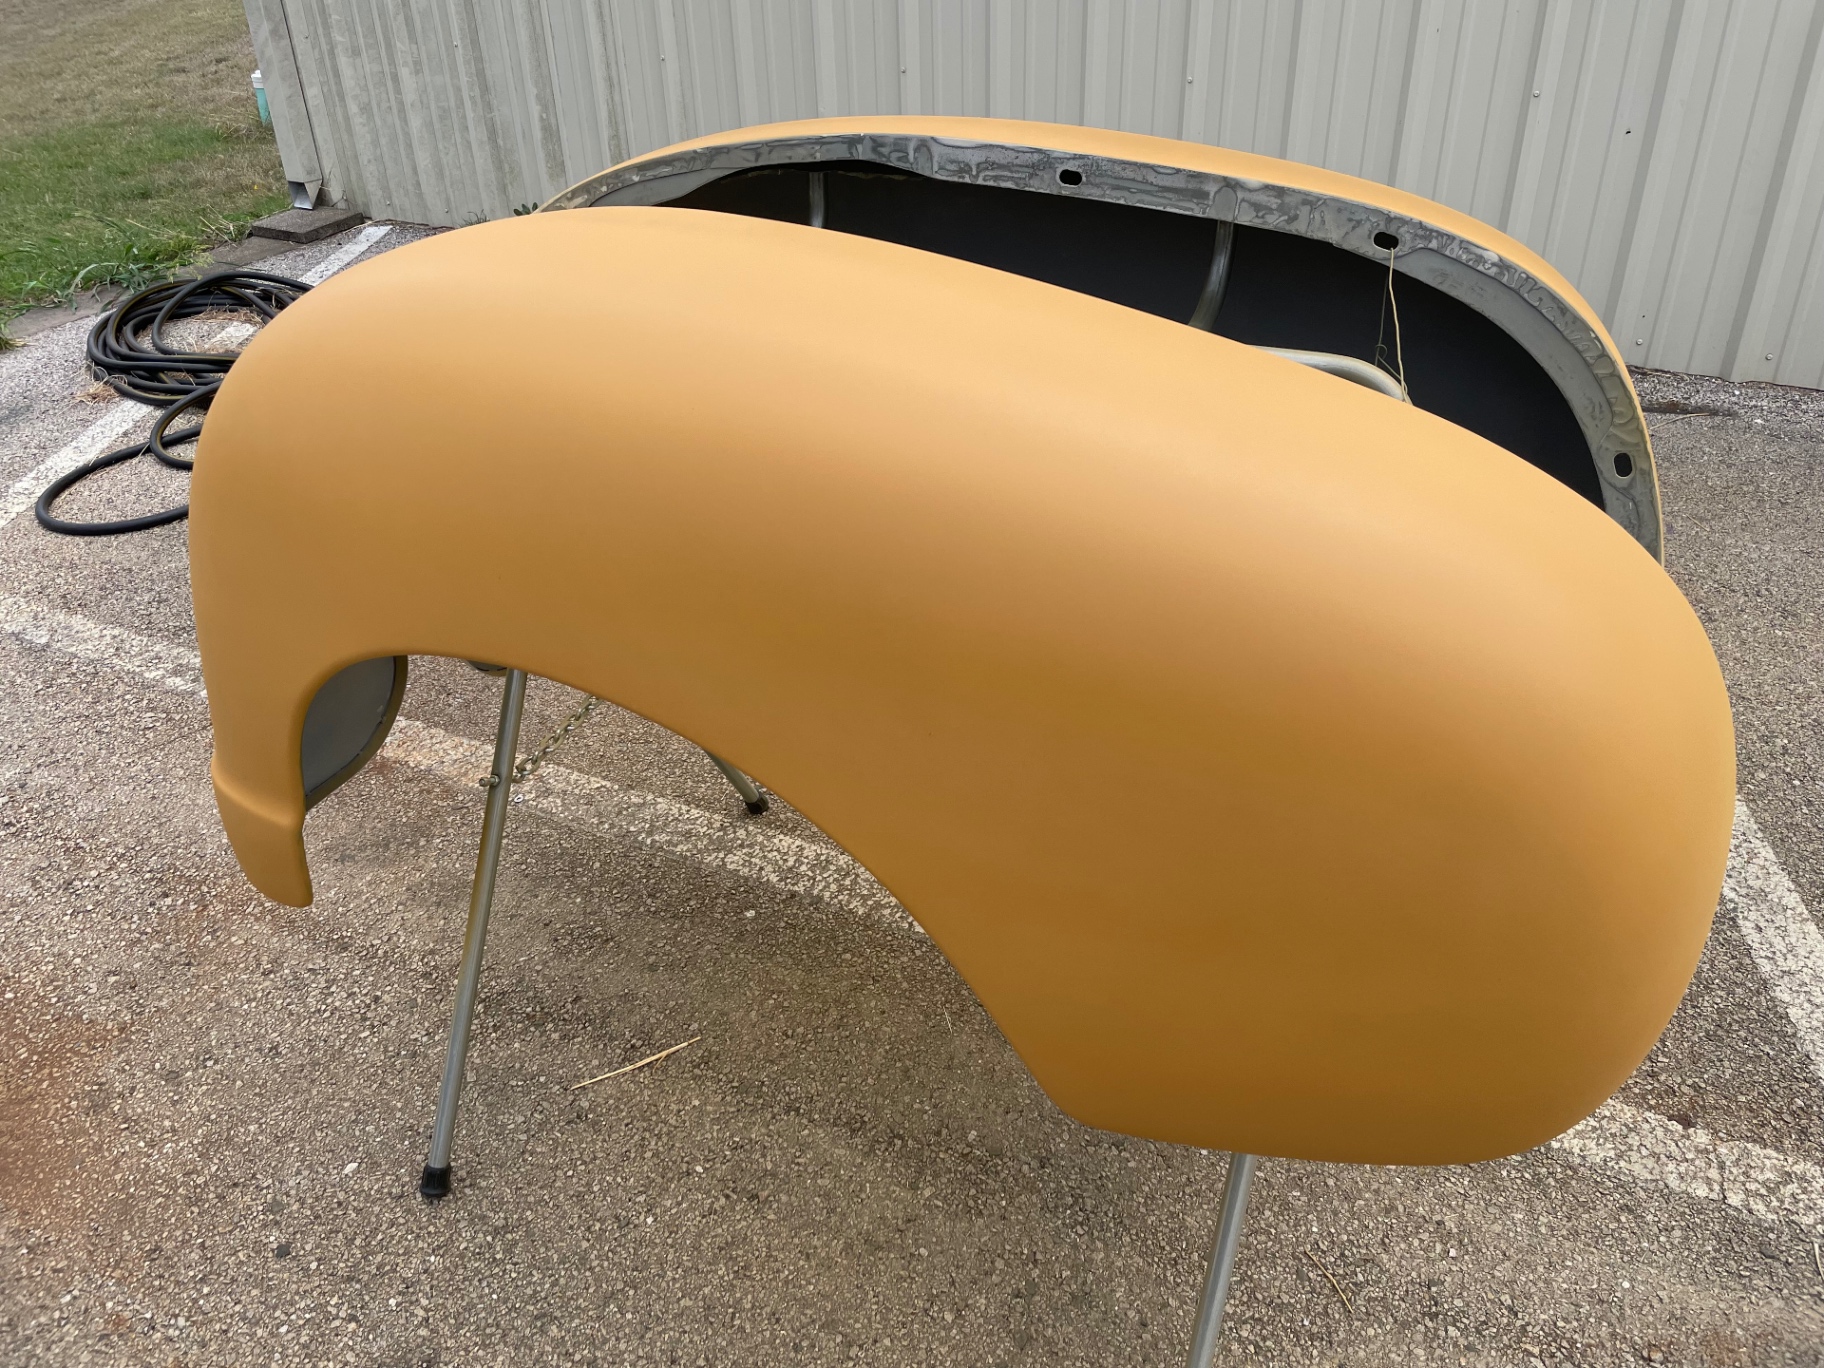
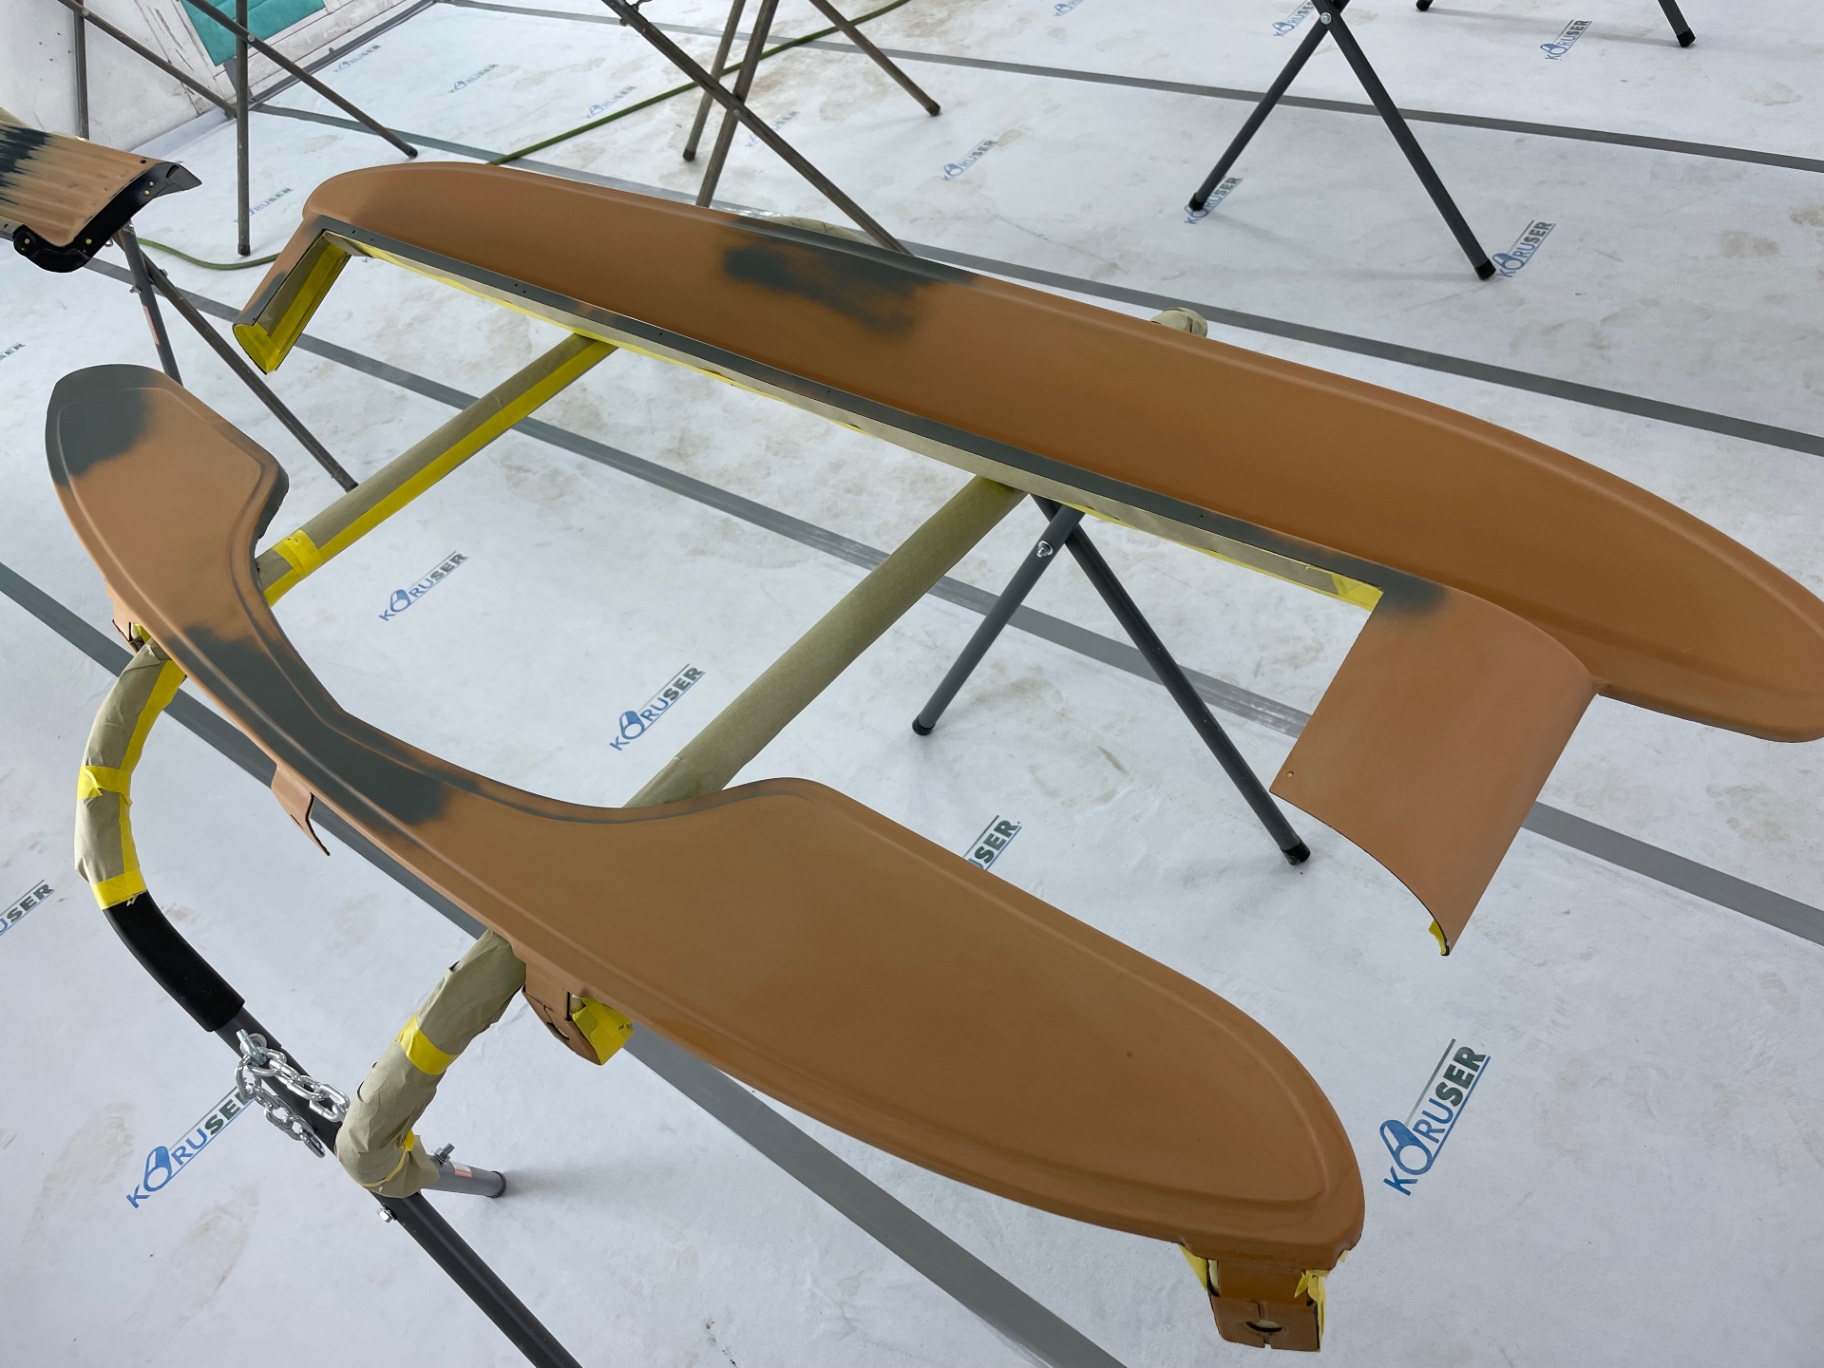
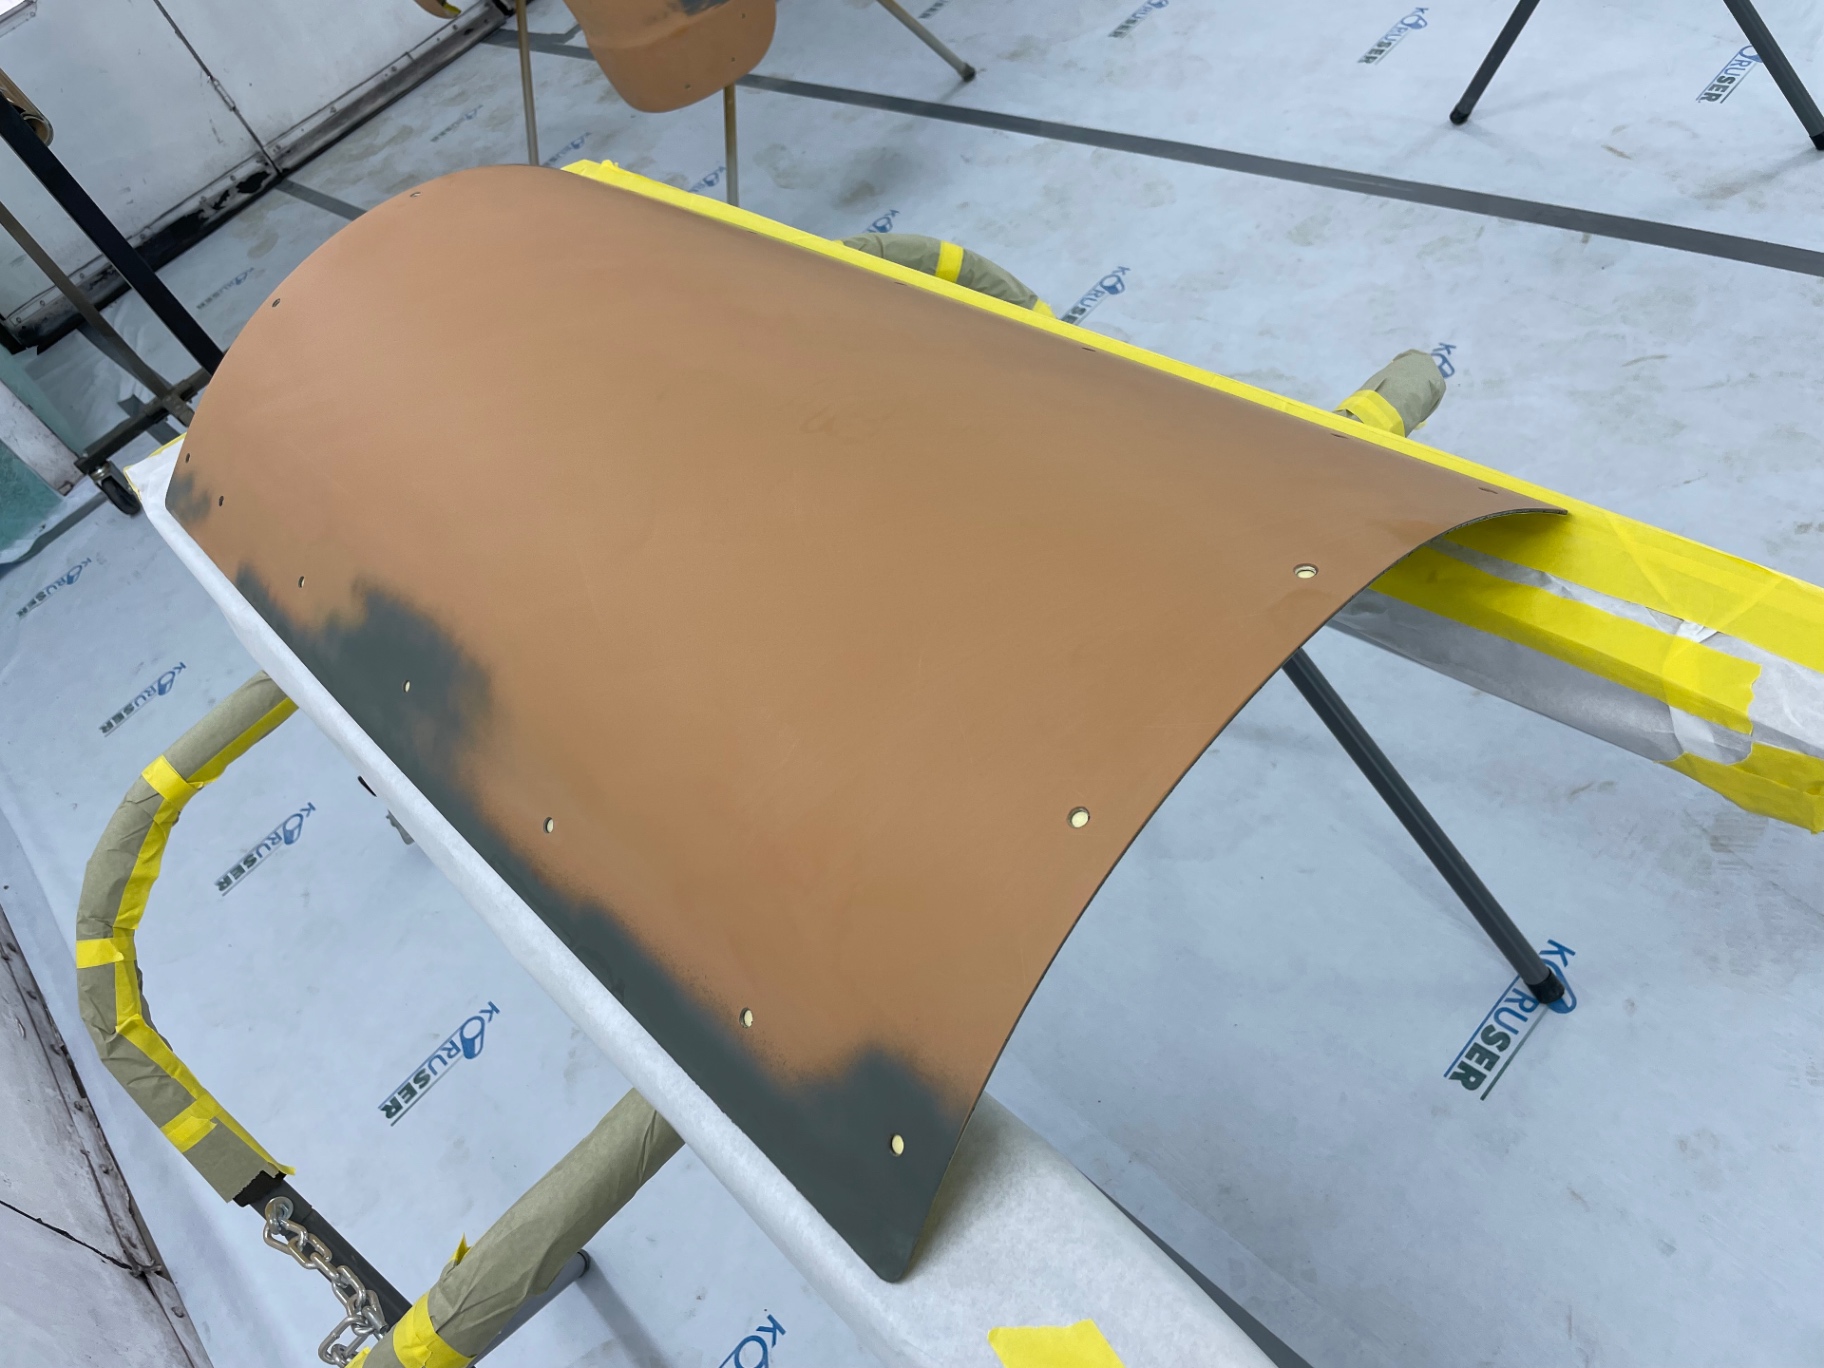
June was all about surface. Every panel — bed sides, tailgate, fenders, inner structure, radiator cover, running boards — shot in high-build orange primer, then blocked flat. The orange lets us see every low spot and file mark under raking light before color goes on. Guide coat sanded through in the booth reveals where the metal still needs work; anywhere the black stays, we block again. Once the surfaces read dead-straight from every angle, we start laying the final base coat.

Booth full of primered panels — fenders, running boards, tailgate, and grille surround staged for blocking.J021
Booth full of primered panels — fenders, running boards, tailgate, and grille surround staged for blocking.
Rear fender in orange high-build — surface reads clean under raking light.J022
Rear fender in orange high-build — surface reads clean under raking light.
Running boards and inner wheel tub hung out to flash between coats.J023
Running boards and inner wheel tub hung out to flash between coats.
Front fender inner structure and skirts — every hidden surface primered too.J024
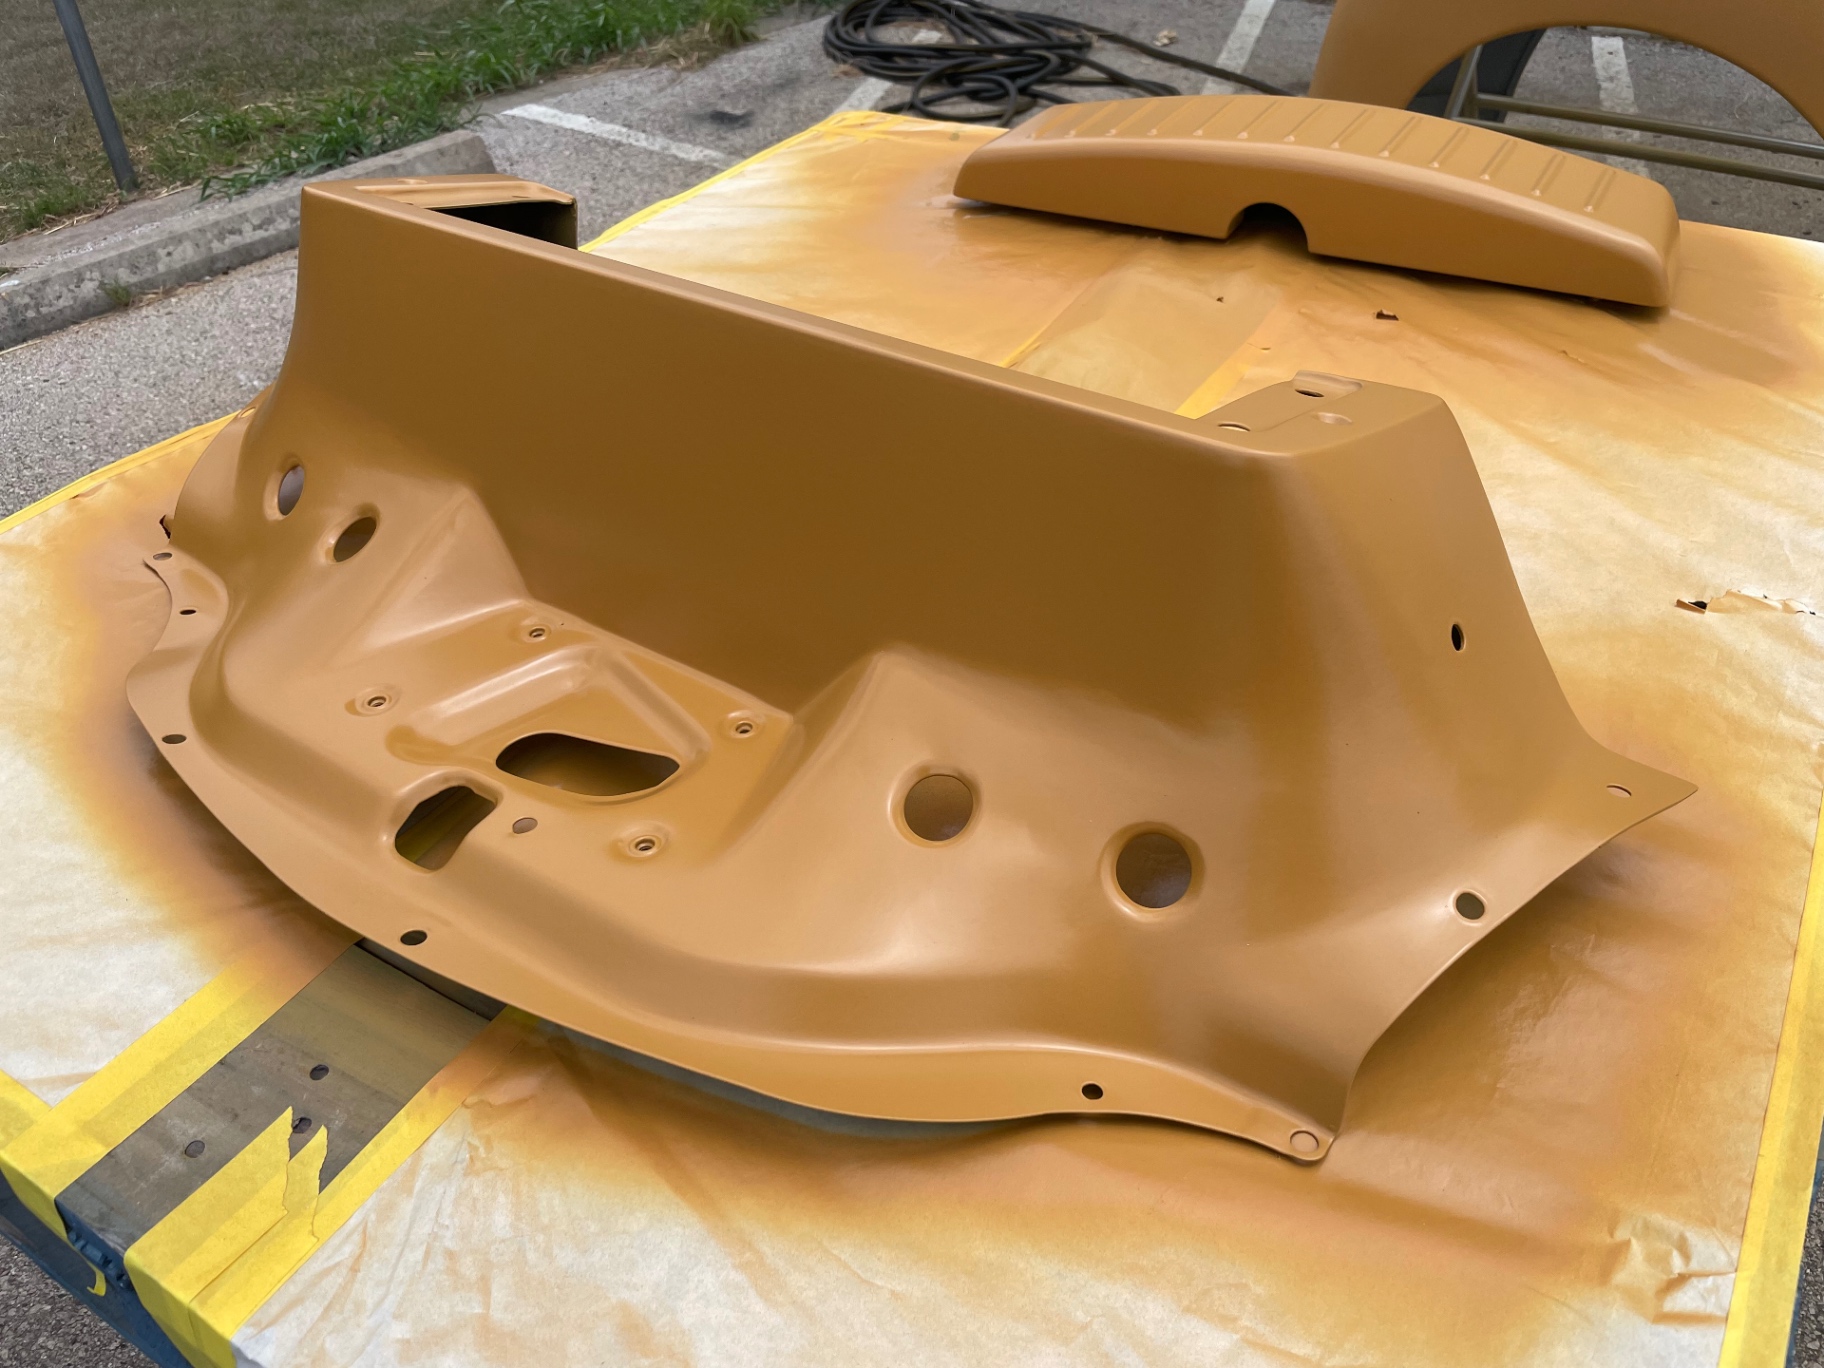
Front fender inner structure and skirts — every hidden surface primered too.
Firewall and radiator cap panel laid flat for even coverage.J025
Firewall and radiator cap panel laid flat for even coverage.
Guide-coat sanding on the running board — dark shadows show the low spots to chase.J026
Guide-coat sanding on the running board — dark shadows show the low spots to chase.
Radiator cover after block sanding — surface reading straight from every angle.J027
Radiator cover after block sanding — surface reading straight from every angle.
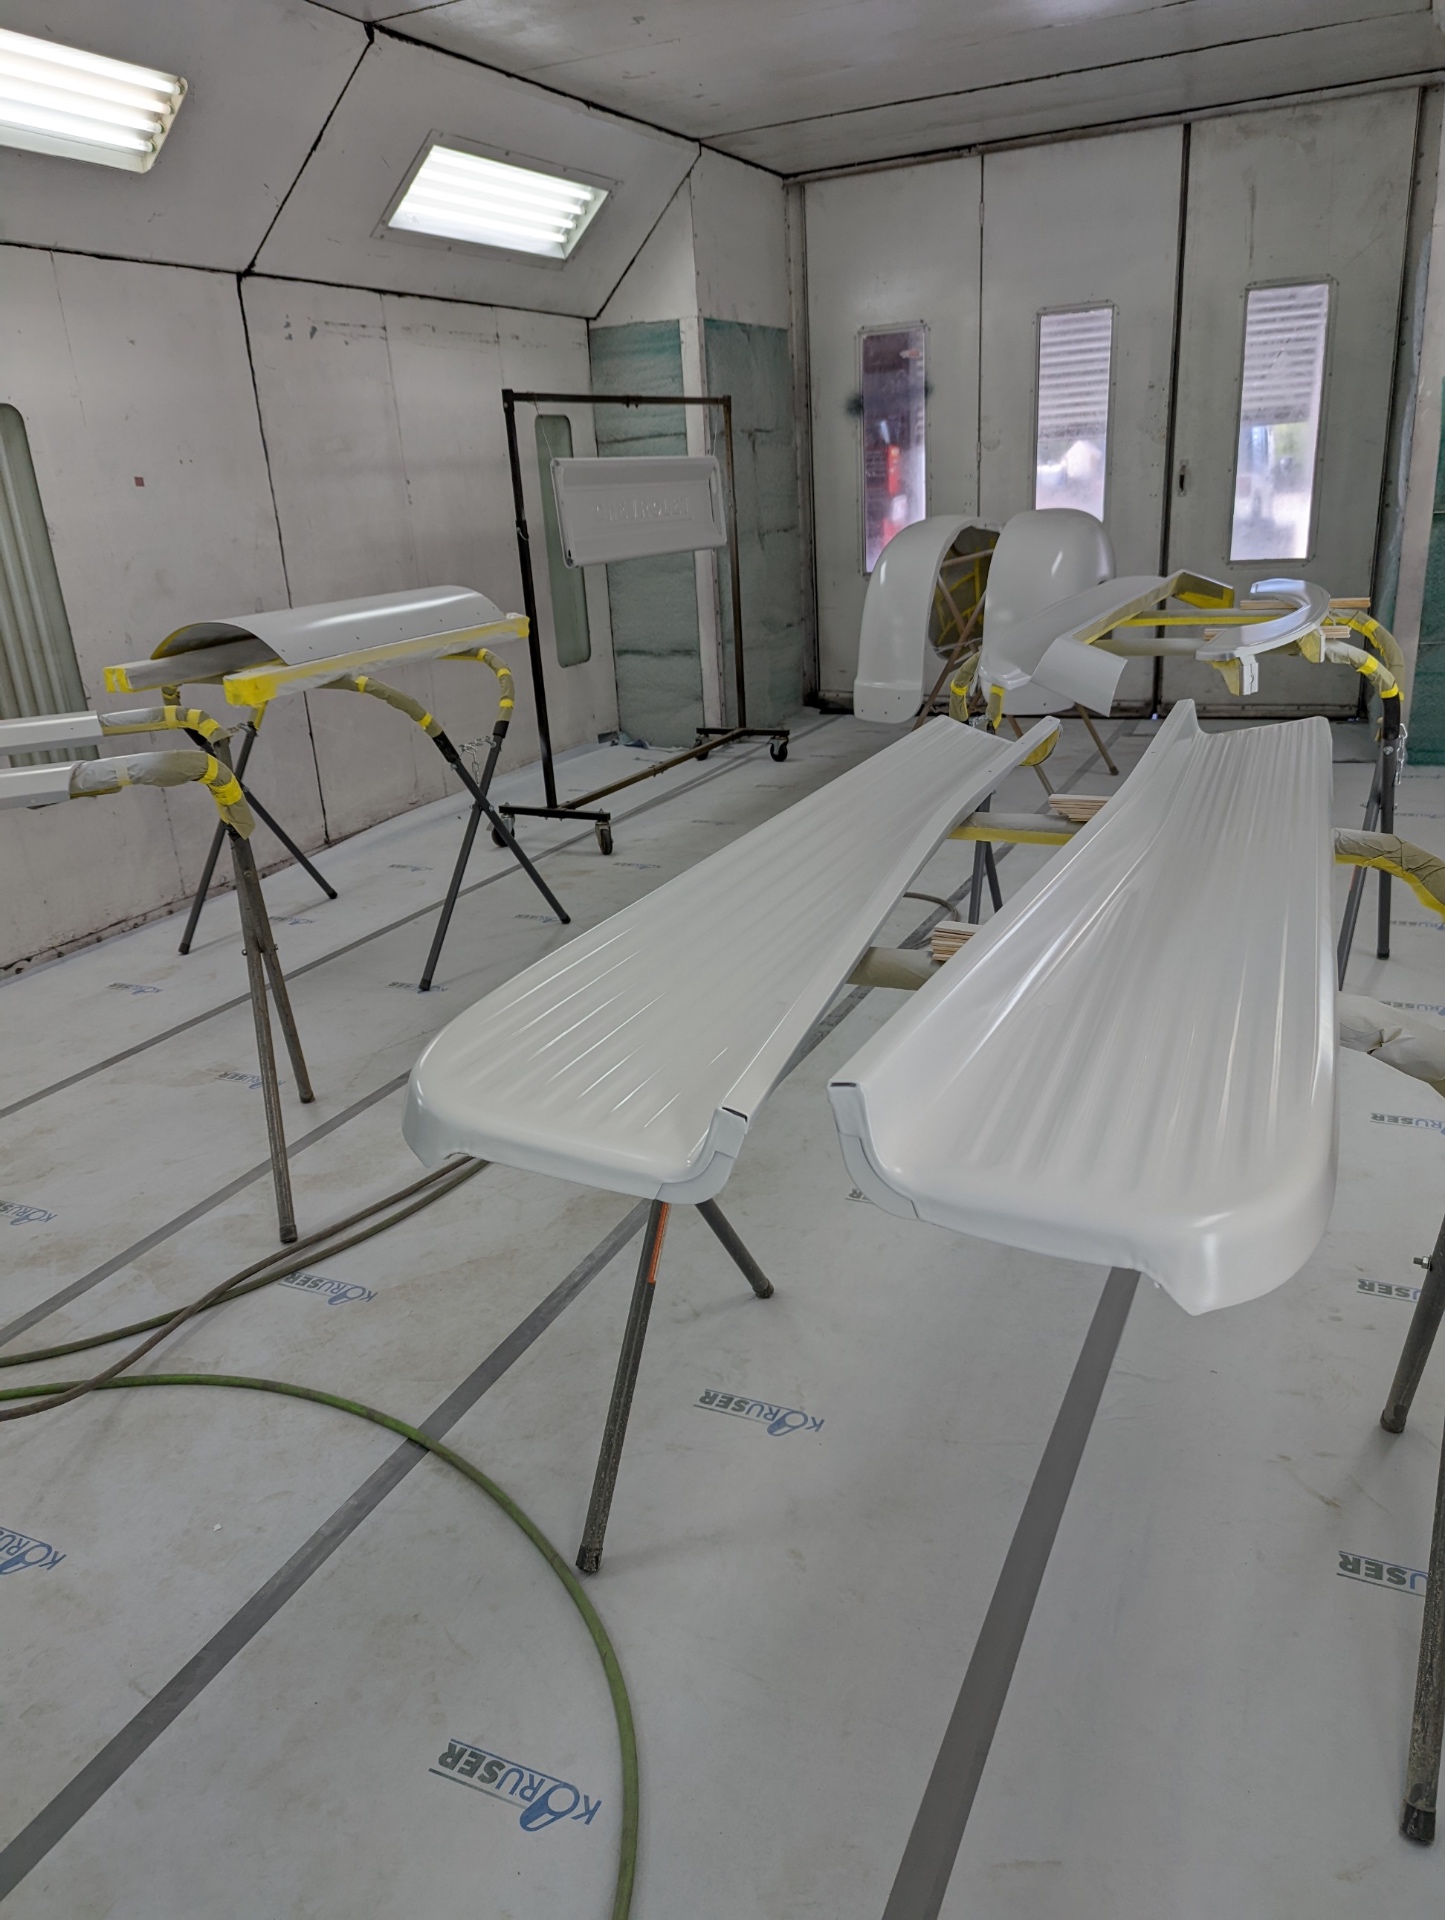
First base coat going on — white sealer laid down on the running boards.J028
First base coat going on — white sealer laid down on the running boards.
Panels in the booth after the first color pass — depth starting to show.J029
Panels in the booth after the first color pass — depth starting to show.
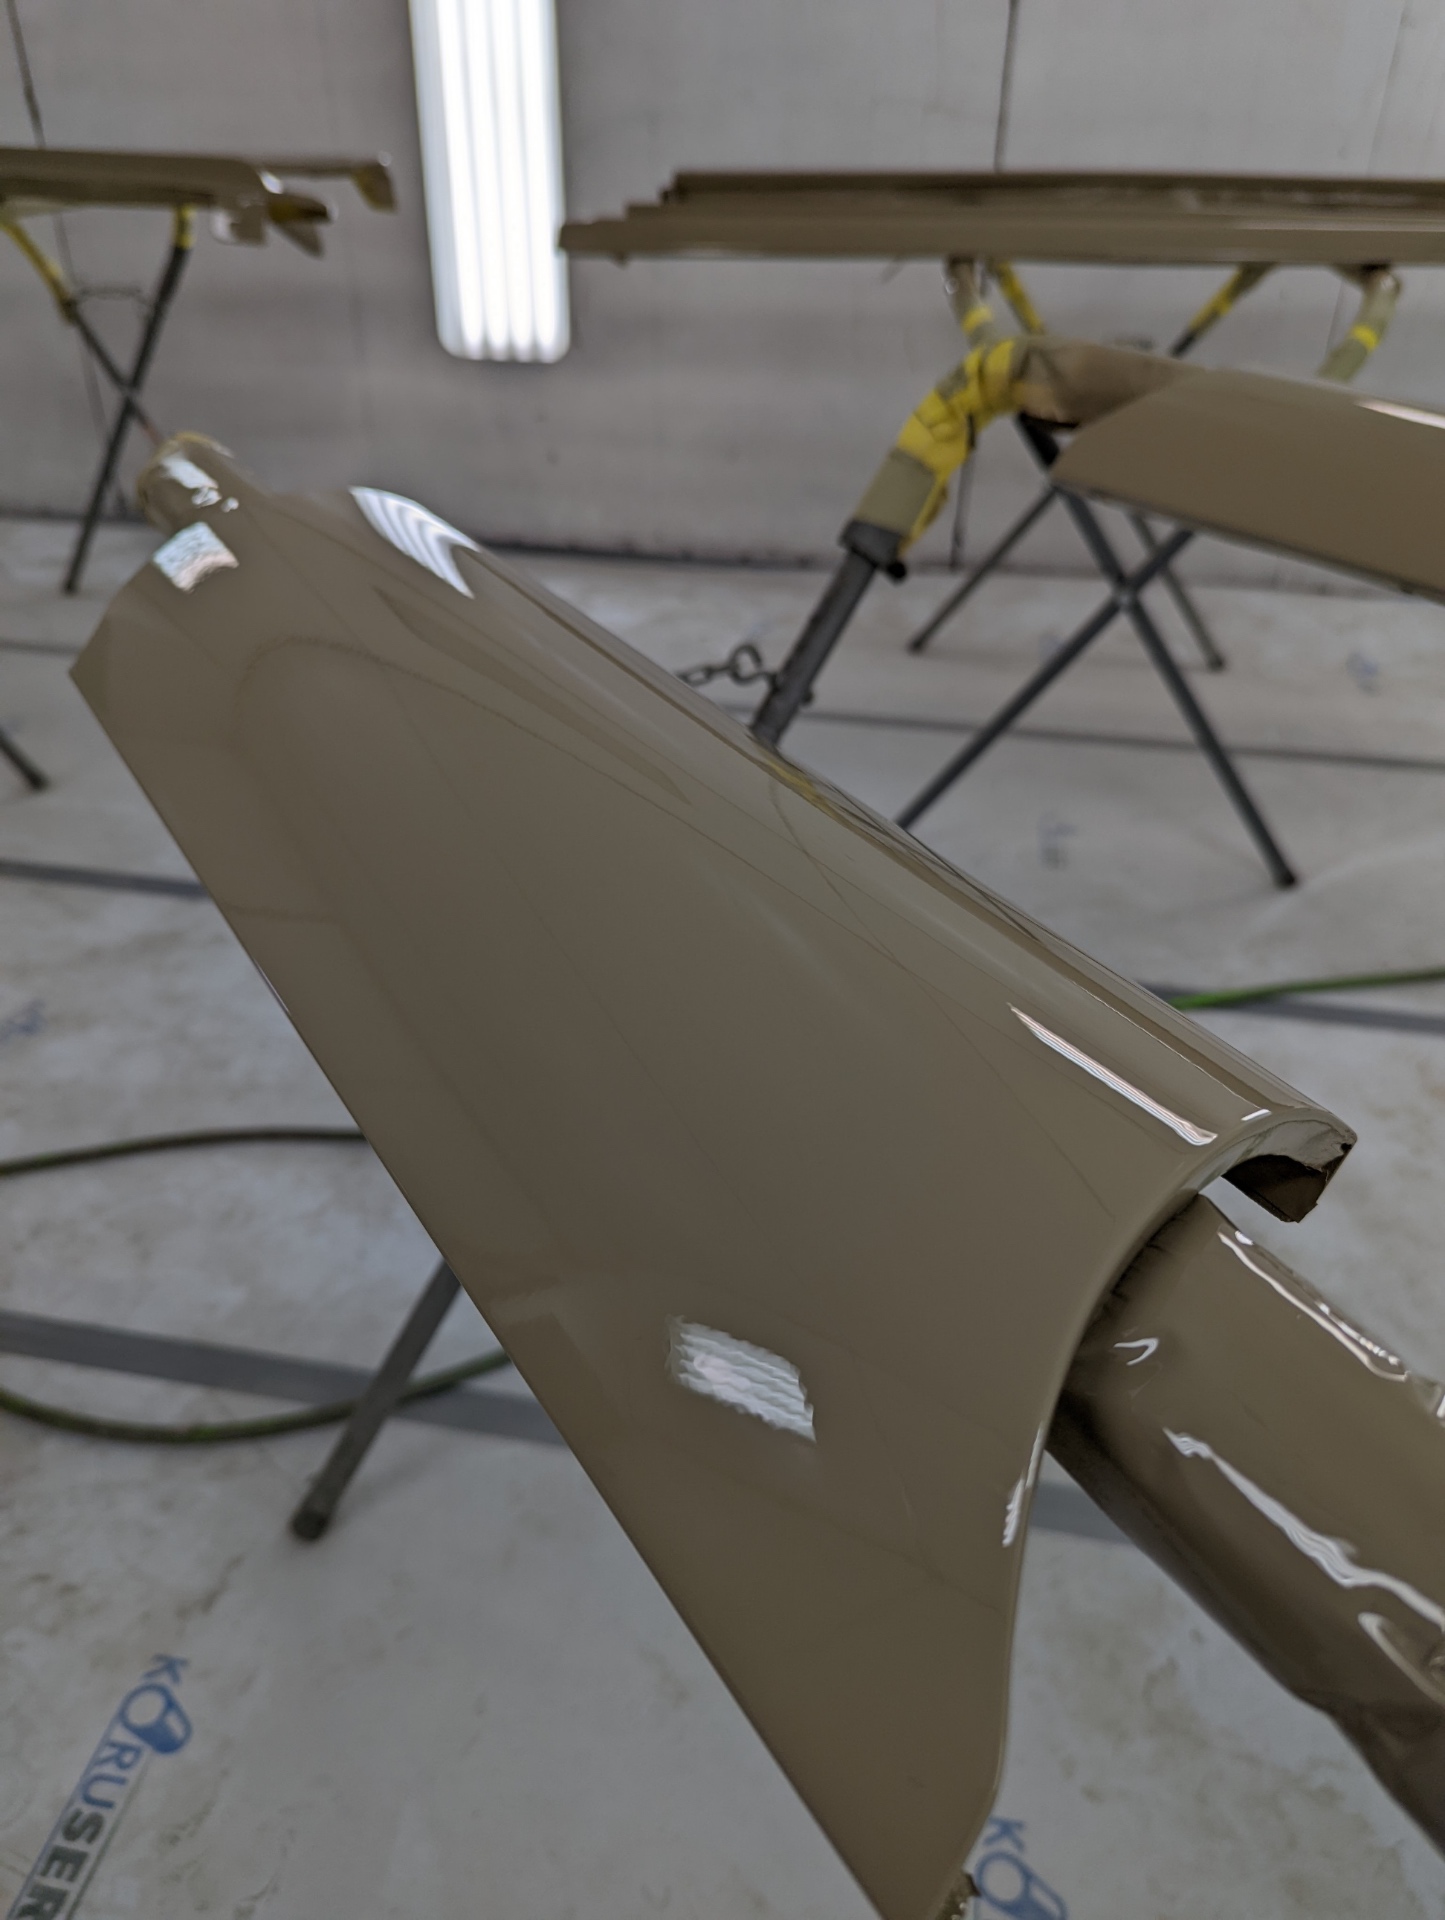
Wet base coat on a fender edge — reflections telling the truth about the block work.J030
Wet base coat on a fender edge — reflections telling the truth about the block work.

UPDATE 05 / 08

Jul 1, 2022

PAINT & ASSEMBLY

Color on the panels — bumpers in black, first assembly

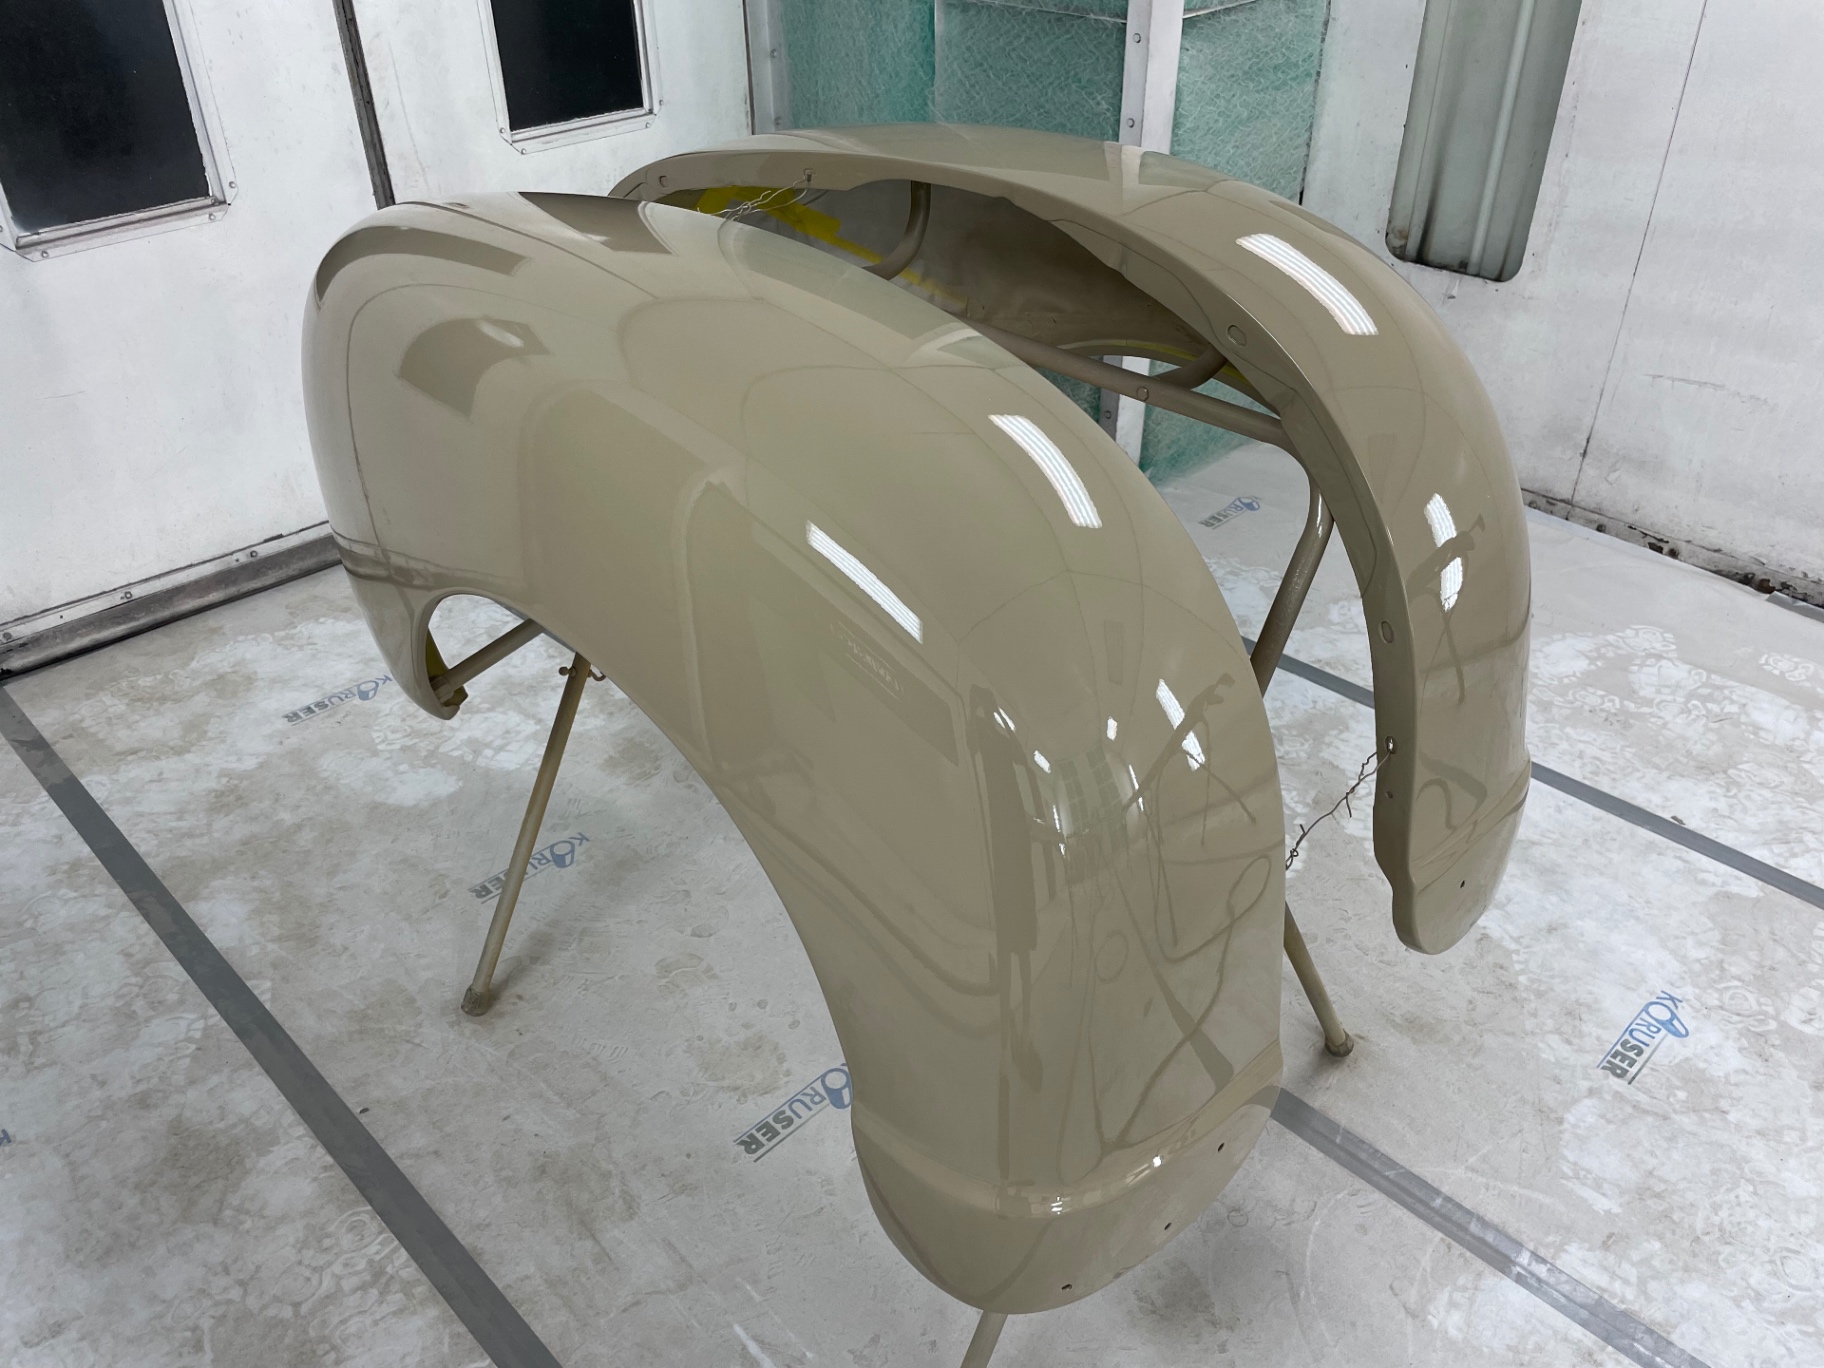
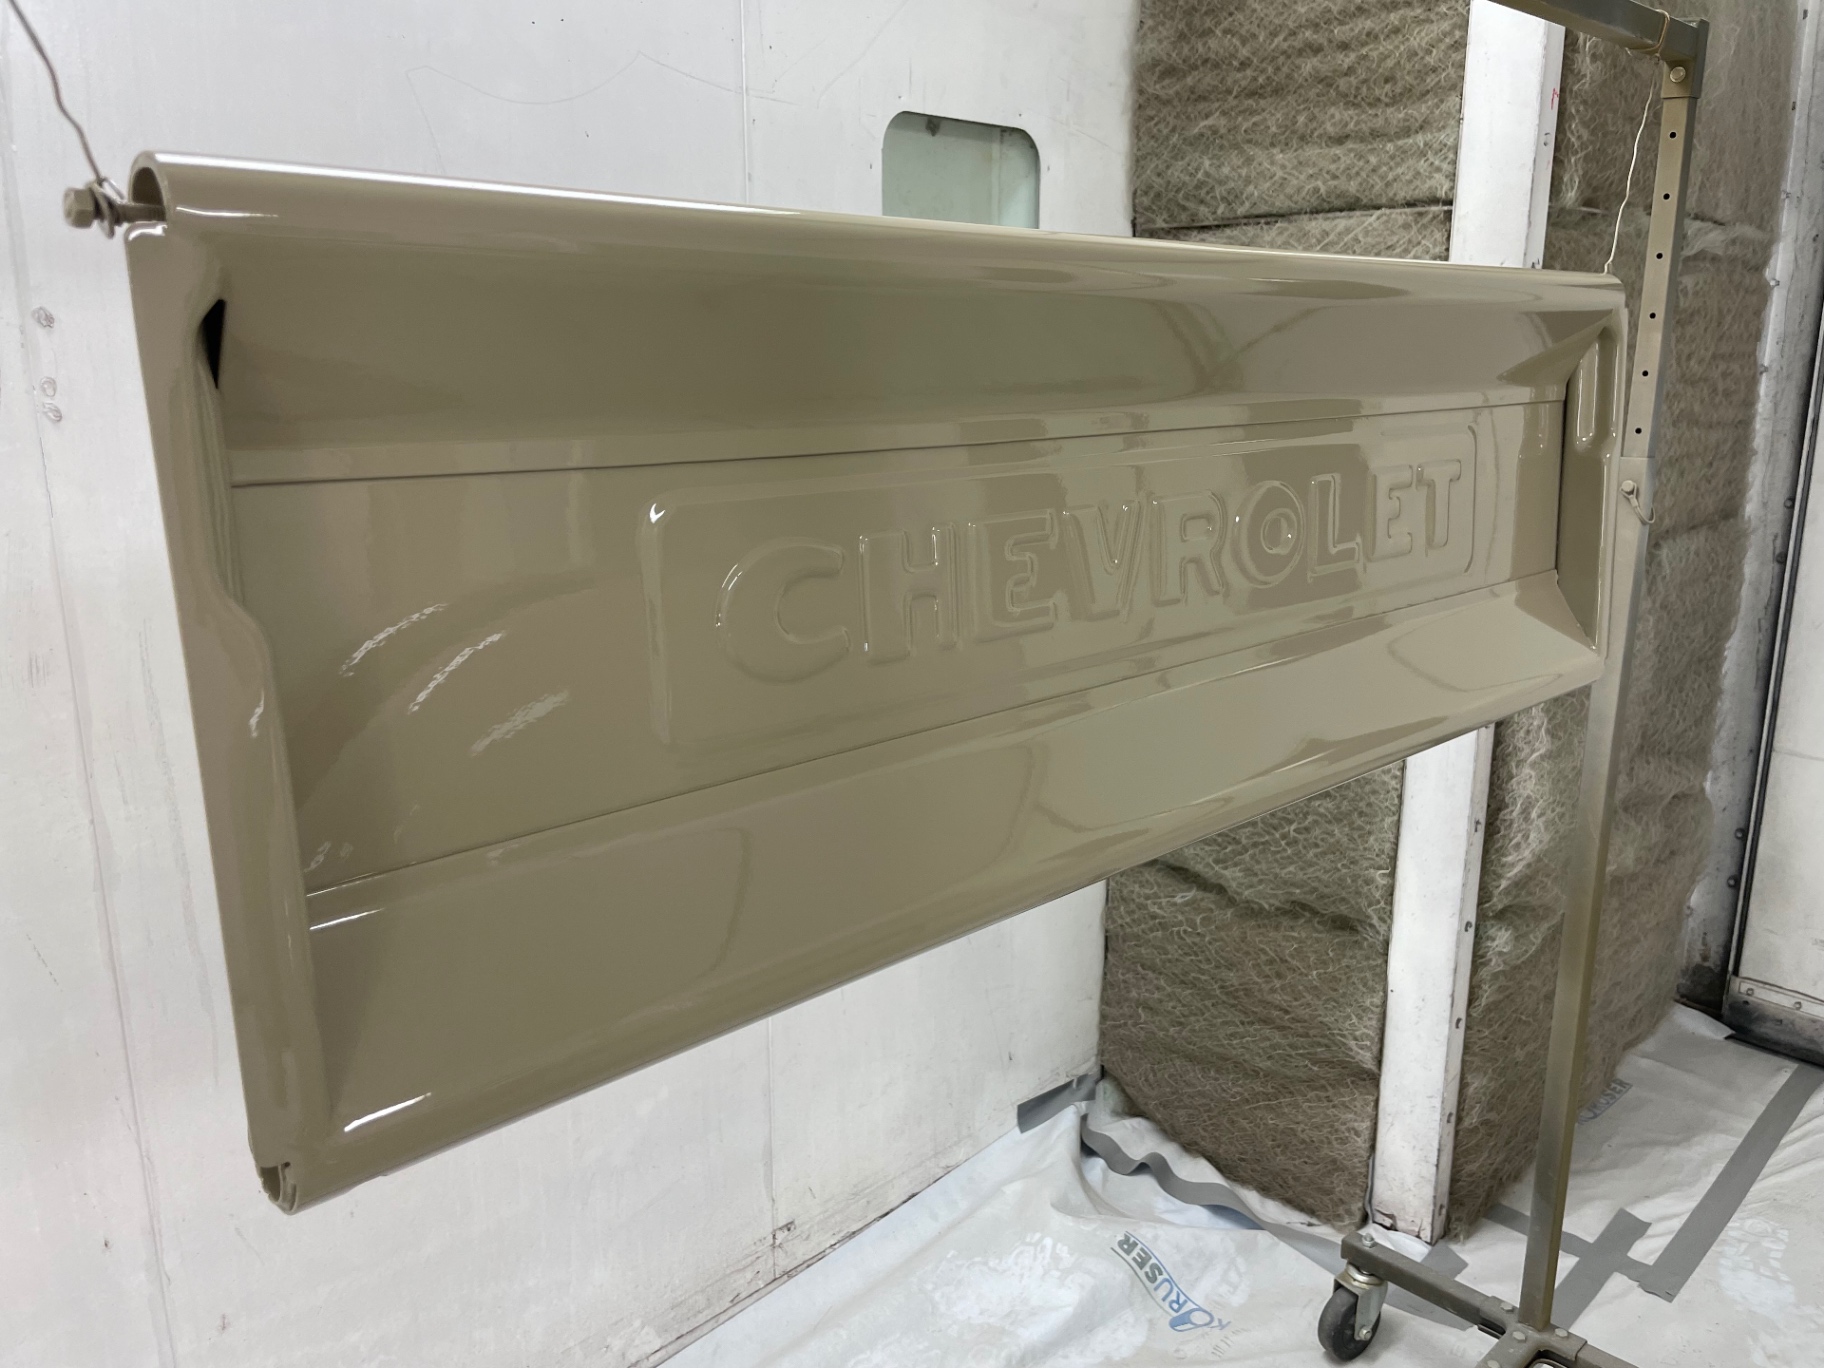
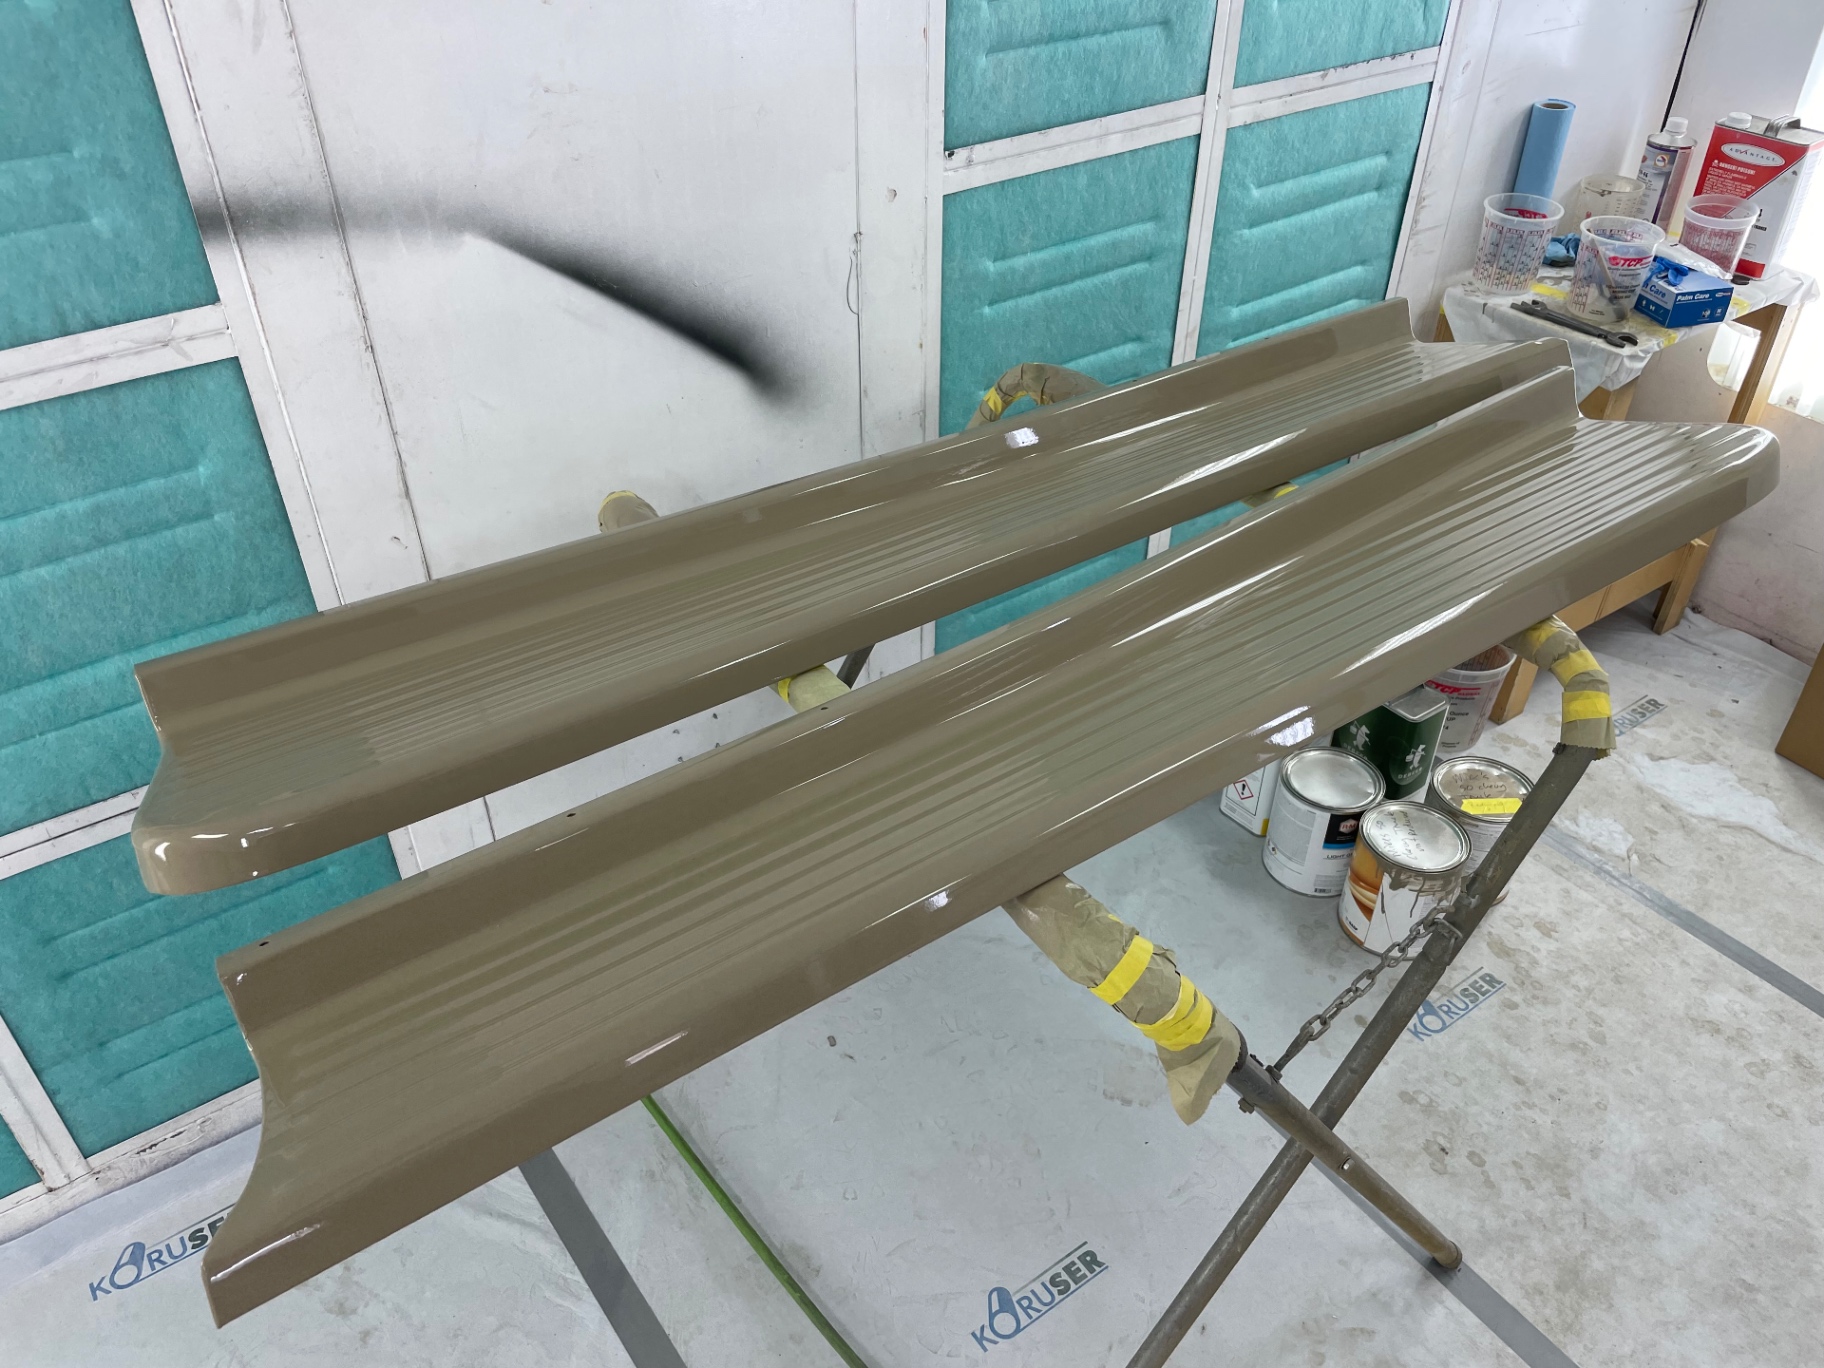
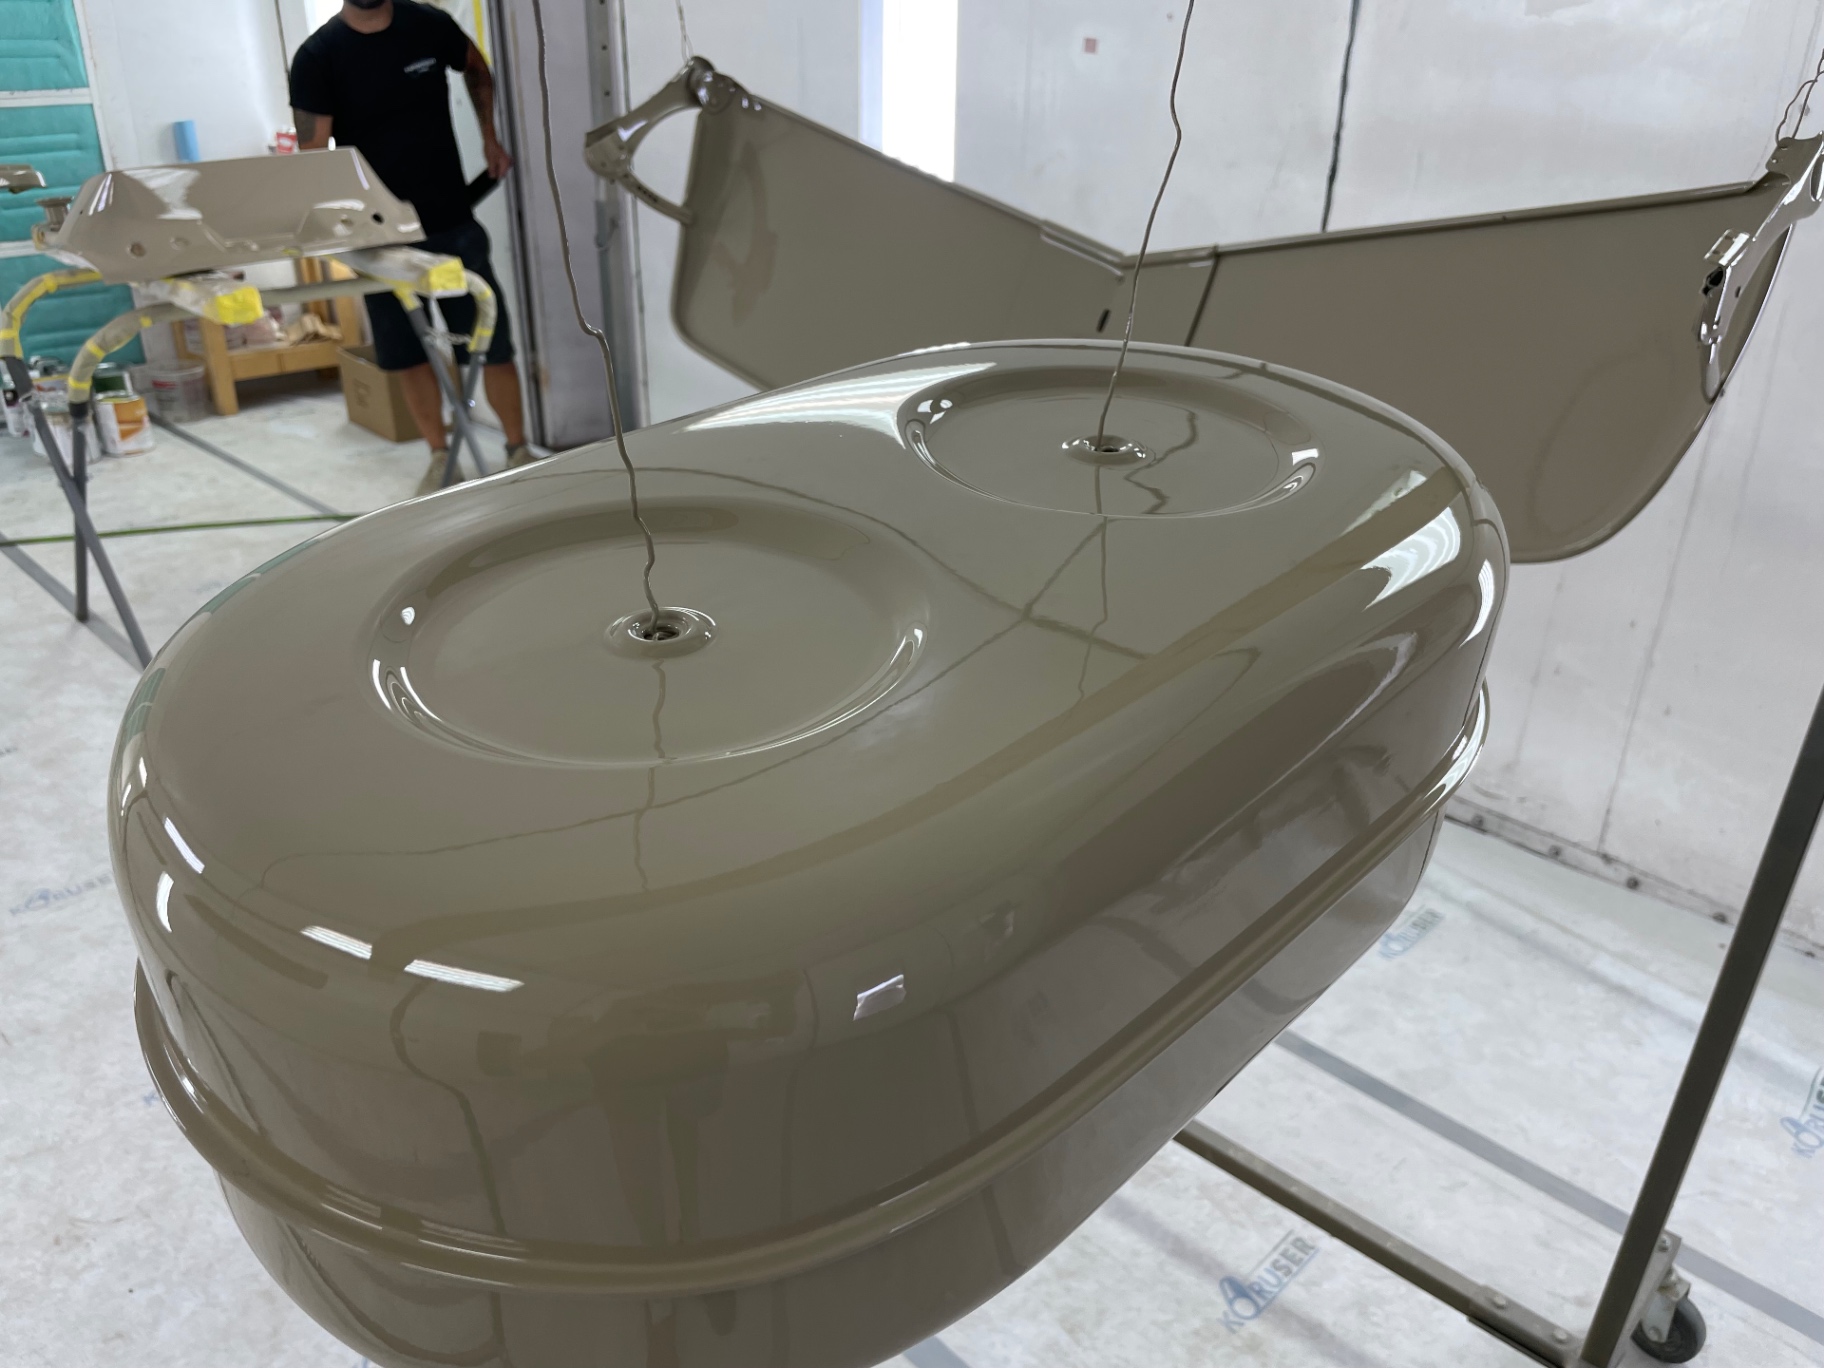
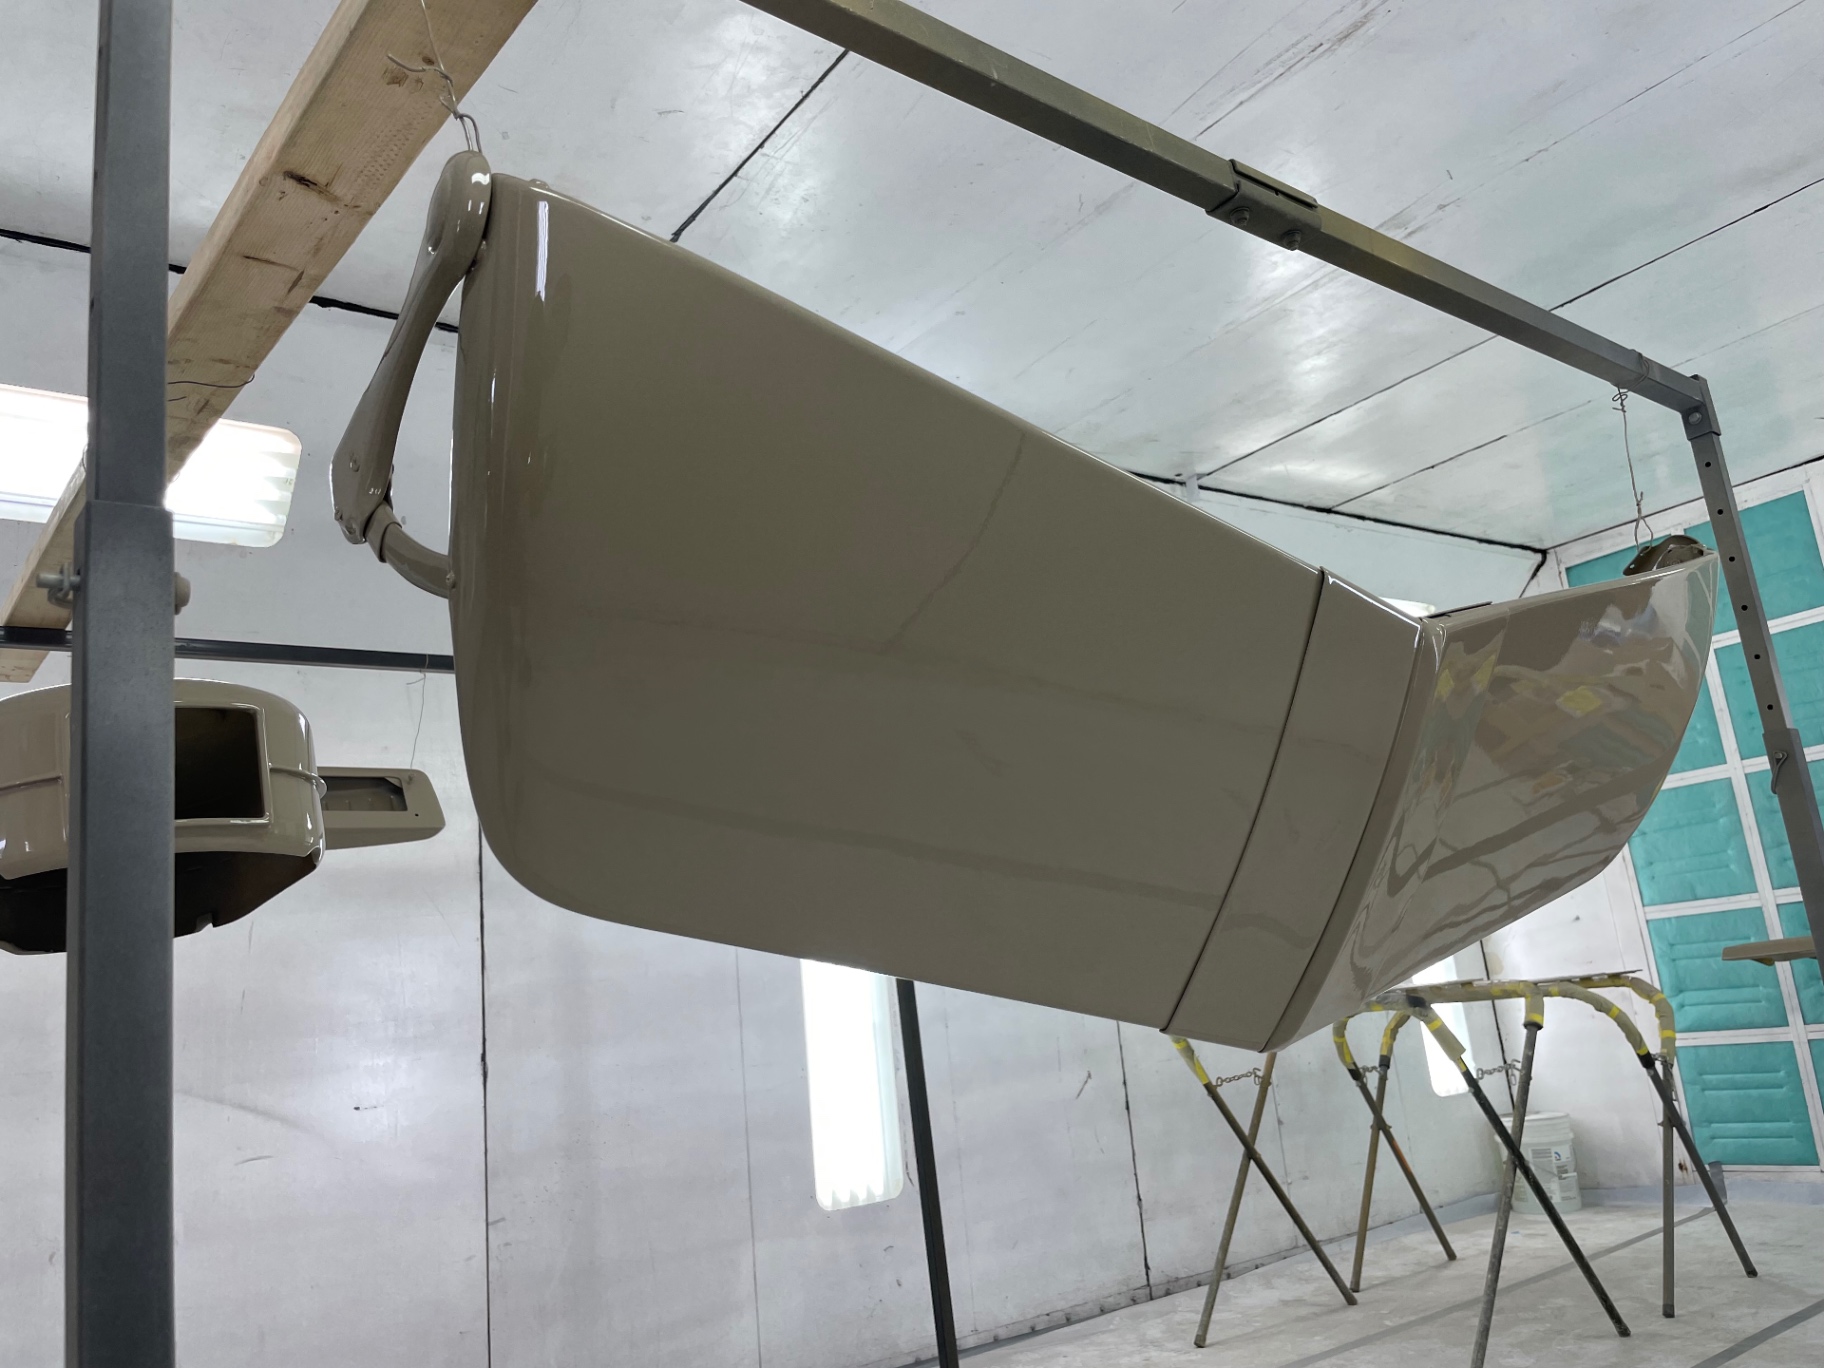
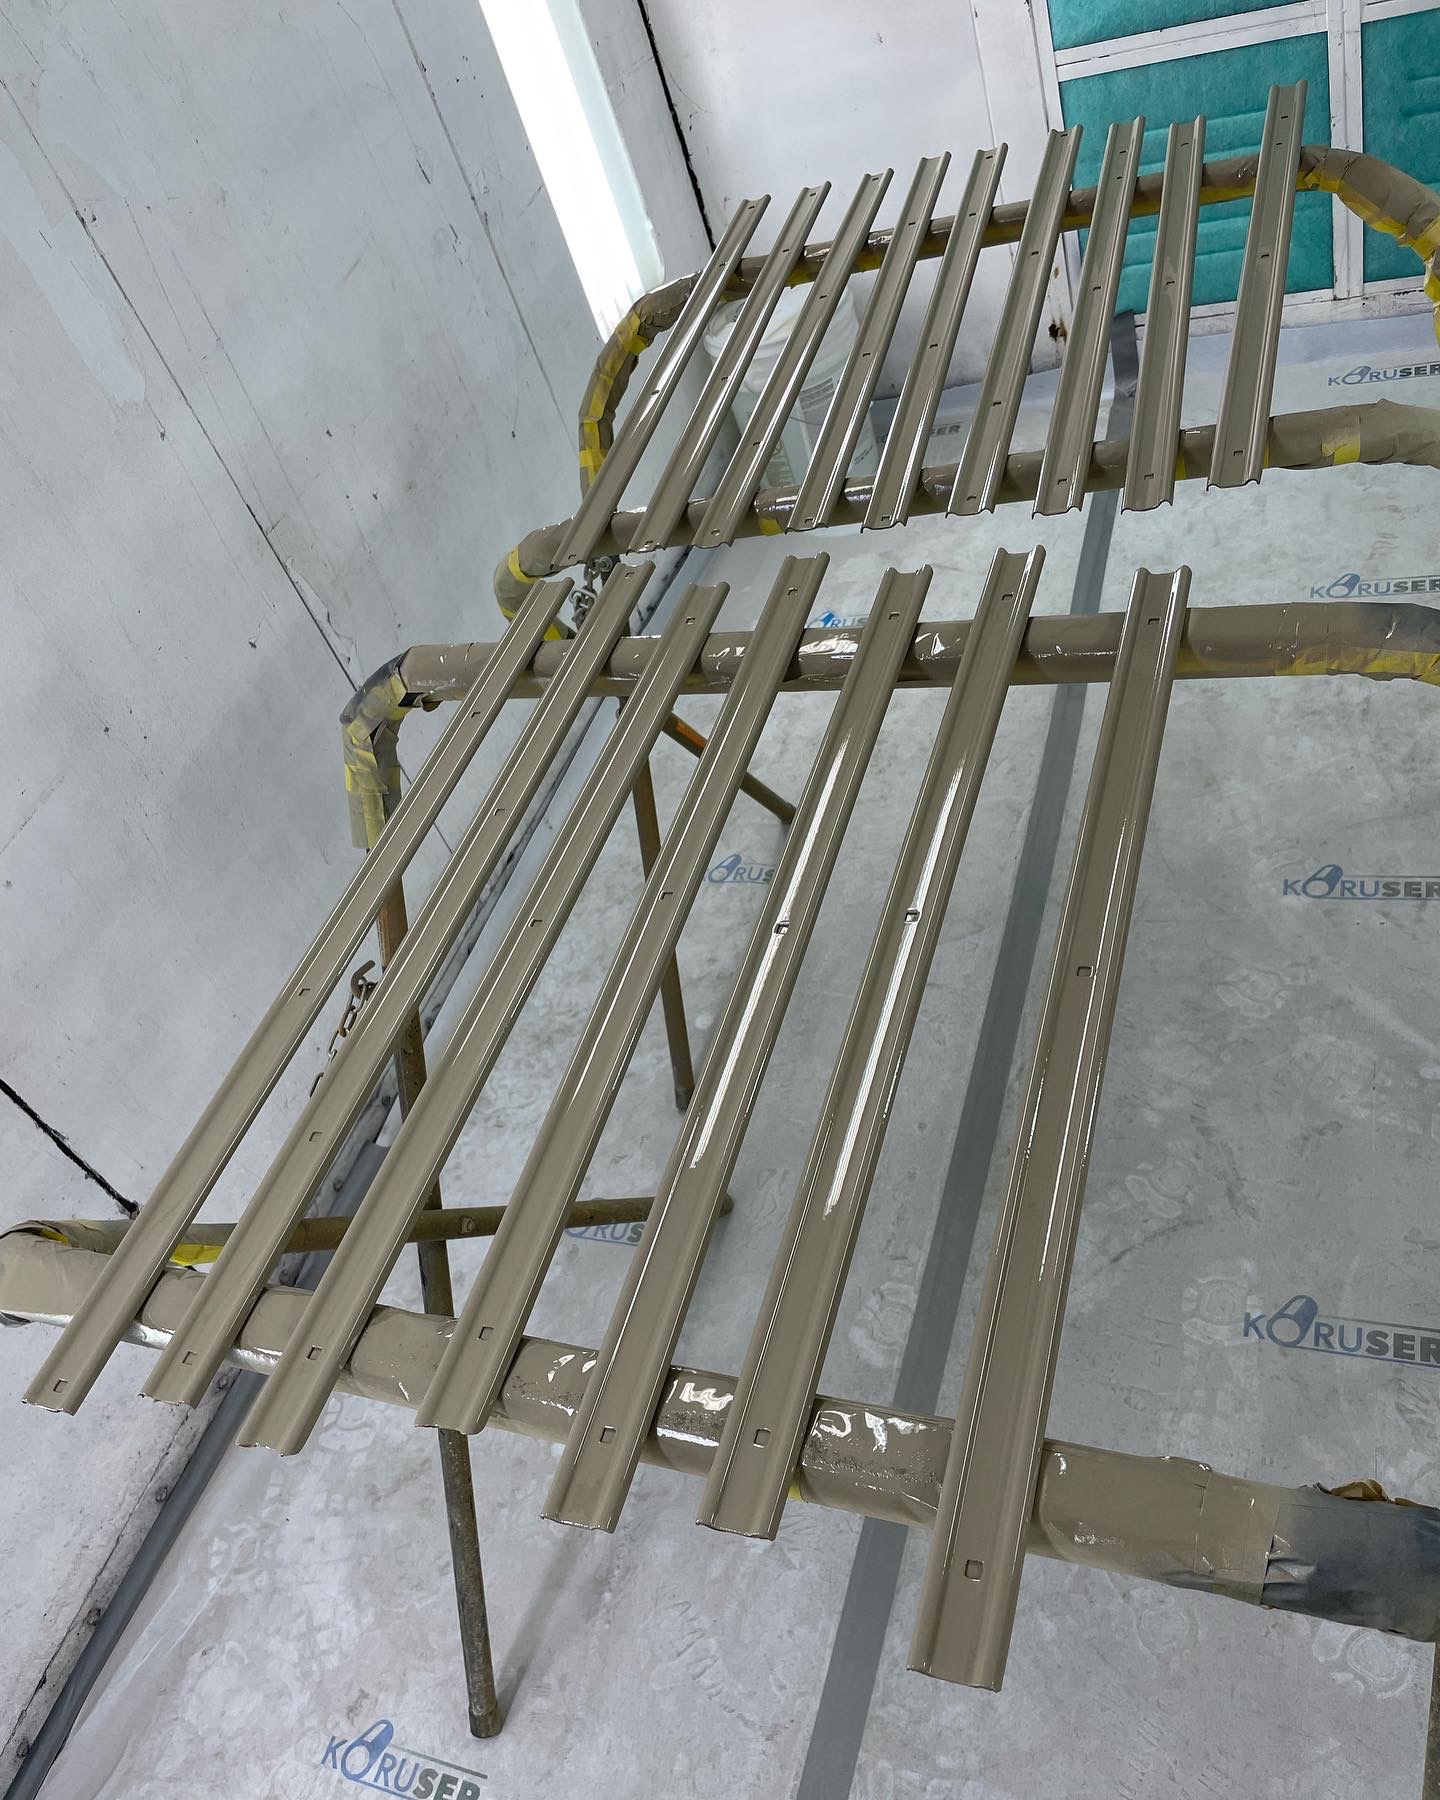
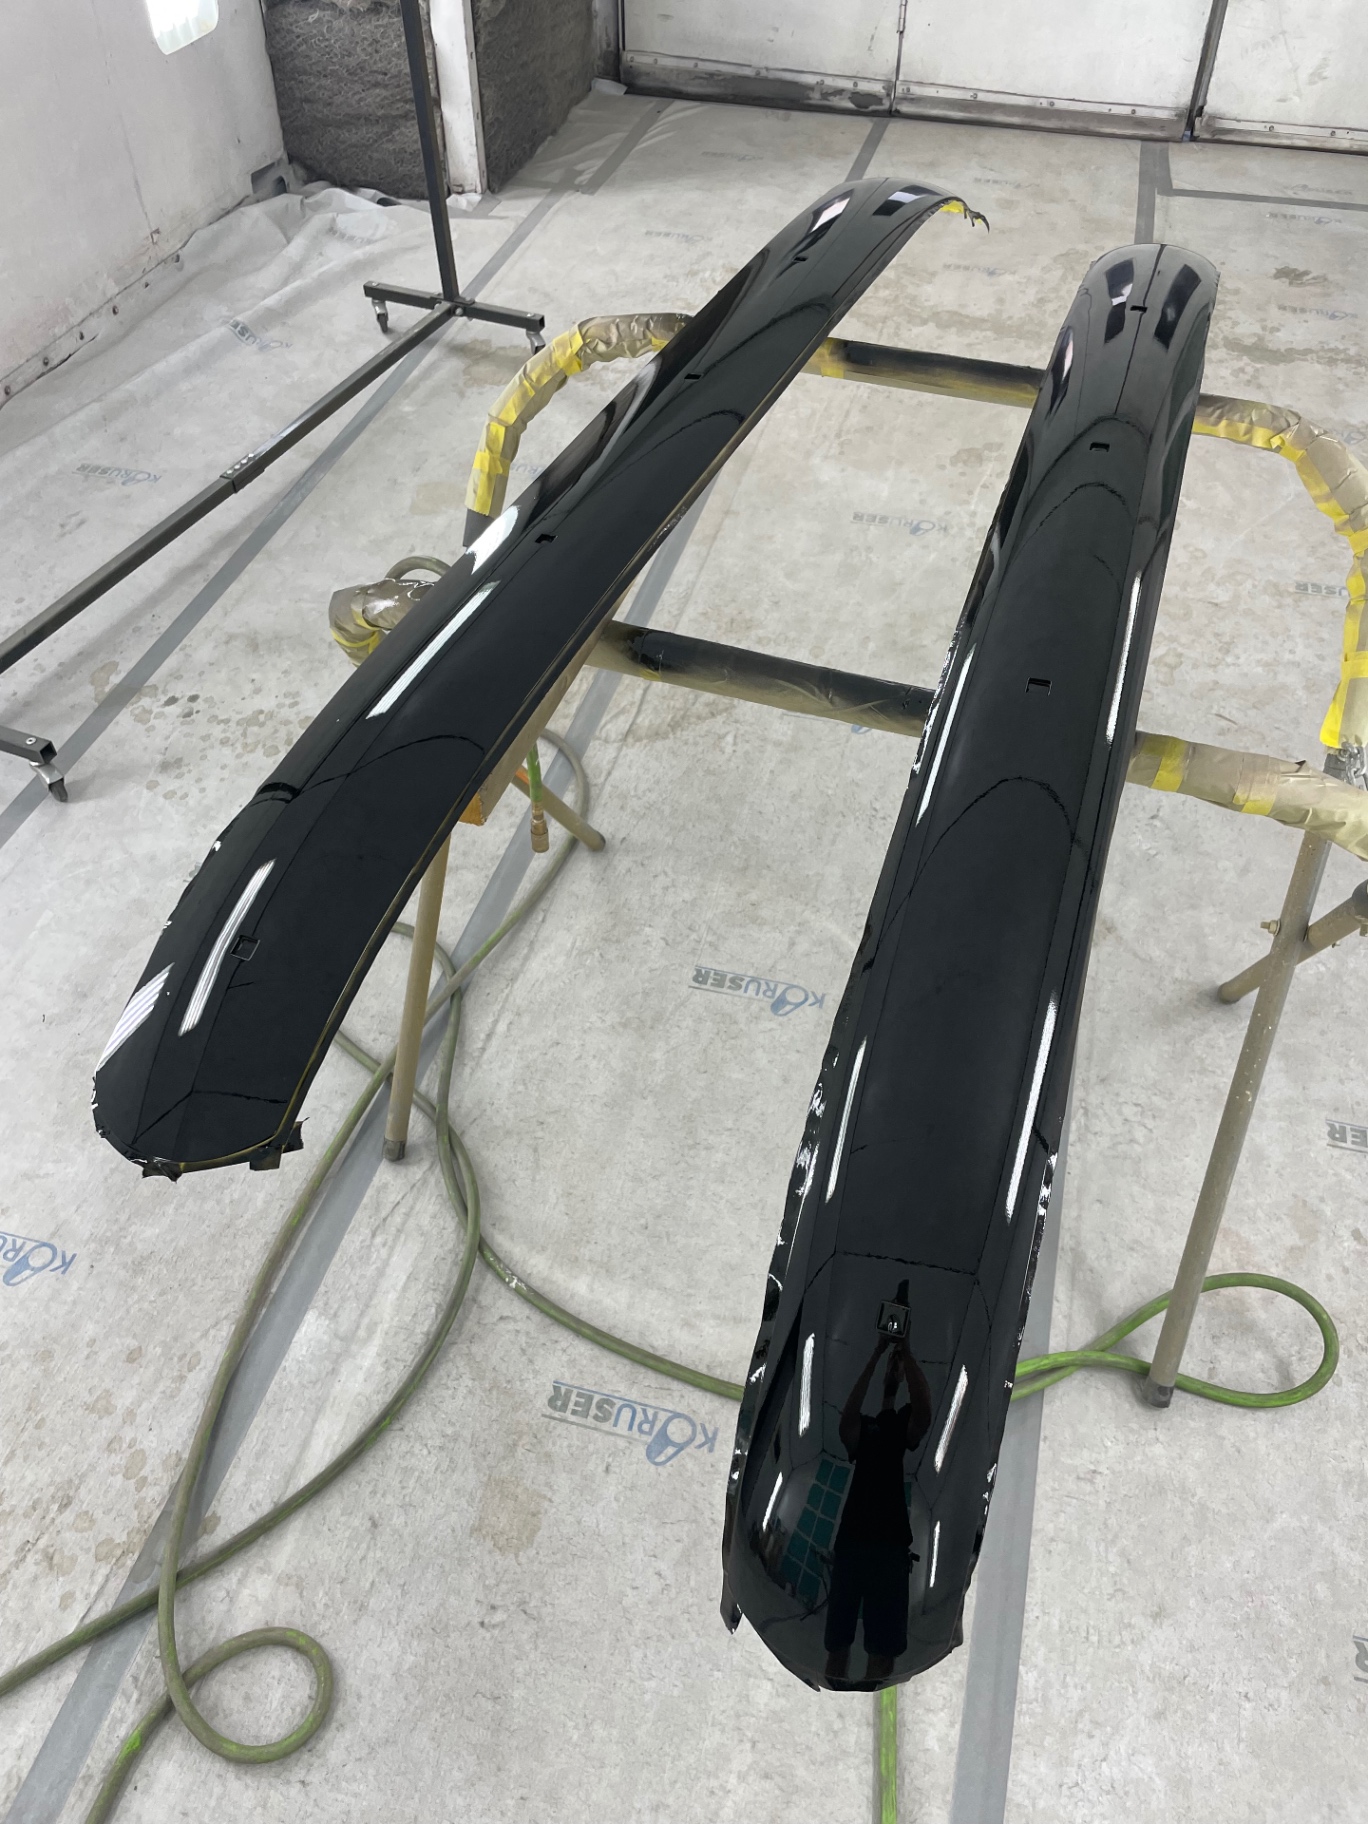
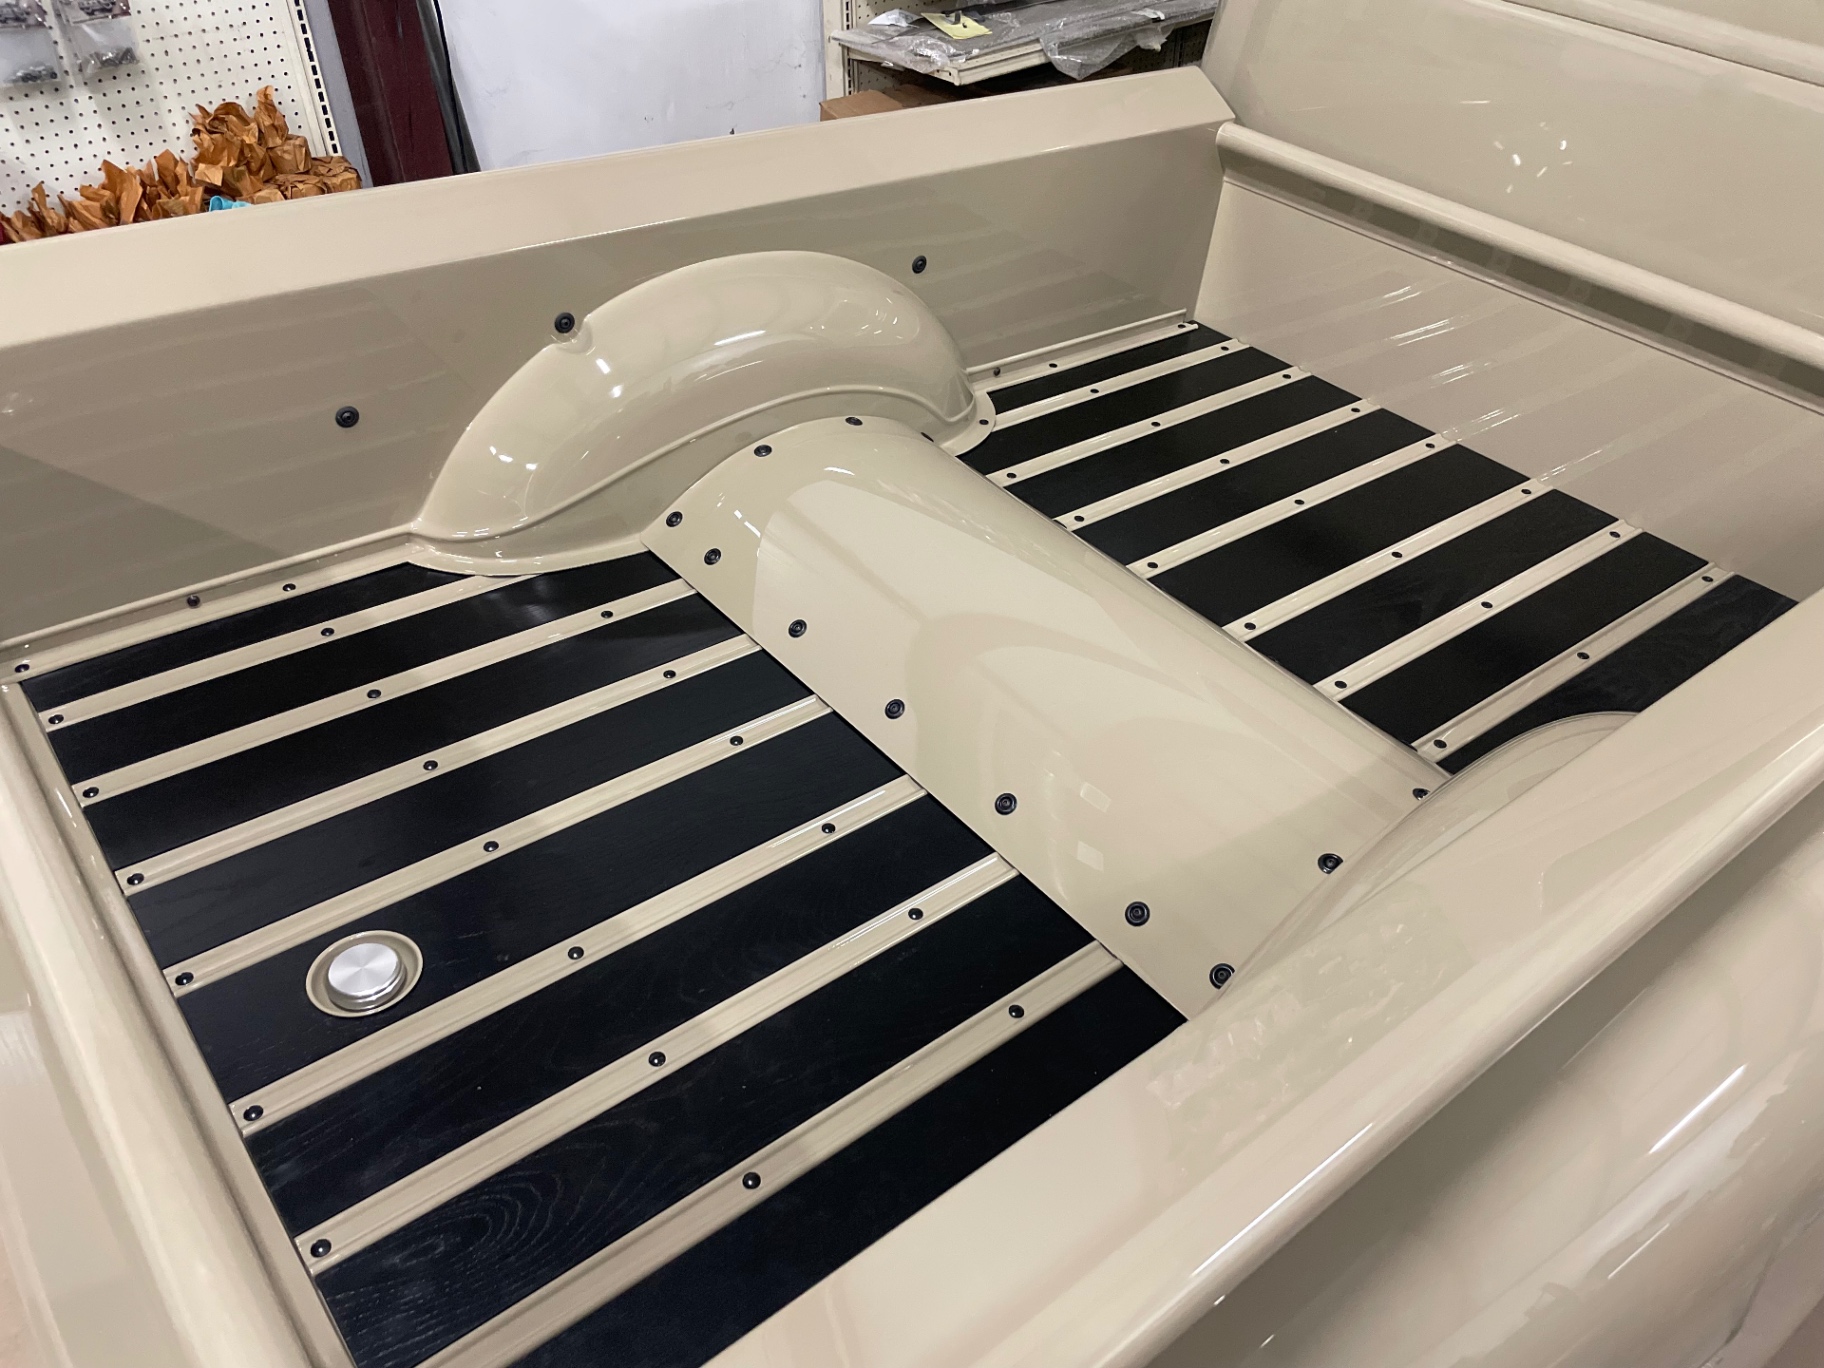
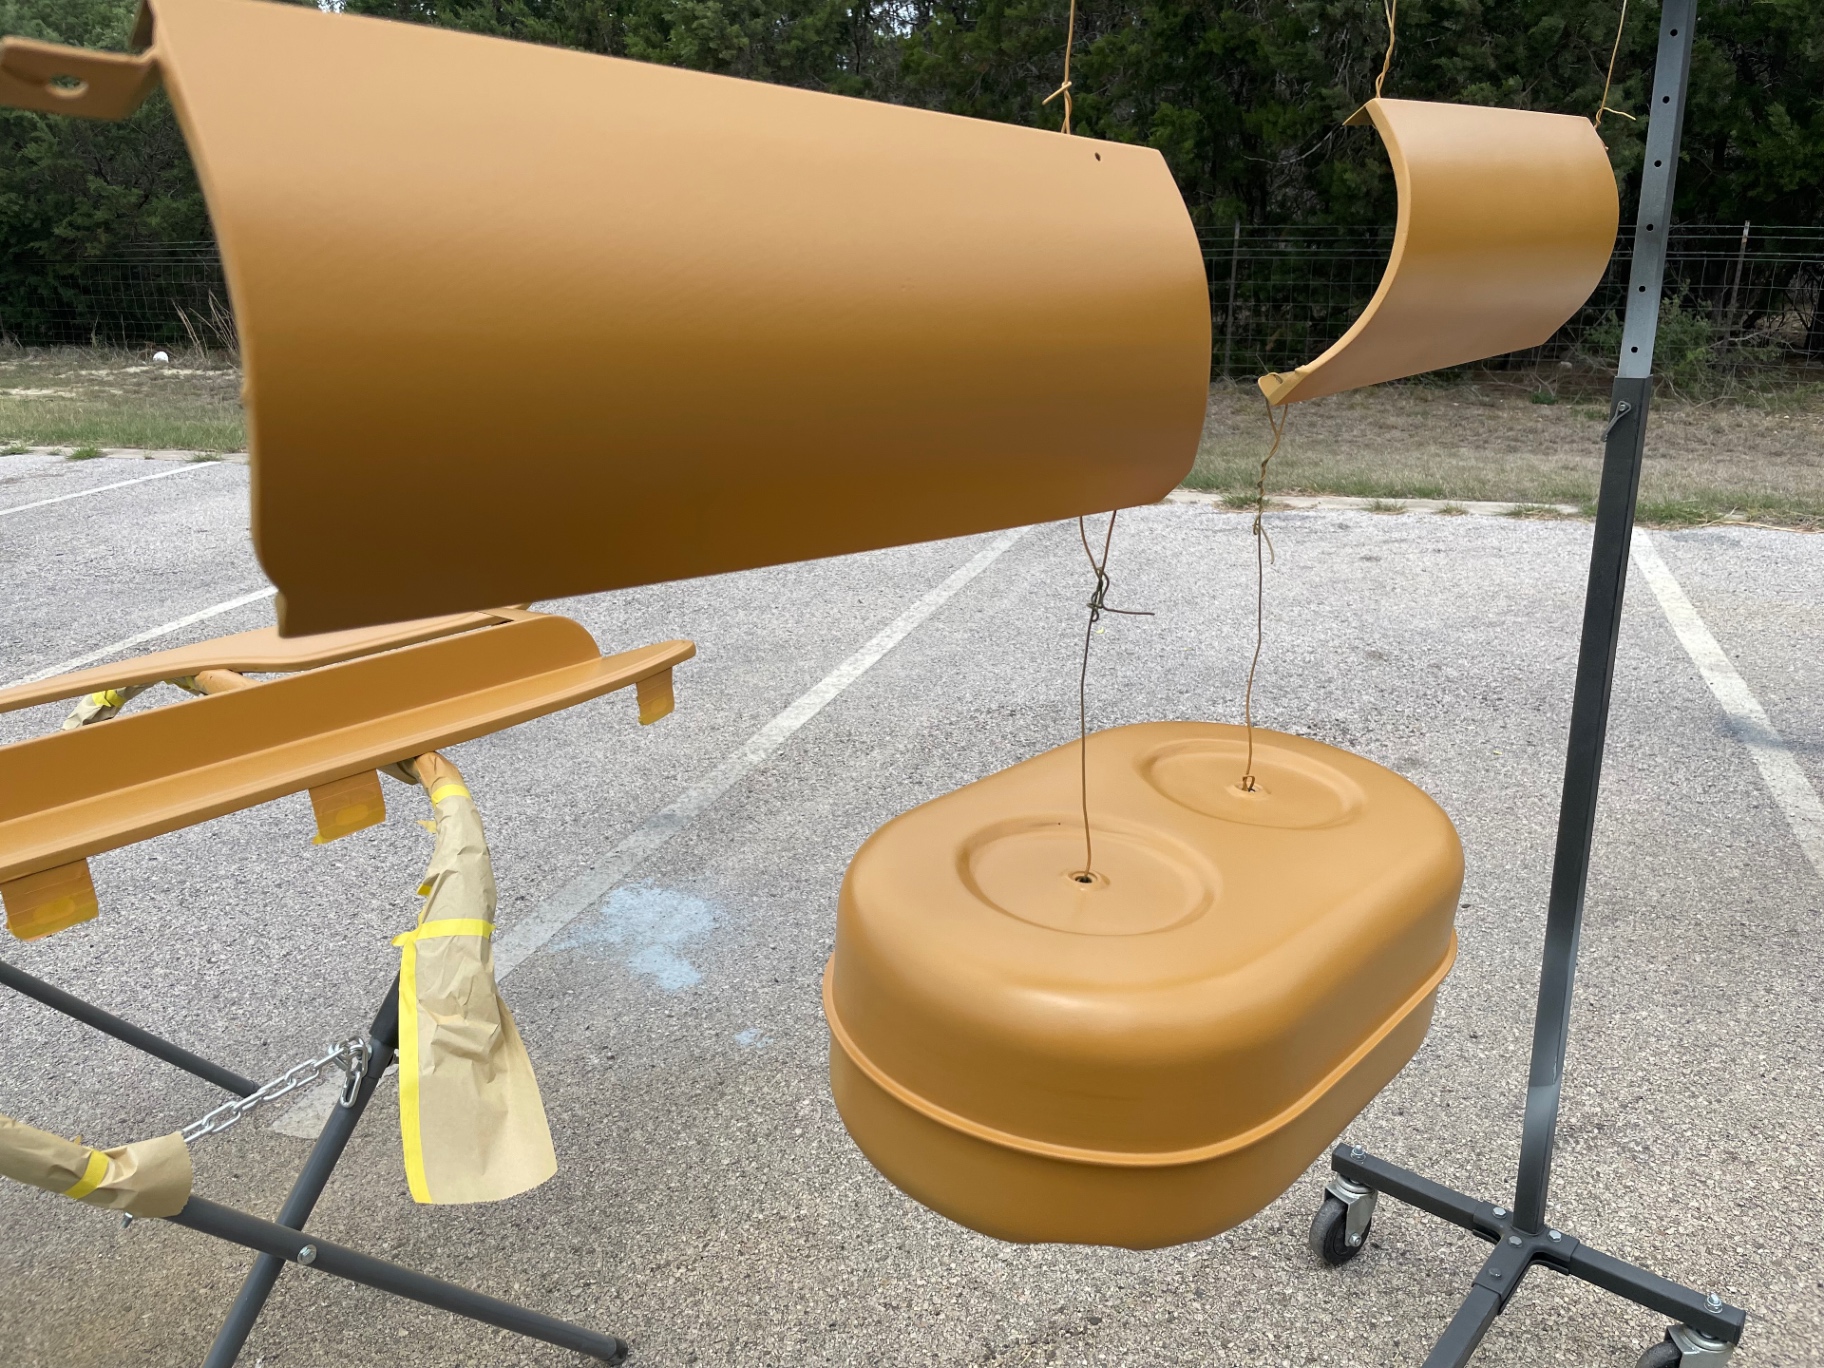
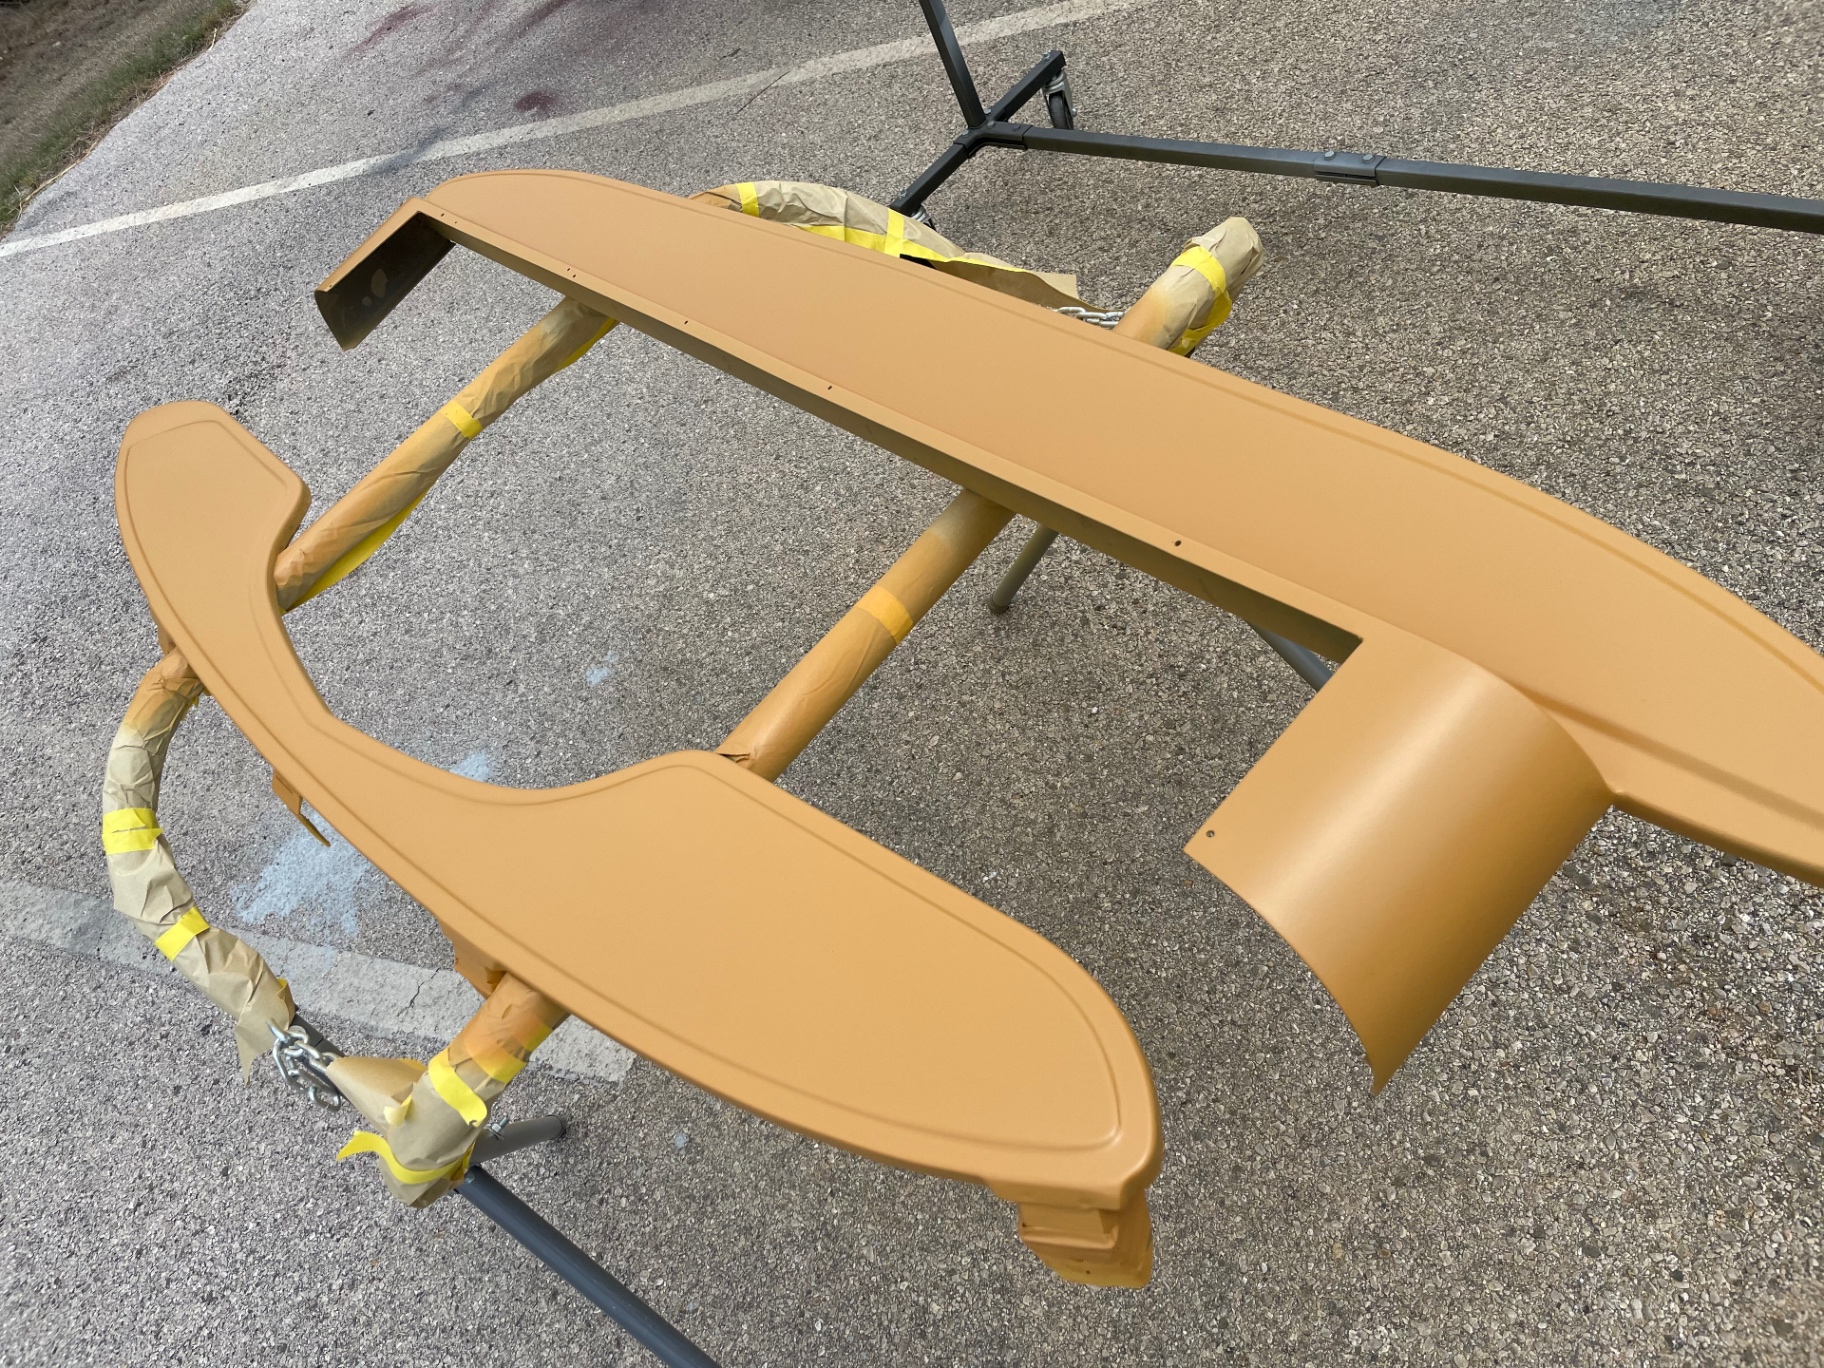
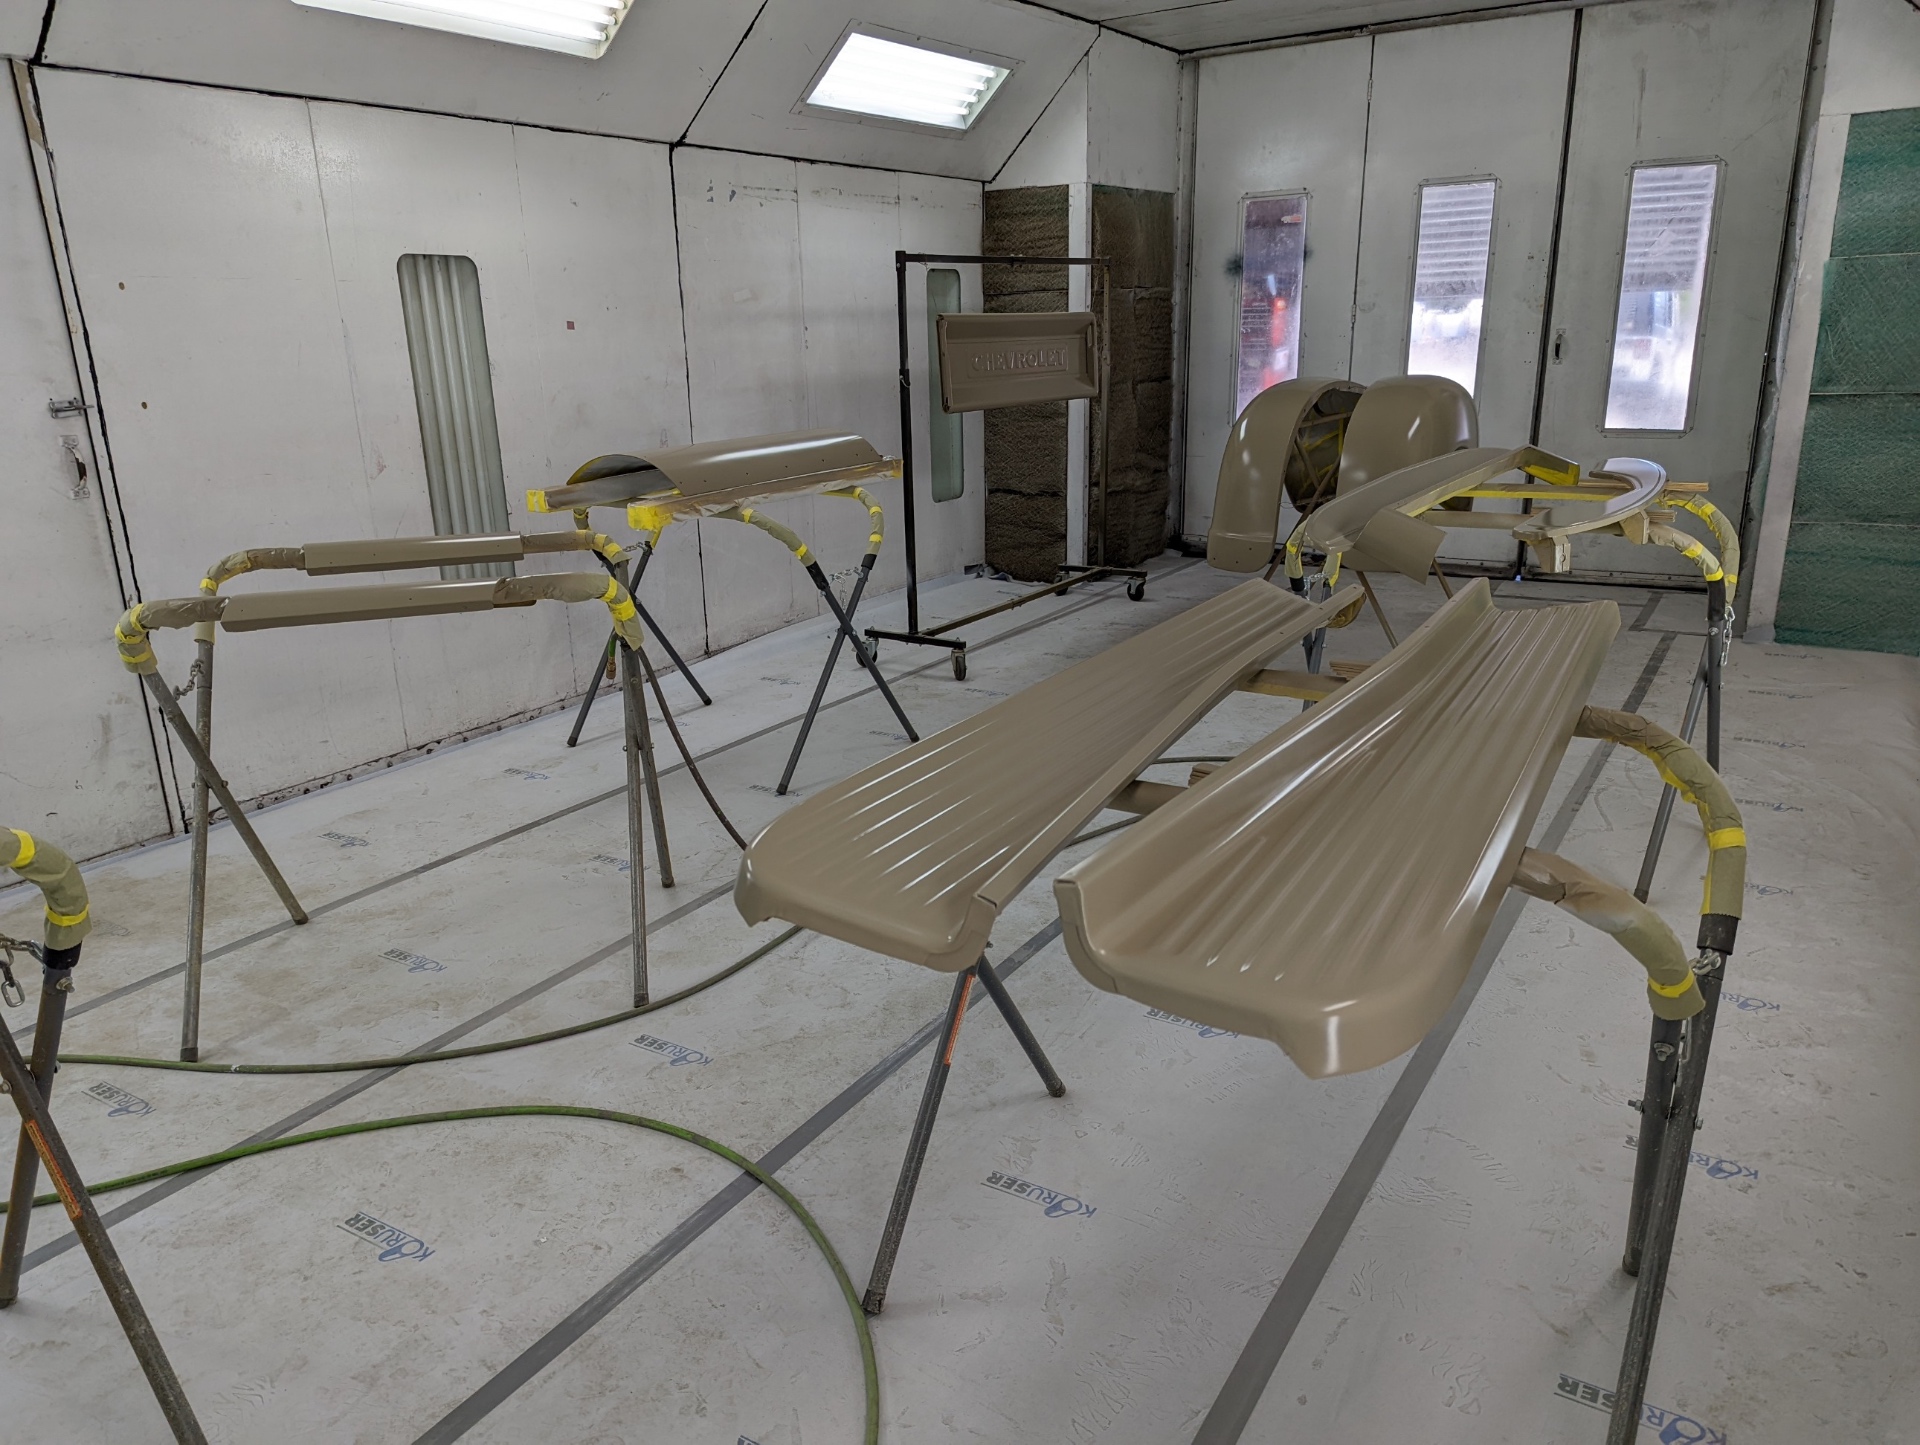
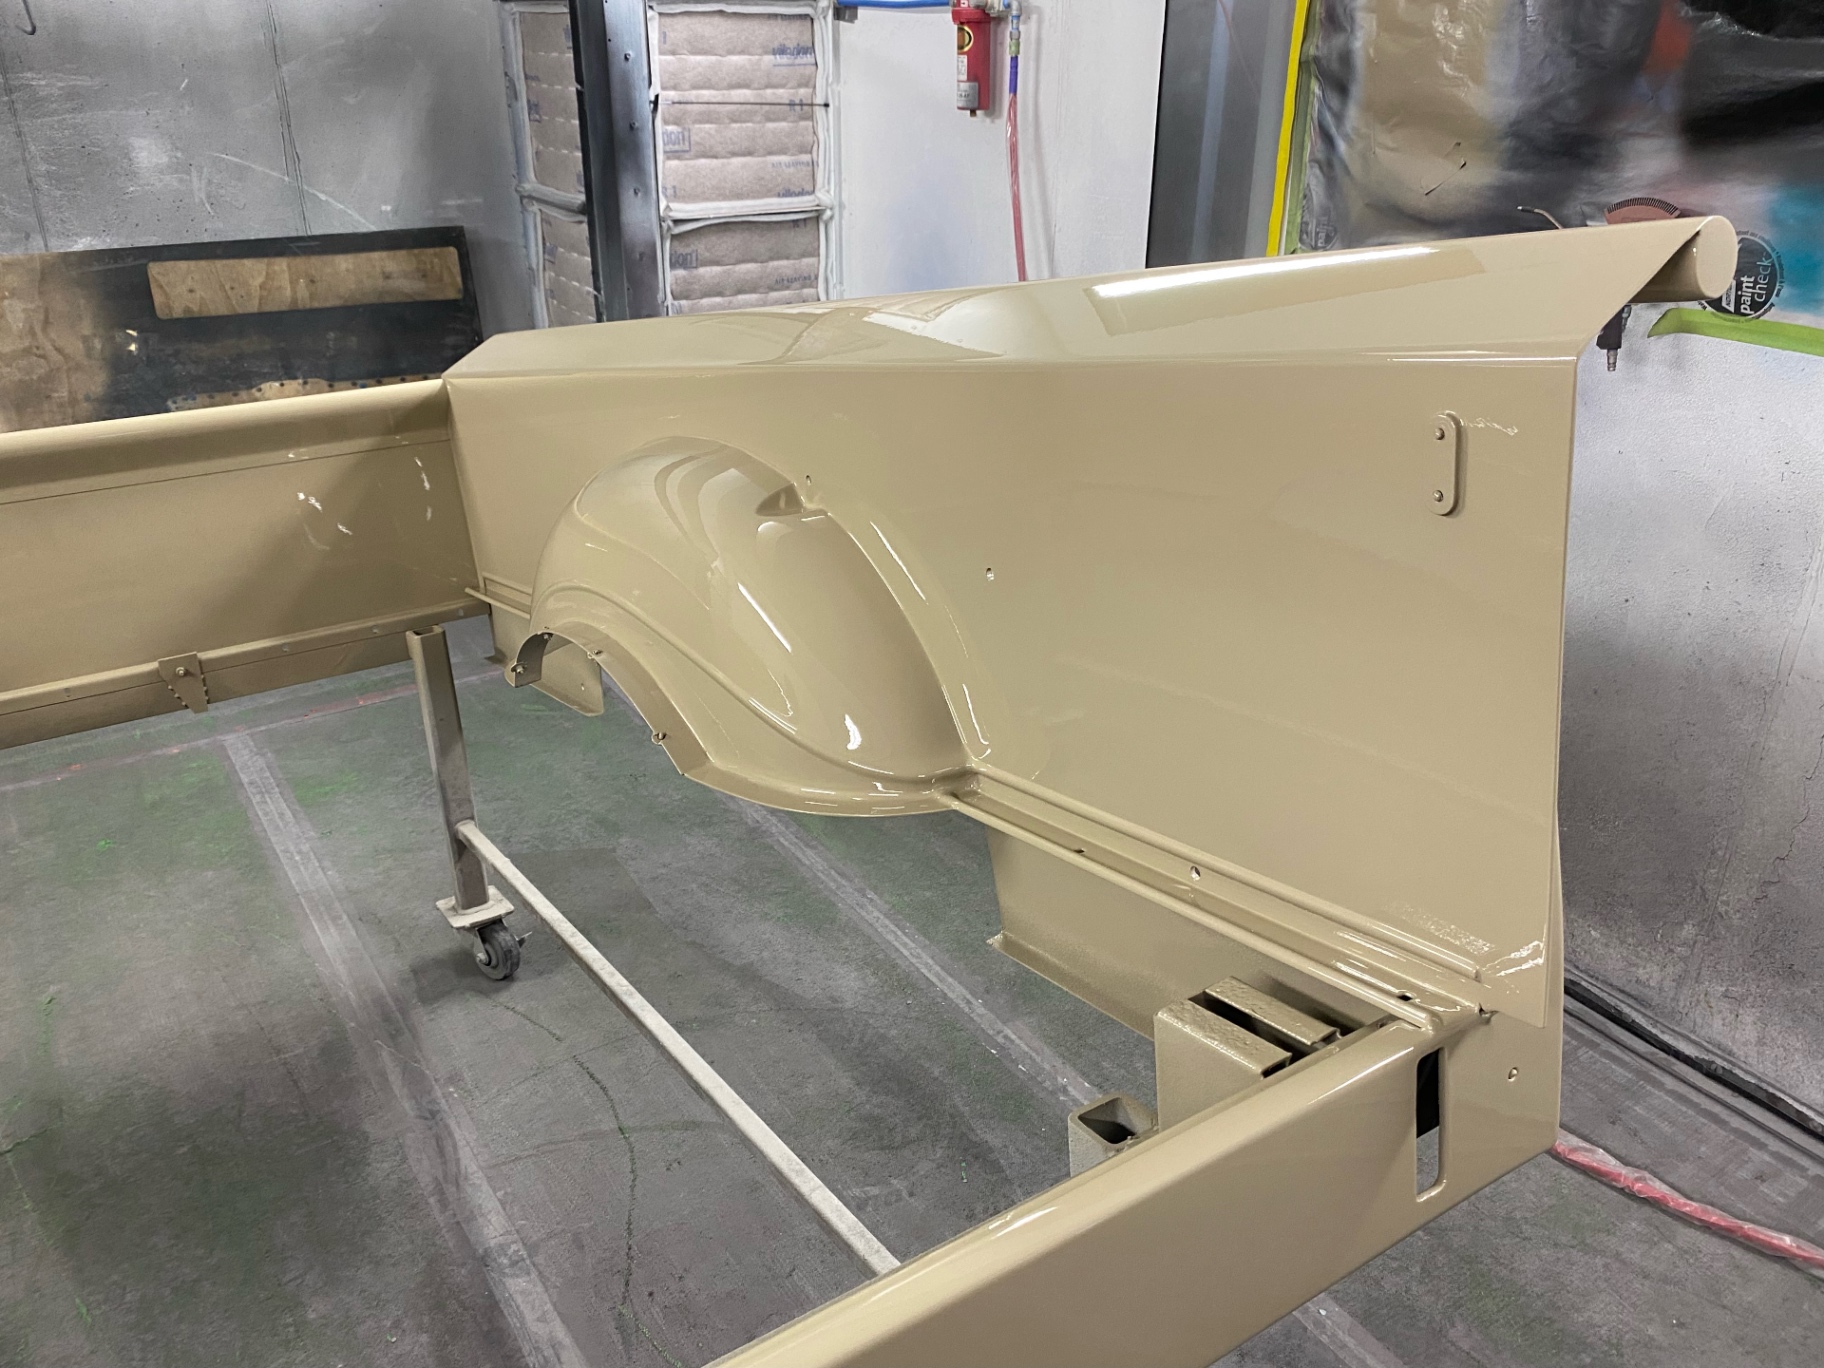
Early July the booth turned tan. Fenders, tailgate, running boards, bed strips, air cleaner, and cab panels all laid down in the final khaki-tan base and clear. Bumpers went the other direction — shot in deep gloss black to anchor the palette. With the color locked in, the truck started coming back together: bed floor bolted down over black wood planks between polished strips, Bel Air inner tubs dropped in, tail lights and stainless tailgate latches installed on the rear corners, and the dressed engine set back under the hood with the tan air cleaner and valve covers tying the bay to the body.

Front and rear fenders in fresh color — glass-smooth reflections coming off the block work.J031
Front and rear fenders in fresh color — glass-smooth reflections coming off the block work.
Tailgate with the stamped Chevrolet script, laid down in the final tan.J032
Tailgate with the stamped Chevrolet script, laid down in the final tan.
Running boards shot together — ribs picking up the booth light cleanly.J033
Running boards shot together — ribs picking up the booth light cleanly.
Air cleaner top and door skin hung to flash — the color reads warm under the lights.J034
Air cleaner top and door skin hung to flash — the color reads warm under the lights.
Cab quarter and rear panel hung on the rack after clear.J035
Cab quarter and rear panel hung on the rack after clear.
Bed floor strips in body color — ready to sandwich the black wood planks.J036
Bed floor strips in body color — ready to sandwich the black wood planks.
Front and rear bumpers in gloss black — the anchor to the tan body.J037
Front and rear bumpers in gloss black — the anchor to the tan body.
Bed floor assembled — black wood planks between painted strips, wheel tub back in.J038
Bed floor assembled — black wood planks between painted strips, wheel tub back in.
Rear corner buttoned up — custom stainless tailgate latch and tail light installed.J039
Rear corner buttoned up — custom stainless tailgate latch and tail light installed.
Engine set back in — tan air cleaner and valve covers tie the bay to the body.J040
Engine set back in — tan air cleaner and valve covers tie the bay to the body.

UPDATE 04 / 08

Jul 15, 2022

DELIVERY MILESTONE

Phase 1 complete — out in the Texas sun

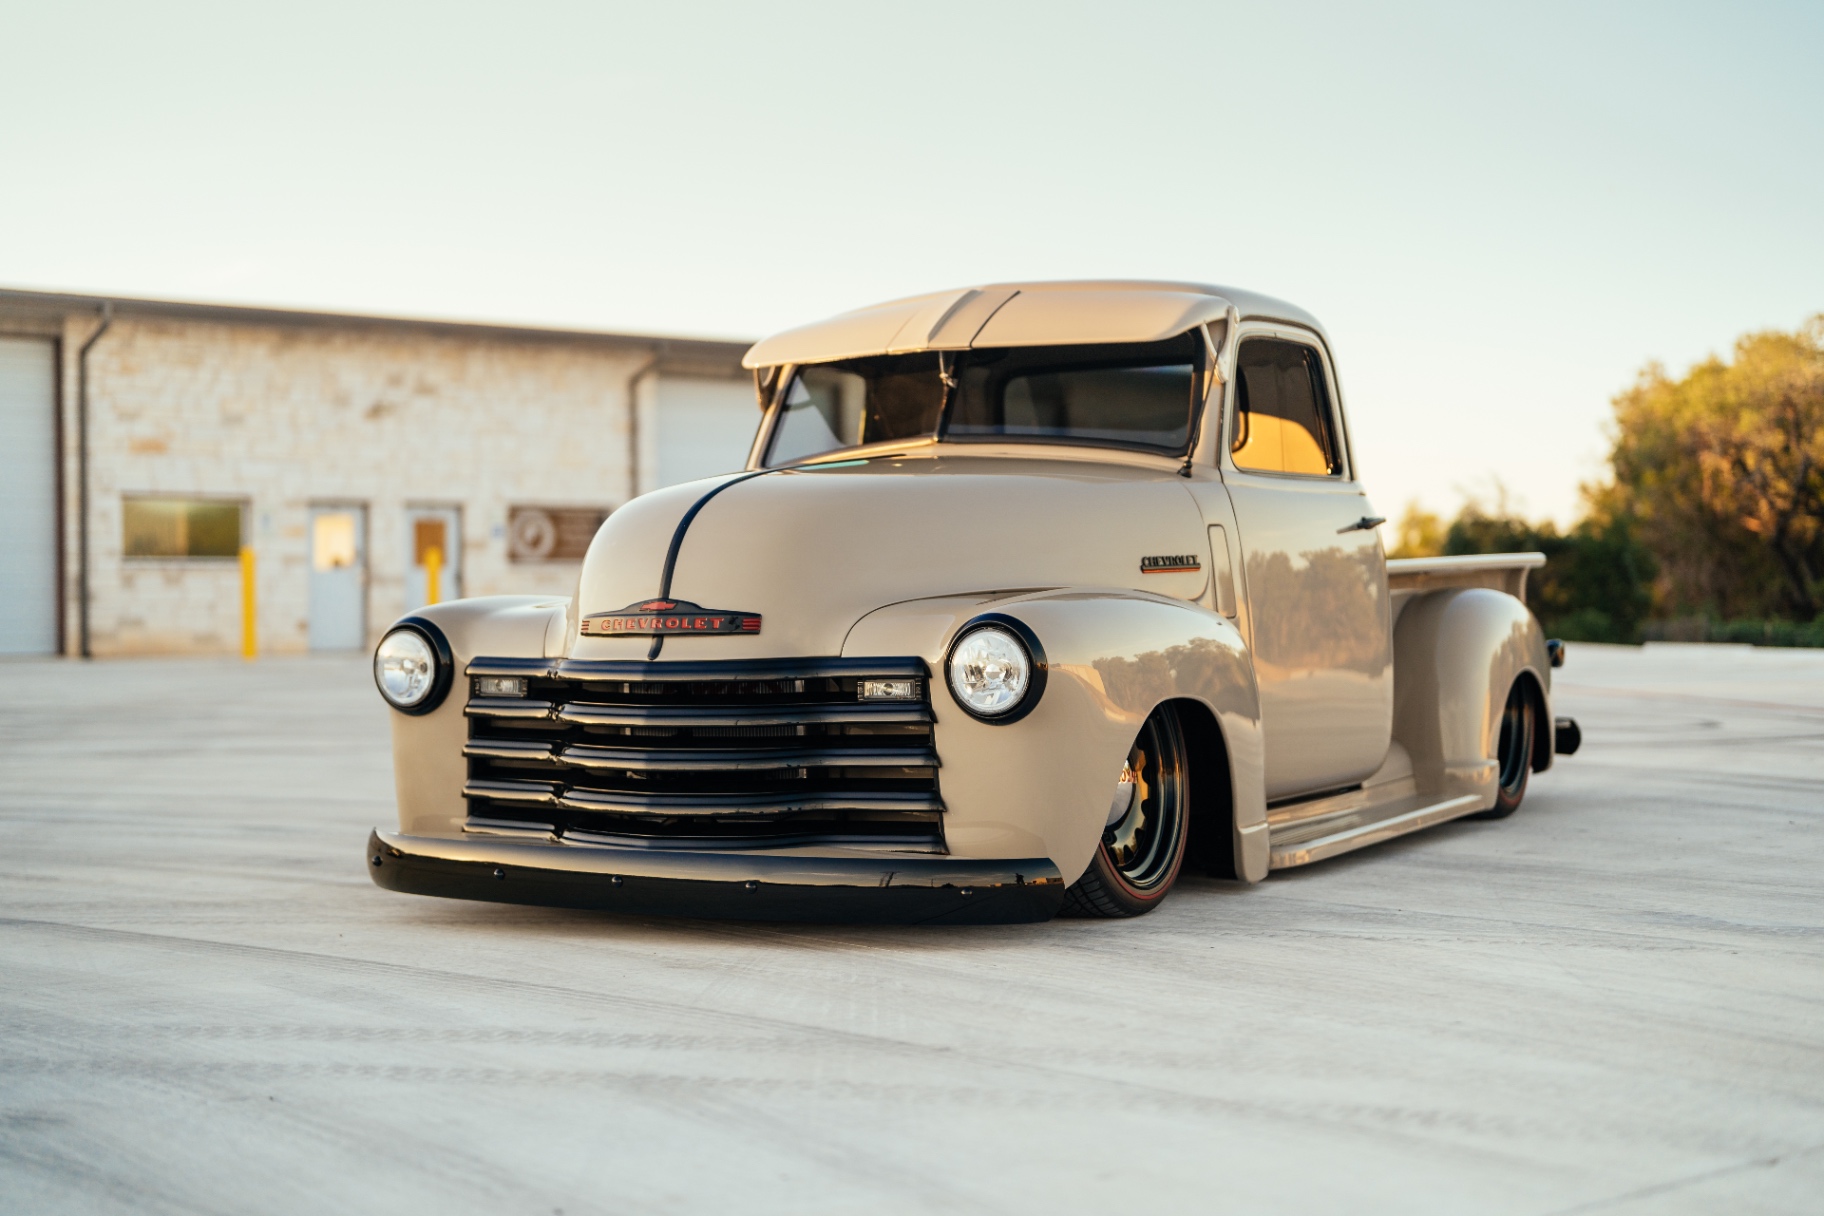
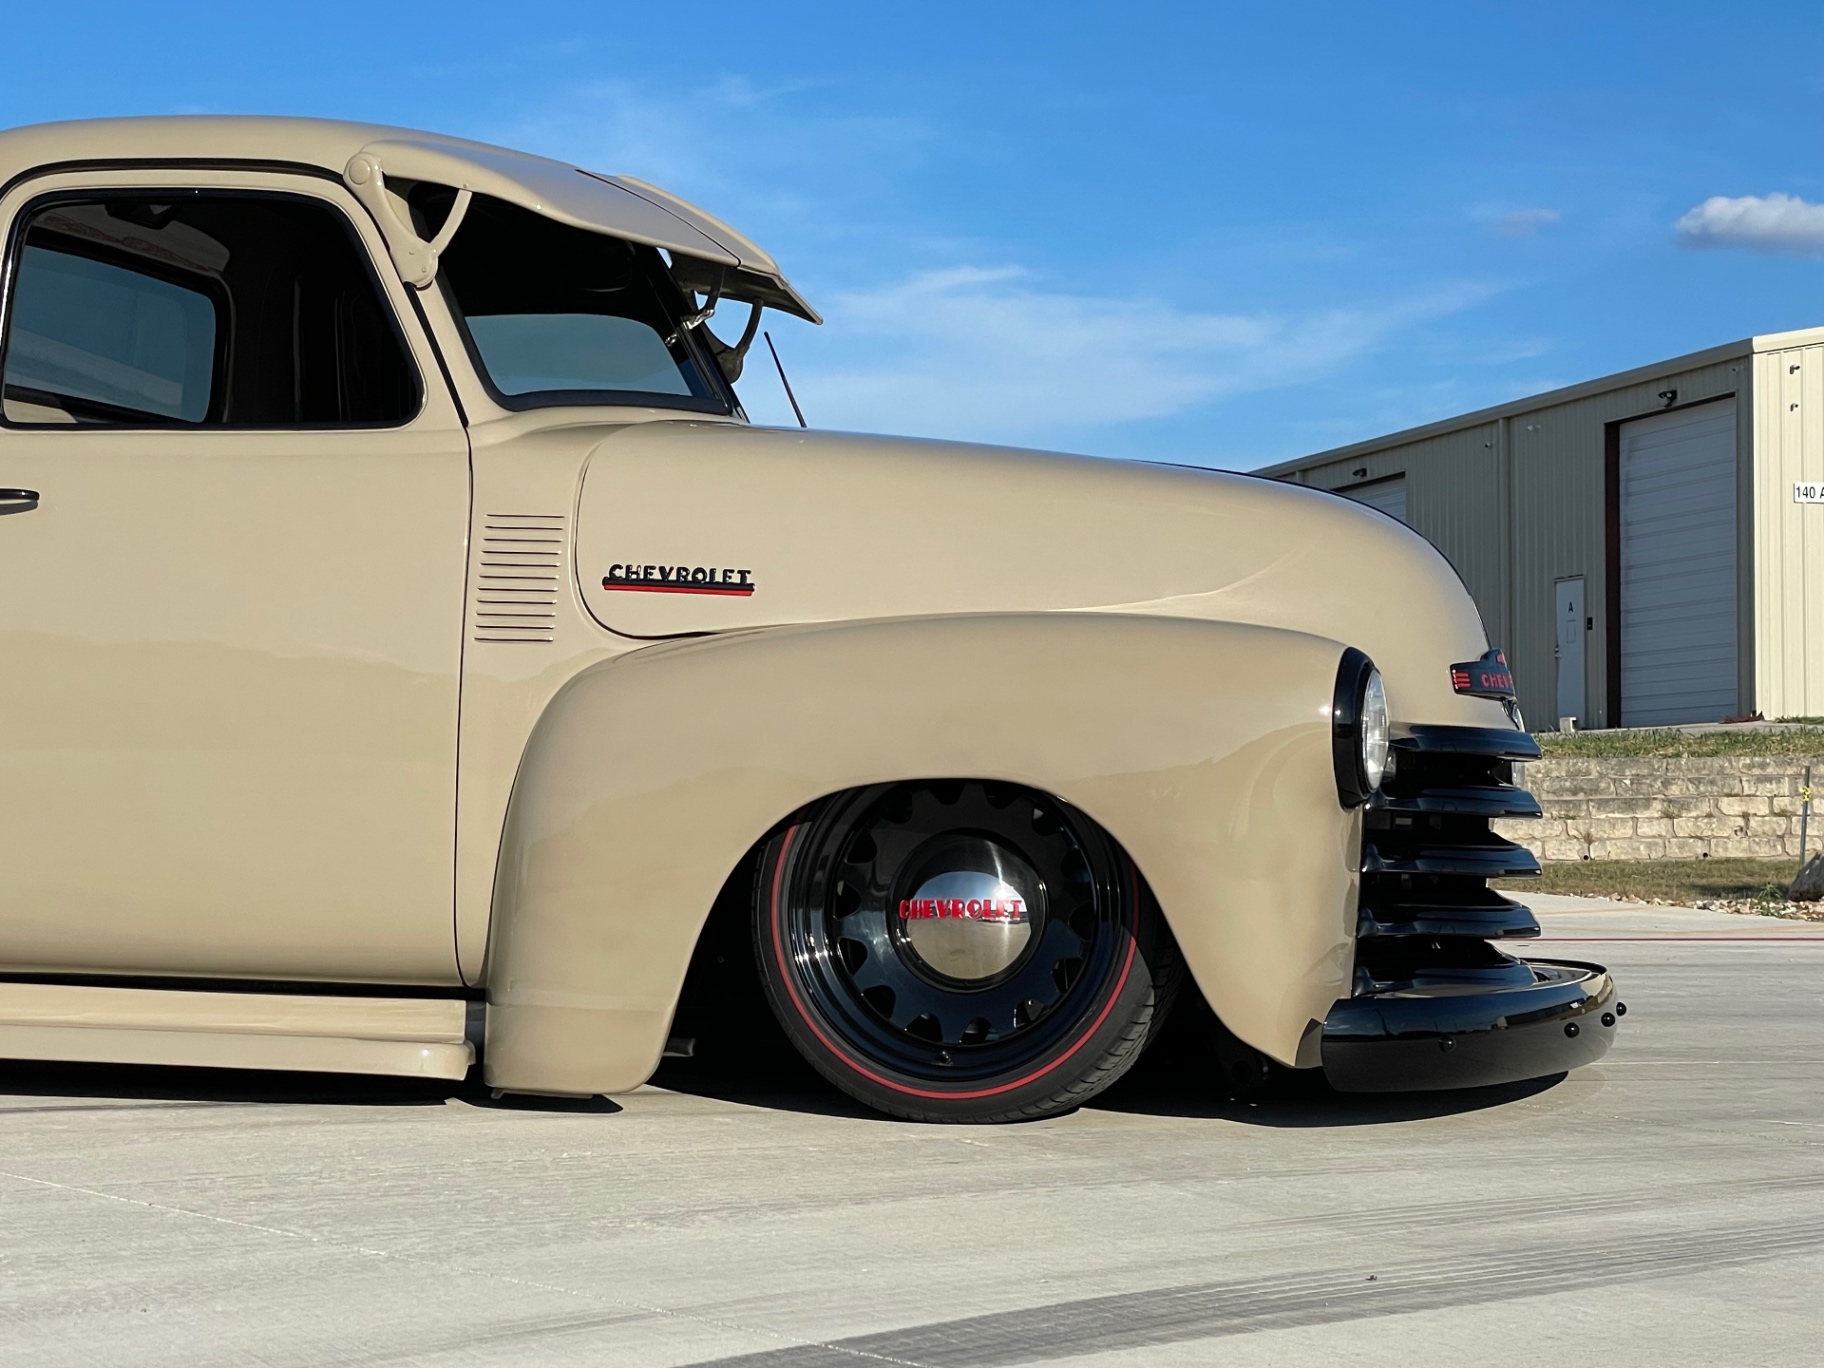
Phase 1 of M. Tabb's 1950 Chevrolet 3100 wrapped up in July 2022. What came in with odd color combos, a poor stance, and failing chassis parts rolled out slammed on air, straight, and stitched together end to end. First shakedown photos below — front, side, and rear — with the 18/20 Detroit Steel Wheels and Diamond Back redlines finally under it.

Side profile — air dumped, 18/20 Detroit Steel Wheels on Diamond Back redlines.J041
Side profile — air dumped, 18/20 Detroit Steel Wheels on Diamond Back redlines.
Front three-quarter — fabricated radiator cover and cleaned-up nose.J042
Front three-quarter — fabricated radiator cover and cleaned-up nose.
Rear — welded bed, custom tail light stems, HF tailgate stops (no chains).J043
Rear — welded bed, custom tail light stems, HF tailgate stops (no chains).

UPDATE 03 / 08

Jul 25, 2022

PORTFOLIO MILESTONE

Finished — Texas sun on the tan and black

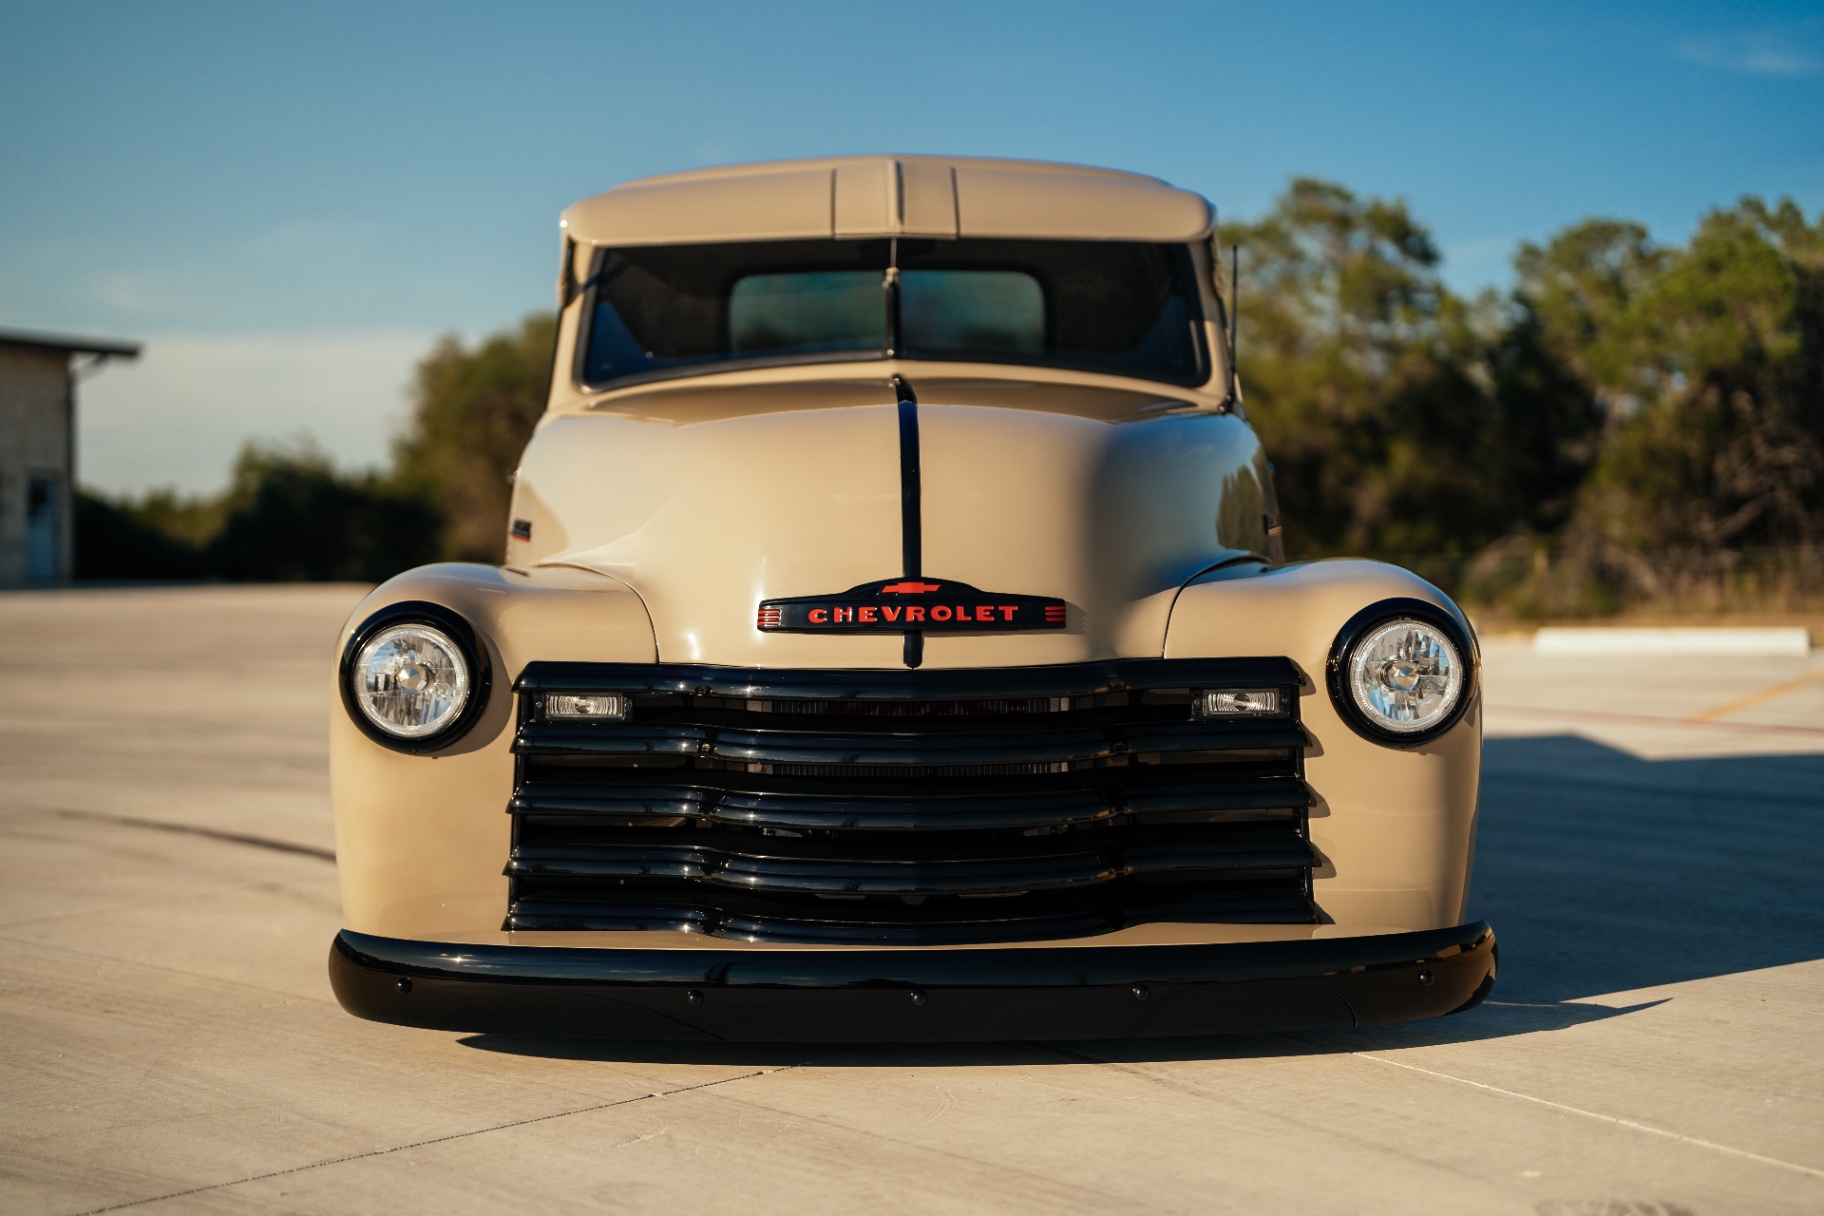
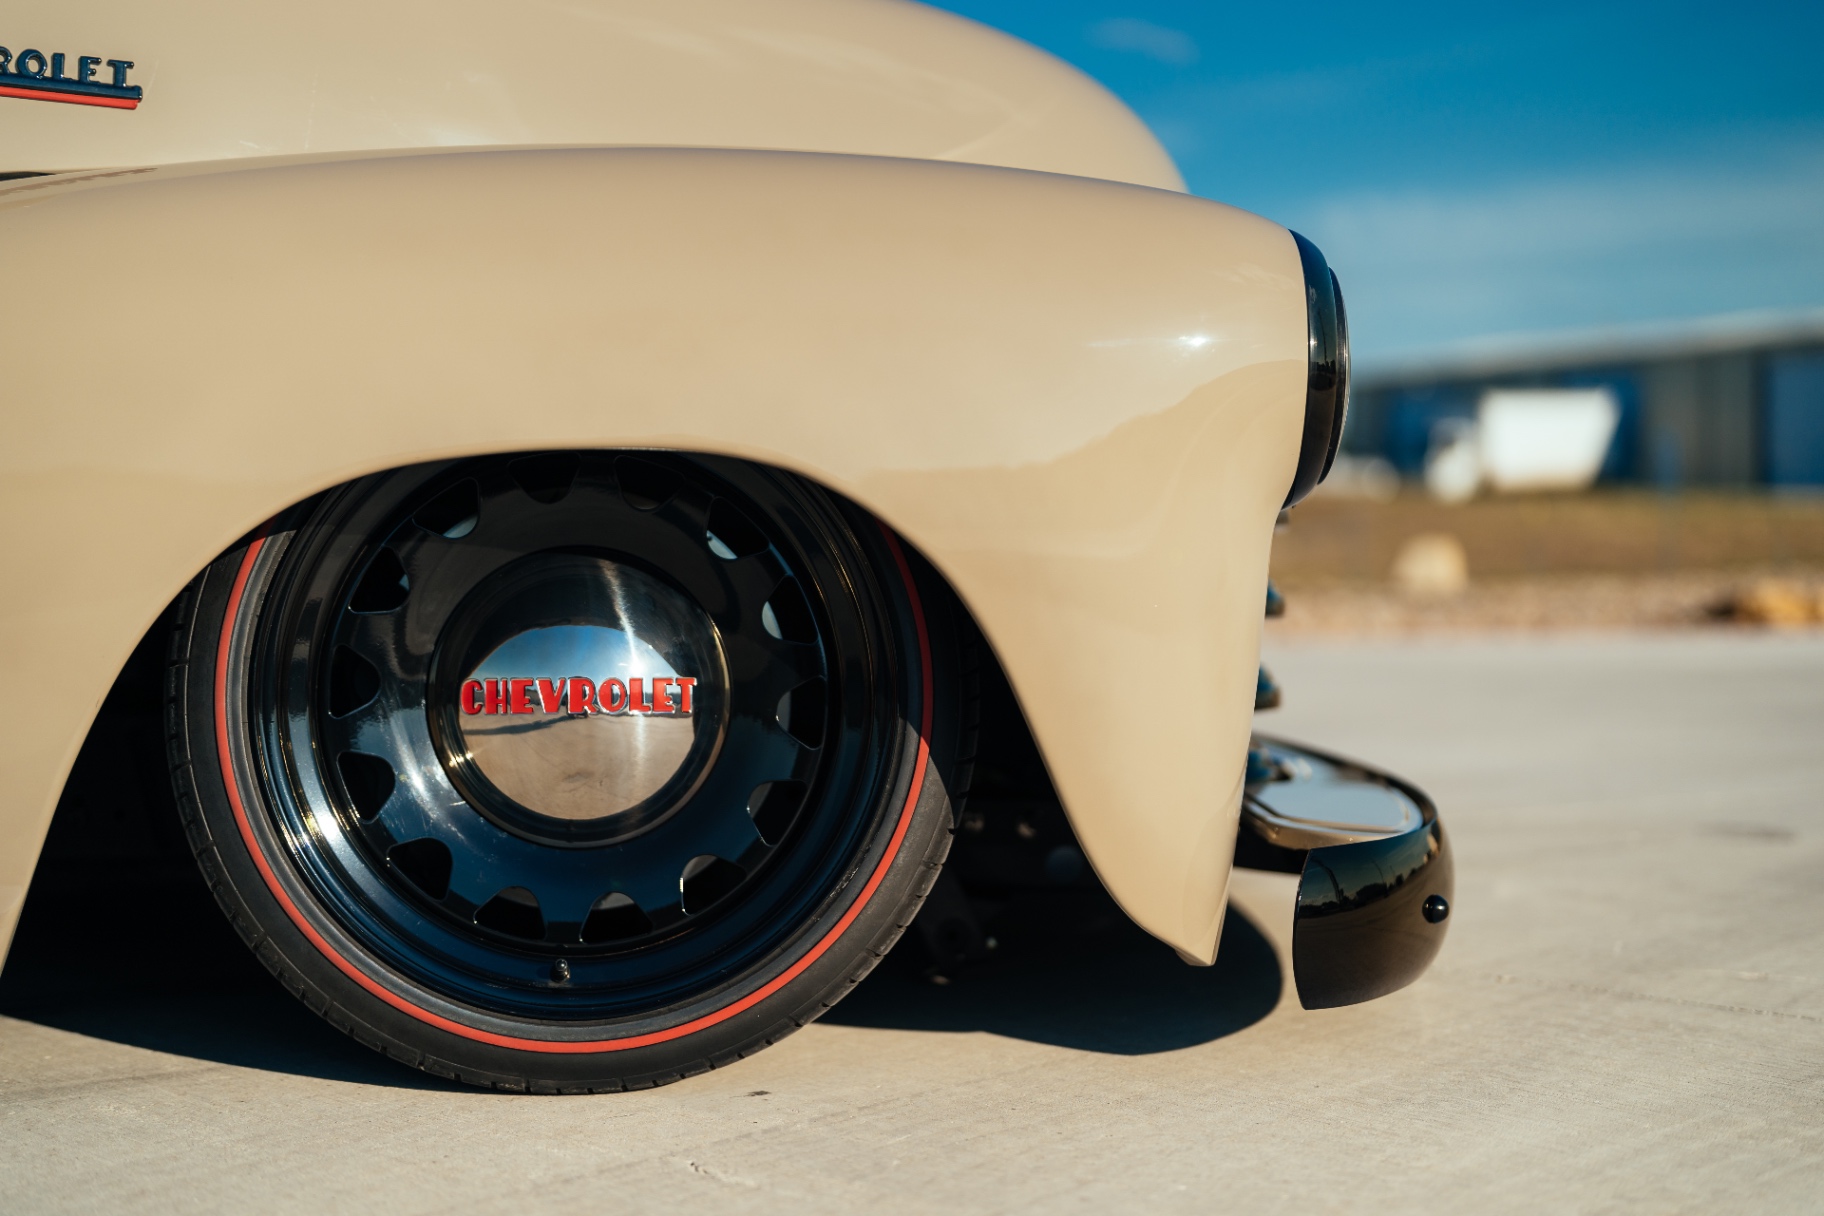
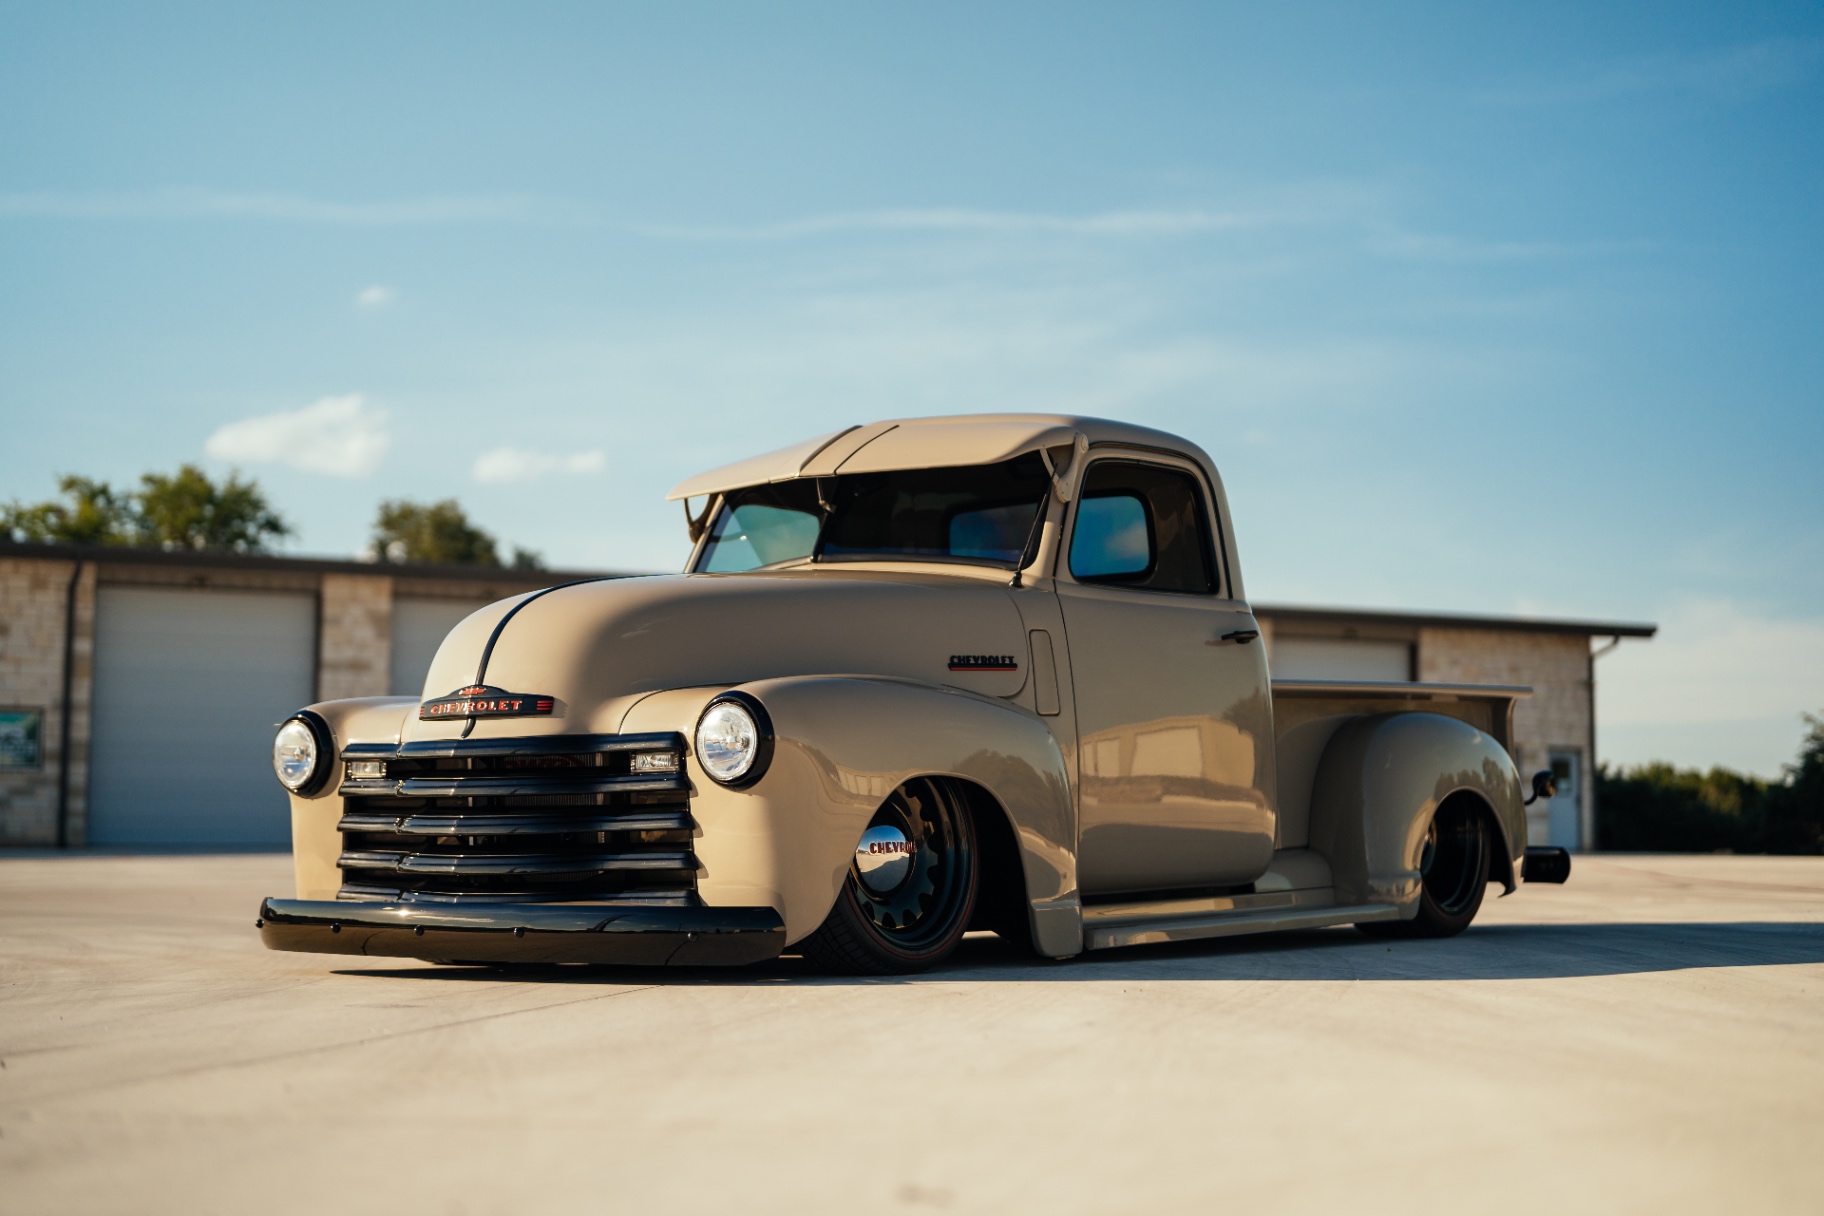
End of July we pulled the truck out for its portfolio session. Air dumped, redlines showing, tan body against the black grille, bumpers, and Detroit Steel wheels — everything Phase 1 was chasing, sitting in the Texas evening light.

Front low three-quarter — the stance shot that anchors the build.J044
Front low three-quarter — the stance shot that anchors the build.
Sunset front three-quarter — warm light pulling the tan warmer.J045
Sunset front three-quarter — warm light pulling the tan warmer.
Dead-on nose — black grille bars and red Chevrolet badge against the tan.J046
Dead-on nose — black grille bars and red Chevrolet badge against the tan.
Cab and fender detail — reflections reading straight down the side.J047
Cab and fender detail — reflections reading straight down the side.
Detroit Steel wheel with Diamond Back redline — the detail that finishes it.J048
Detroit Steel wheel with Diamond Back redline — the detail that finishes it.
High three-quarter — hood, cab, and bed lines together in one frame.J049
High three-quarter — hood, cab, and bed lines together in one frame.
Golden-hour front three-quarter — every panel reading clean.J050
Golden-hour front three-quarter — every panel reading clean.
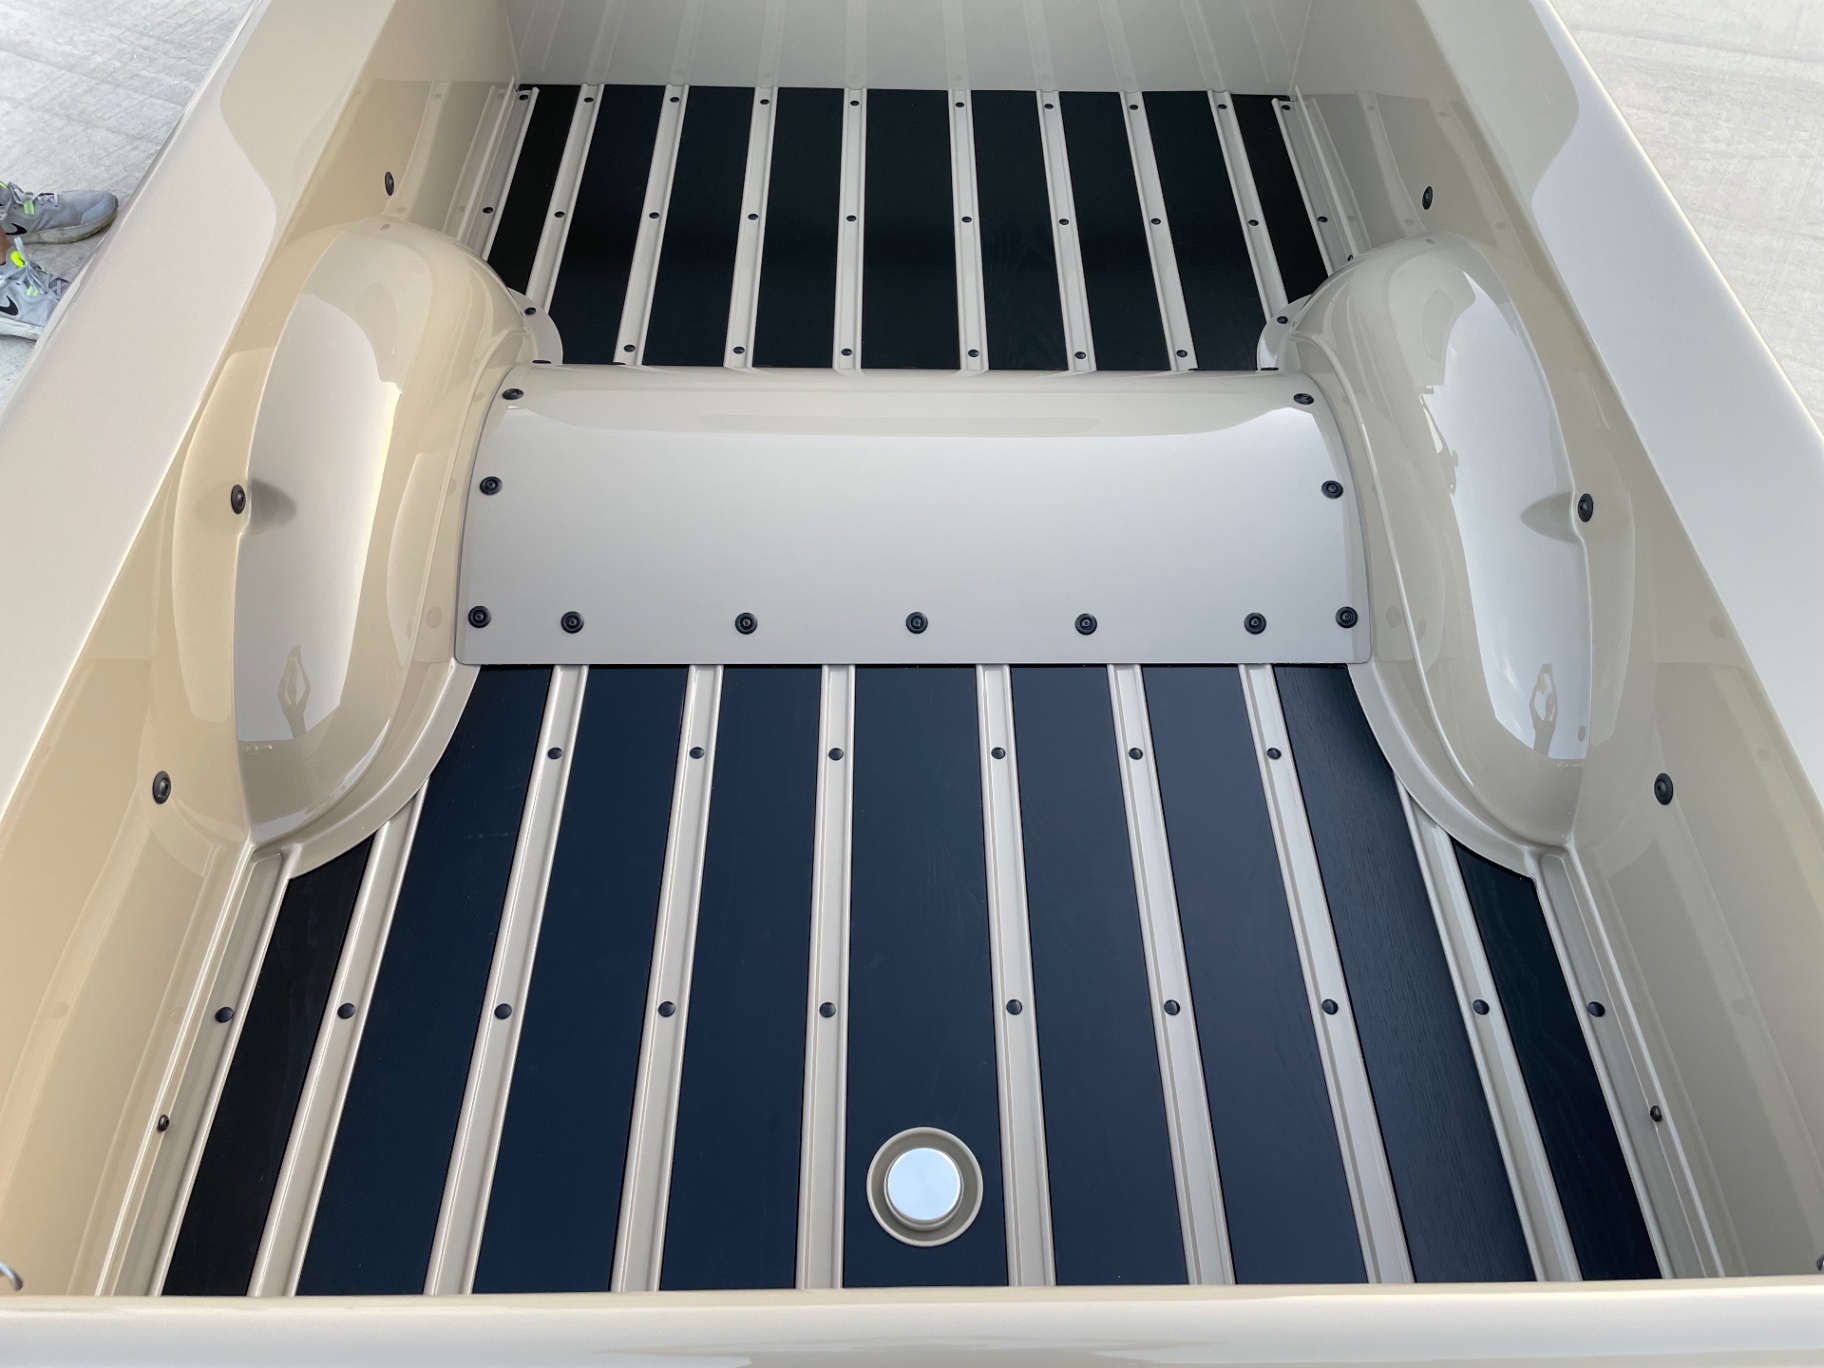
Bed floor overhead — black wood between painted strips, Bel Air tub in body color.J051
Bed floor overhead — black wood between painted strips, Bel Air tub in body color.
Tailgate detail — stamped Chevrolet script, HF tailgate stops, gloss black bumper.J052
Tailgate detail — stamped Chevrolet script, HF tailgate stops, gloss black bumper.
Rear three-quarter — bed, fender, and stance all telling the same story.J053
Rear three-quarter — bed, fender, and stance all telling the same story.

UPDATE 02 / 08

Aug 15, 2022

INTERIOR

Interior phase 1 — red dash accents, retro wheel, behind-the-seat audio

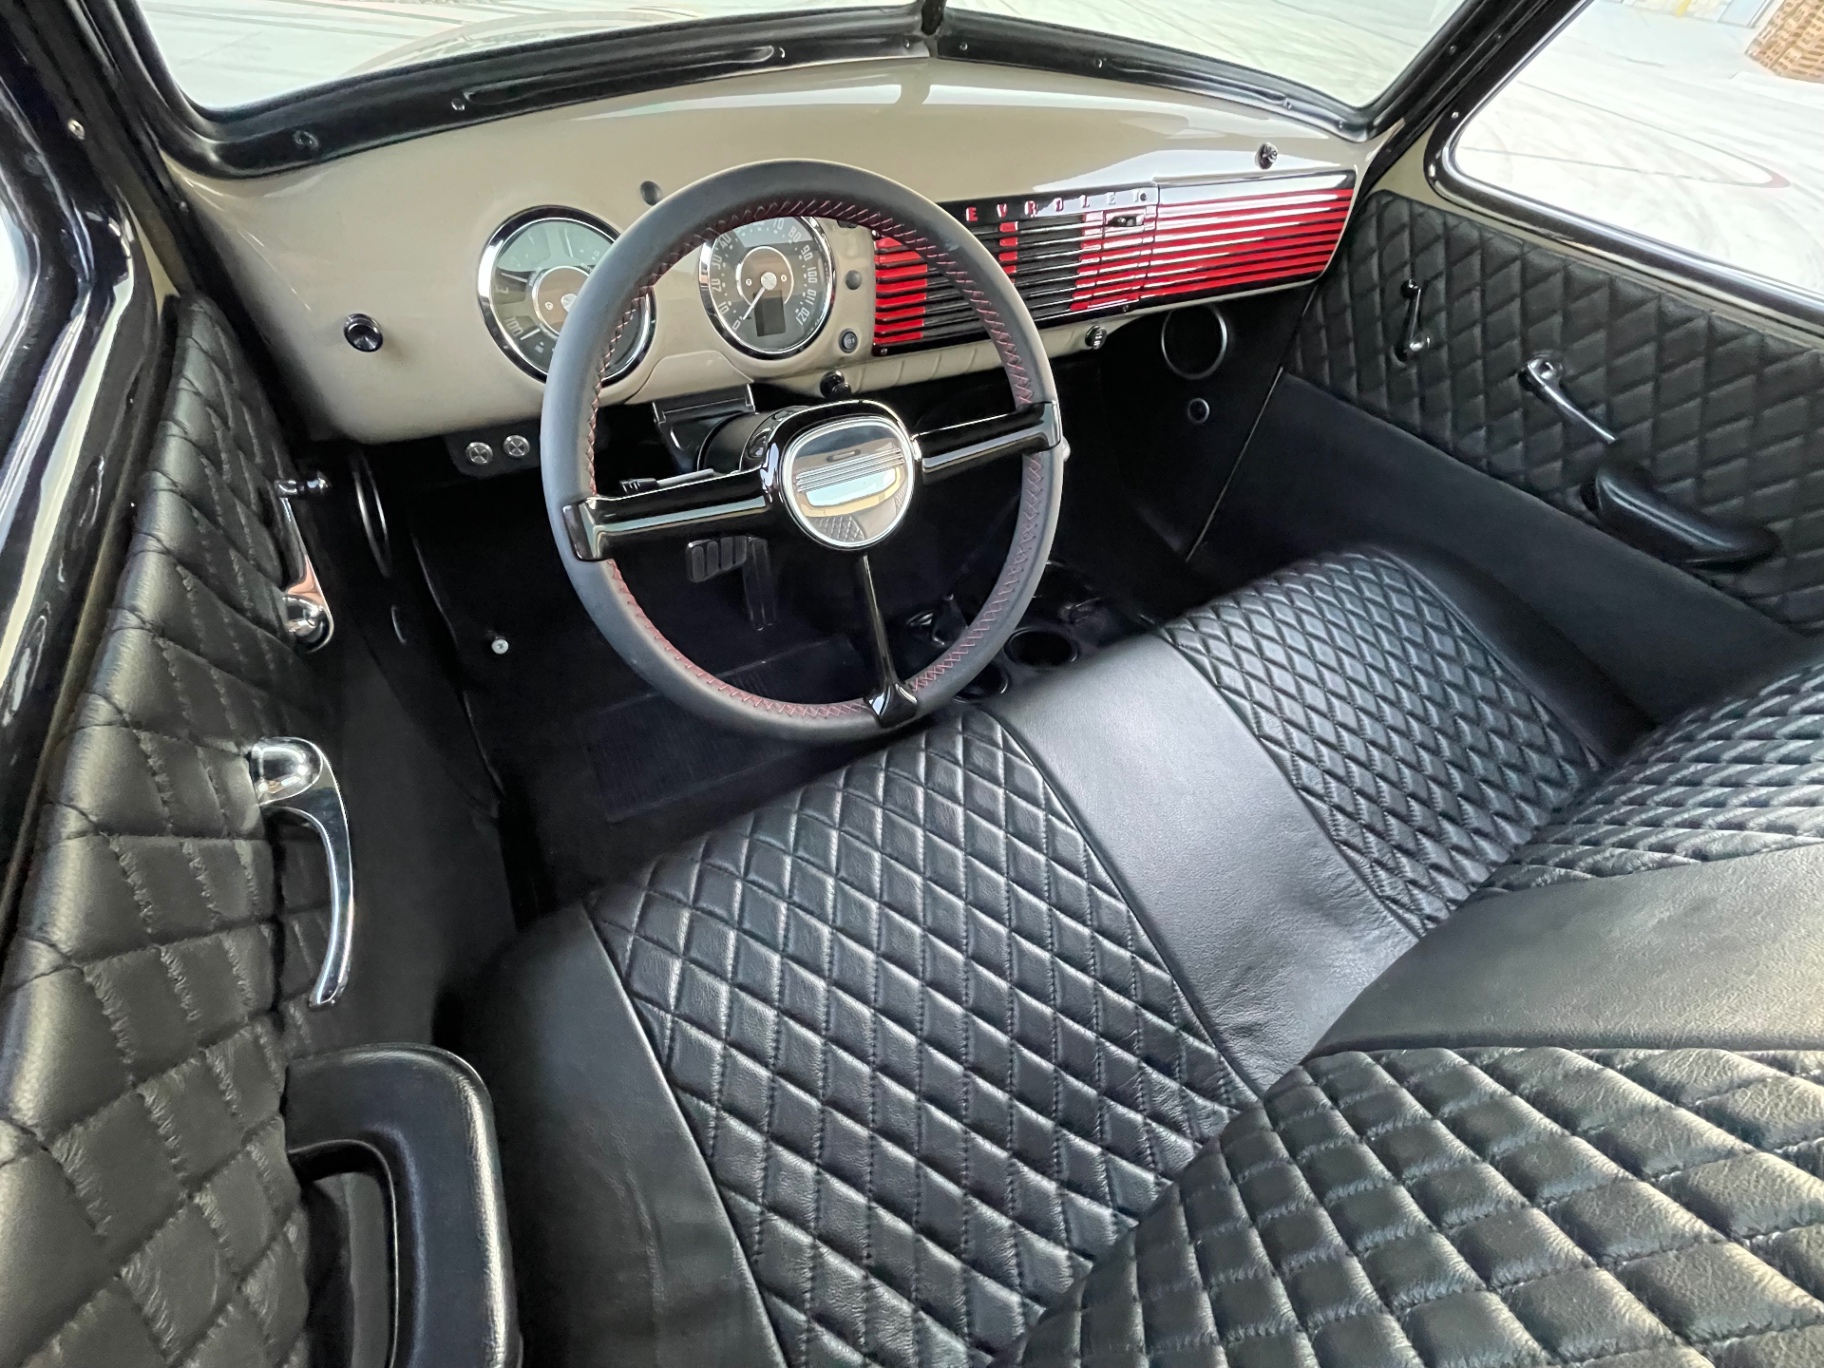
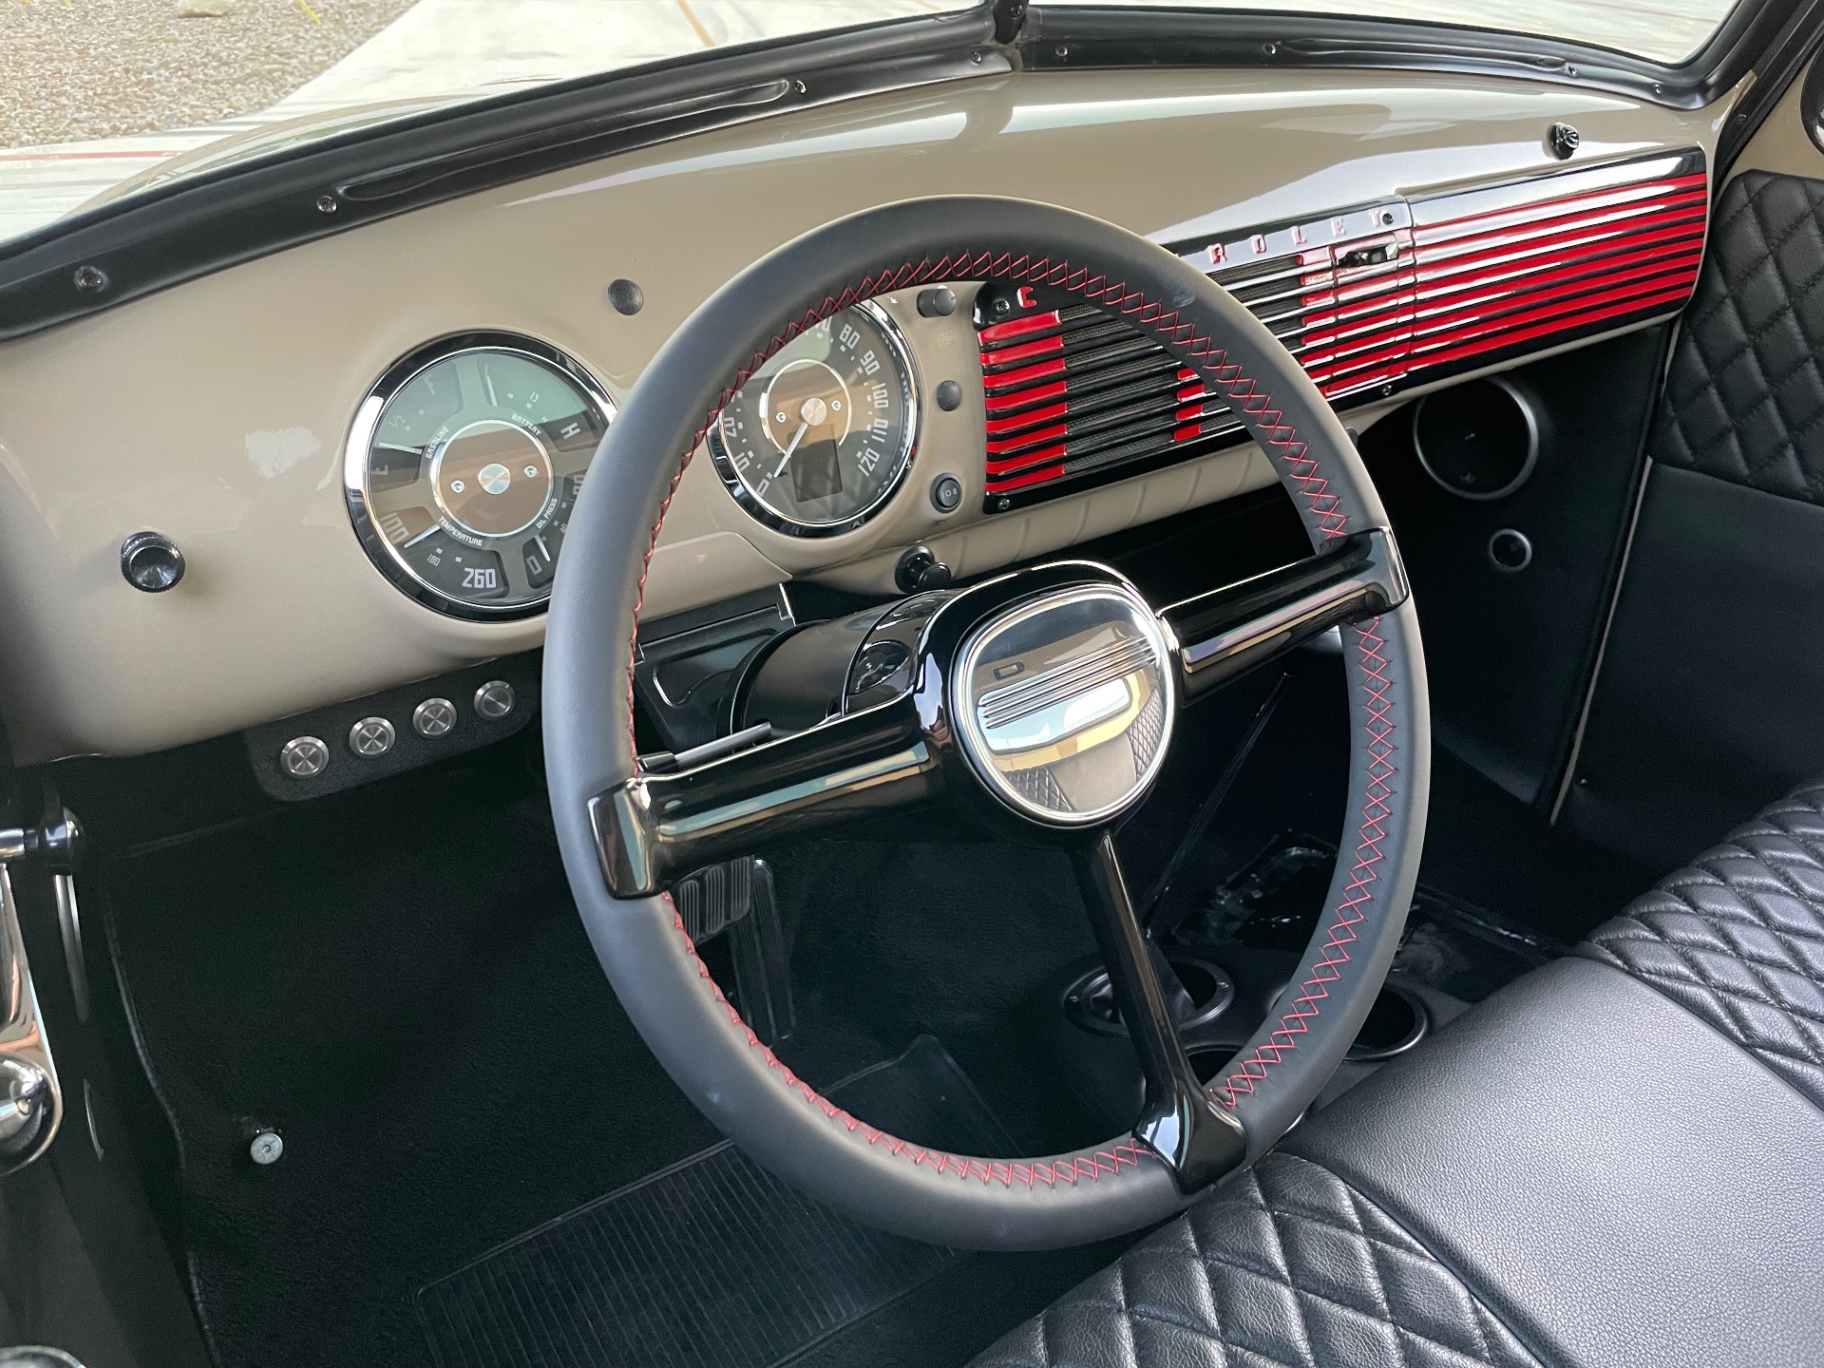
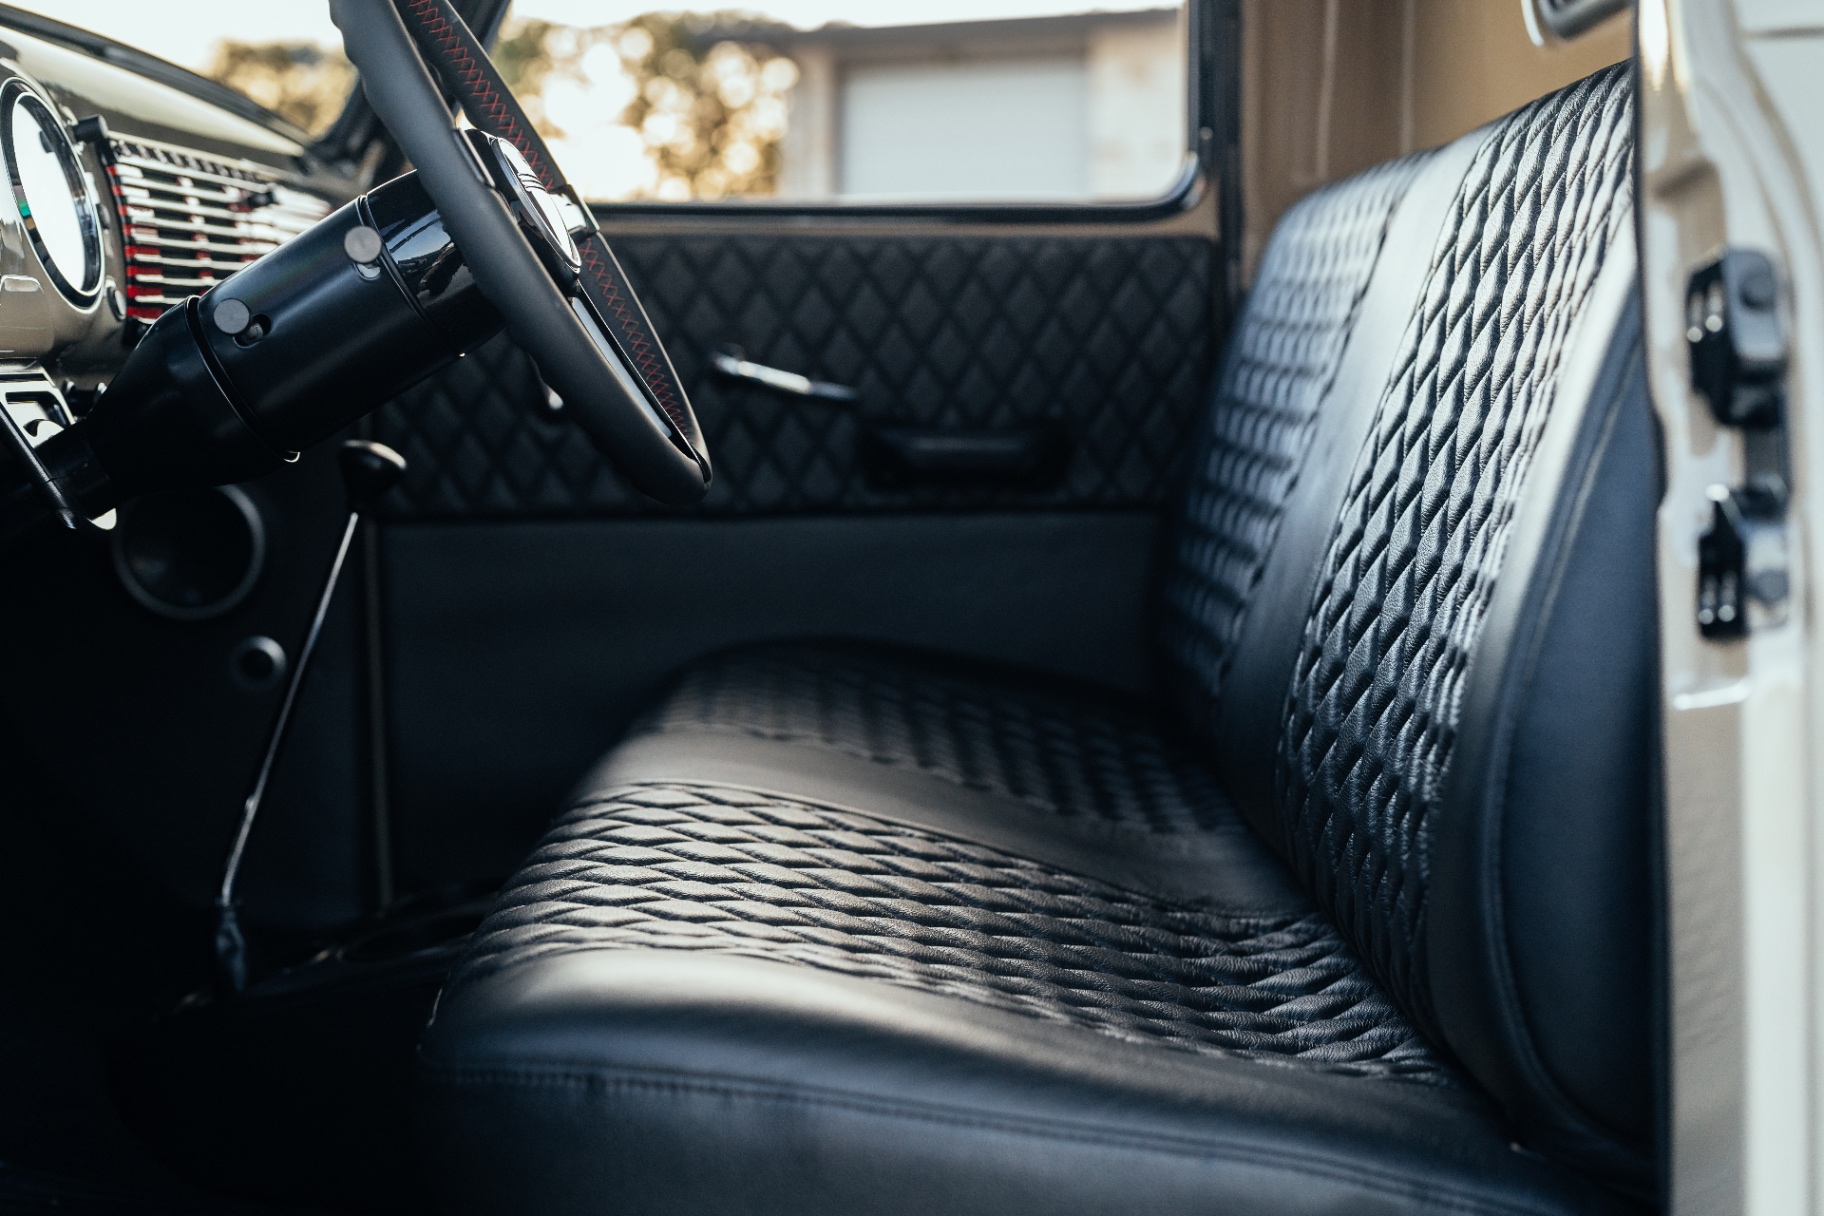
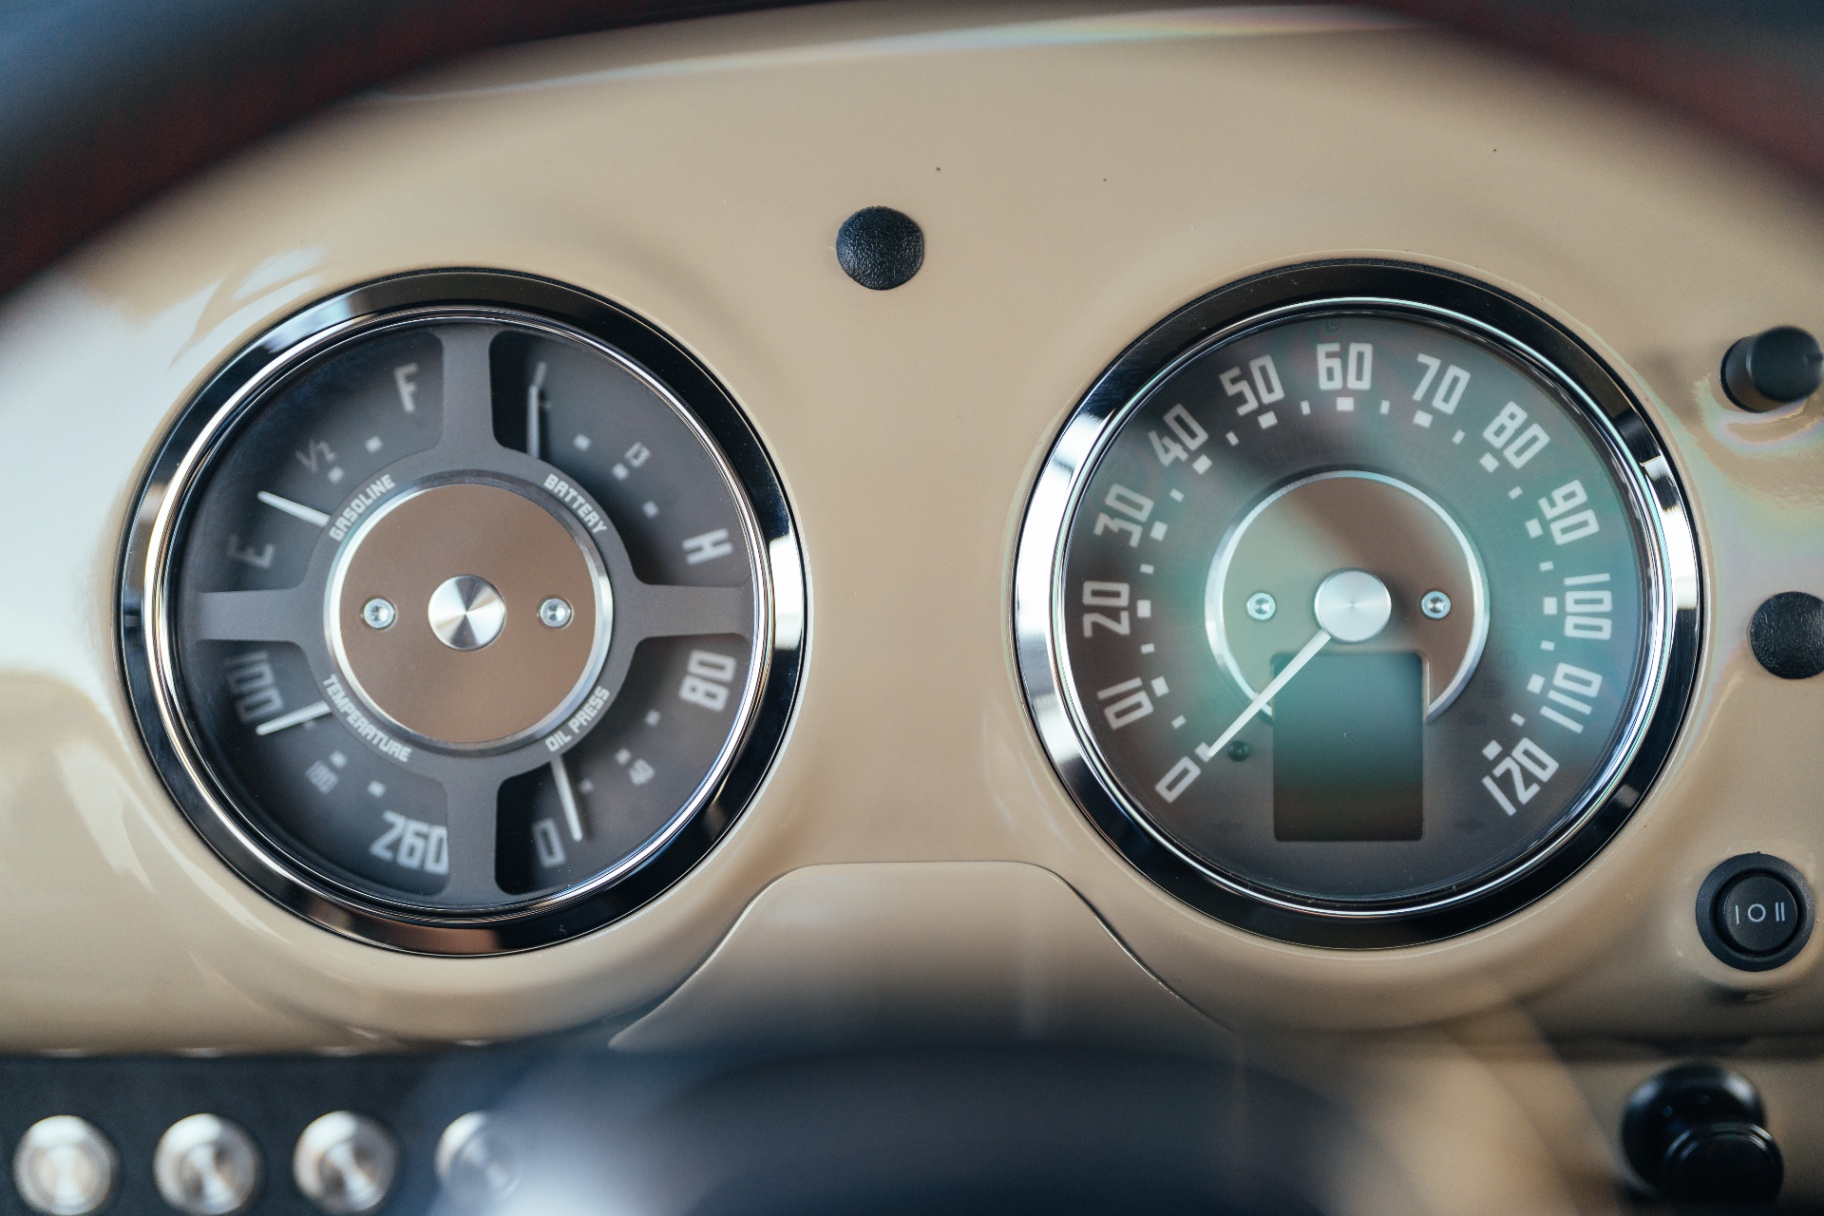
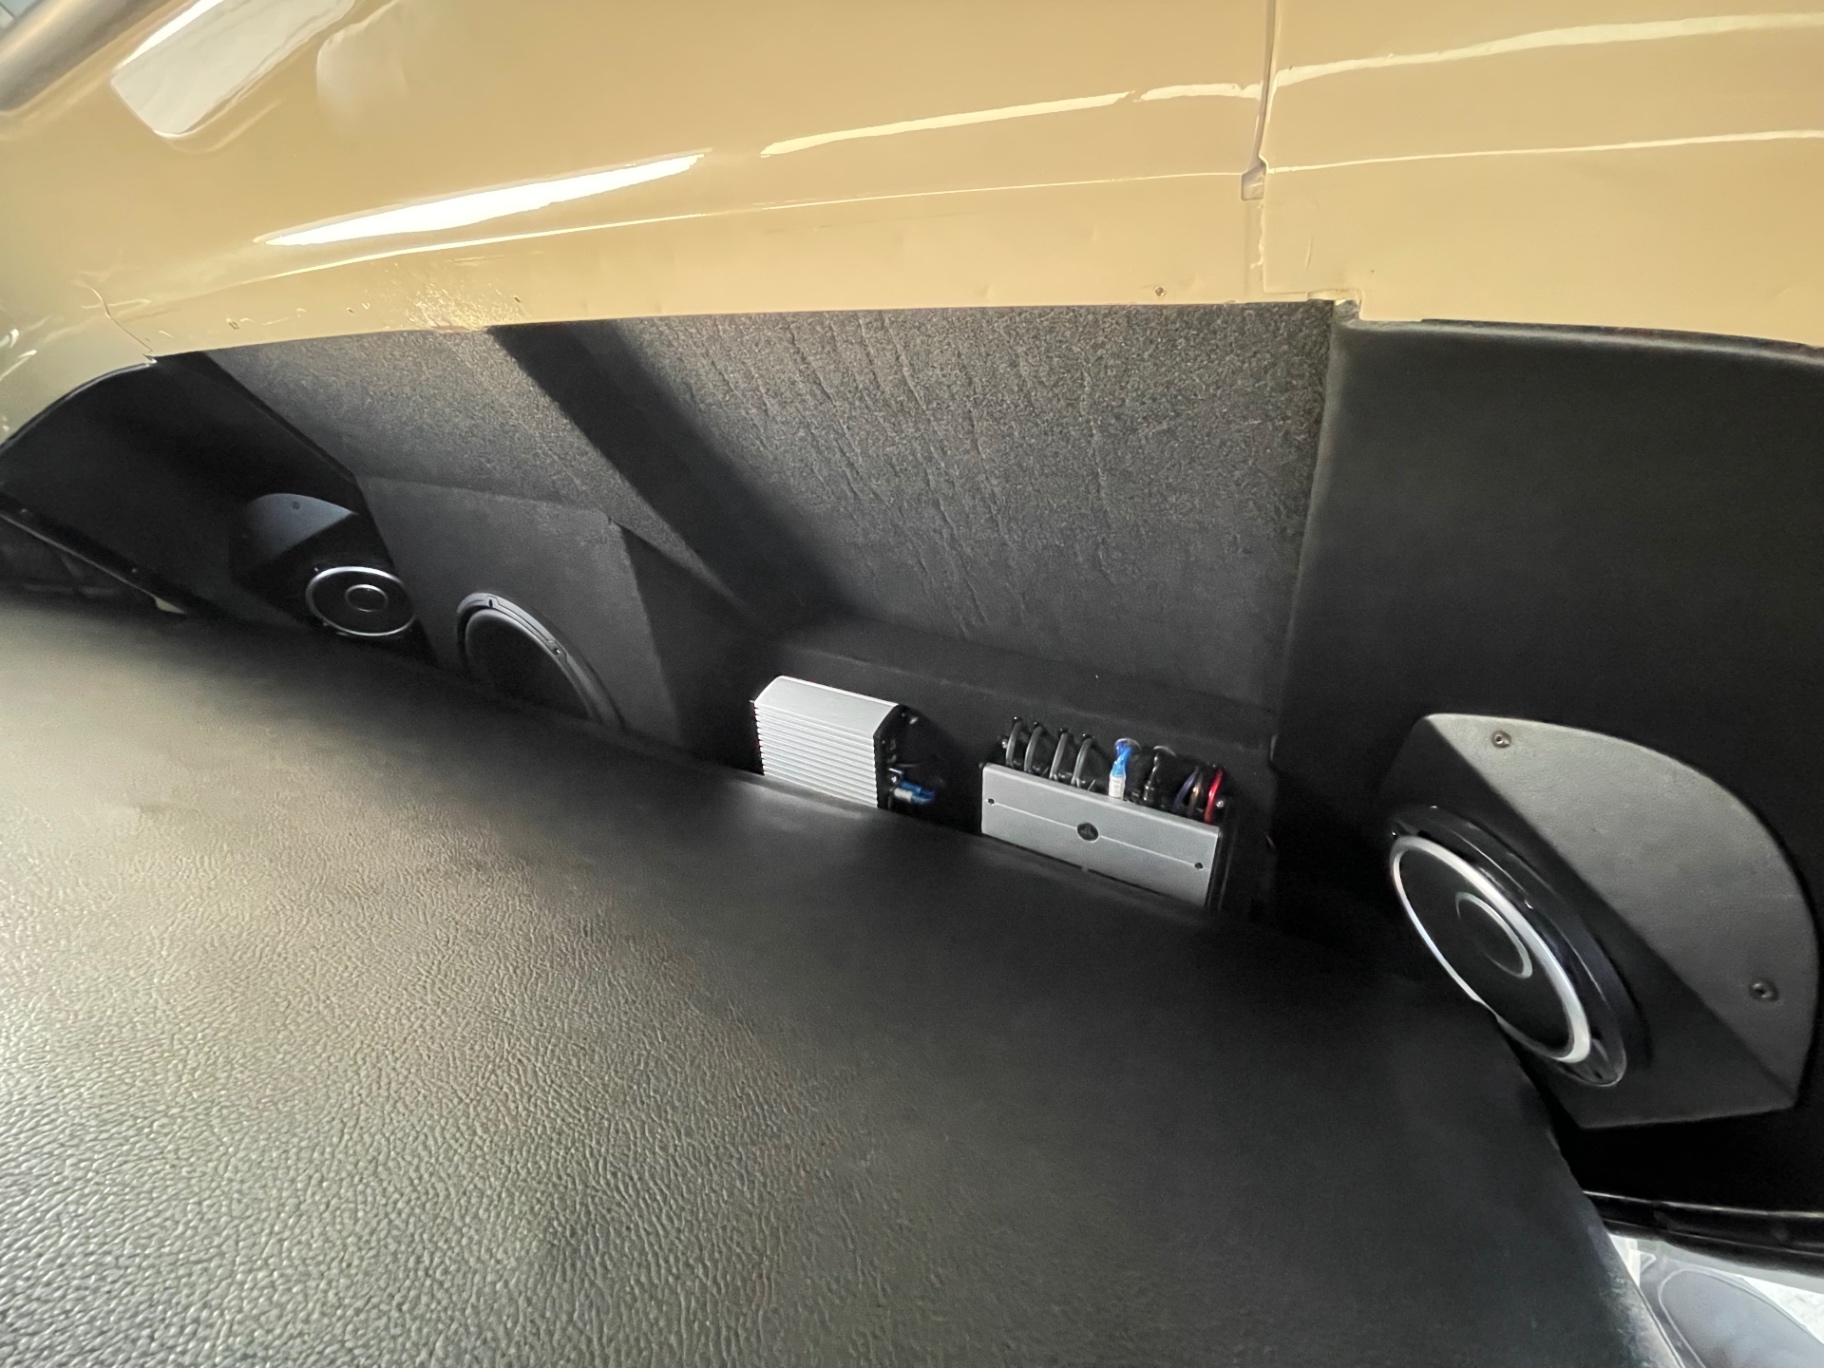
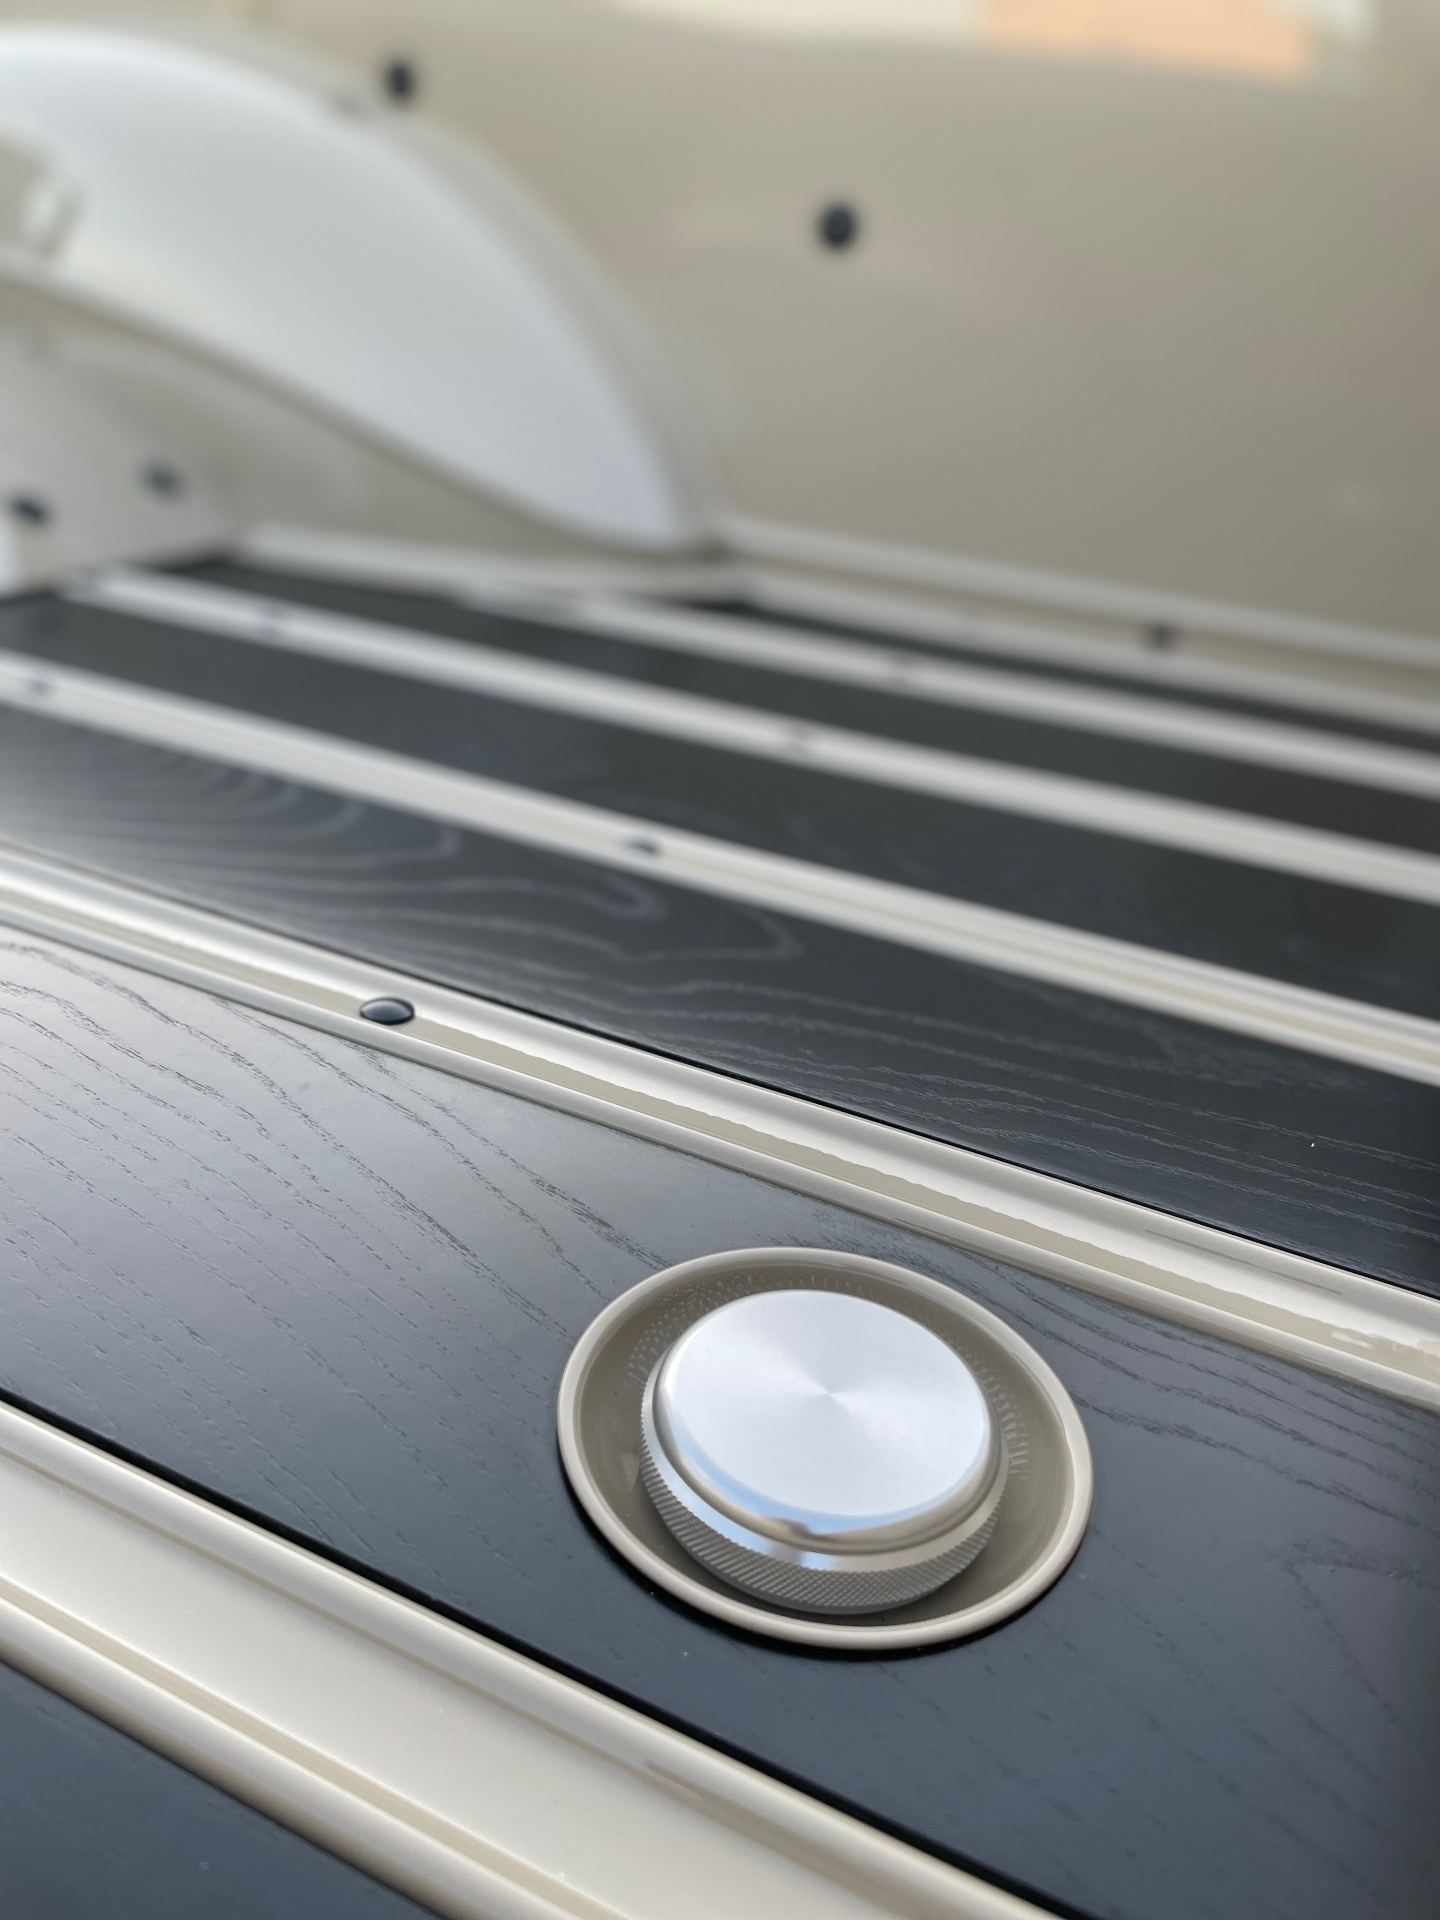
Phase 1 of the interior came together around a black diamond-stitched bench that came with the truck, plus phase 1 door panels and kick panels against the tan dash. Red pinstripe accents were pulled through the dash grille and matched to the stitching on the Sparc Industries Billet retro 3100 steering wheel. Dakota Digital RTX gauges sit behind an OE-style bezel, and JL Audio amps and speakers were mounted behind the seat and in the kick panels. The bed came out of assembly with painted strips over black wood planks and the polished center fuel filler. We later ended up redoing the door panels — this set is the first pass.

Cab overhead — diamond-stitched bench, black carpet, red dash grille peeking through the wheel.J054
Cab overhead — diamond-stitched bench, black carpet, red dash grille peeking through the wheel.
Driver seat view — Dakota Digital RTX gauges in the OE bezel, red-stitched Sparc Industries Billet wheel.J055
Driver seat view — Dakota Digital RTX gauges in the OE bezel, red-stitched Sparc Industries Billet wheel.
Bench and door panel — phase 1 diamond stitch, later revisited on the doors.J056
Bench and door panel — phase 1 diamond stitch, later revisited on the doors.
Dakota Digital RTX gauges — OE-look faces, digital brains behind the glass.J057
Dakota Digital RTX gauges — OE-look faces, digital brains behind the glass.
Behind-the-seat audio — JL Audio amps and speakers tucked out of sight, with more in the kick panels.J058
Behind-the-seat audio — JL Audio amps and speakers tucked out of sight, with more in the kick panels.
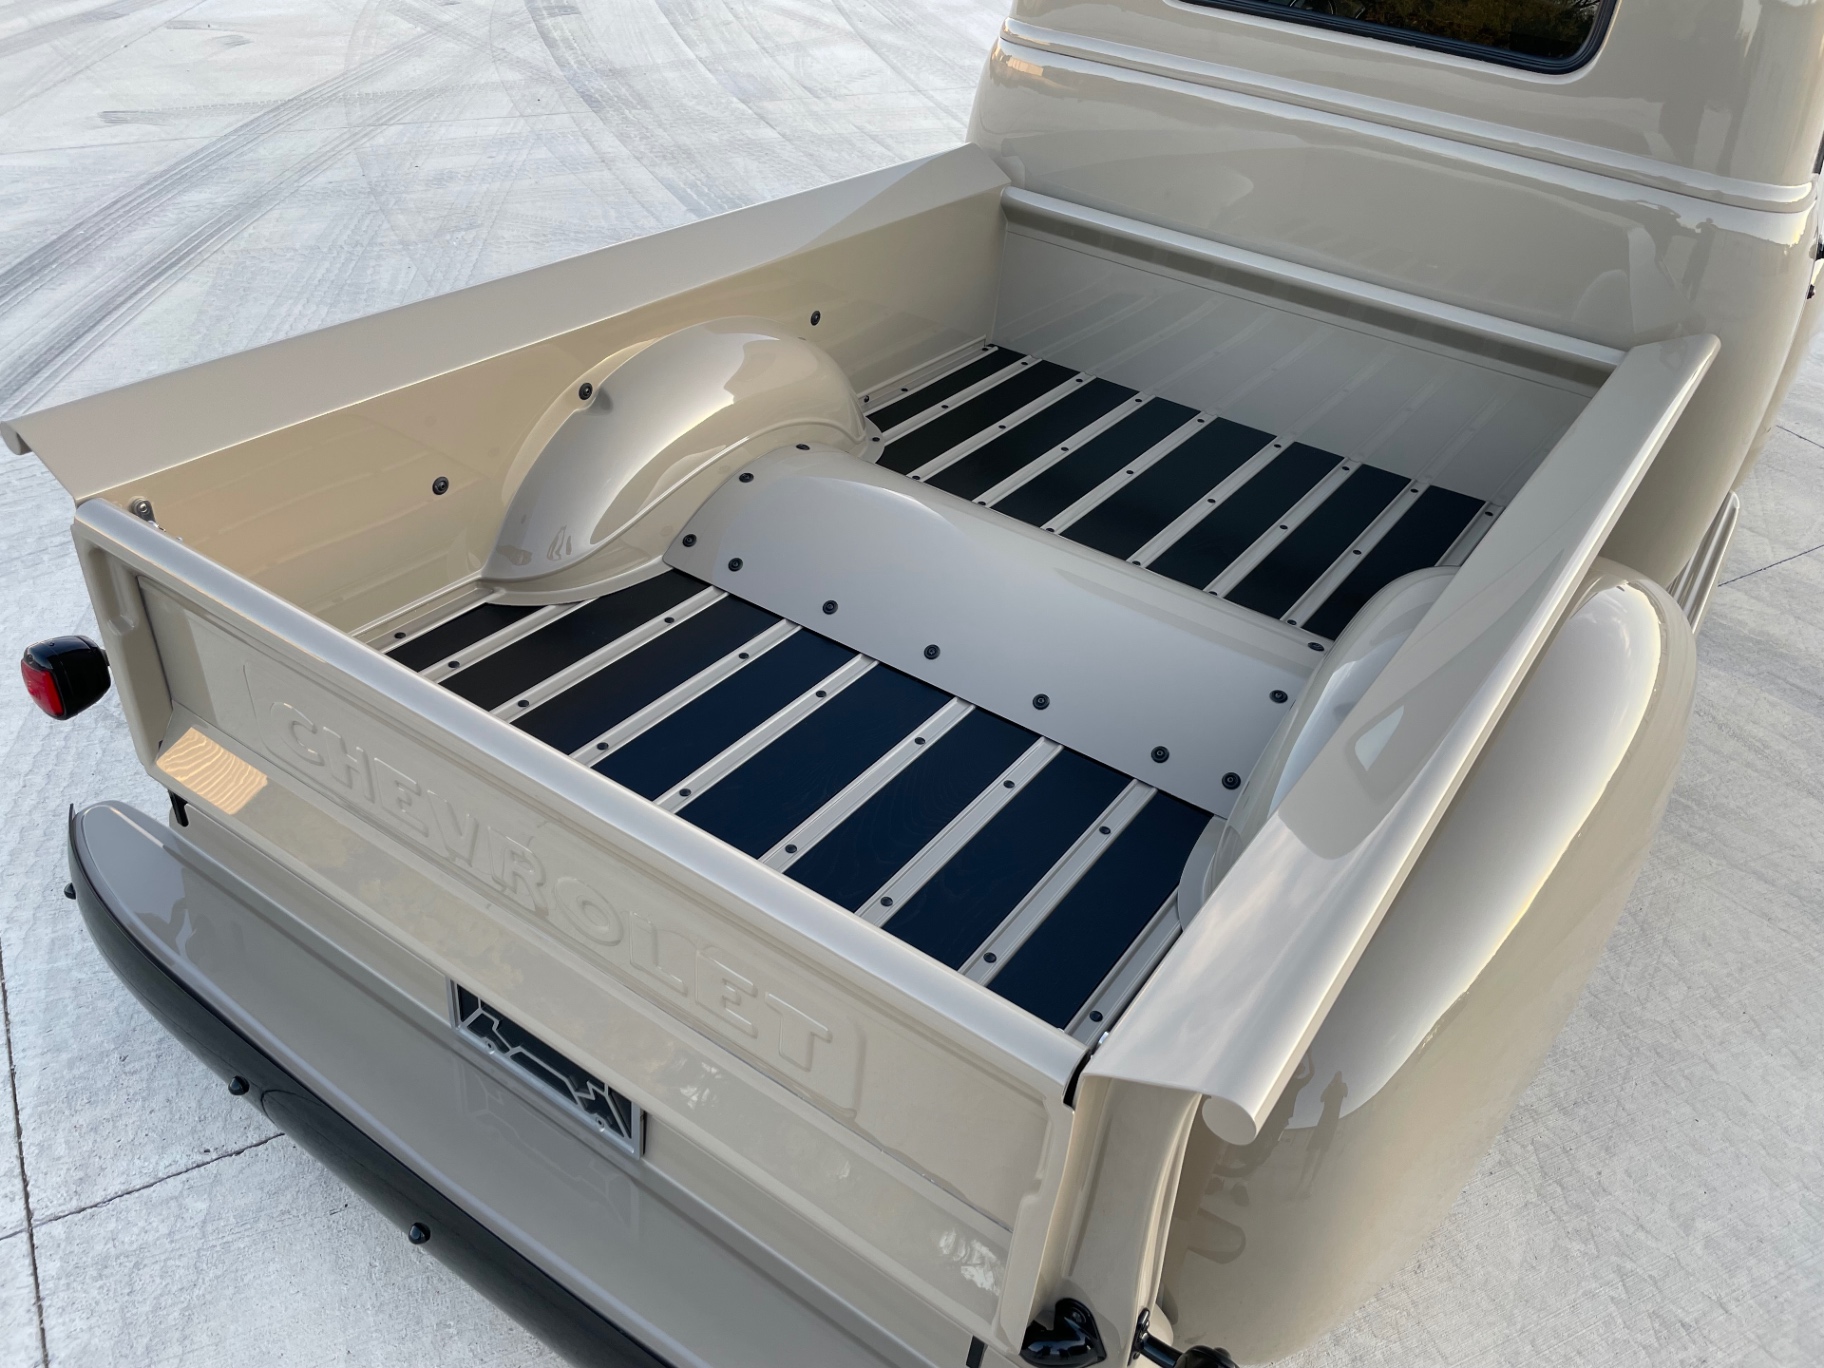
Bed assembled — painted strips over black wood planks, Bel Air tubs in body color, stainless latches on the tailgate.J059
Bed assembled — painted strips over black wood planks, Bel Air tubs in body color, stainless latches on the tailgate.
Bed floor overhead — symmetrical strips, tubs, and center driveshaft cover, polished fuel filler at the rear.J060
Bed floor overhead — symmetrical strips, tubs, and center driveshaft cover, polished fuel filler at the rear.
Bed floor detail — polished billet fuel filler flush with the black wood plank.J061
Bed floor detail — polished billet fuel filler flush with the black wood plank.

UPDATE 01 / 08

Jun 15, 2024

INTERIOR MILESTONE

Interior phase 2 — hand-built thin door panels, leather and magnets

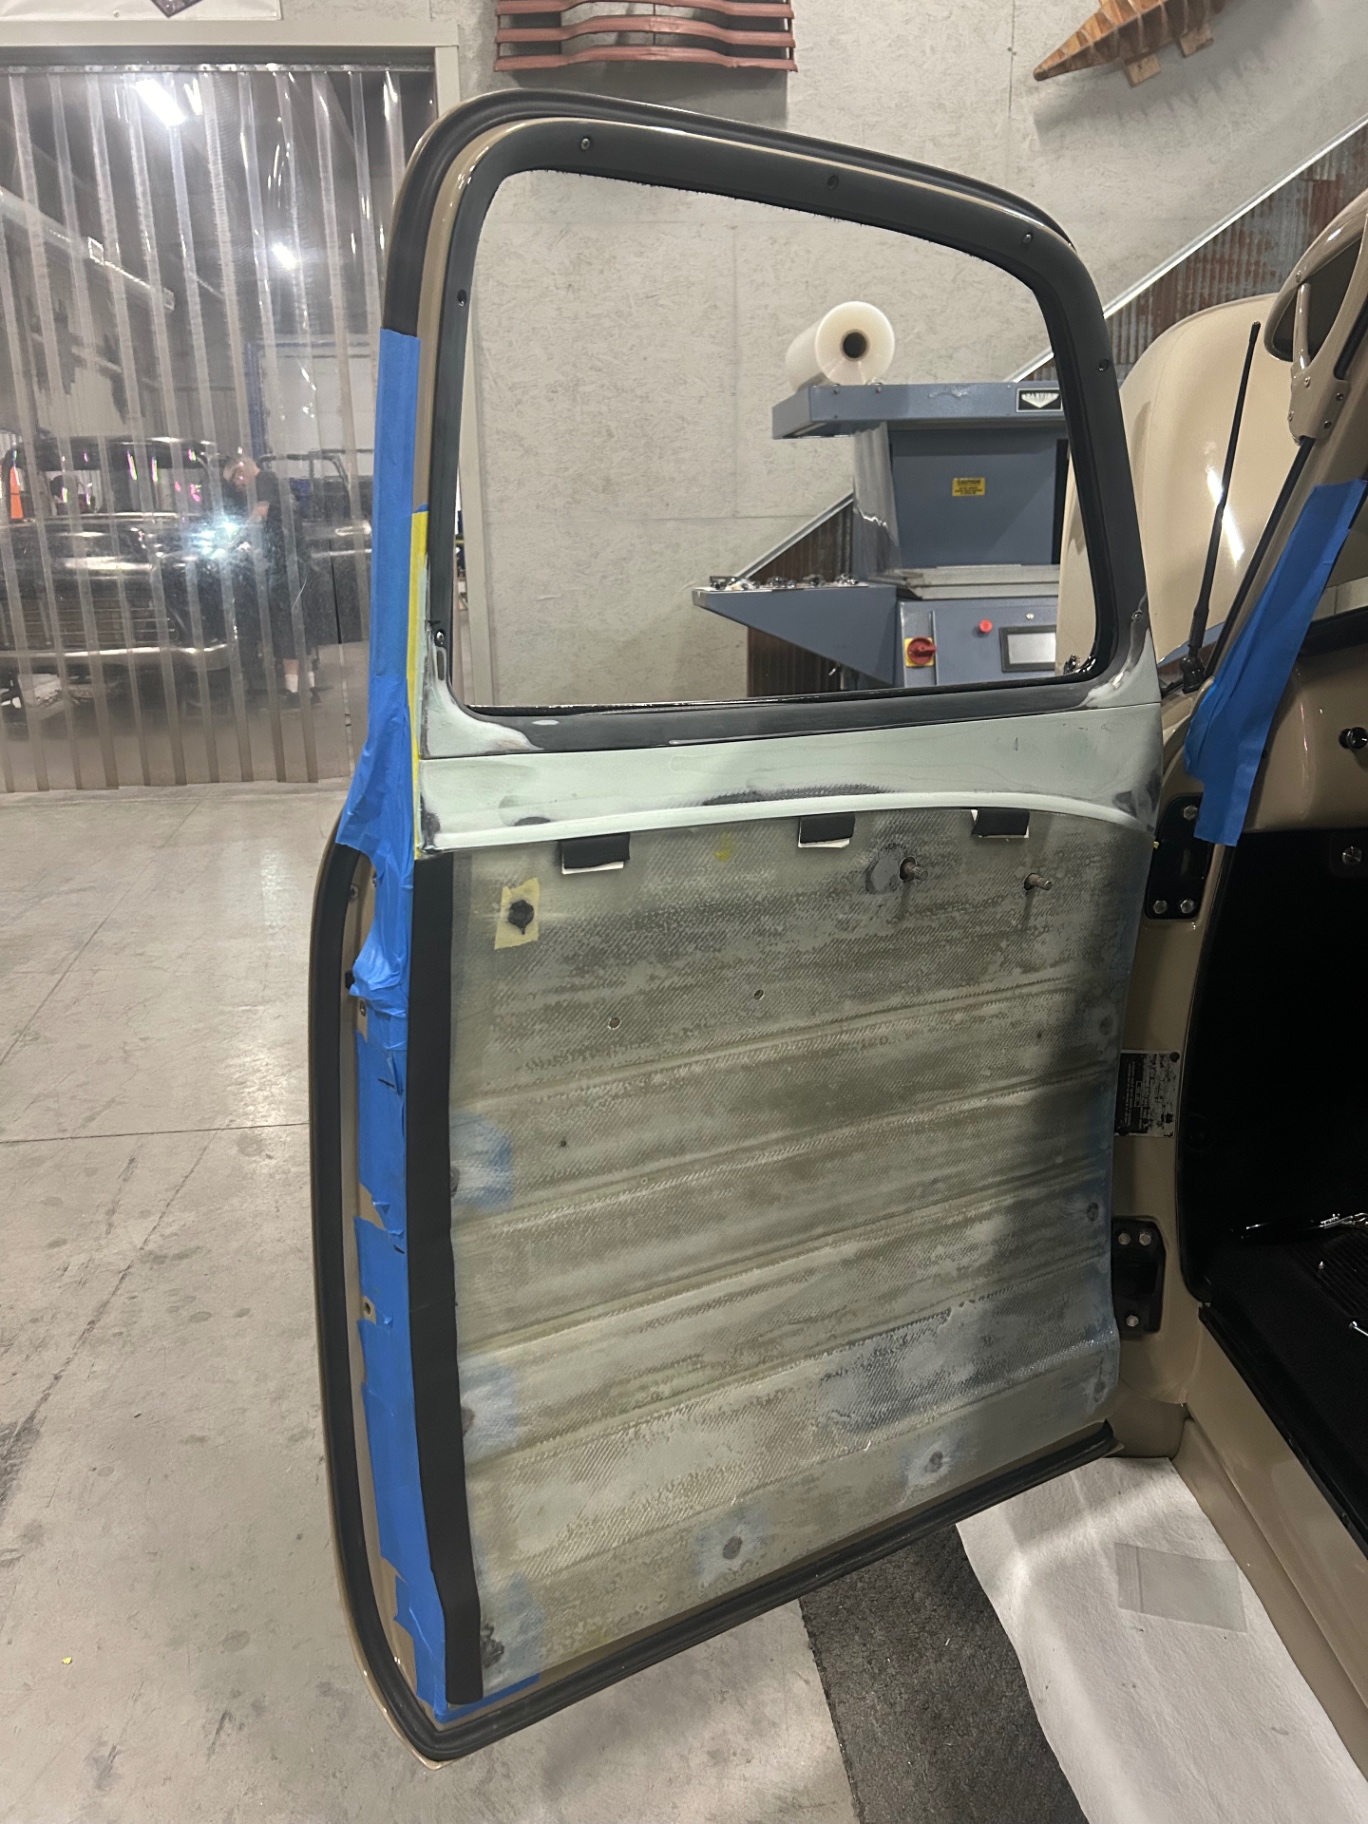
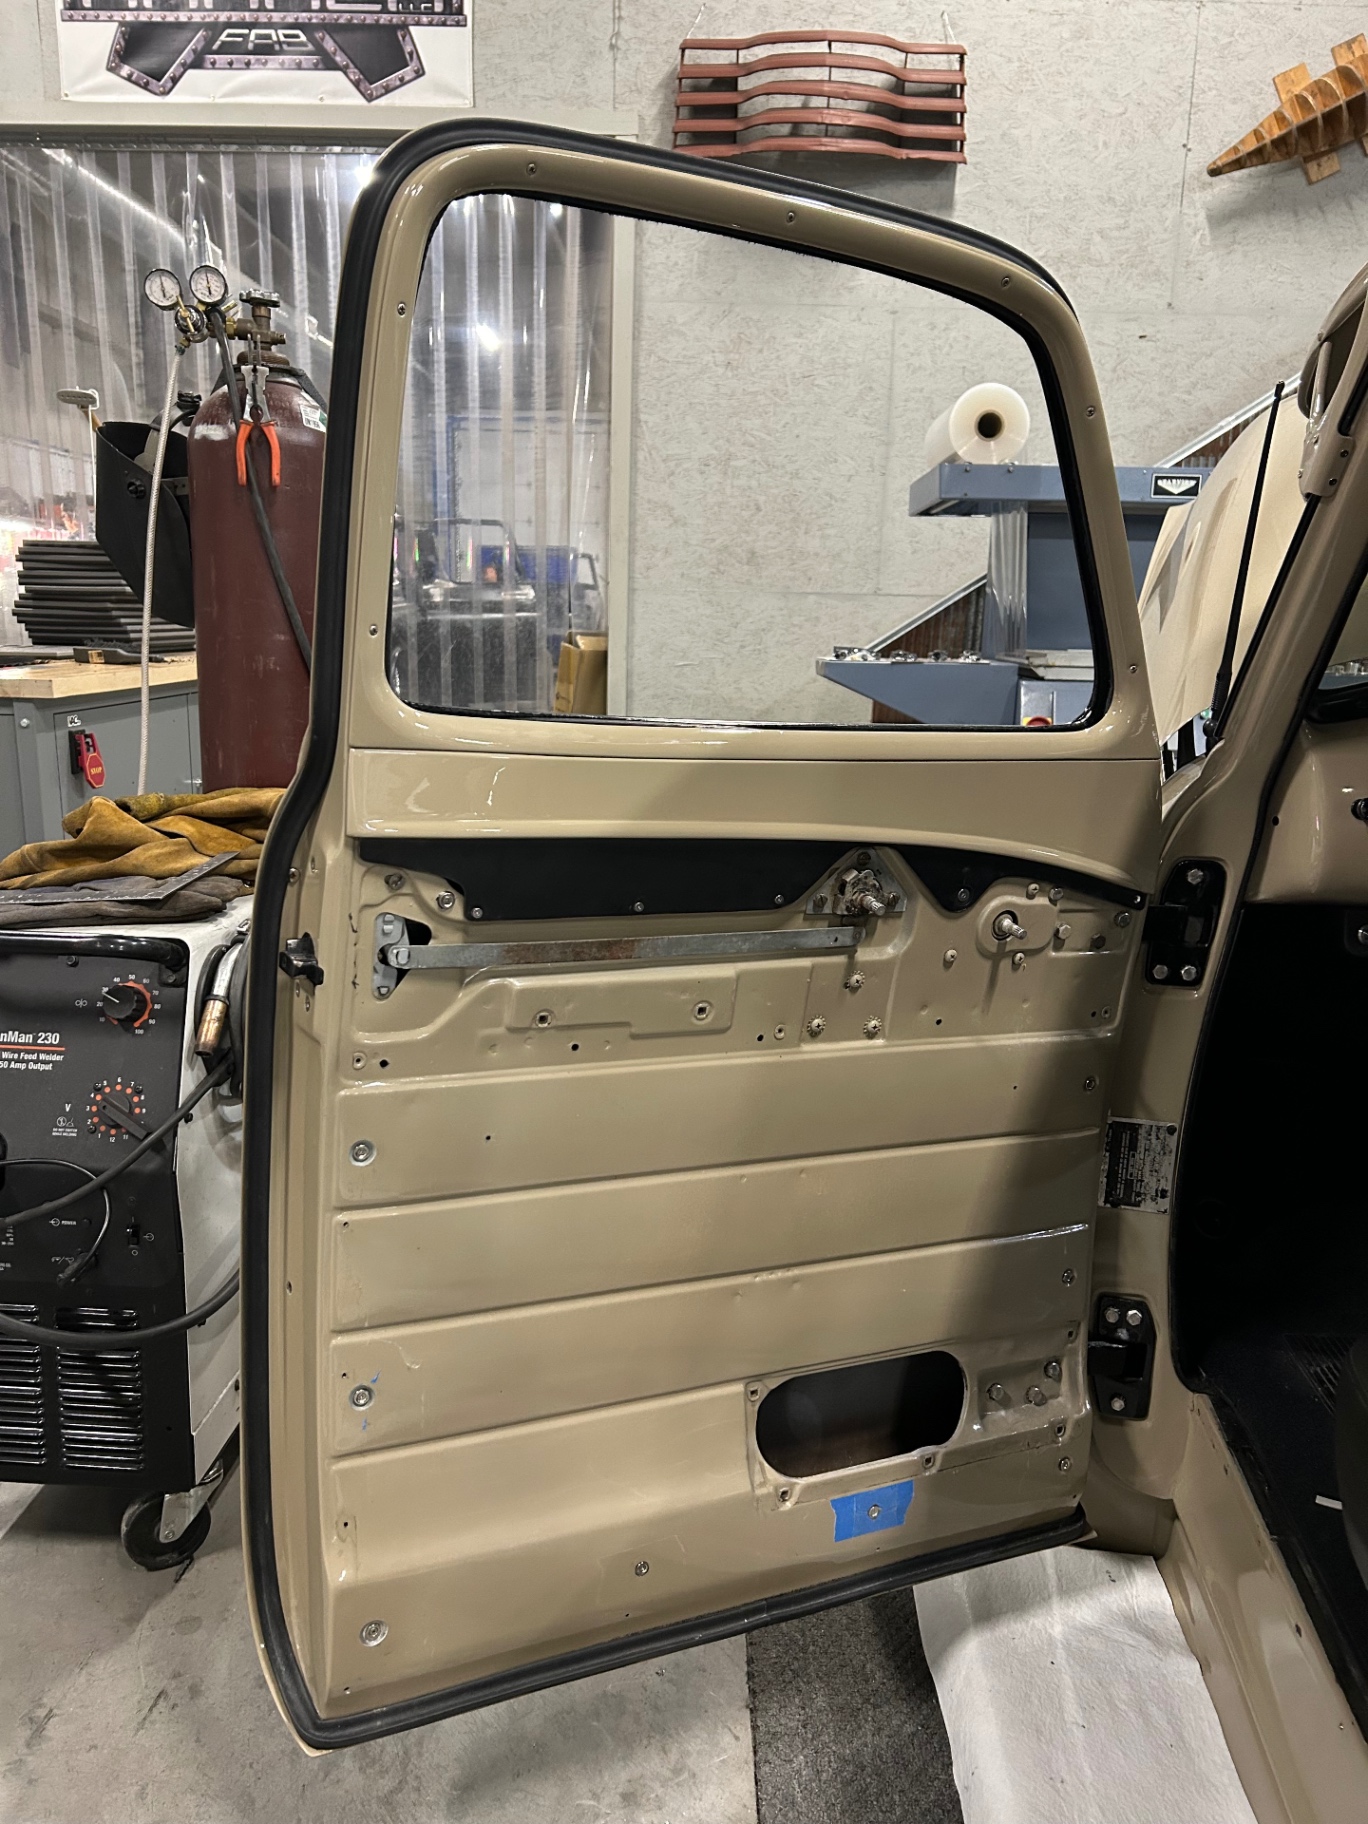
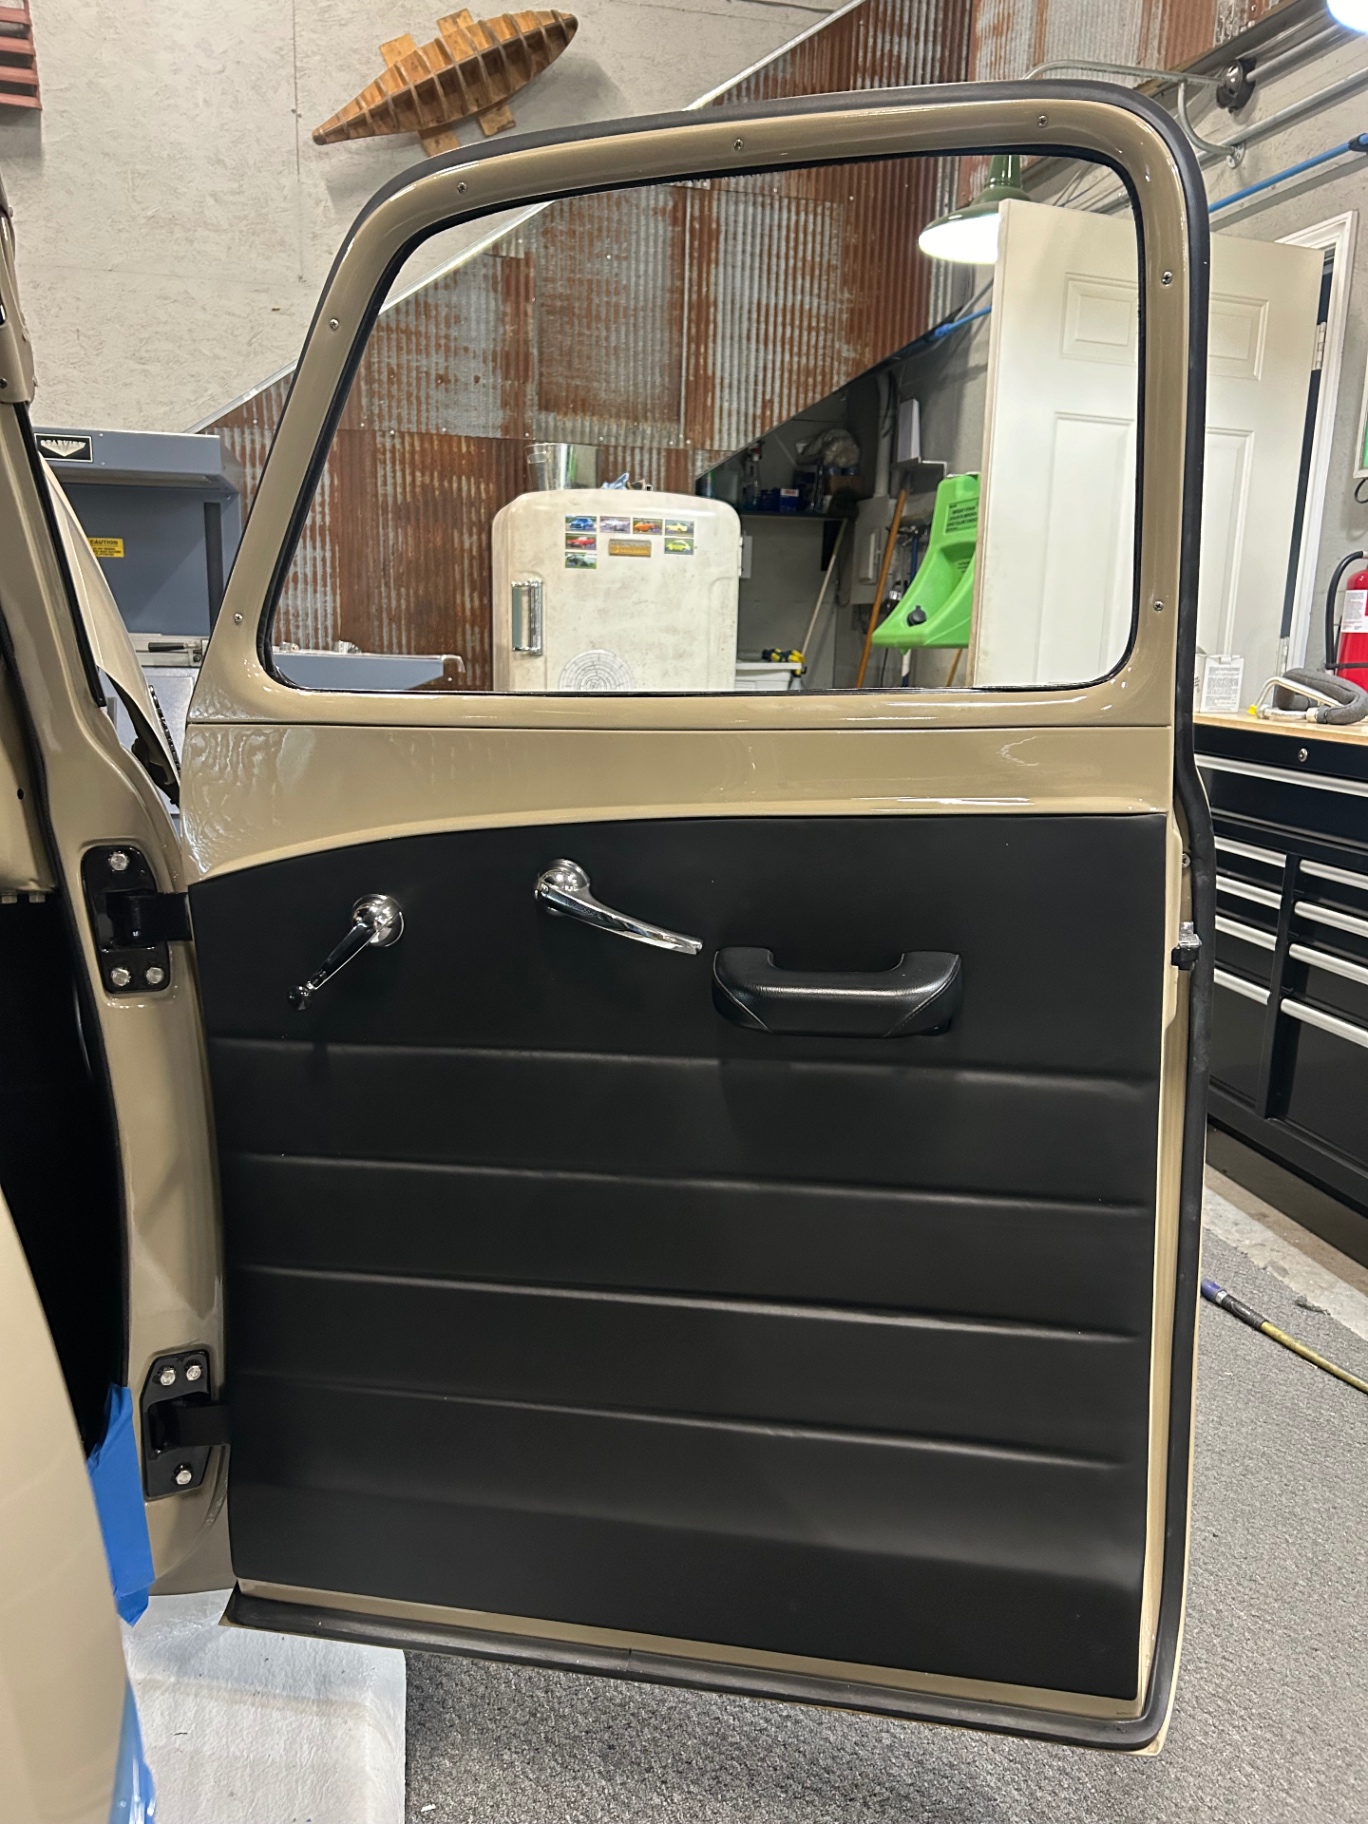
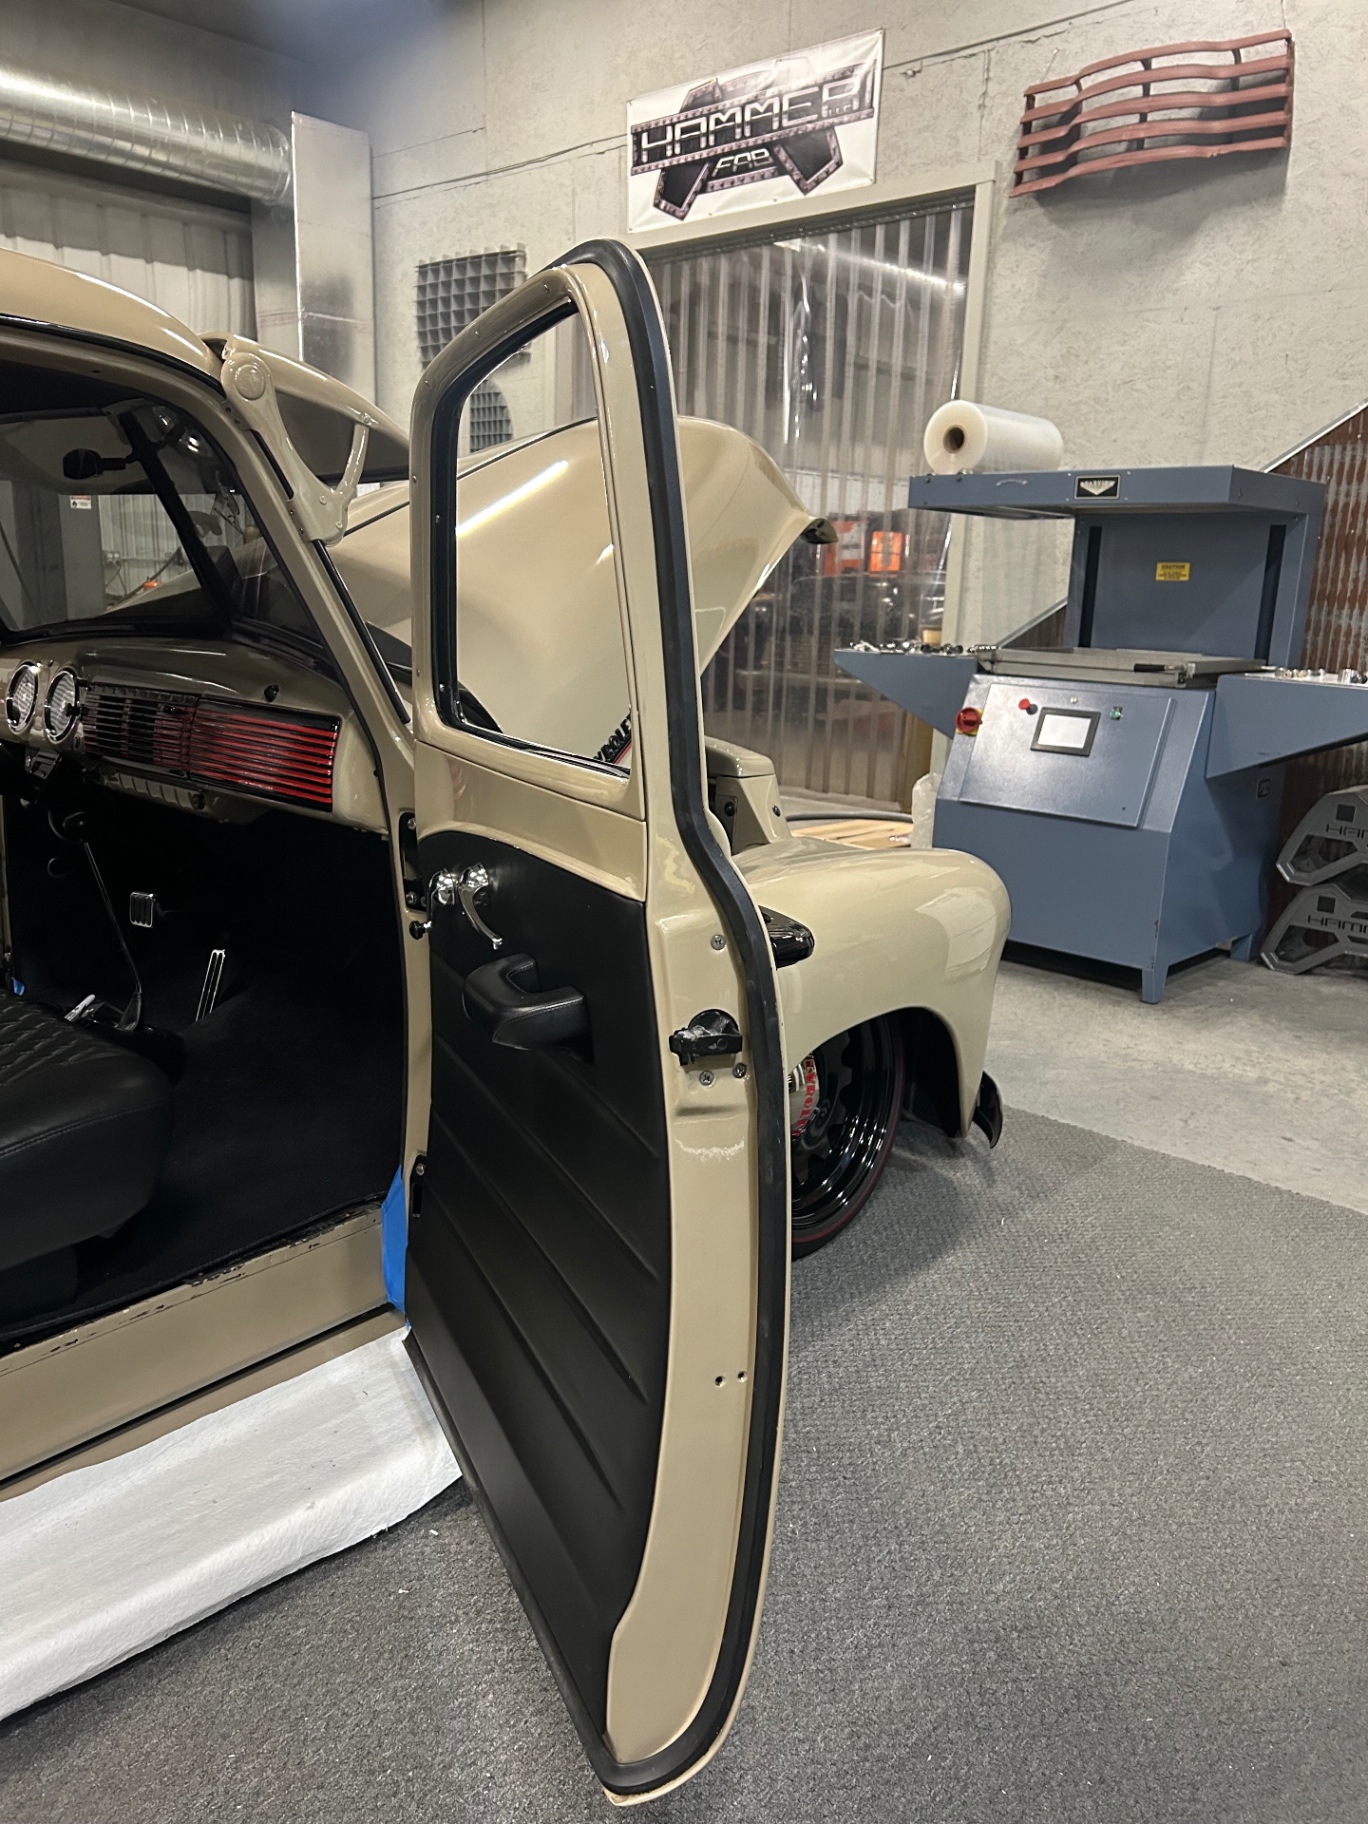
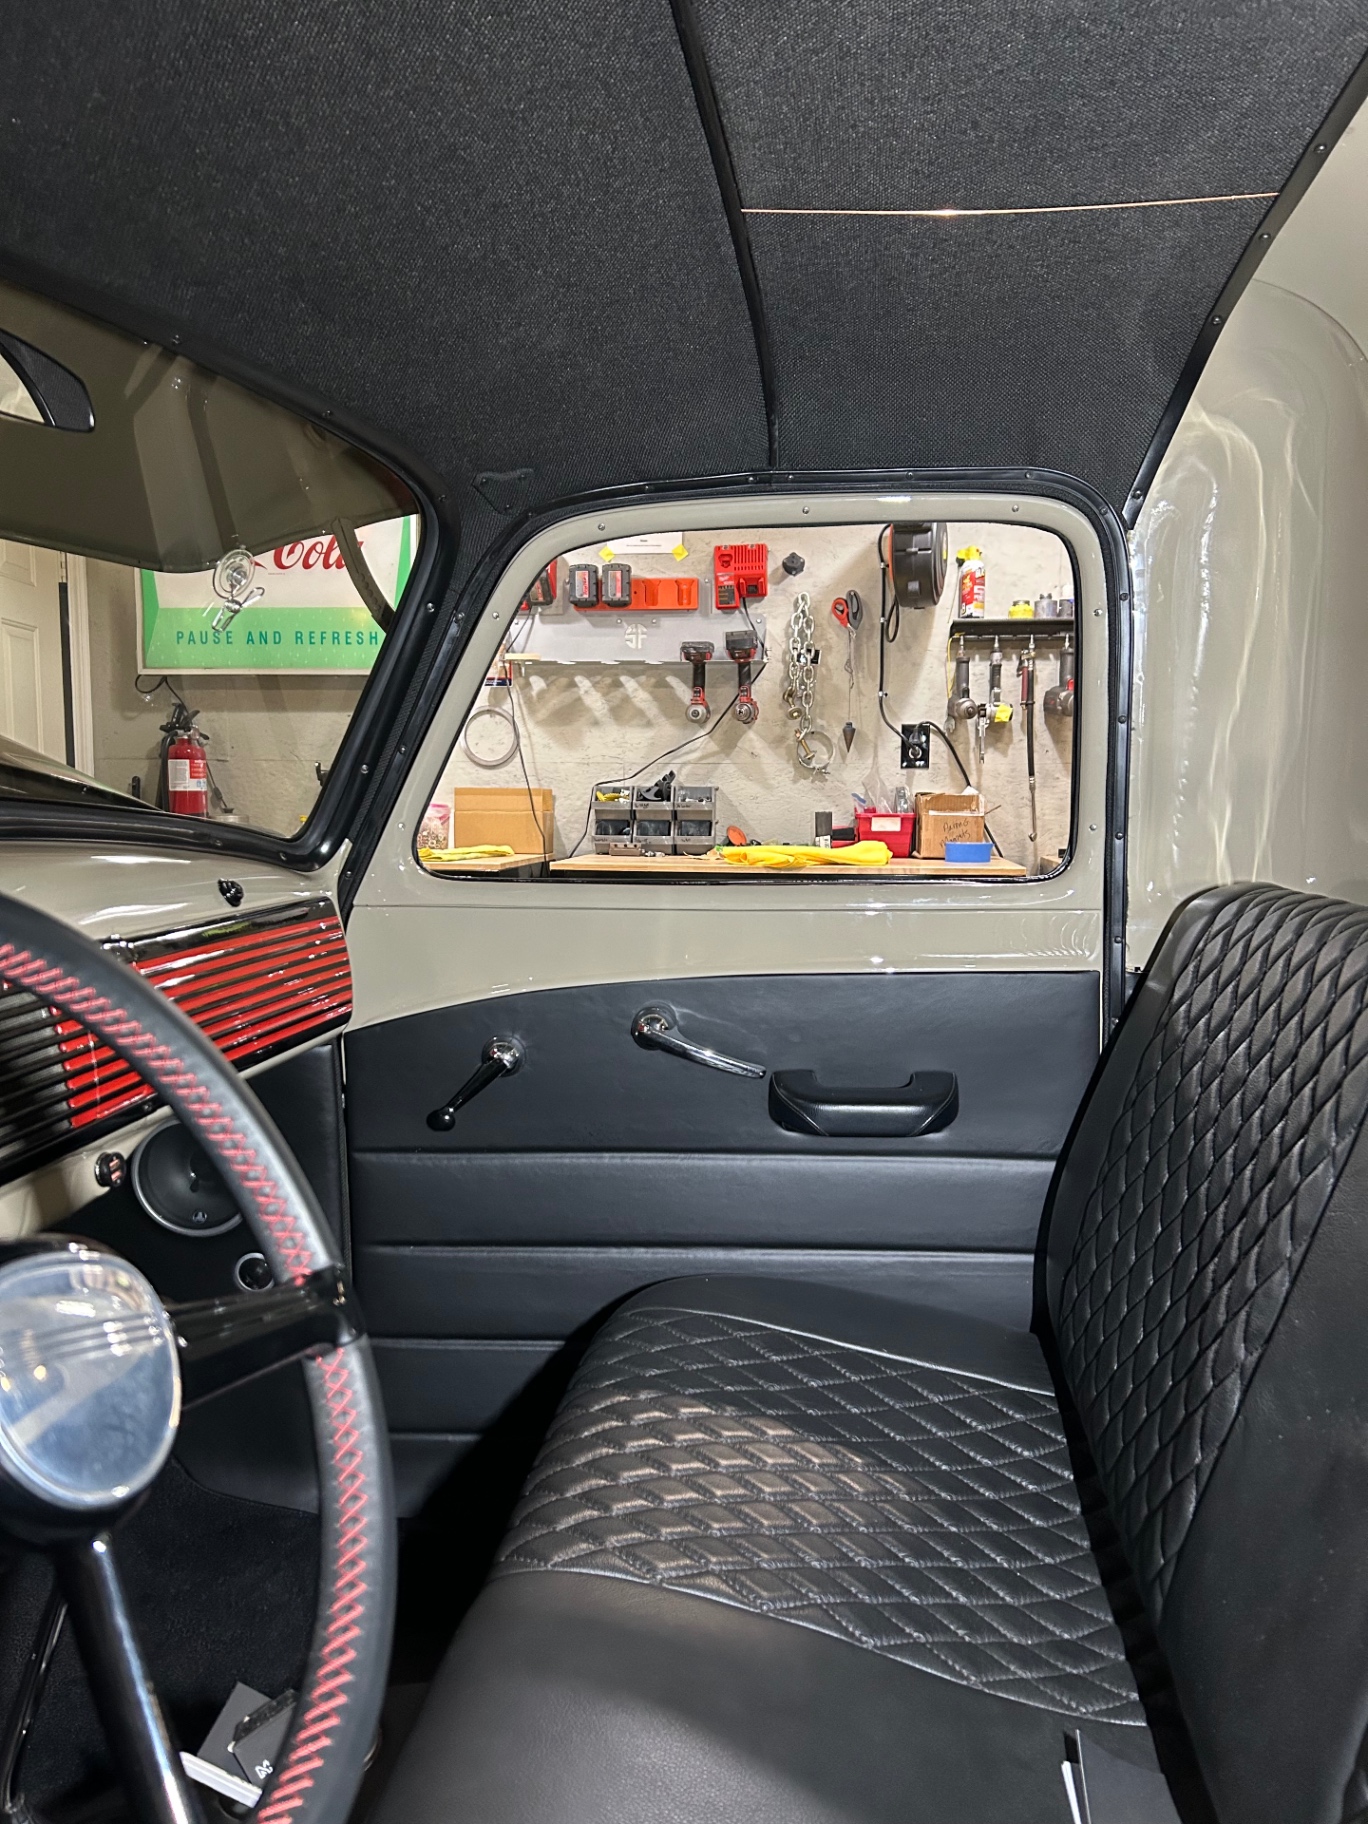
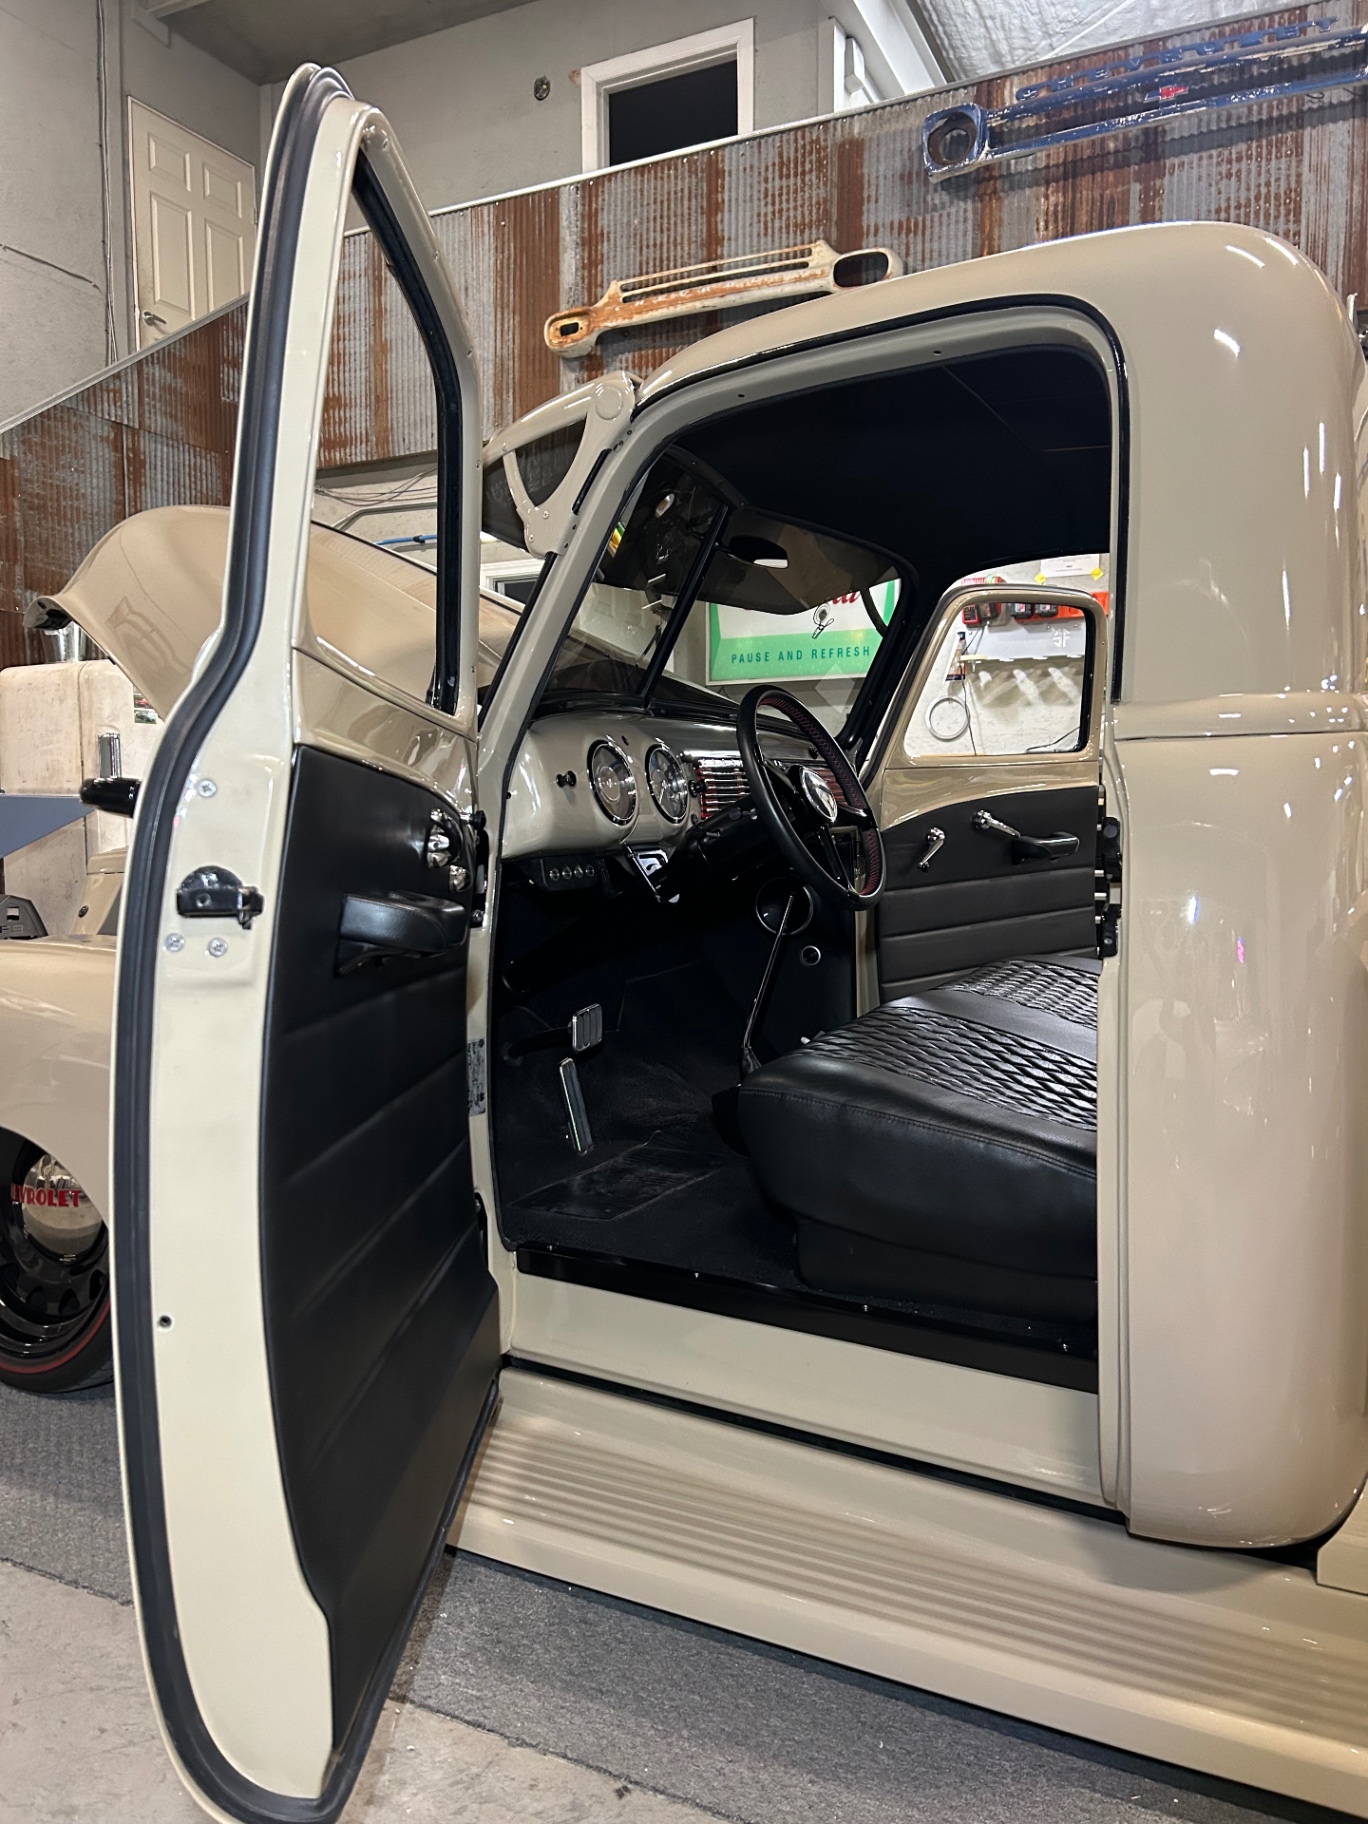
Phase 2: we redid the door panels from scratch. The upper section is fabricated in metal, form-fit to the door, and the lower section is hand-laid fiberglass shaped to the door's contour. Building them this way lets us keep razor-thin edges — anyone can bolt on a thick, bulky panel; keeping them thin and light takes real fabrication. Both halves are wrapped in black leather and attach with hidden magnets, so nothing breaks up the surface. The result is a cleaner, tighter cab that reads as one continuous shape from the painted upper into the leather lower.
Cab with new panels open — thin edges, painted upper flowing into leather lower, diamond bench behind.J062
Cab with new panels open — thin edges, painted upper flowing into leather lower, diamond bench behind.
Bare door shell in the shop — starting point before fabricating the new metal upper.J063
Bare door shell in the shop — starting point before fabricating the new metal upper.
Inner door structure exposed — window regulator and mounts, ready for the fabricated panel.J064
Inner door structure exposed — window regulator and mounts, ready for the fabricated panel.
New panel installed — metal upper painted body color, fiberglass lower wrapped in black leather.J065
New panel installed — metal upper painted body color, fiberglass lower wrapped in black leather.
Door open on the truck — panel edges sit tight to the sheet metal, no bulk.J066
Door open on the truck — panel edges sit tight to the sheet metal, no bulk.
Passenger panel — form-fit lower hugs the door contour, magnets hold it flush.J067
Passenger panel — form-fit lower hugs the door contour, magnets hold it flush.
Passenger door from the cab side — clean two-tone break, thin edges all the way around.J068
Passenger door from the cab side — clean two-tone break, thin edges all the way around.
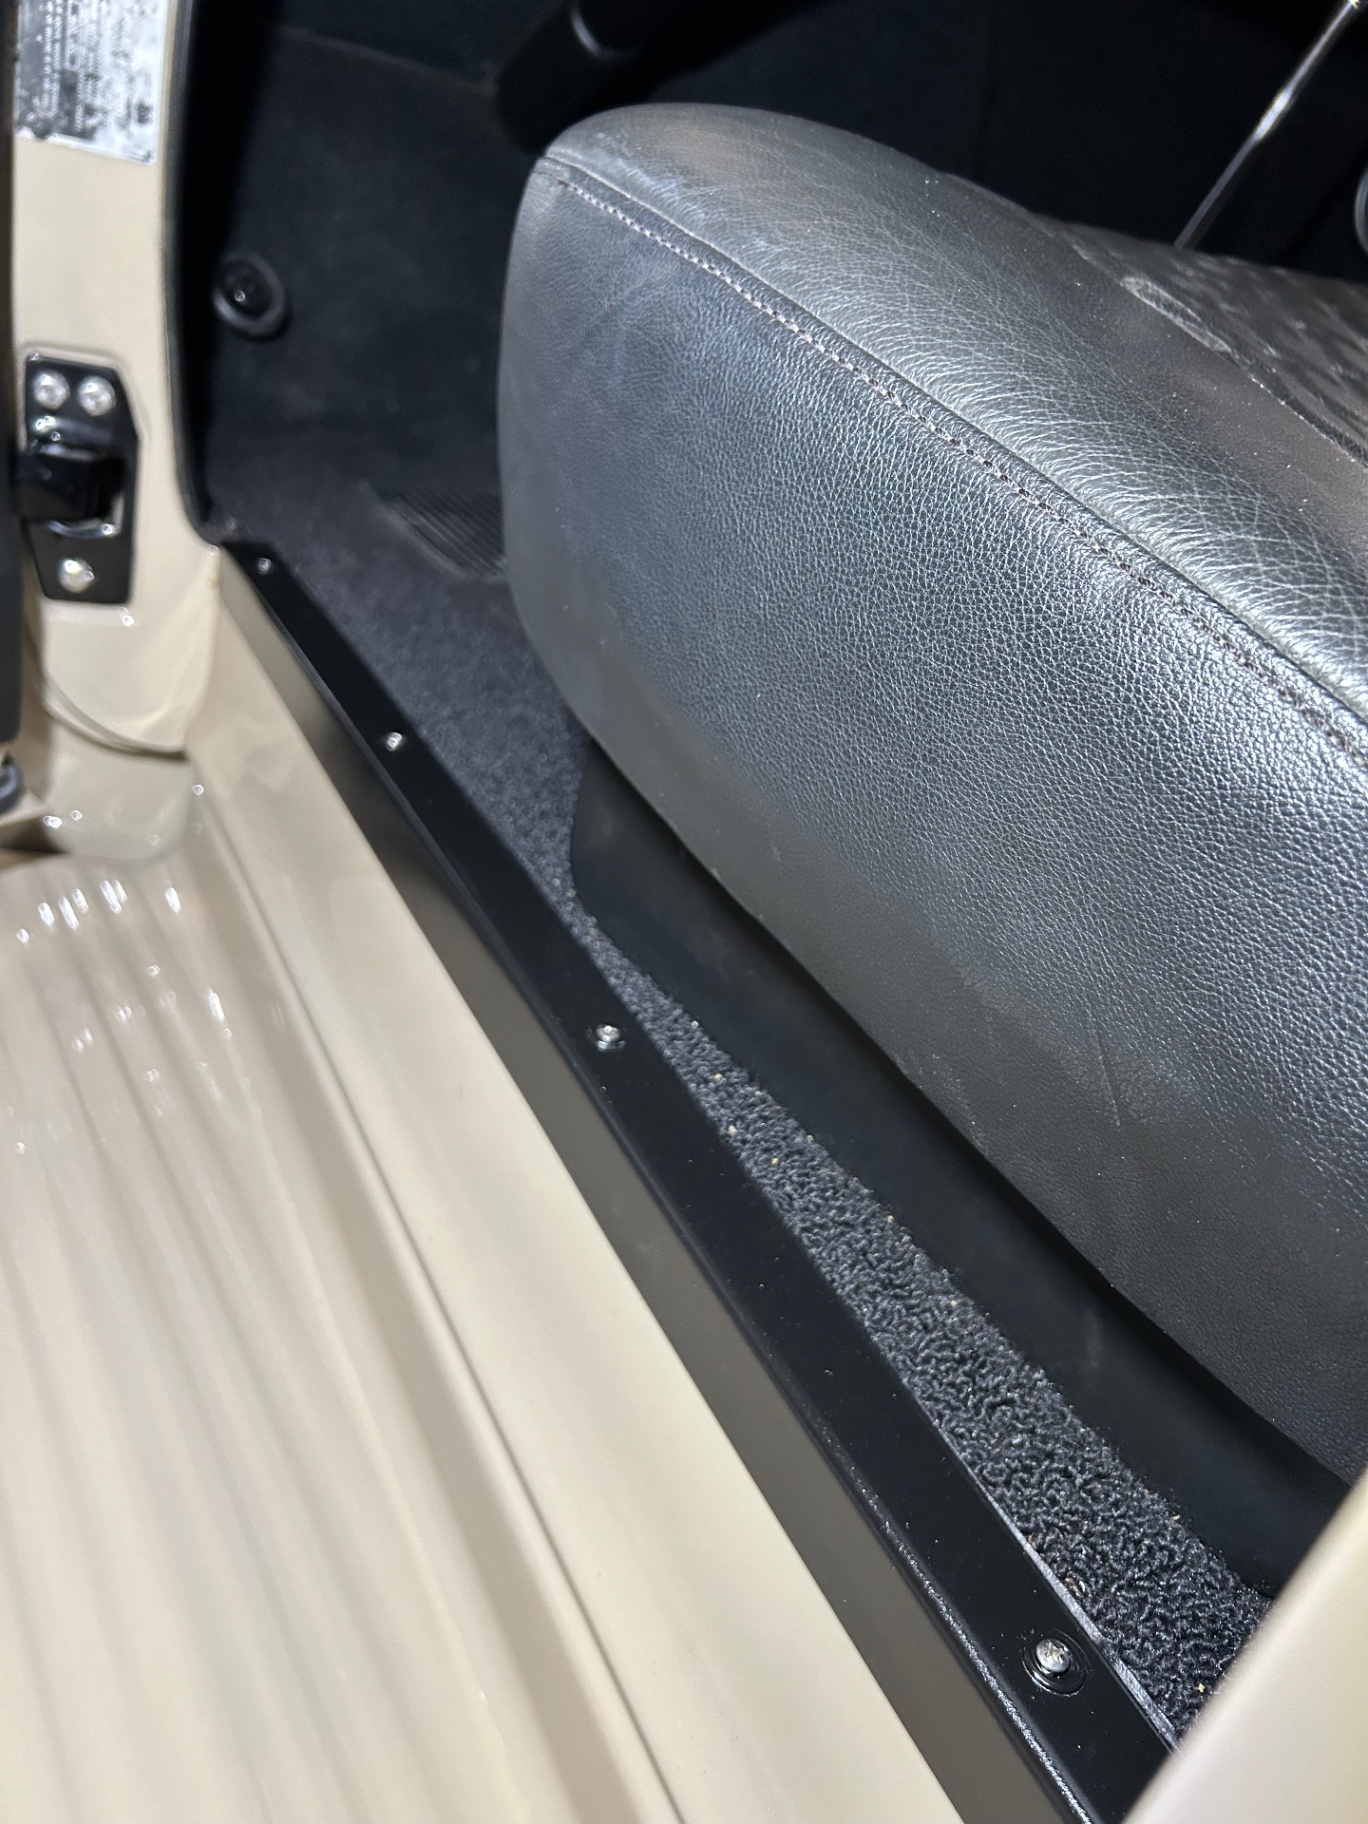
Sill and kick detail — diamond-stitched seat bolster, black sill plate, tan floor pan.J069
Sill and kick detail — diamond-stitched seat bolster, black sill plate, tan floor pan.
Interior looking across the bench — headliner, red-accented dash and wheel, new leather door panel through the window.J070
Interior looking across the bench — headliner, red-accented dash and wheel, new leather door panel through the window.

§ 04 — Process

Chapter by chapter.

Every build is documented as it moves through the shop. Here's how this one came together.

Chassis & suspensionC071
CUSTOM CONTROL ARMS · FOUR-LINK · AIR RIDE
01CHAPTER

Chassis & suspension

The stock front end and its failing components were pulled and replaced with hand-built tubular control arms. Out back we cut in a custom rear frame step notch and fabricated a triangulated four-link, then installed air ride at all four corners for real ride height control. A custom stainless 2.5" exhaust was routed to match the new chassis geometry.

Bed, body & paintC072
WELDED BED · BEL AIR TUBS · HF TAILGATE STOPS
02CHAPTER

Bed, body & paint

The bed box was fully welded together — no bolted seams — then body-worked to a clean finish. Bed, rear fenders, running boards, tailgate, and bumpers were all sprayed in the final khaki-tan with gloss black accents. Bel Air inner wheel tubs were fitted, a custom black bed floor was retrofit between polished strips, and our Hammer Fab tailgate stops eliminated the factory chains.

Interior — phase 1 & 2C073
DIAMOND STITCH · DAKOTA DIGITAL · LEATHER-AND-MAGNET PANELS
03CHAPTER

Interior — phase 1 & 2

Interior came together in two phases. Phase 1: black diamond-stitched bench (supplied with the truck), Dakota Digital RTX gauges behind an OE bezel, red-accented Sparc Industries Billet wheel, and JL Audio amps and speakers behind the seat and in the kick panels. Phase 2: door panels rebuilt from scratch with fabricated metal uppers and form-fit fiberglass lowers, wrapped in black leather and held on with hidden magnets — razor-thin edges, no bulk.

Wheels, stance & tail lightsC074
18/20 DETROIT STEEL · DIAMOND BACK REDLINES
04CHAPTER

Wheels, stance & tail lights

The truck rolls on 18" front / 20" rear Detroit Steel Wheels wrapped in Diamond Back Classic redline tires. Custom rear tail light stems were designed and fabricated in-house with the wiring routed through the center of each stem for a clean back end. The finished stance and detail work have carried the truck to numerous local show wins.

§ 05 — Gallery

Frame by frame.

8 FRAMES · SHOT IN-HOUSE

50 Chevy 3100 — frame 1G075
001 / 008
50 Chevy 3100 — frame 2G076
002 / 008
50 Chevy 3100 — frame 3G077
003 / 008
50 Chevy 3100 — frame 4G078
004 / 008
50 Chevy 3100 — frame 5G079
005 / 008
50 Chevy 3100 — frame 6G080
006 / 008
50 Chevy 3100 — frame 7G081
007 / 008
50 Chevy 3100 — frame 8G082
008 / 008

§ 06 — Next steps

Have a project
like this?

Send us the story of the car and what you want it to become. We'll get back with a real assessment and a realistic timeline.

Start an inquiry
51 Chevy 3100

NEXT IN THE LOG →

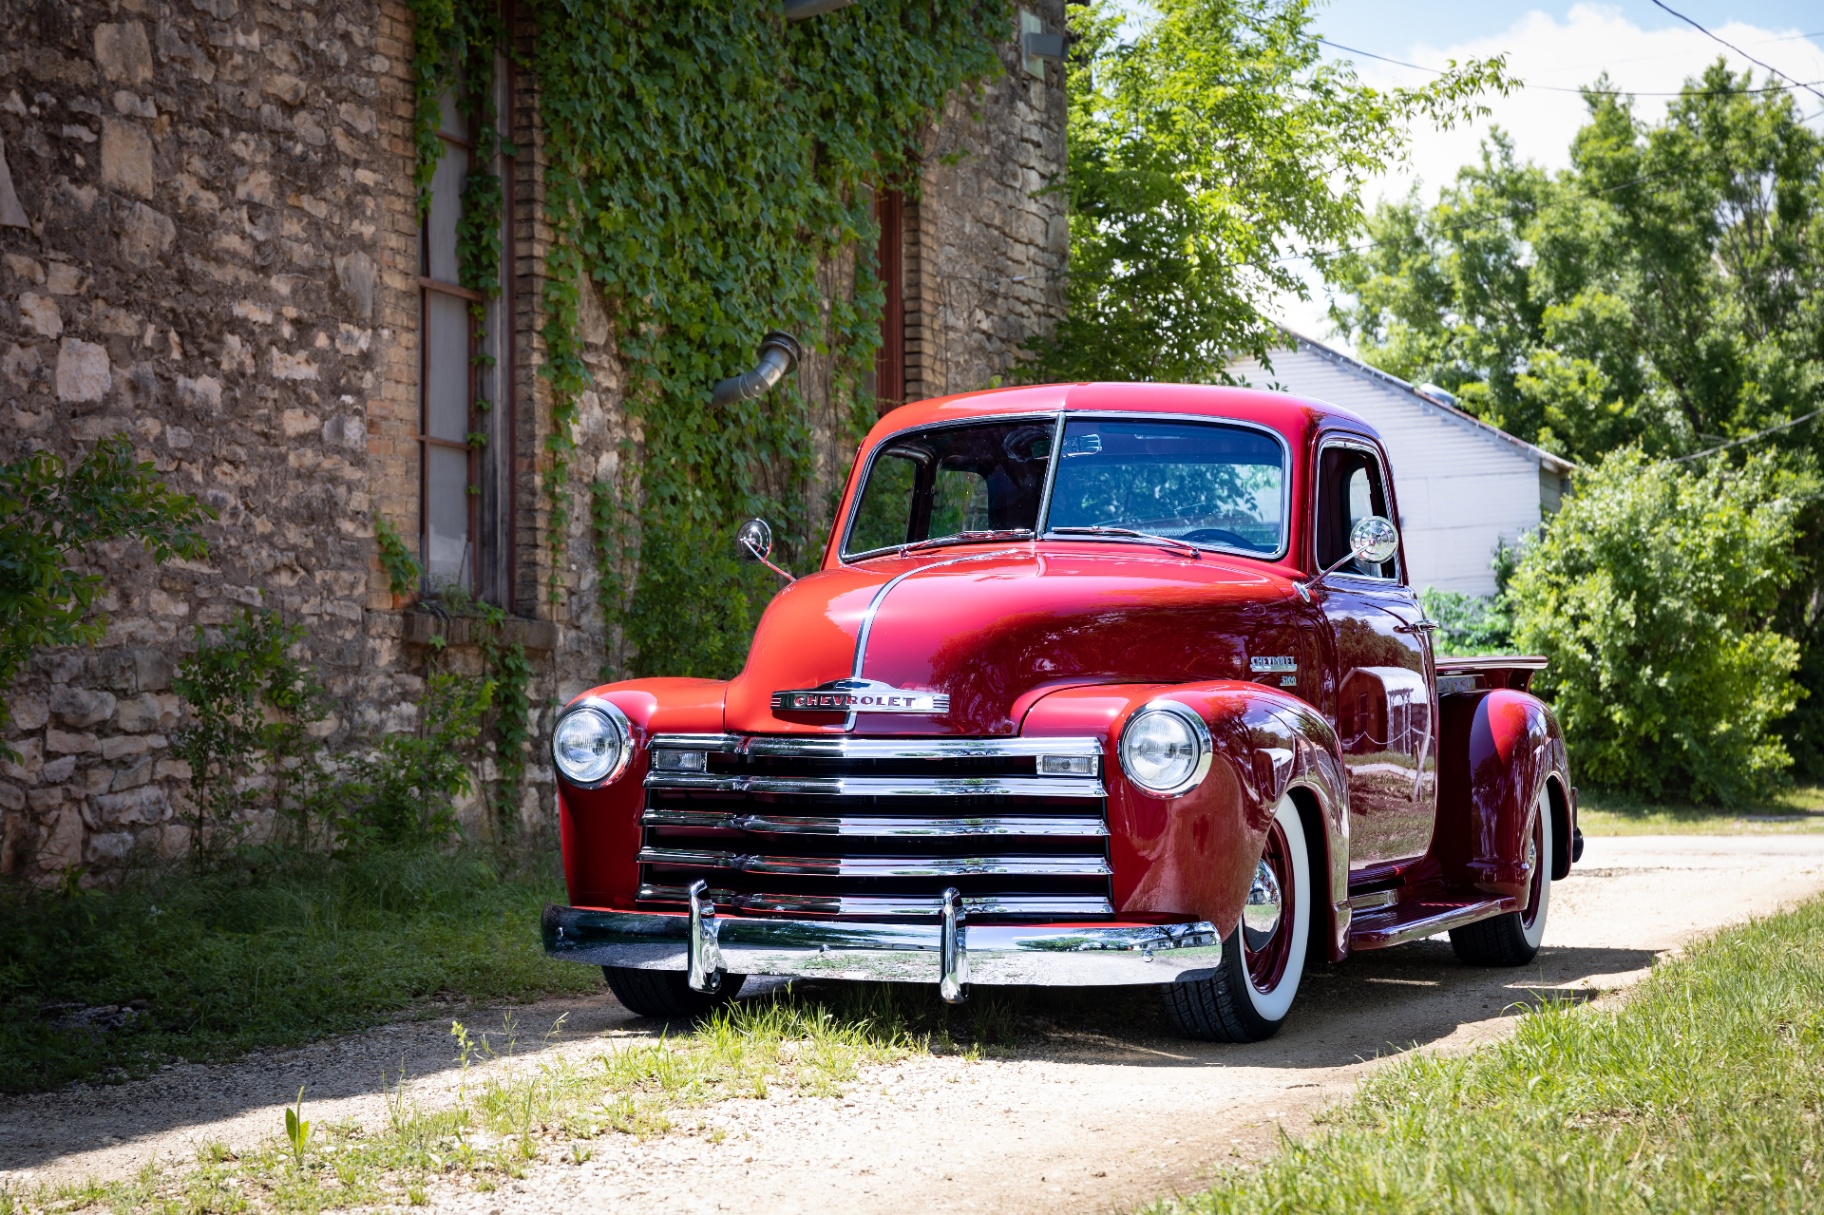
51 Chevy 3100

HF-51-01