63 Impala
ALL BUILDS

1963 · Full custom build

IN BUILD — TWIN-TURBO NELSON RACING POWER

63 Impala

1963
JUPITER, FL
FEB 2020 – IN PROGRESS

§ 01

THE BRIEF

M. Colavechio of Jupiter, FL brought this 1963 Impala to Hammer Fab with a very specific vision: a laid-out, soft blue two-door hardtop with a white roof, riding on staggered polished wheels — and enough boost under the hood to make it move like a modern supercar. The concept rendering was completed in January 2020, the build kicked off in February 2020, and a twin-turbo Nelson Racing Engines V8 arrived in September 2021 to become the heart of the car. The build is still in progress in the shop.

§ 02 — Note from the shop

"Rendered Jan '20, twin-turbo Nelson Racing power in the bay by Sep '21 — M. Colavechio's 63 Impala is coming together."

§ 03 — Build journal

The updates.

A living log of every meaningful moment on this build — new photos, short notes, and the milestones worth marking.

10 UPDATES · 6 MILESTONES

Milestones

  1. JAN 15, 2020Concept rendering complete
  2. SEP 1, 2021Twin-turbo Nelson Racing engine arrives
  3. MAY 1, 2023Two-door roof swap and suicide doors
  4. SEP 1, 2023Stainless gas tank — designed in-house, TIG welded
  5. FEB 1, 2024PWR intercooler and one-off billet intercooler funnel
  6. NOV 1, 2023Custom 14ga floors — beaded on the Pullmax

UPDATE 10 / 10

Jan 15, 2020

DESIGN MILESTONE

Concept rendering complete

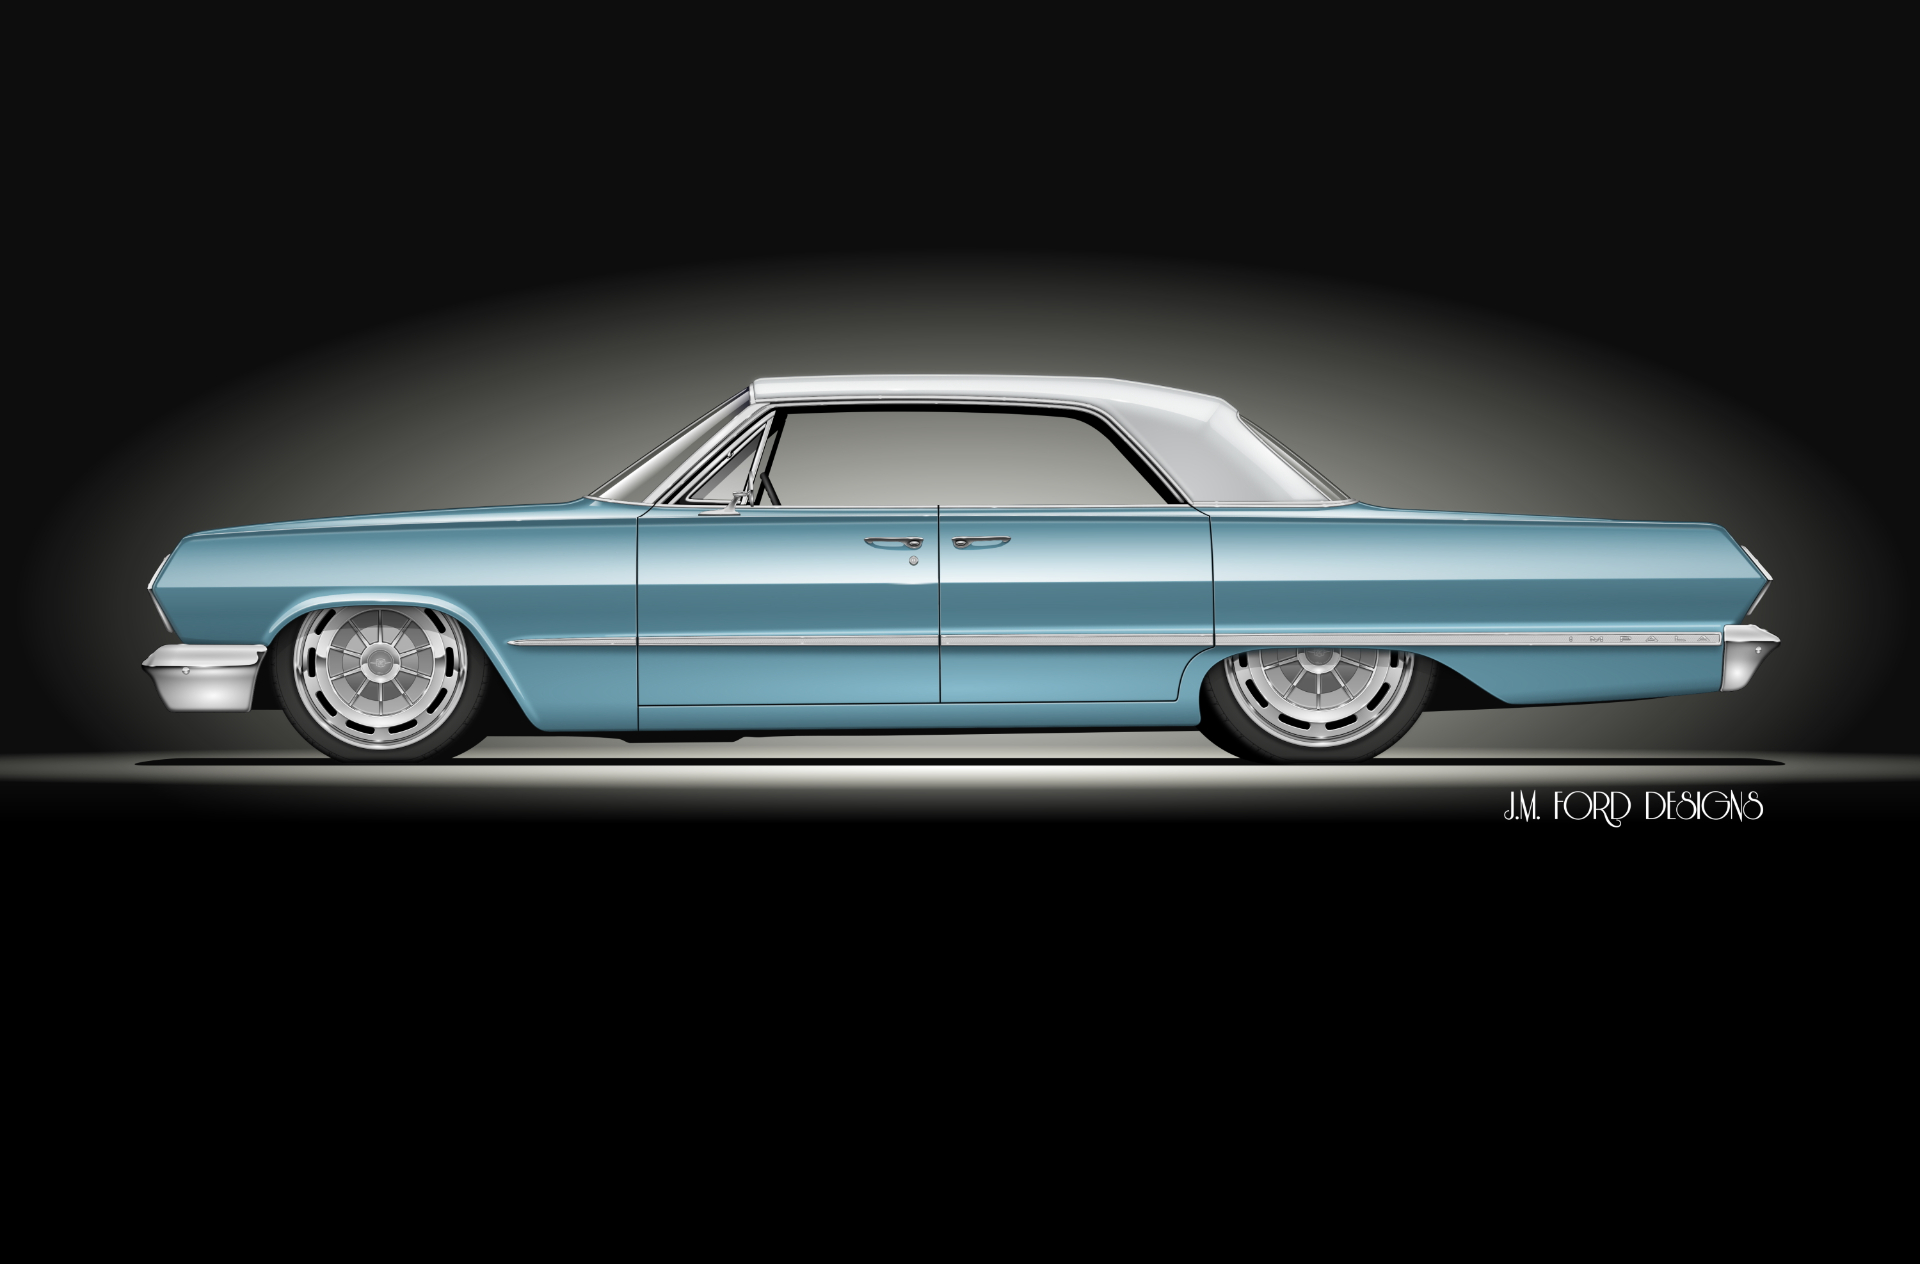
The full concept rendering for M. Colavechio's 1963 Impala was completed in January 2020 — soft metallic blue over a white top, retained chrome trim, and a laid-out stance on polished turbine-style wheels.

Concept rendering — soft blue over white, slammed stance, polished turbines.J001
Concept rendering — soft blue over white, slammed stance, polished turbines.

UPDATE 09 / 10

Sep 1, 2021

DRIVETRAIN MILESTONE

Twin-turbo Nelson Racing engine arrives

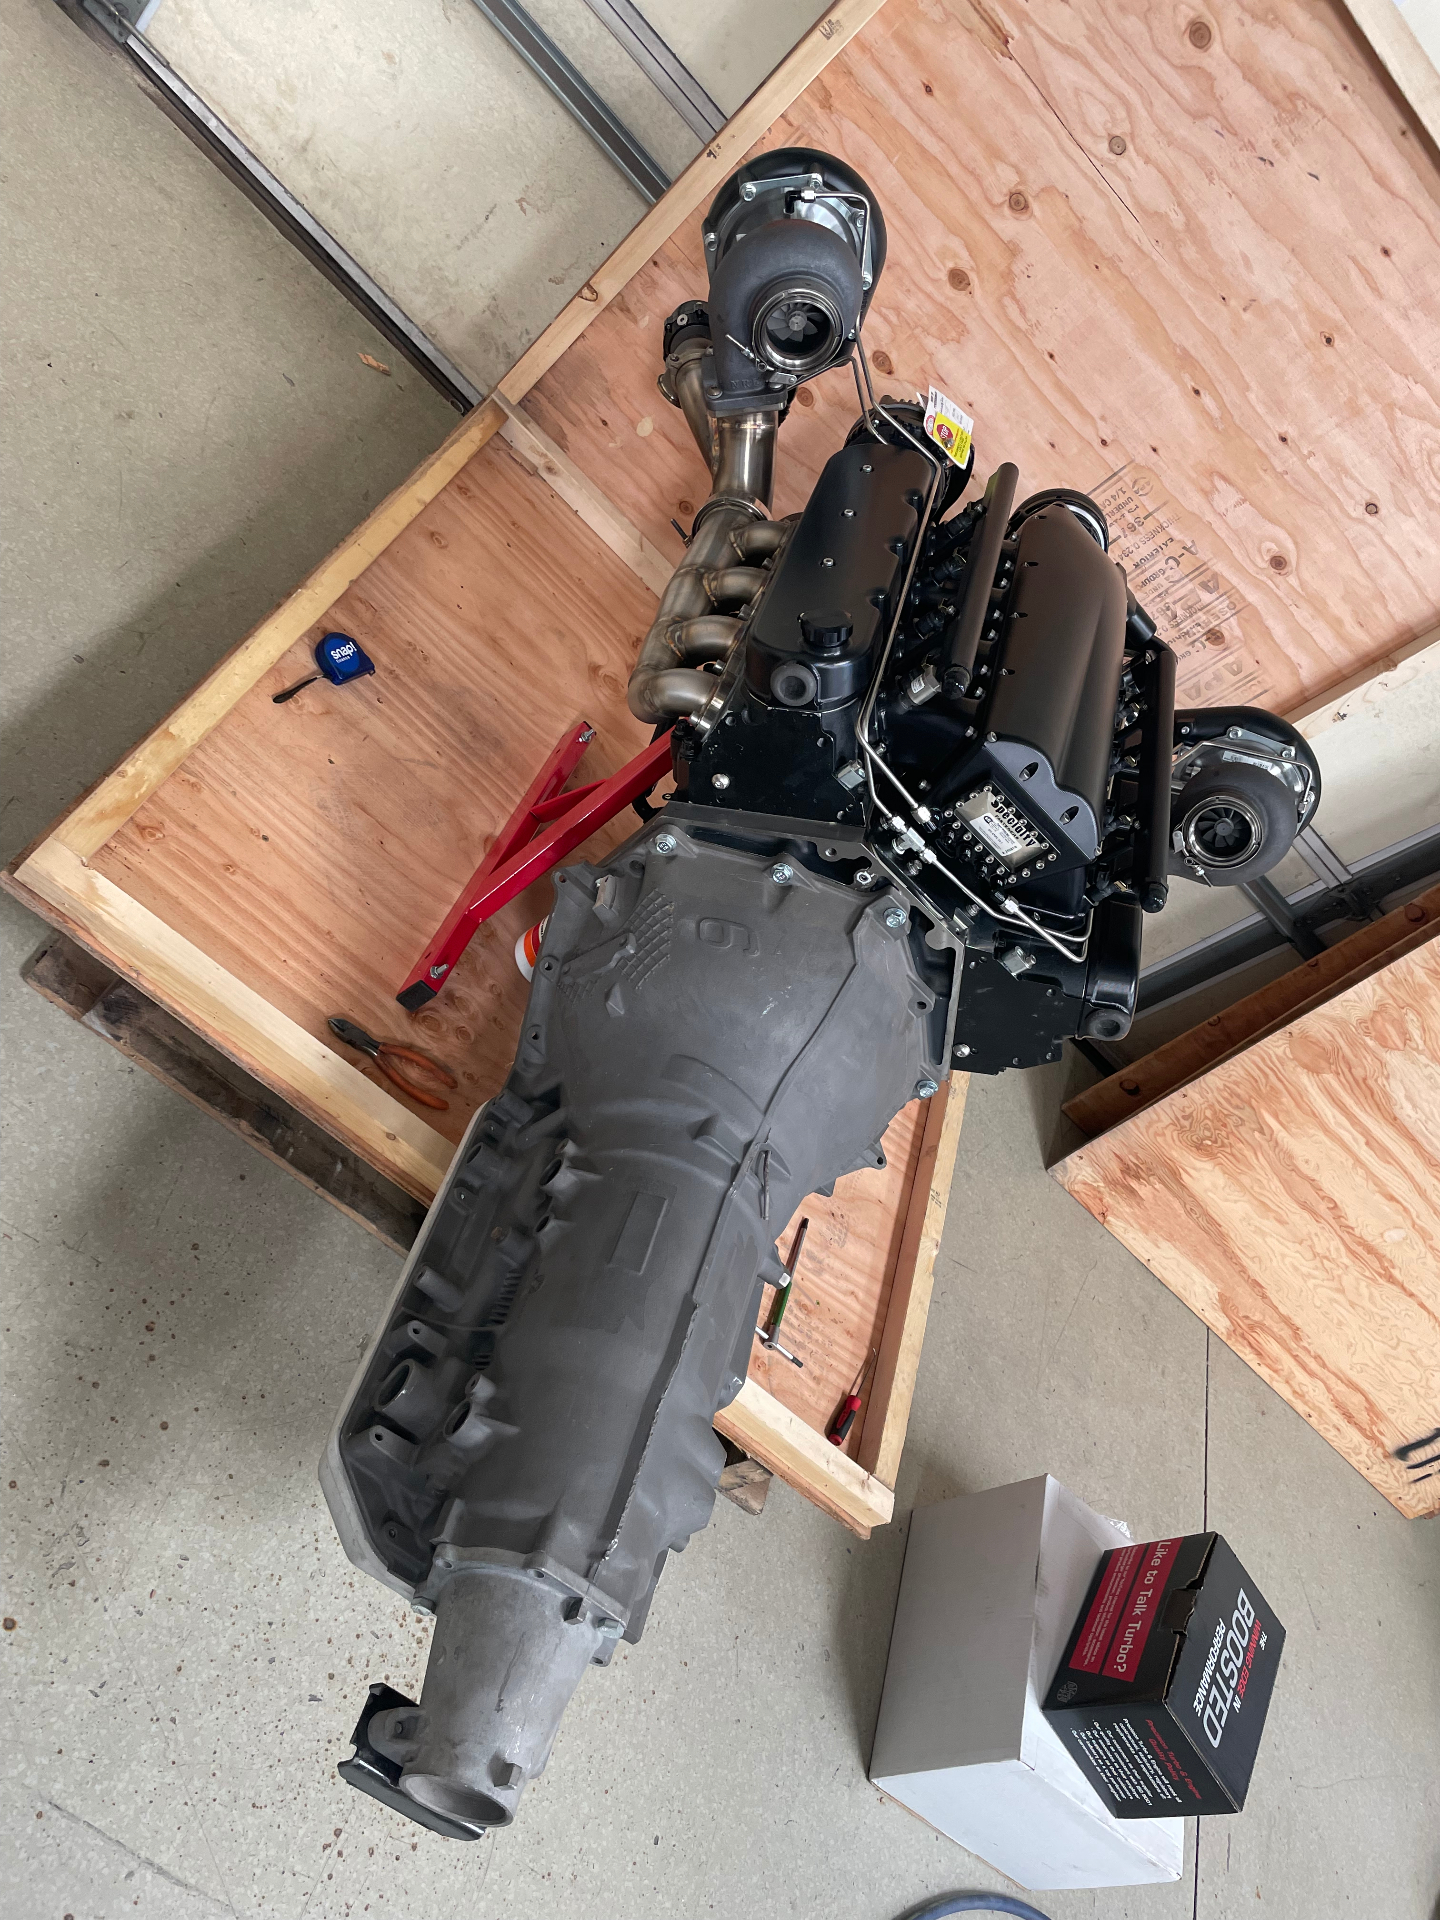
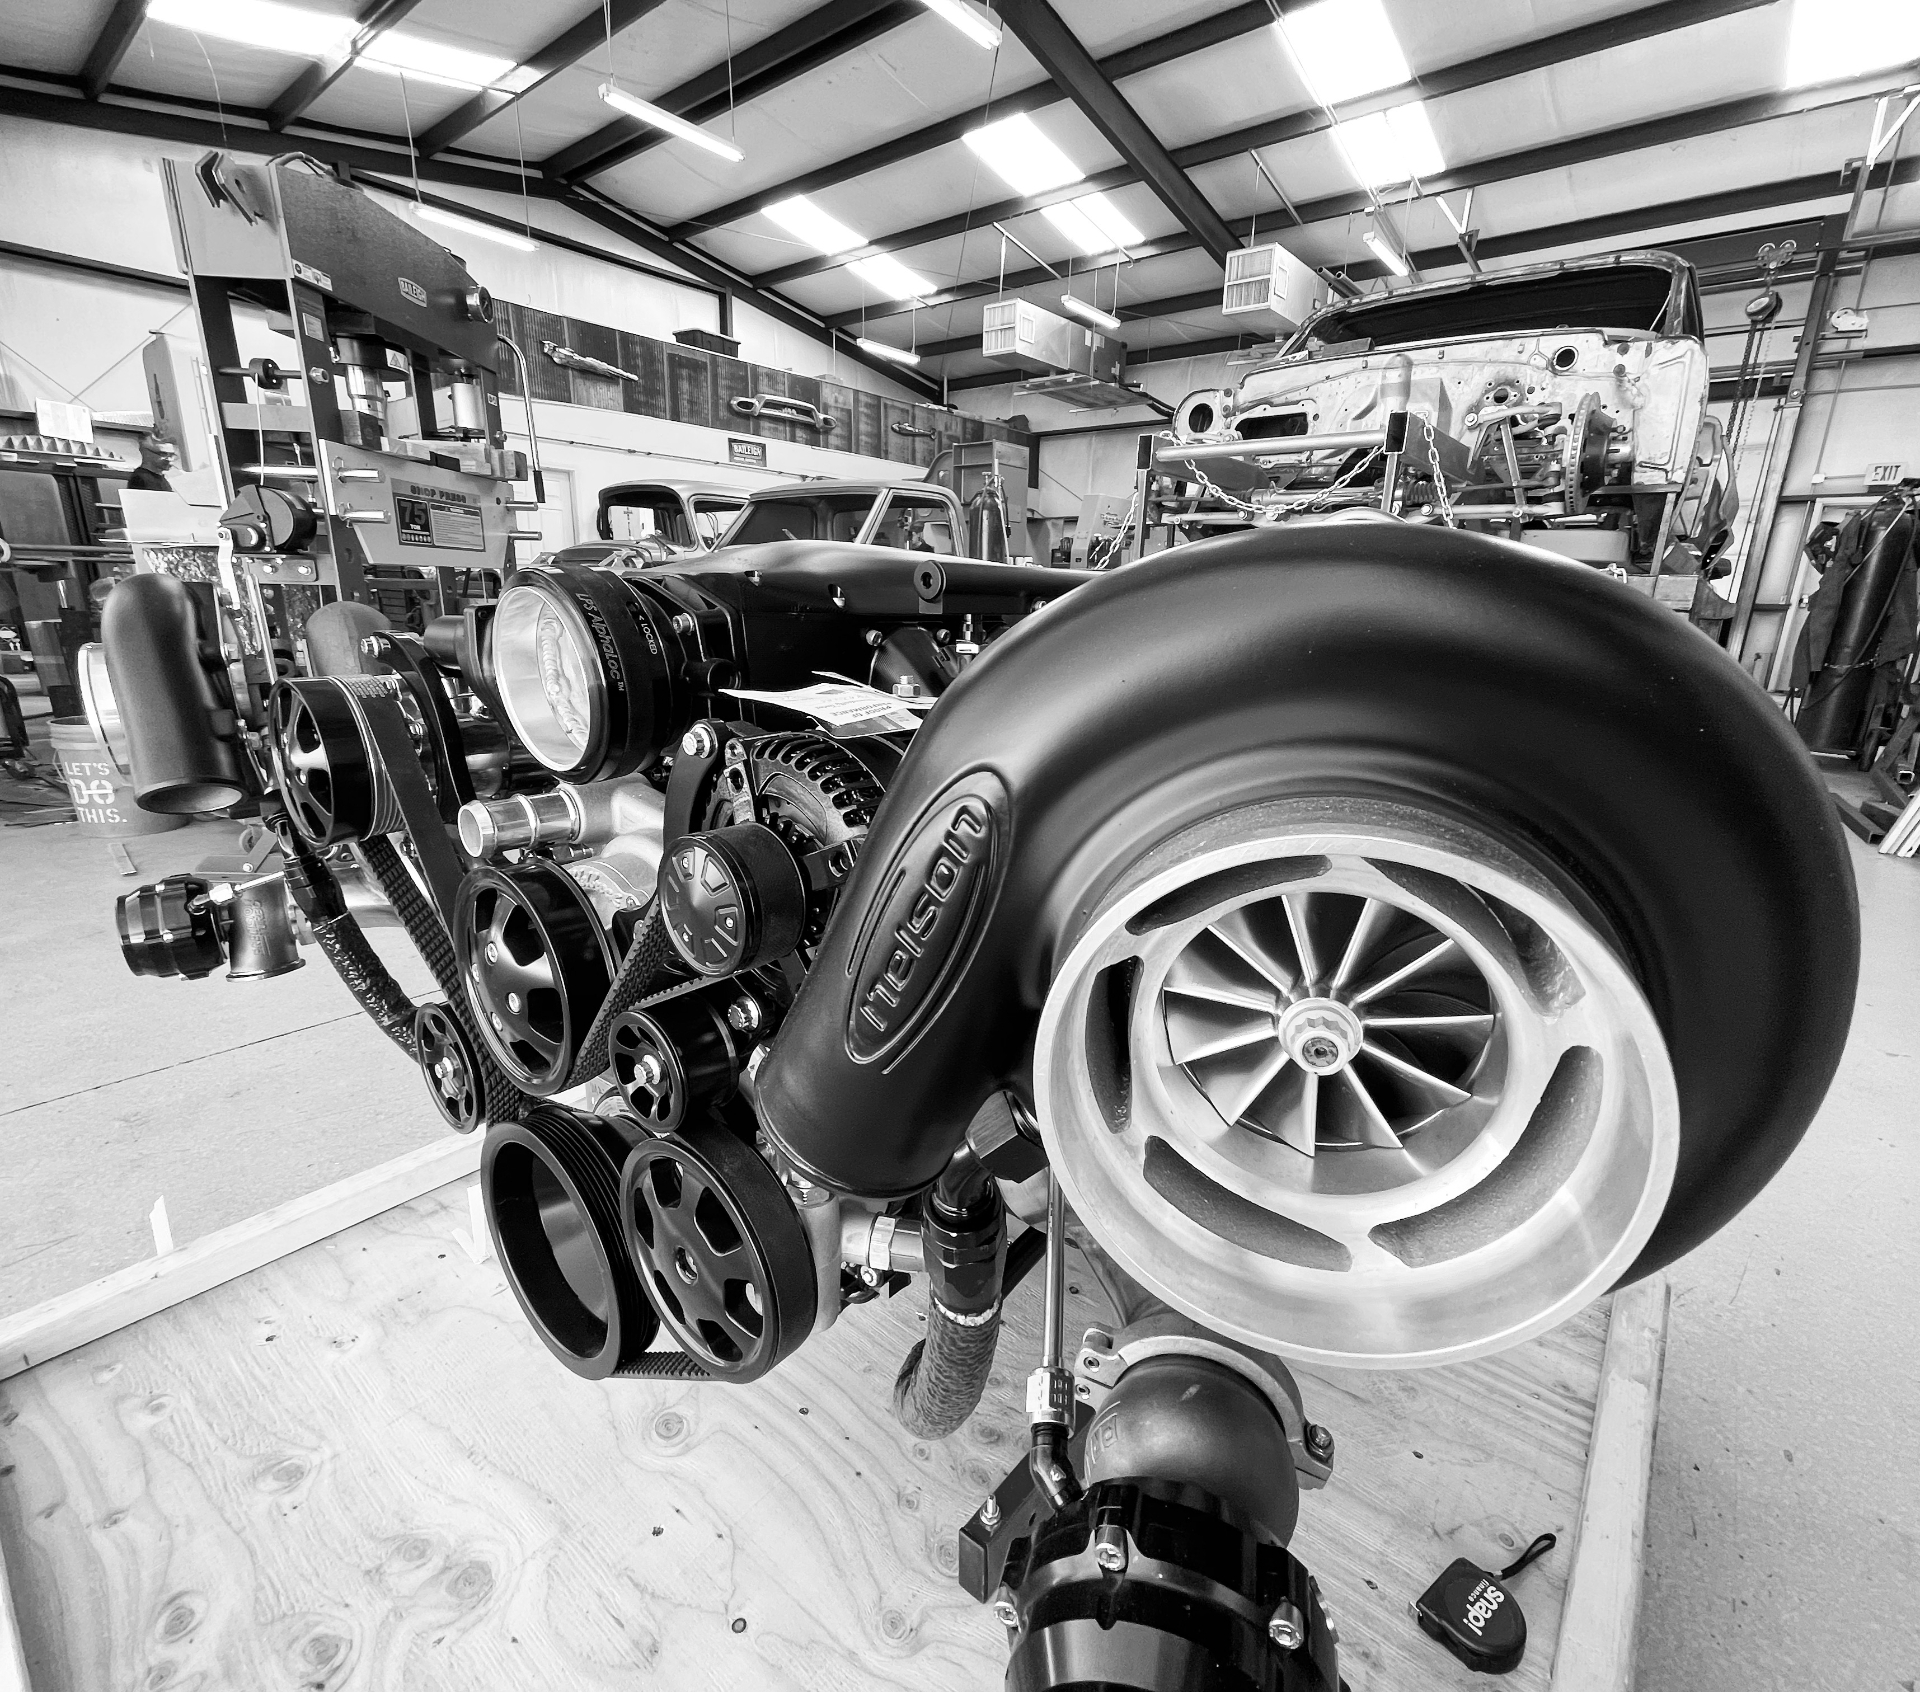
The twin-turbo Nelson Racing Engines V8 arrived at the shop in September 2021 — the powerplant the whole car is being engineered around. Complete long-block with a mated transmission, twin snail-shell turbos on custom stainless manifolds, and a full black-anodized accessory drive.

The Nelson Racing twin-turbo V8 and transmission on the crate the day it landed at the shop.J002
The Nelson Racing twin-turbo V8 and transmission on the crate the day it landed at the shop.
Nelson-branded turbo, front accessory drive, and belt system — a look at the detail that will end up on display under the hood.J003
Nelson-branded turbo, front accessory drive, and belt system — a look at the detail that will end up on display under the hood.

UPDATE 08 / 10

May 1, 2023

FABRICATION MILESTONE

Two-door roof swap and suicide doors

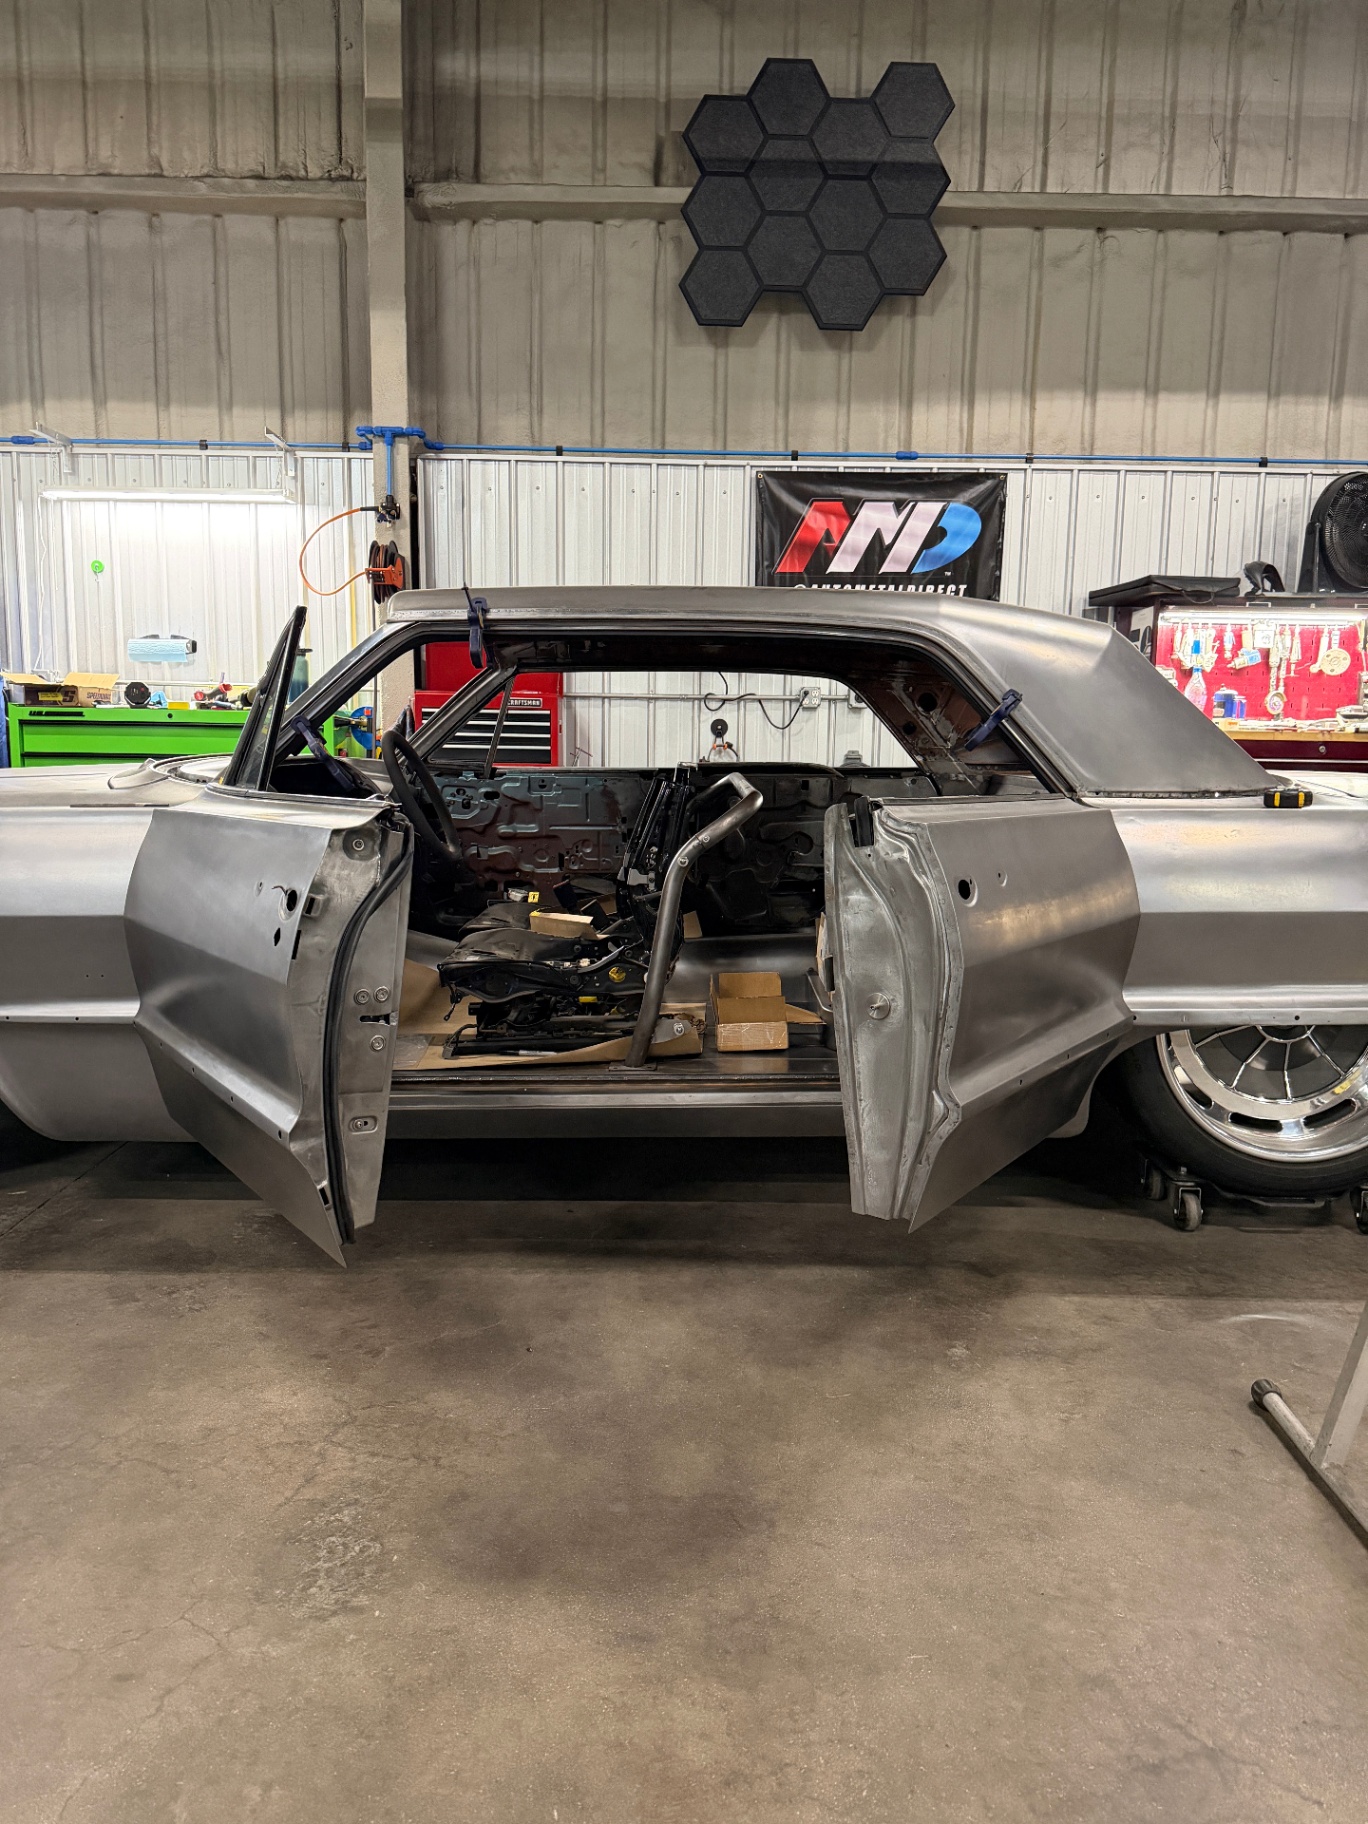
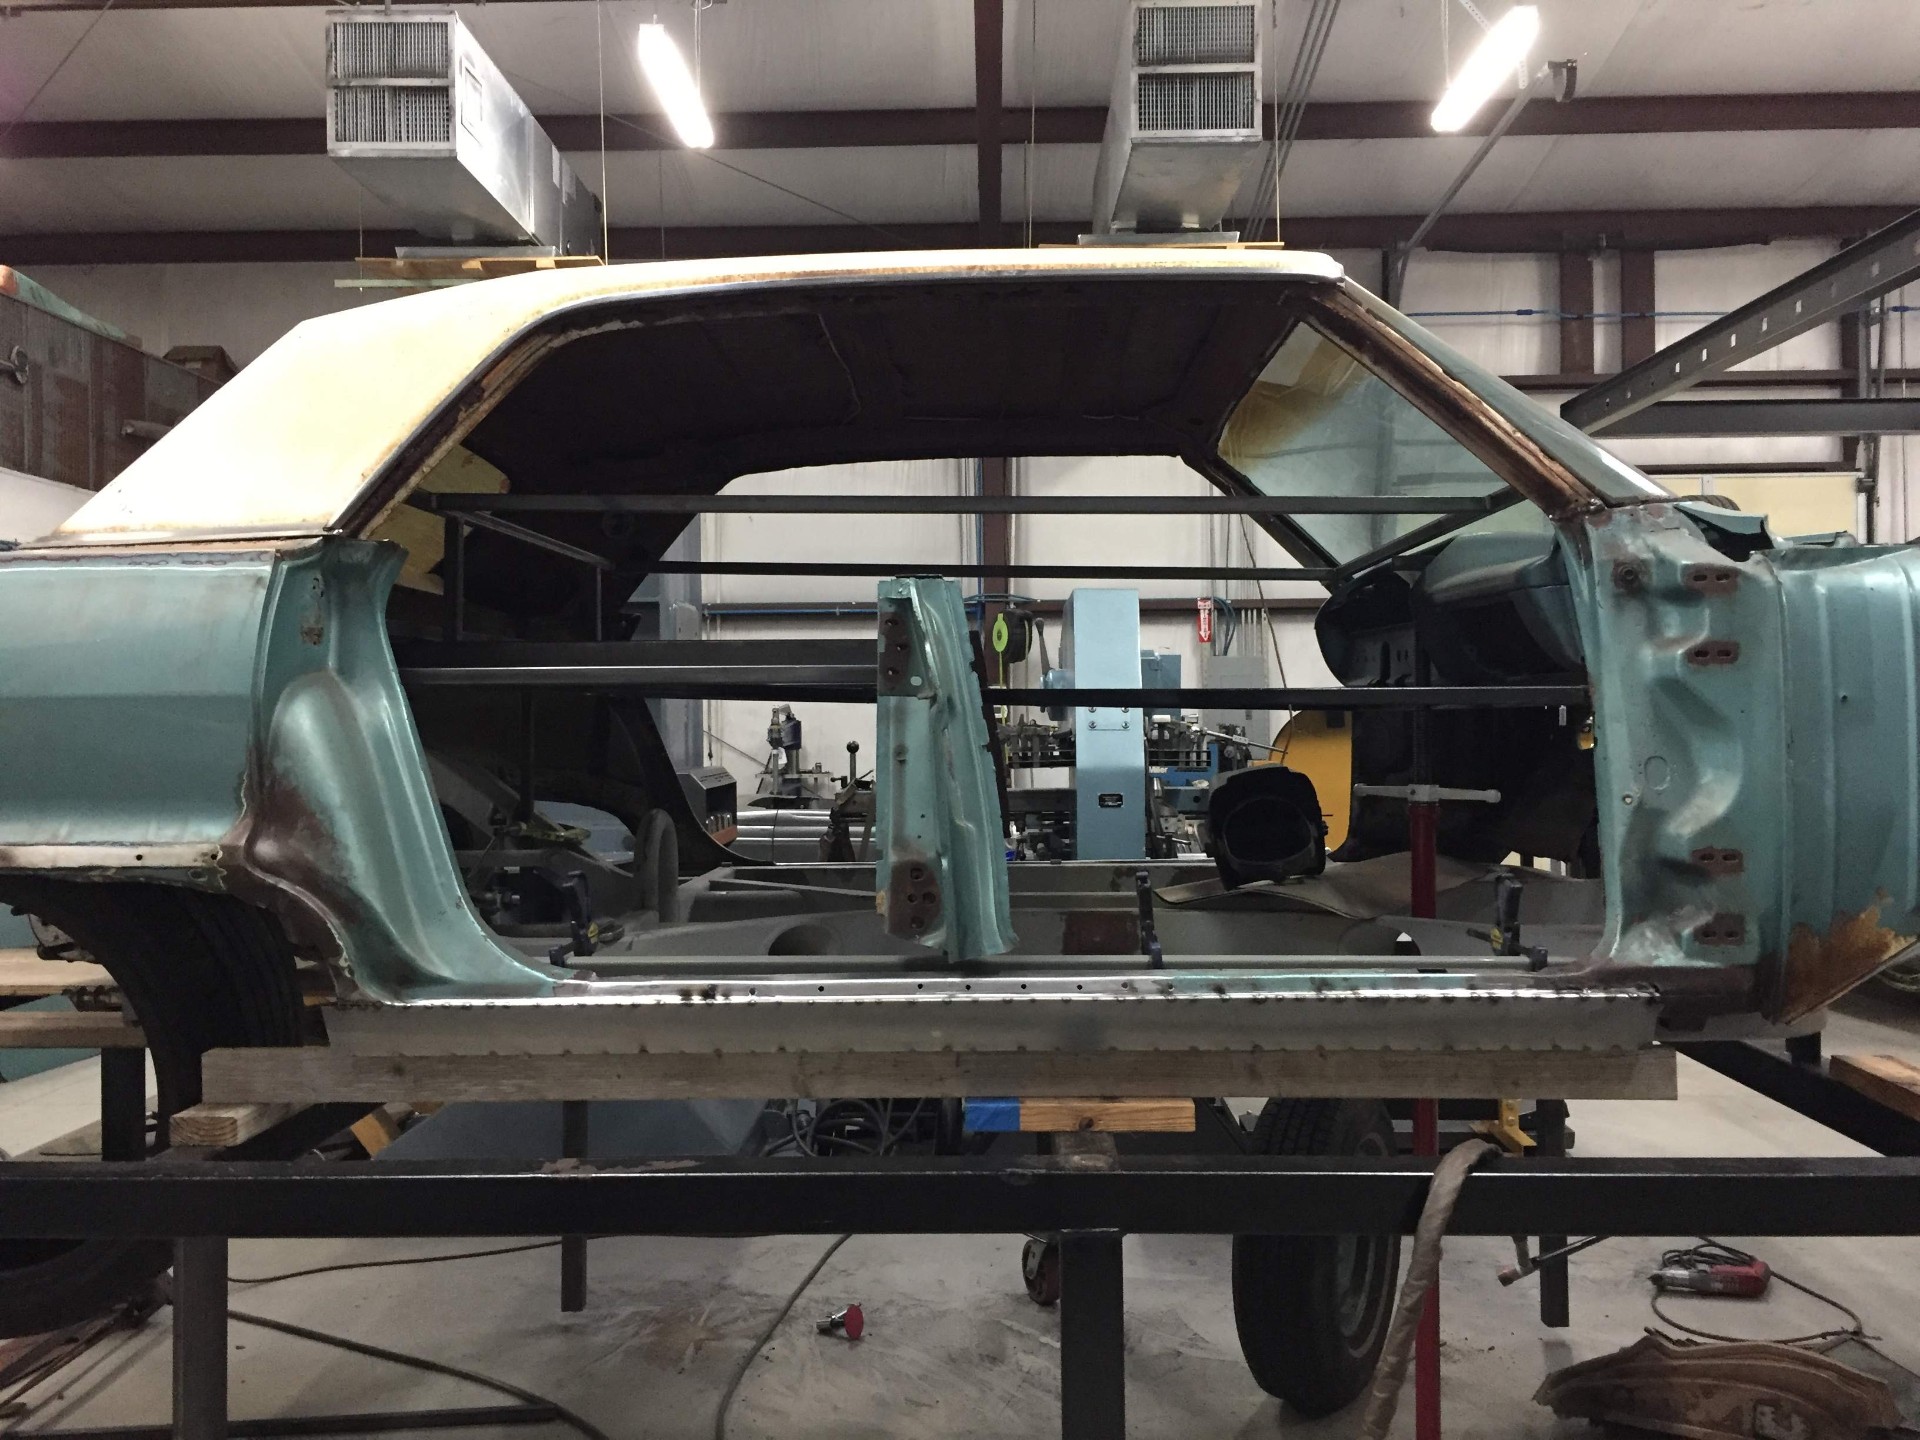
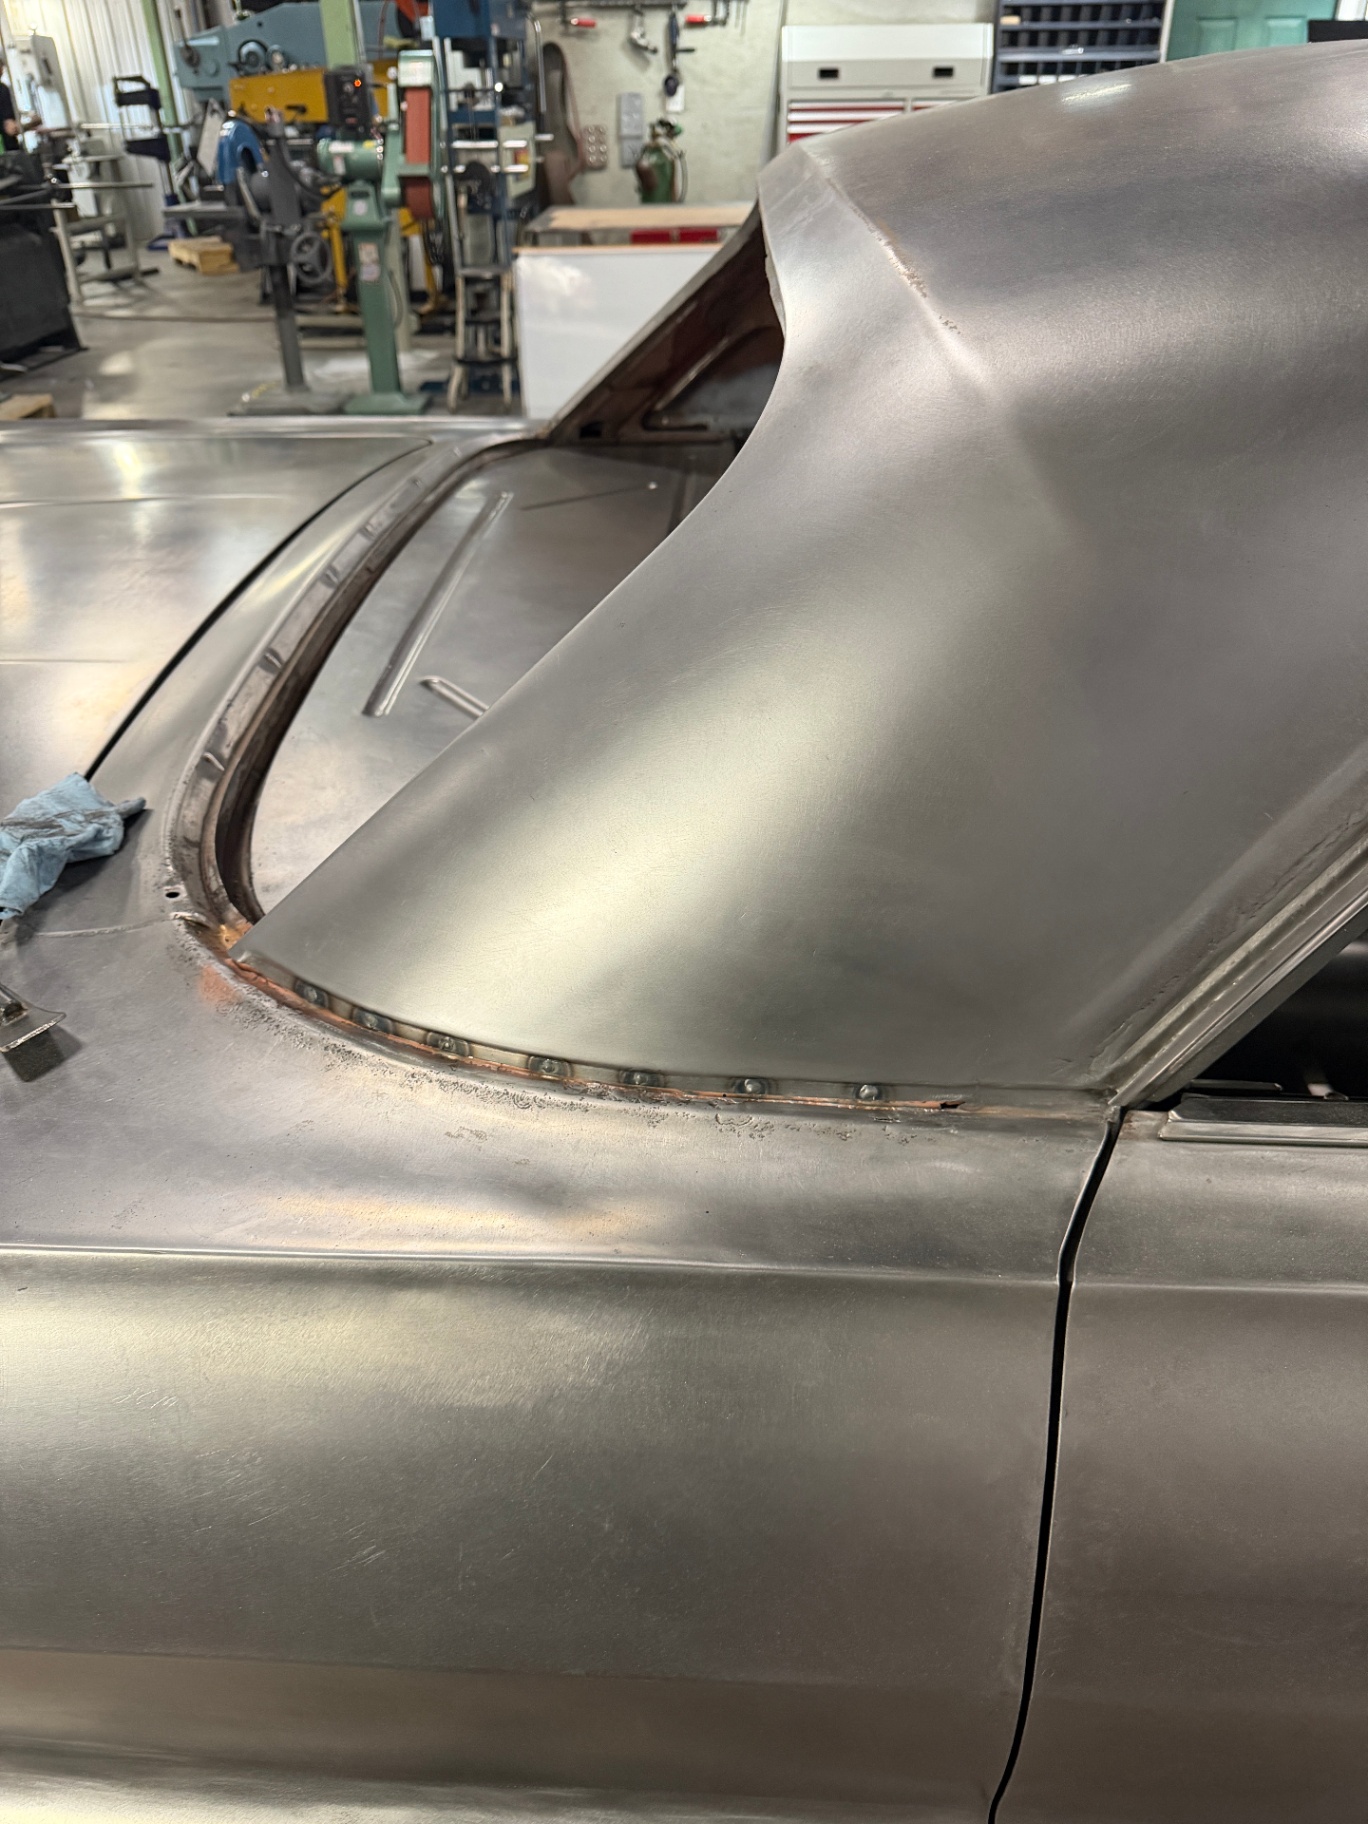
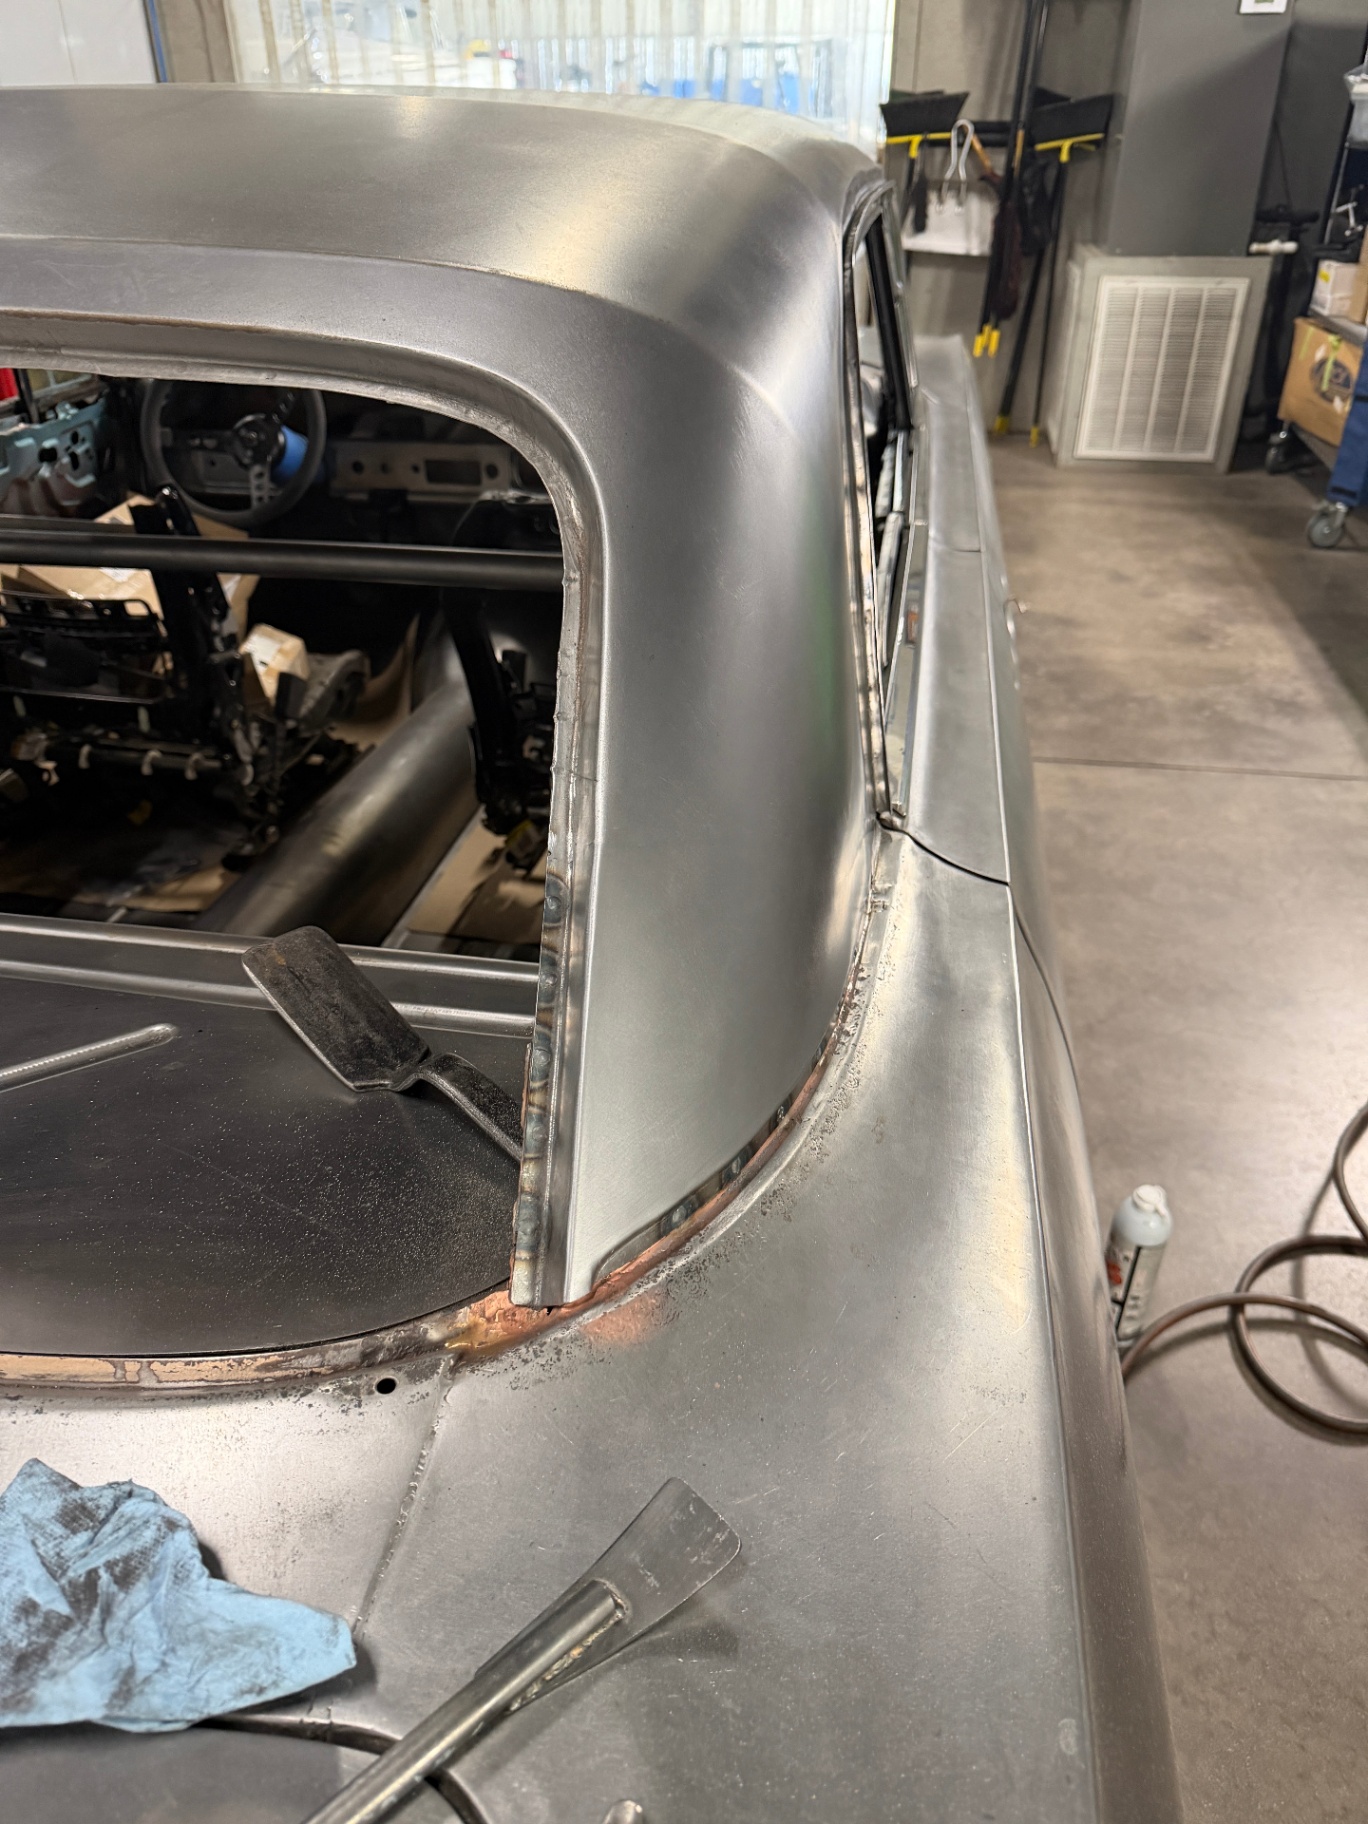
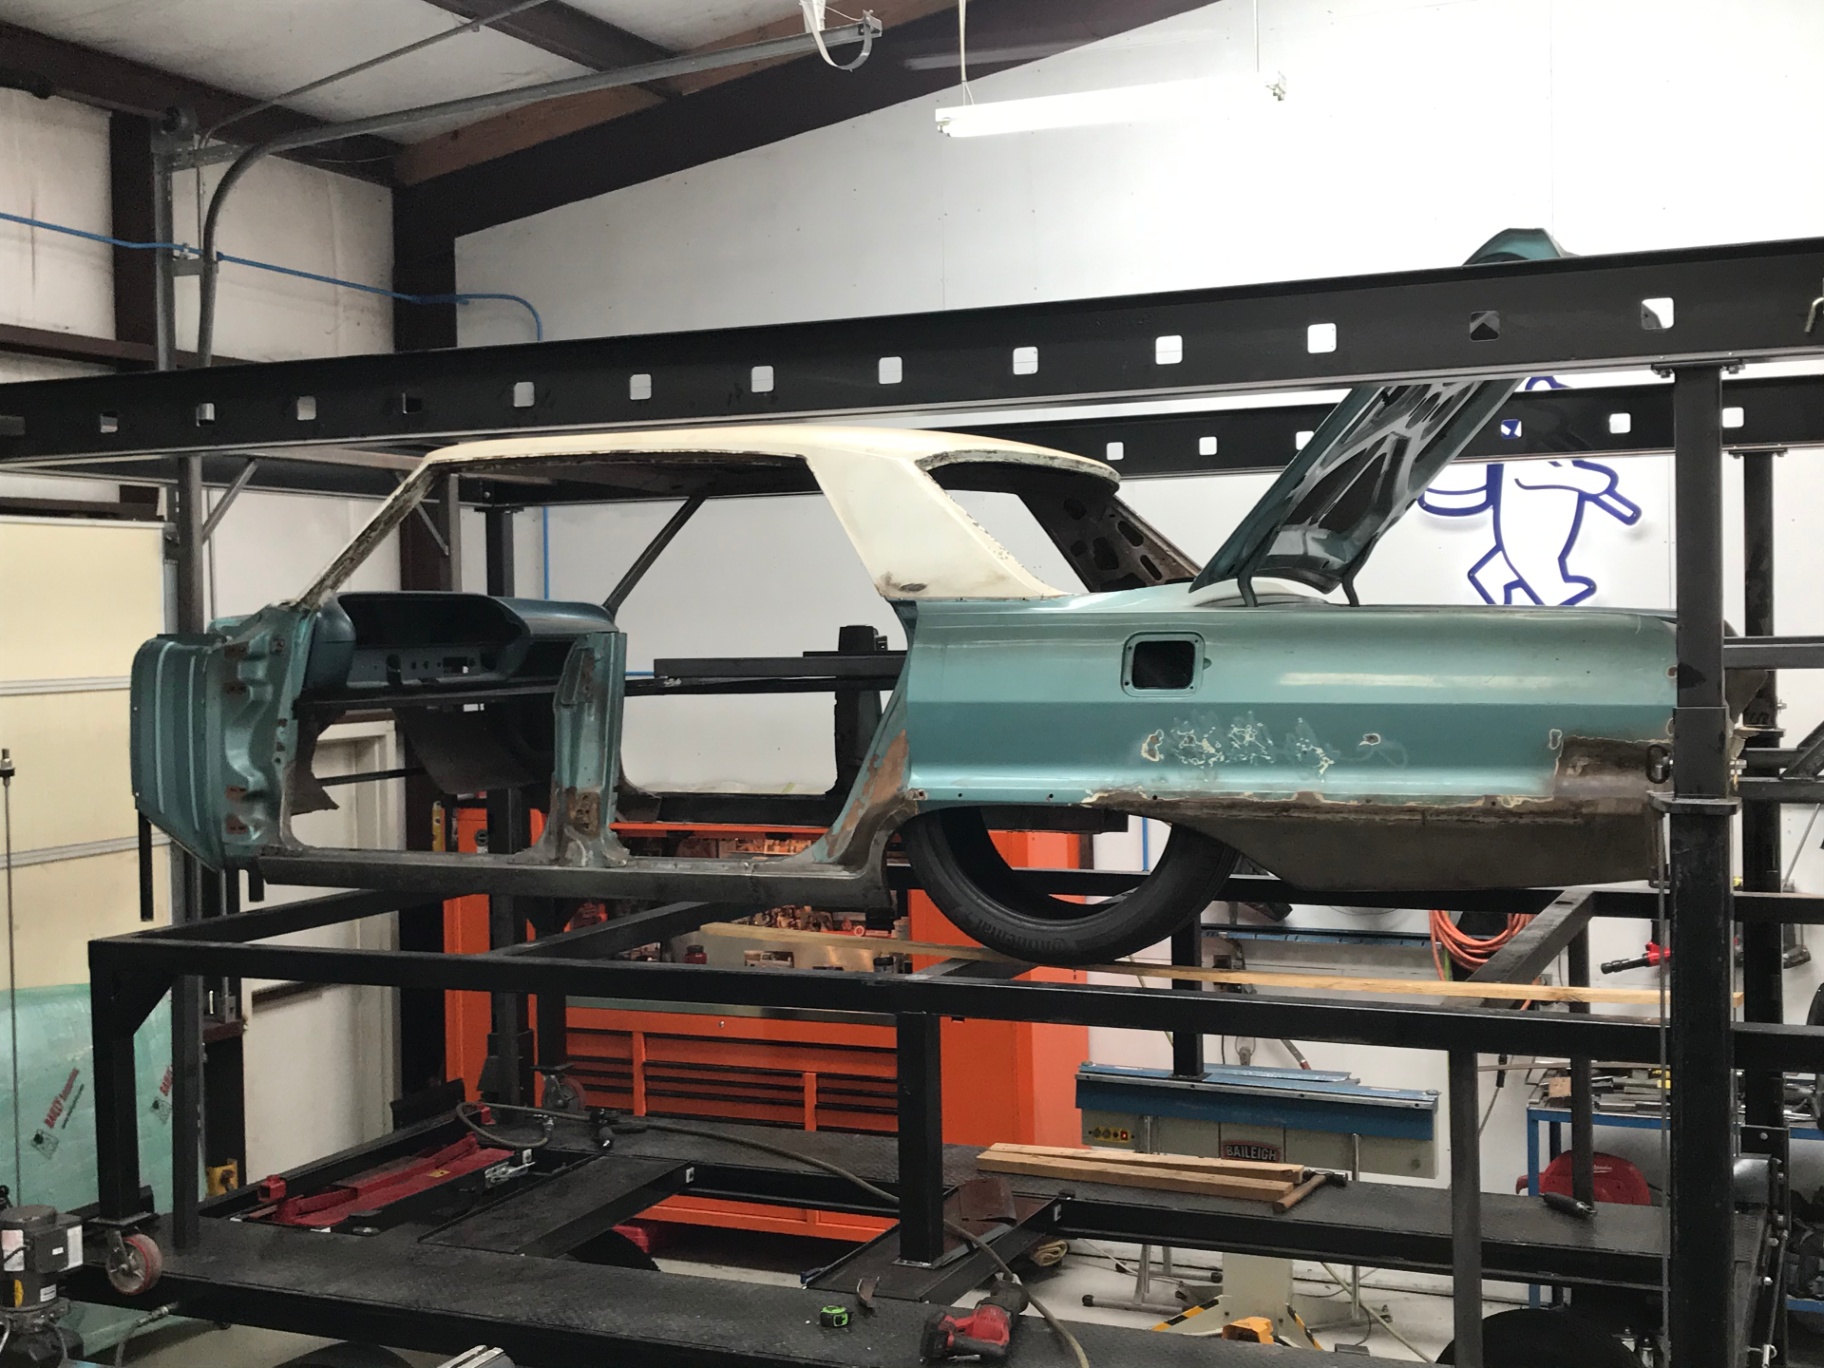
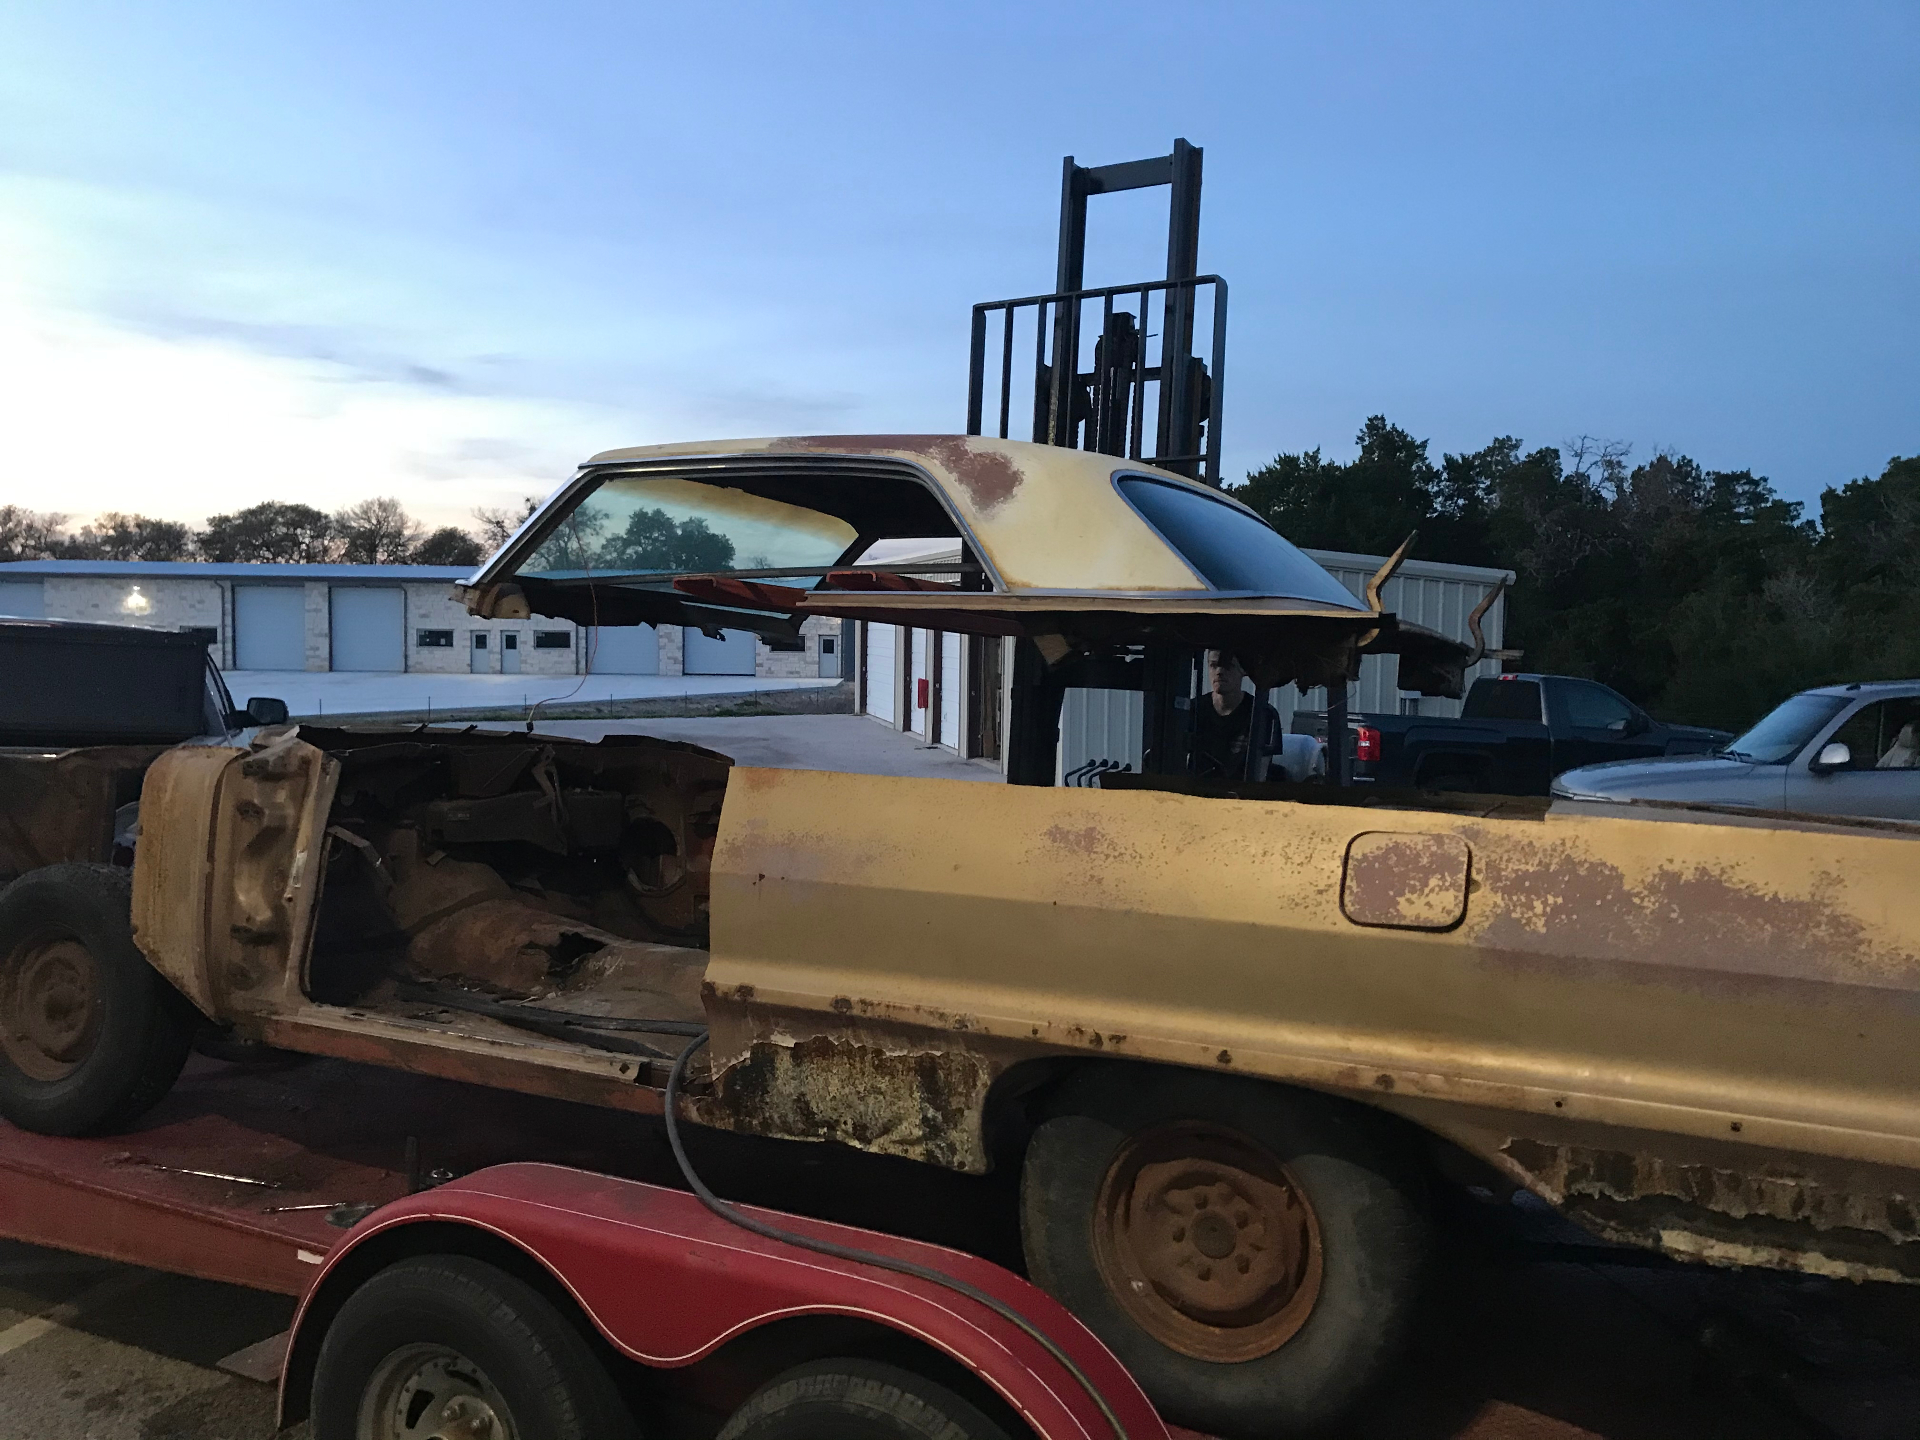
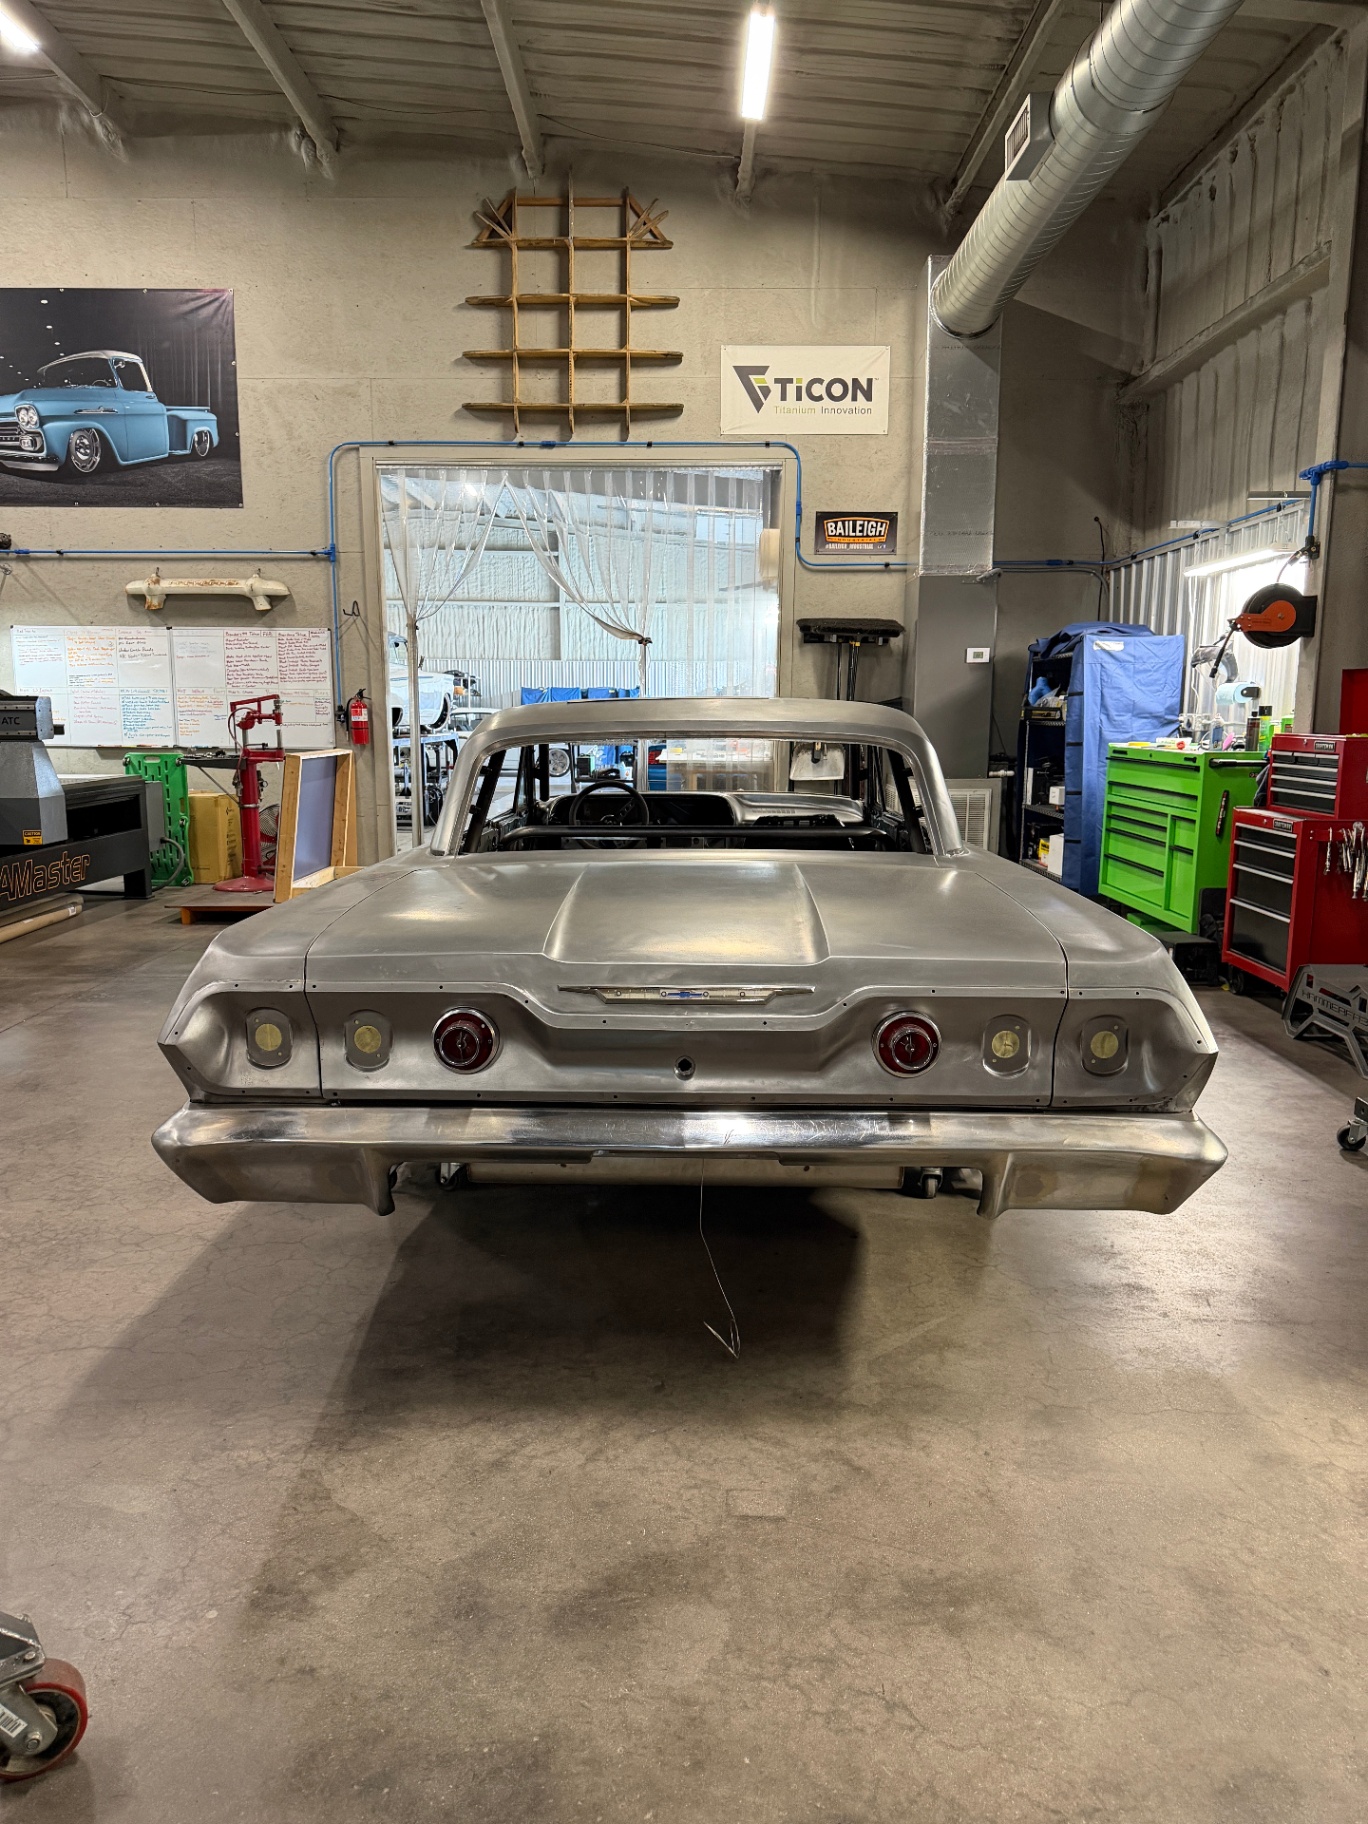
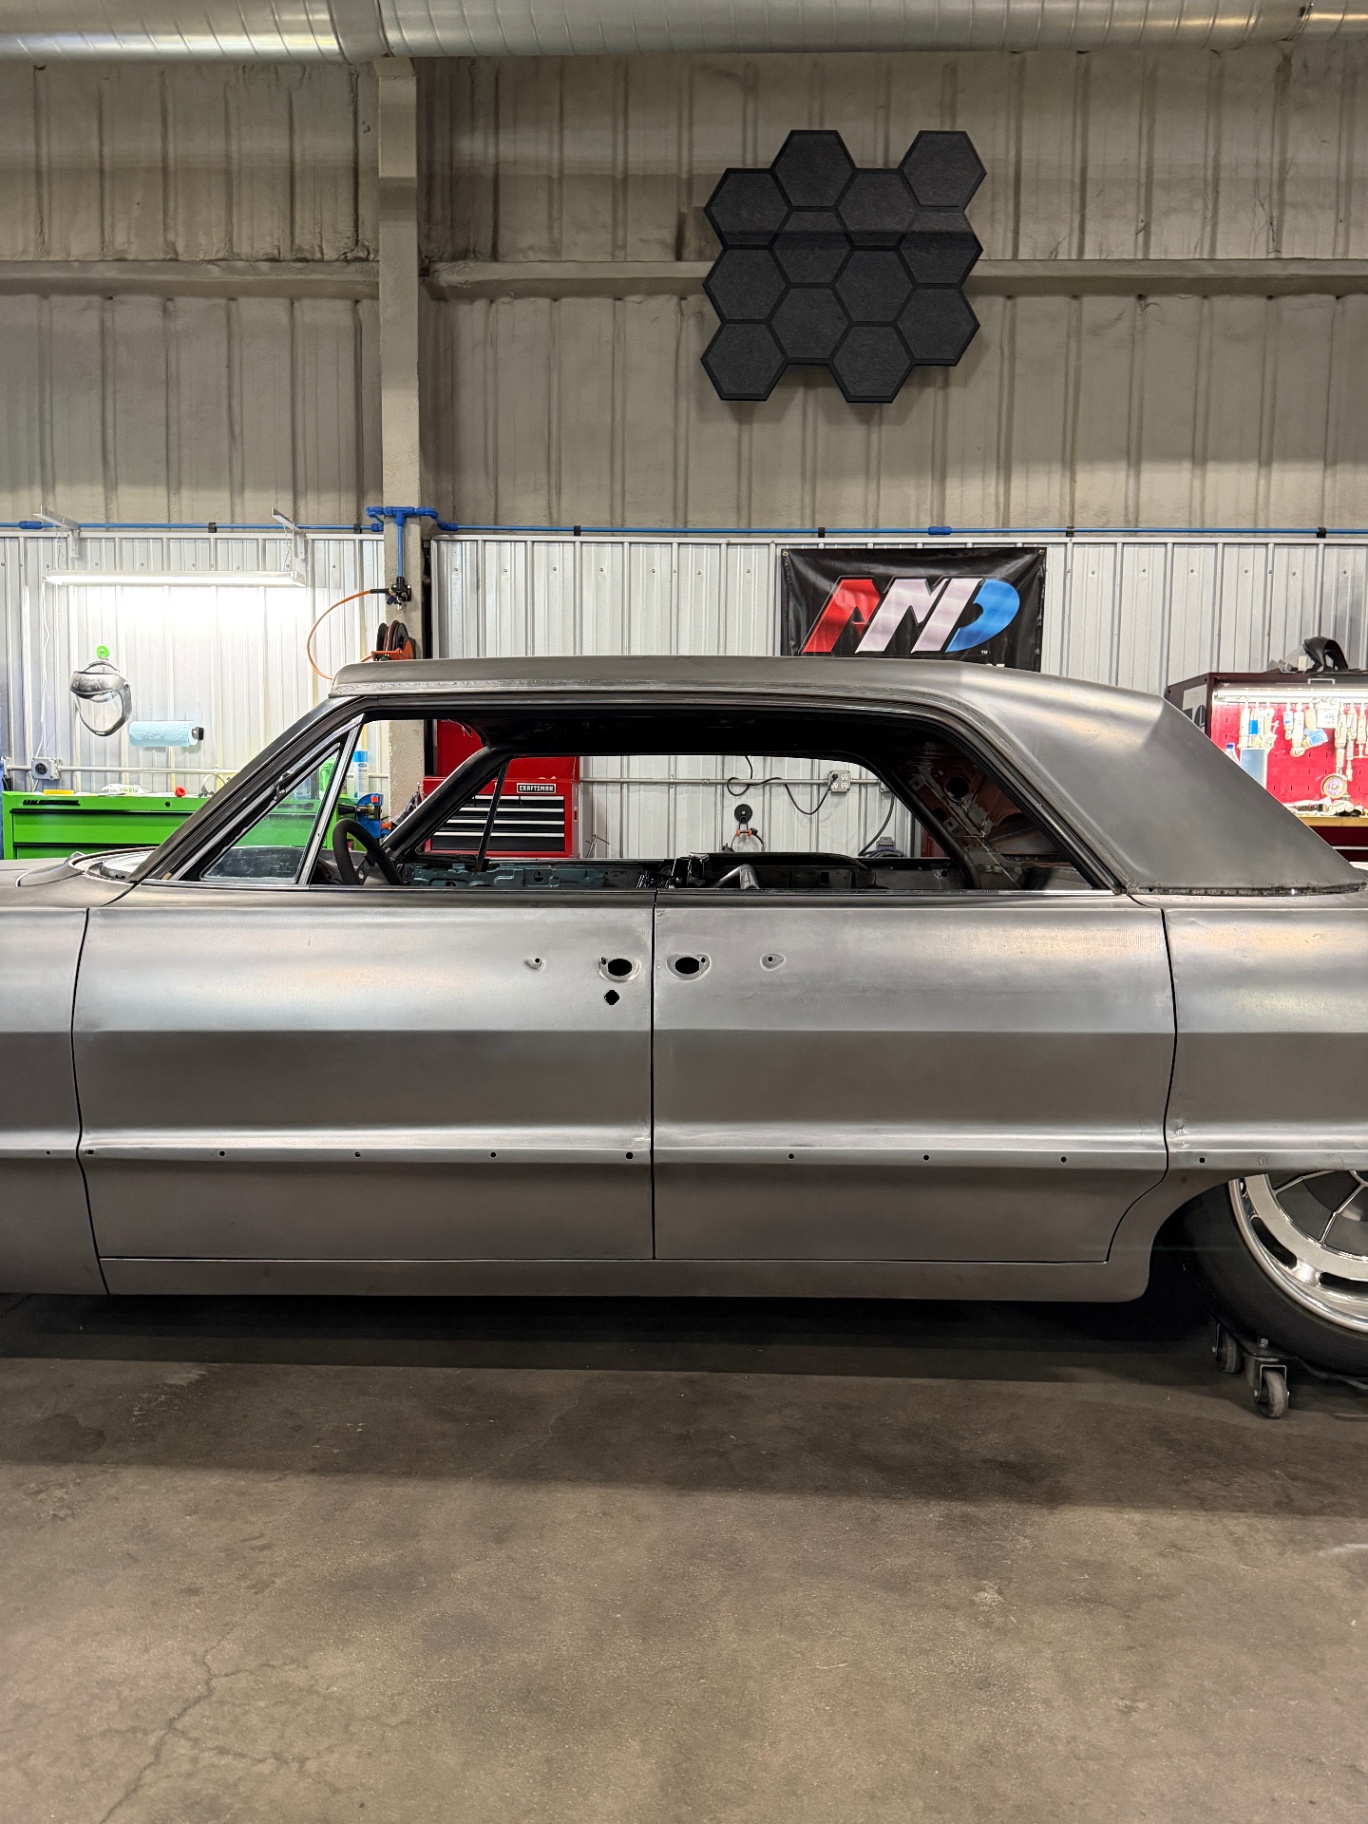
The original four-door roof was cut off and replaced with a hardtop from a two-door donor car — a huge amount of metalwork to blend the new roof line into the existing quarters and A/B-pillars. The doors were also reworked to open suicide-style for the finished car.

Body on the rotisserie with the reworked suicide doors hung and swung open.J004
Body on the rotisserie with the reworked suicide doors hung and swung open.
Two-door roof clamped in place on the shell — the donor hardtop being fitted to the four-door body before final welding.J005
Two-door roof clamped in place on the shell — the donor hardtop being fitted to the four-door body before final welding.
New two-door roof welded in — plug-weld beads along the pillar transition.J006
New two-door roof welded in — plug-weld beads along the pillar transition.
Roof-to-quarter transition around the rear window opening, ready for finish work.J007
Roof-to-quarter transition around the rear window opening, ready for finish work.
C-pillar detail after the roof was blended into the reworked quarter.J008
C-pillar detail after the roof was blended into the reworked quarter.

UPDATE 07 / 10

Aug 1, 2022

BODYWORK

Rust repair and quarter panel work

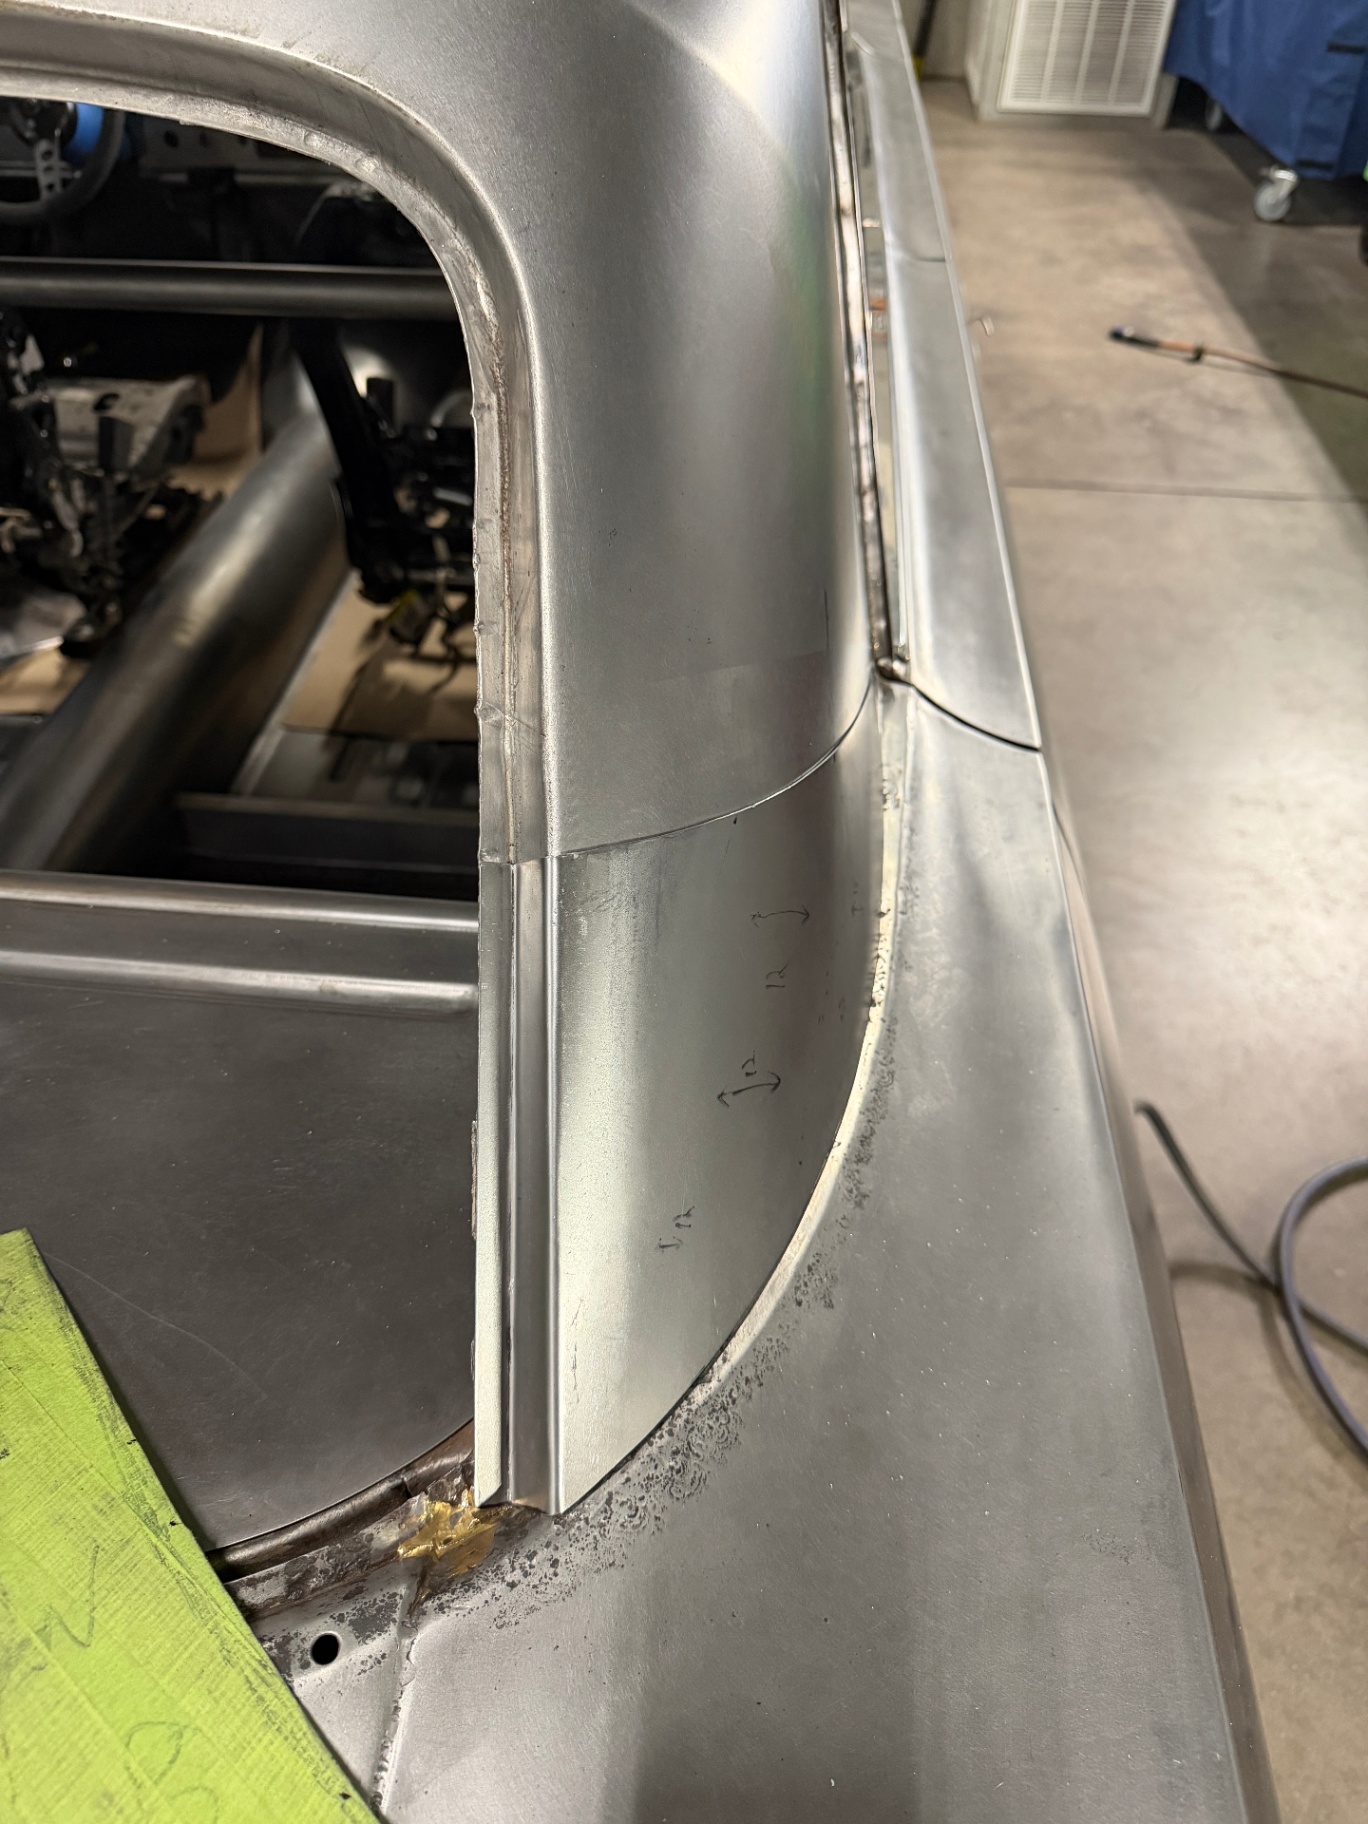
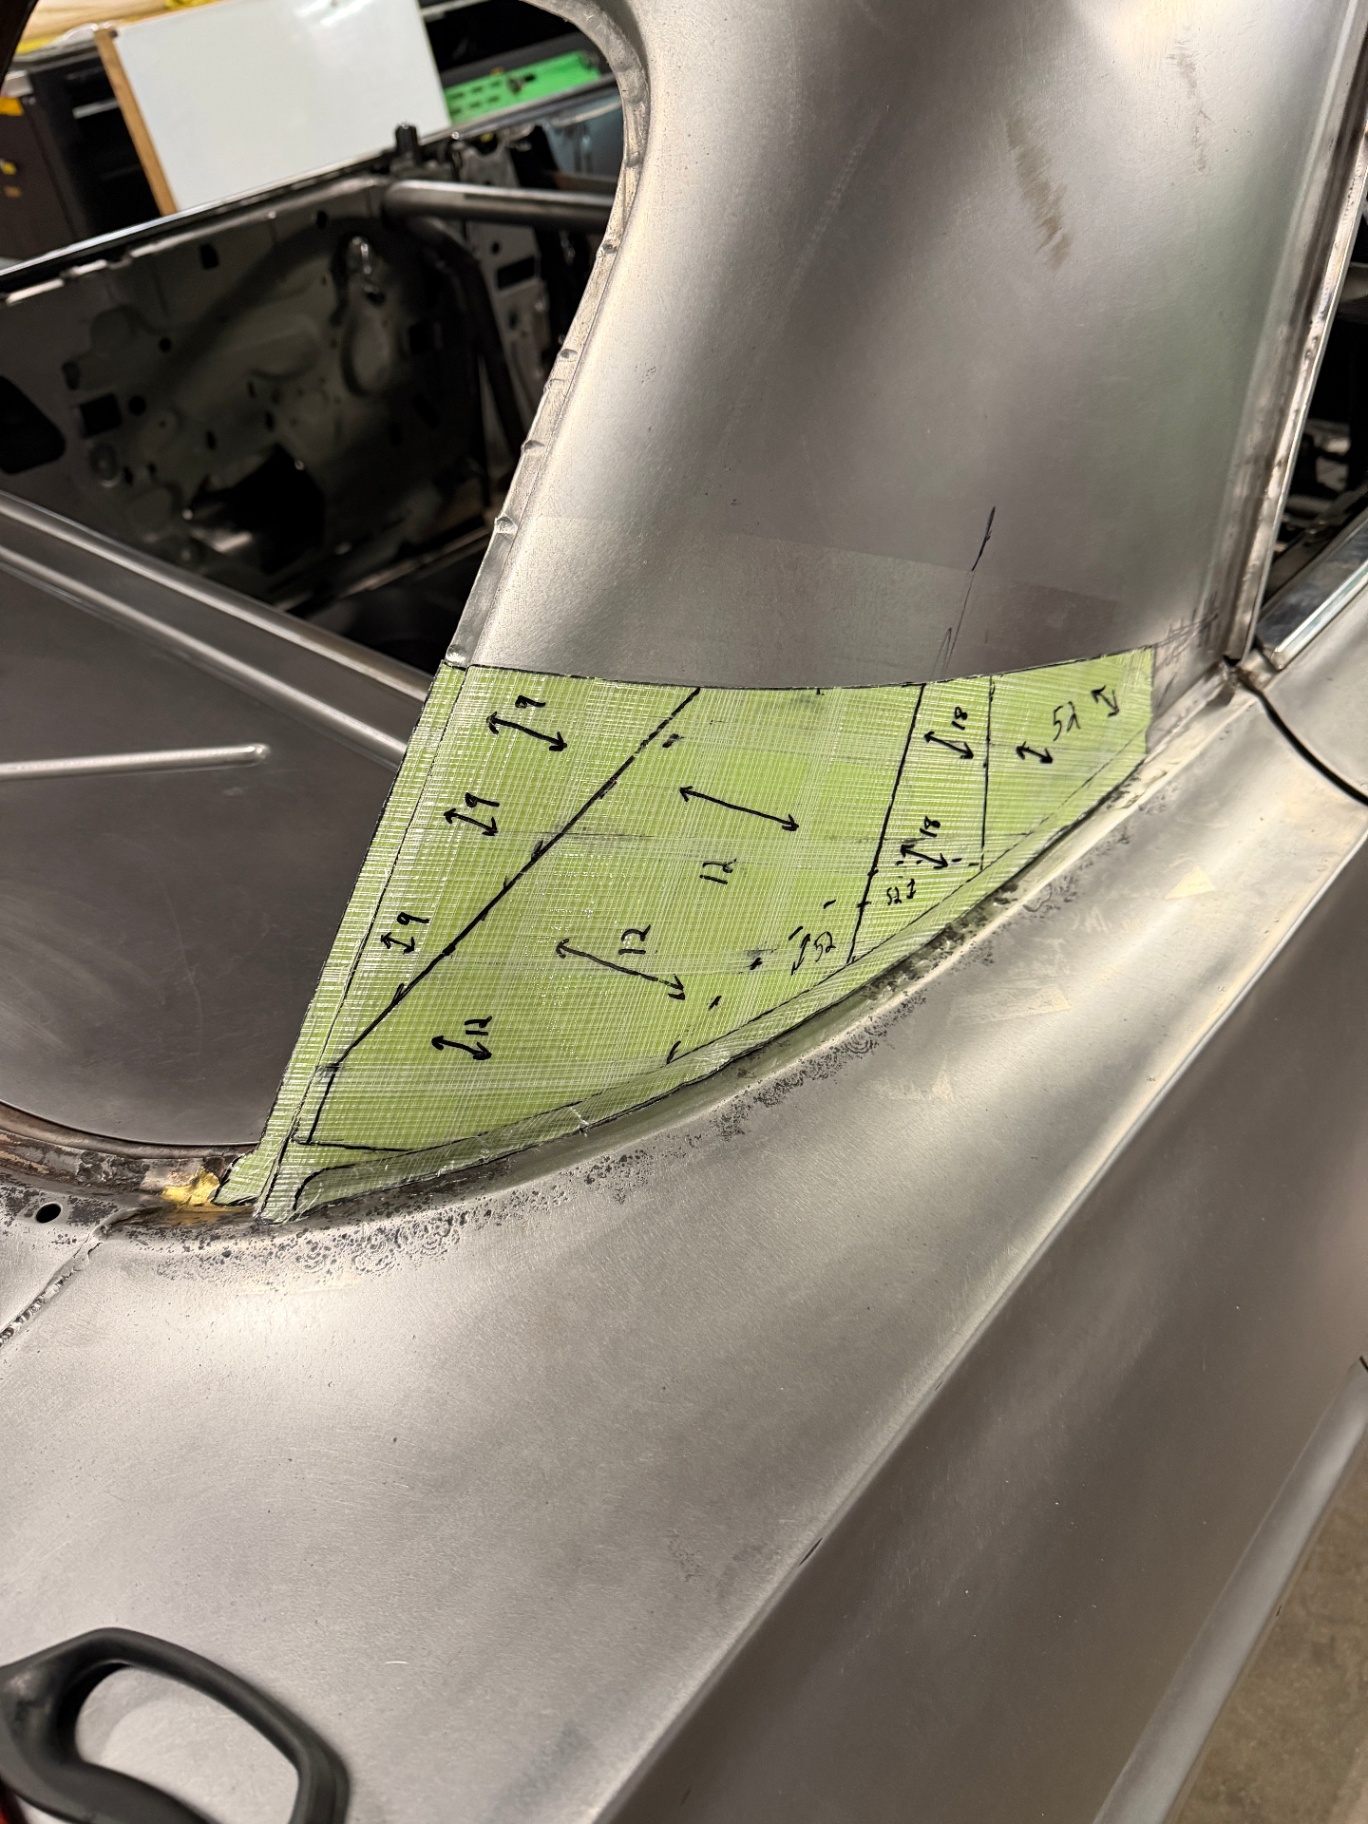
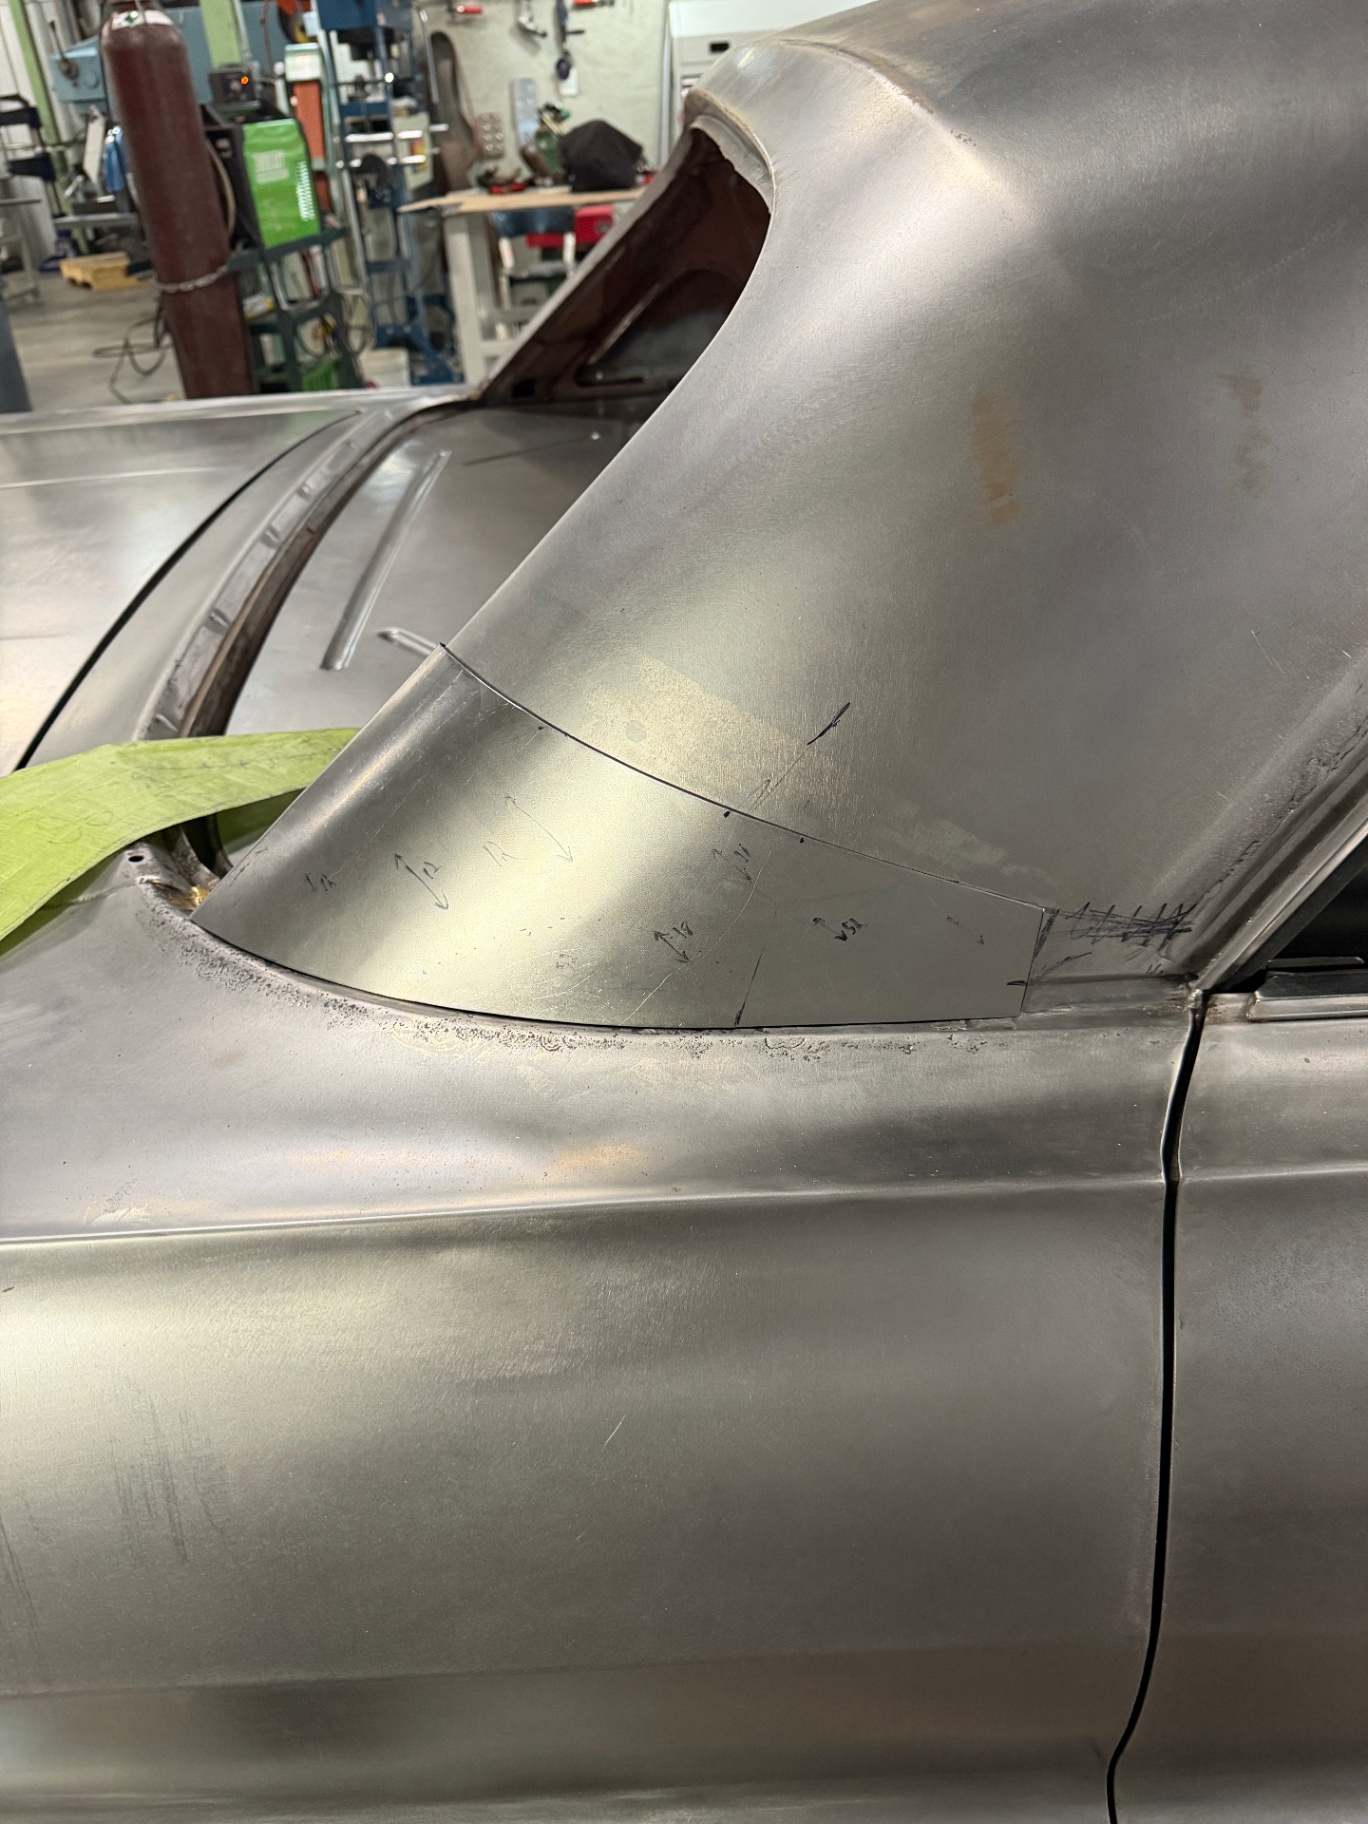
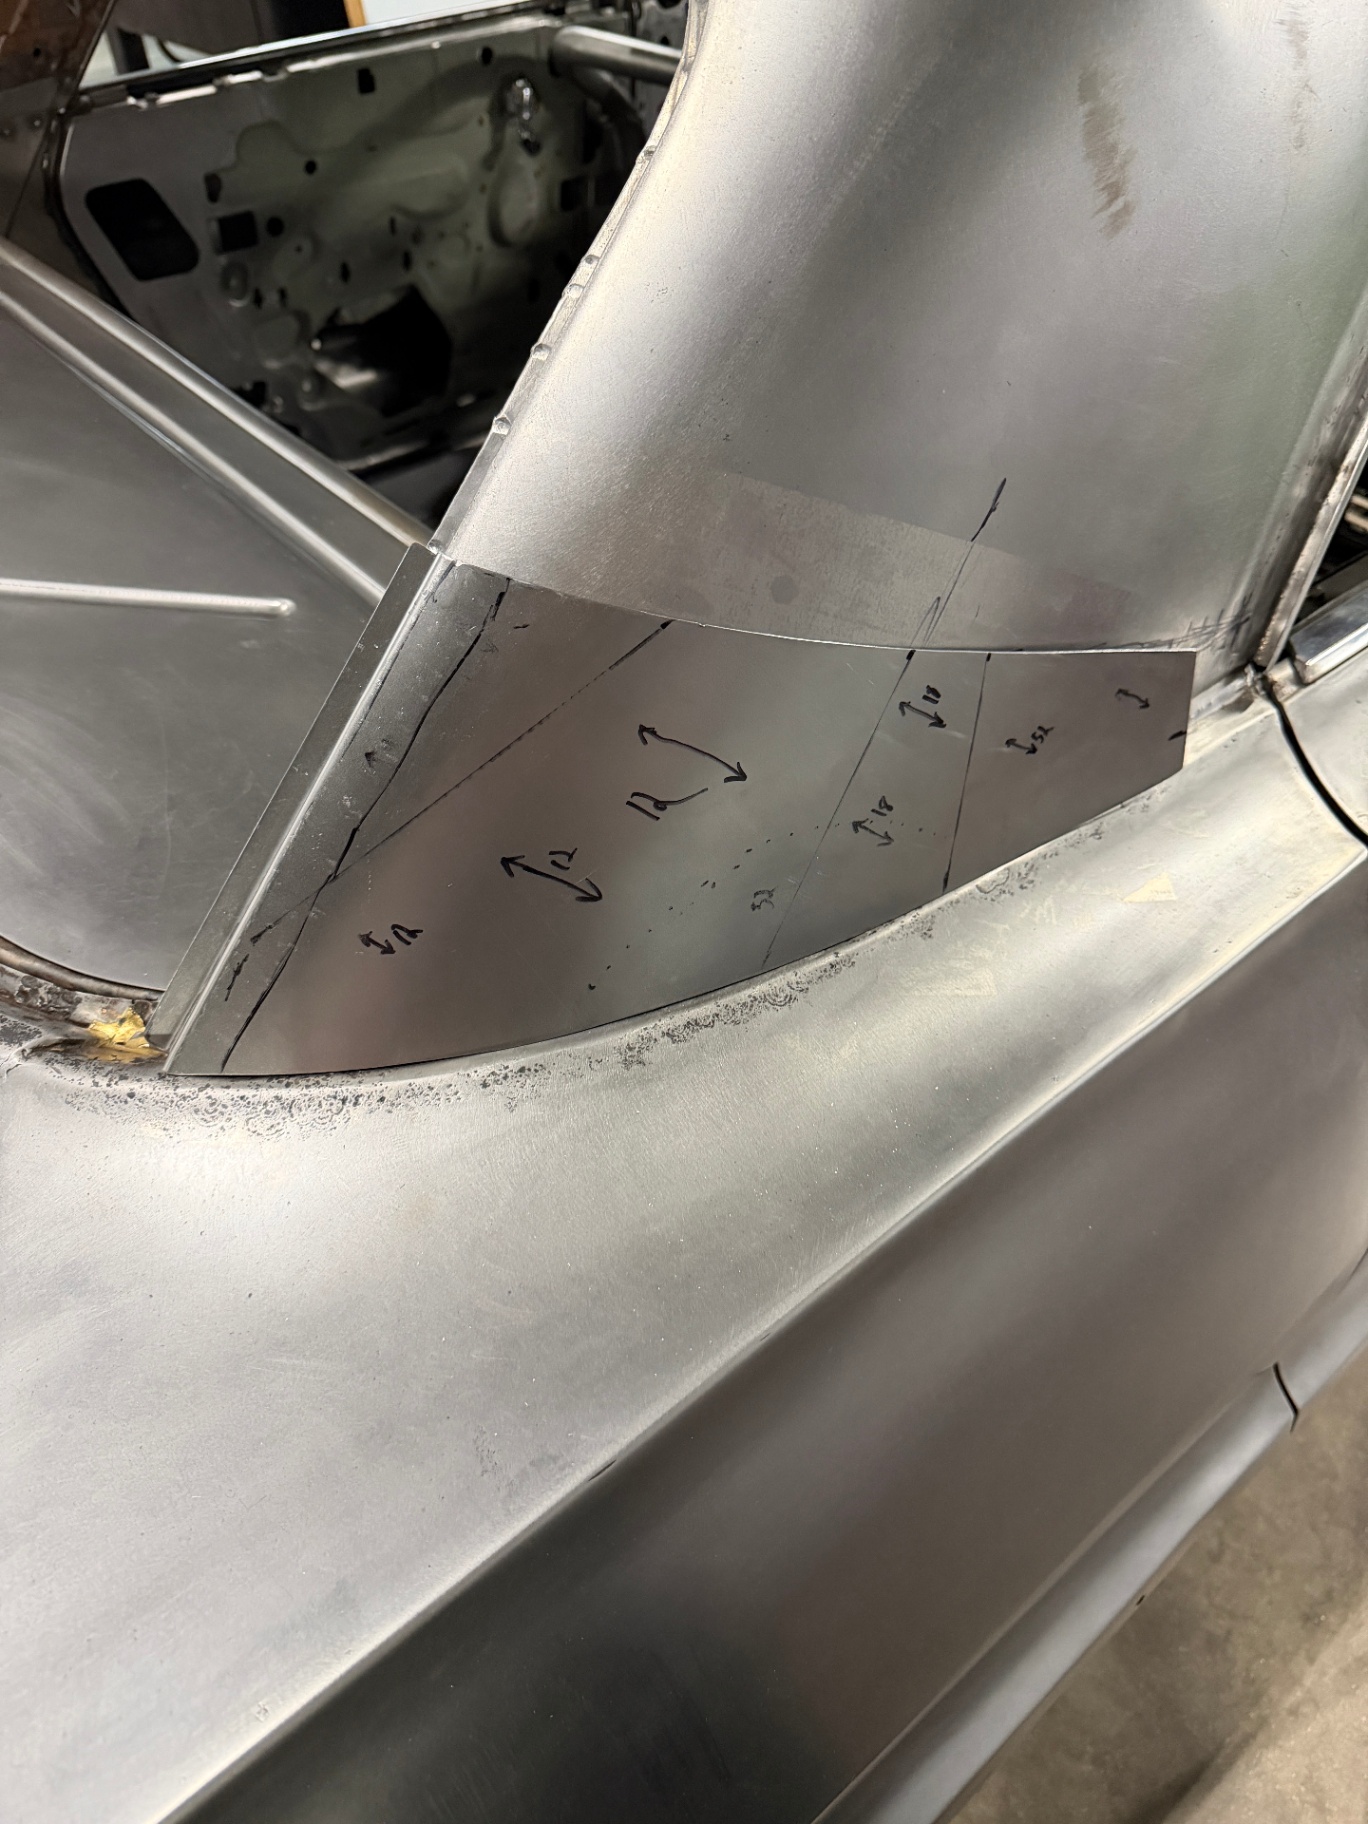
Rust in the lower quarters was cut out and replaced with hand-fabricated patch panels — templated in place, scribed, cut, and welded in so the new metal follows the original body line exactly.

Green fiberglass template taped over the quarter to map the patch panel.J009
Green fiberglass template taped over the quarter to map the patch panel.
Steel patch scribed from the template, ready to trim to size.J010
Steel patch scribed from the template, ready to trim to size.
Patch panel fit-checked in the opening before final weld.J011
Patch panel fit-checked in the opening before final weld.

UPDATE 06 / 10

Feb 1, 2022

CHASSIS

Art Morrison chassis — modified for wheel and stance

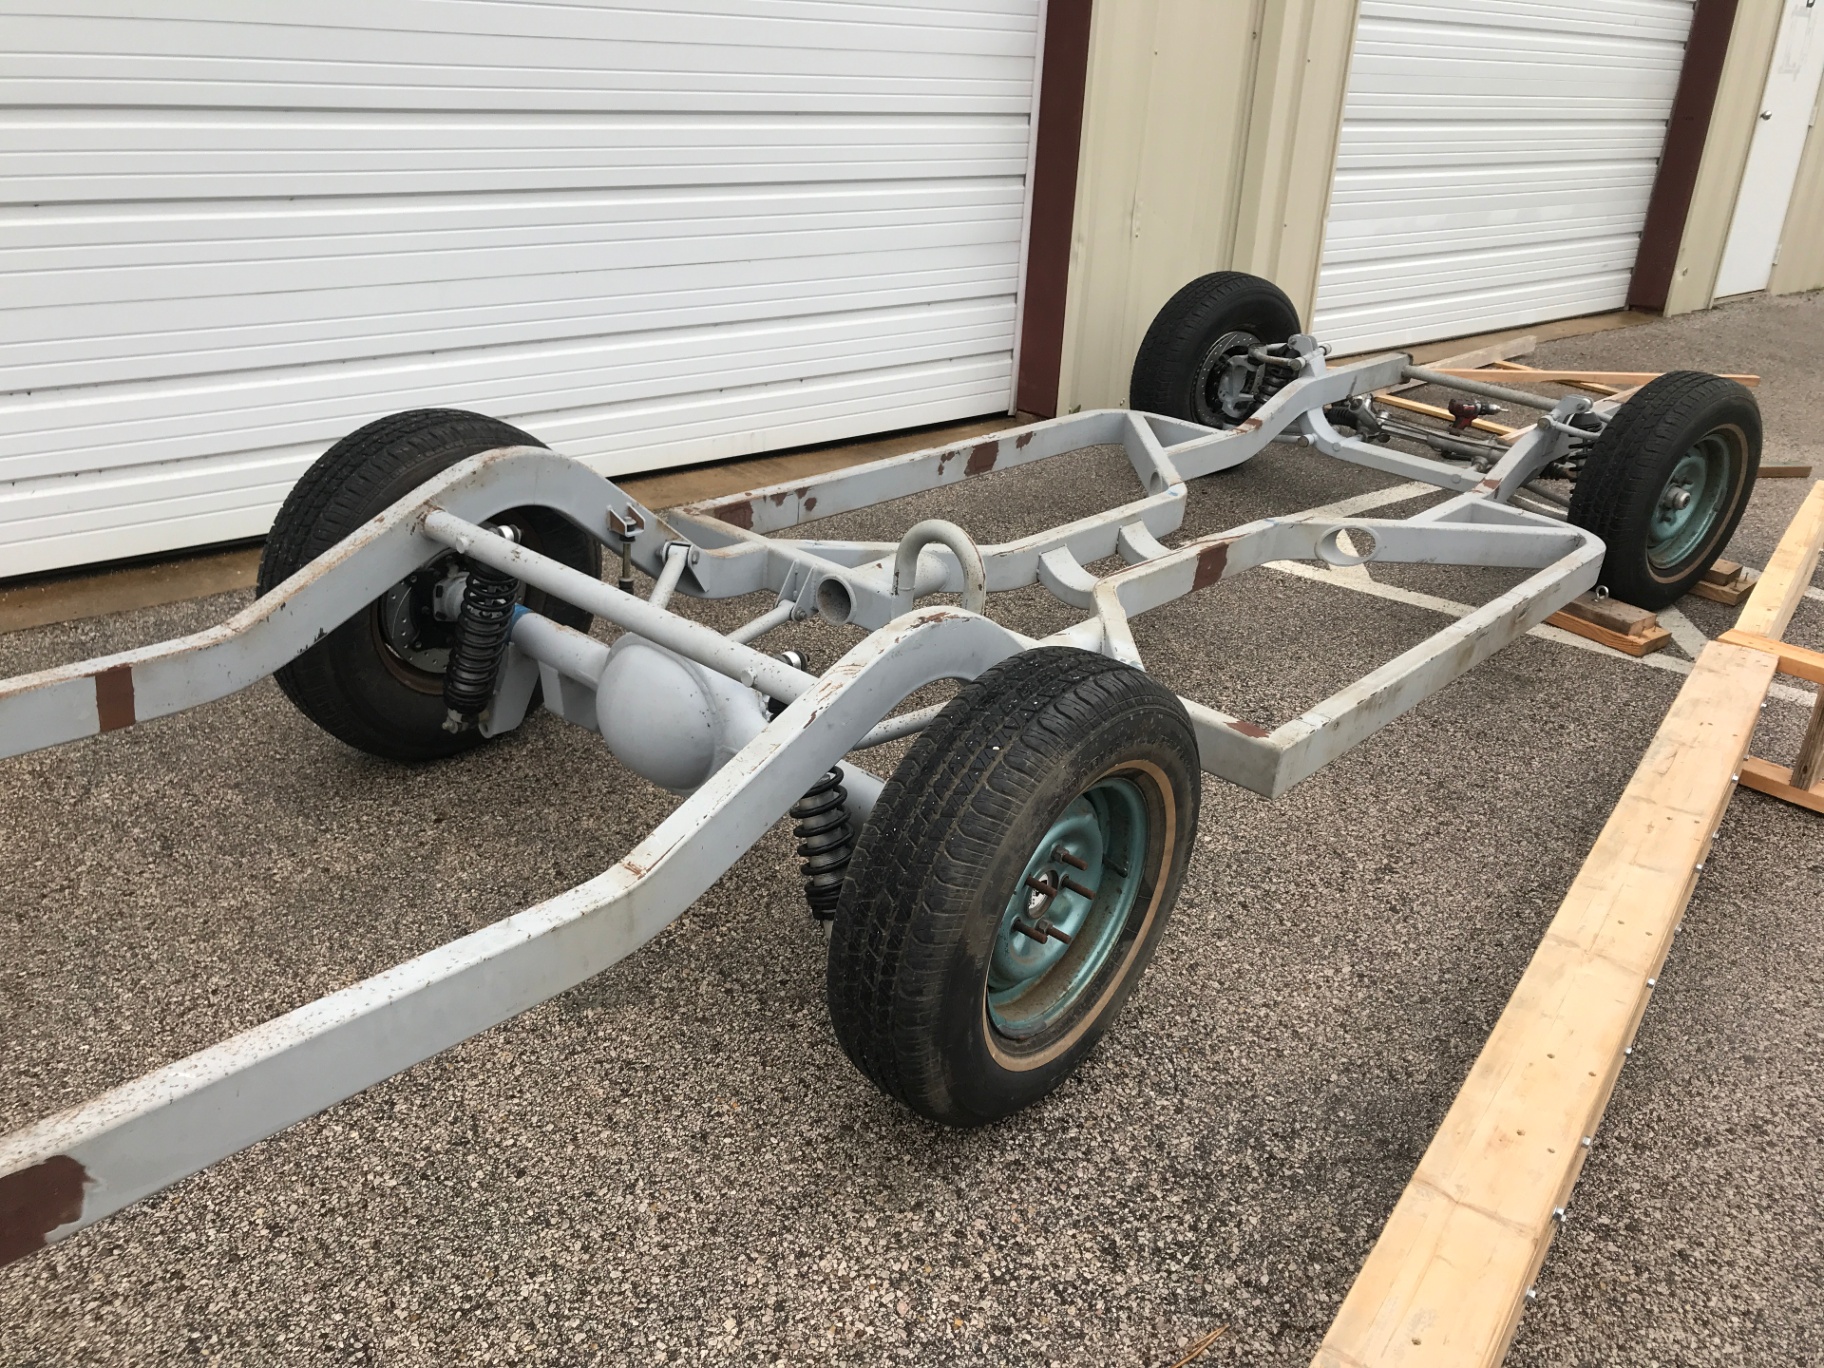
The 63 is being built on an Art Morrison chassis, modified in-house to accommodate the larger wheel and tire package and the laid-out ride height called for in the rendering. The original factory frame came out early in the teardown.

The Impala's original factory frame and suspension after the body came off.J012
The Impala's original factory frame and suspension after the body came off.
Body up on the rotisserie so the new Morrison chassis can be built underneath.J013
Body up on the rotisserie so the new Morrison chassis can be built underneath.

UPDATE 05 / 10

Sep 1, 2023

FABRICATION MILESTONE

Stainless gas tank — designed in-house, TIG welded

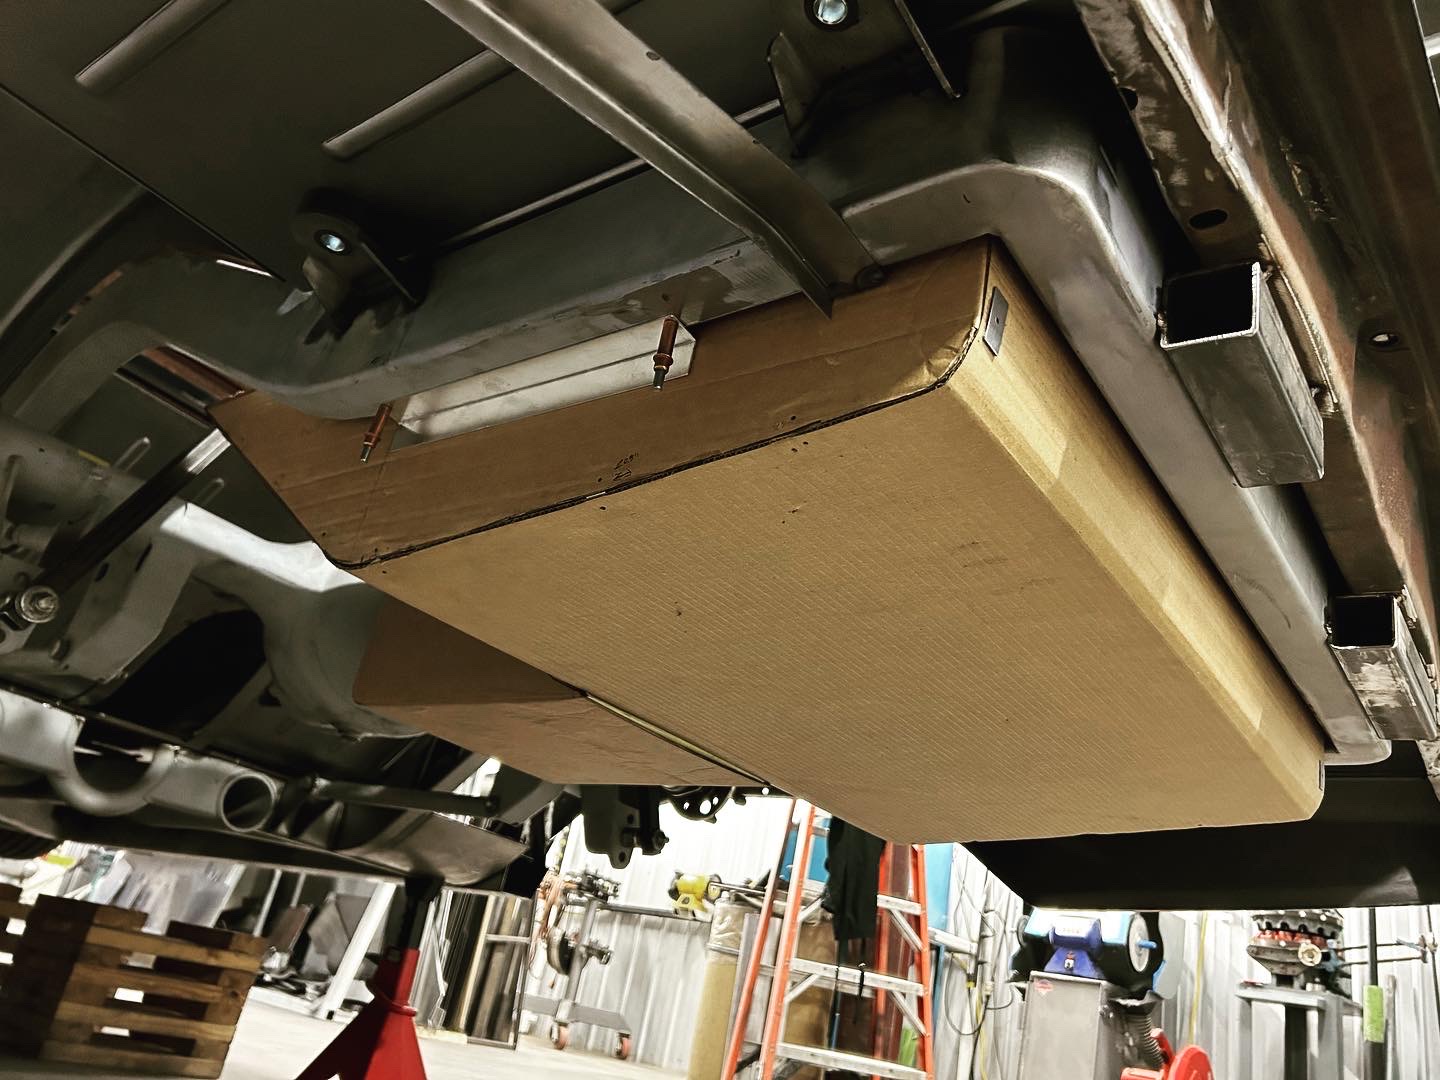
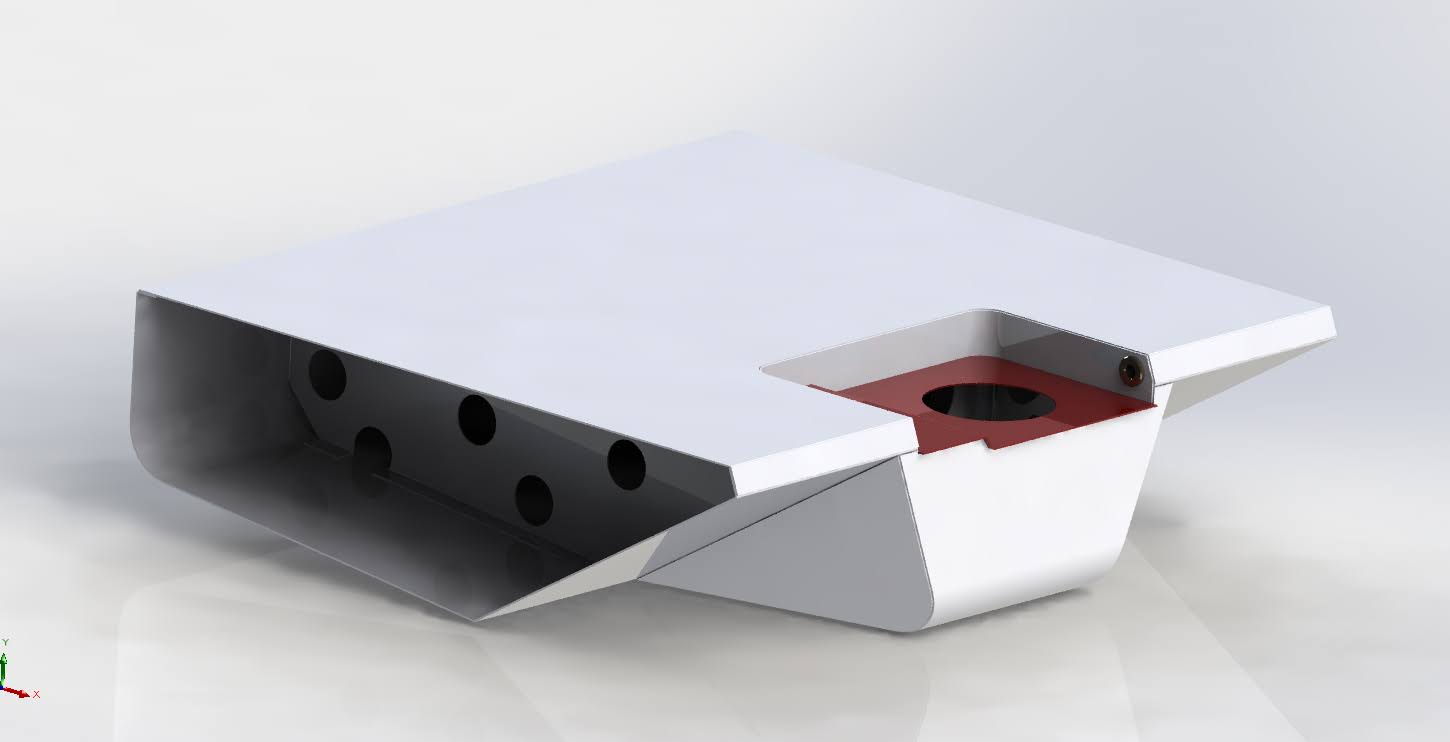
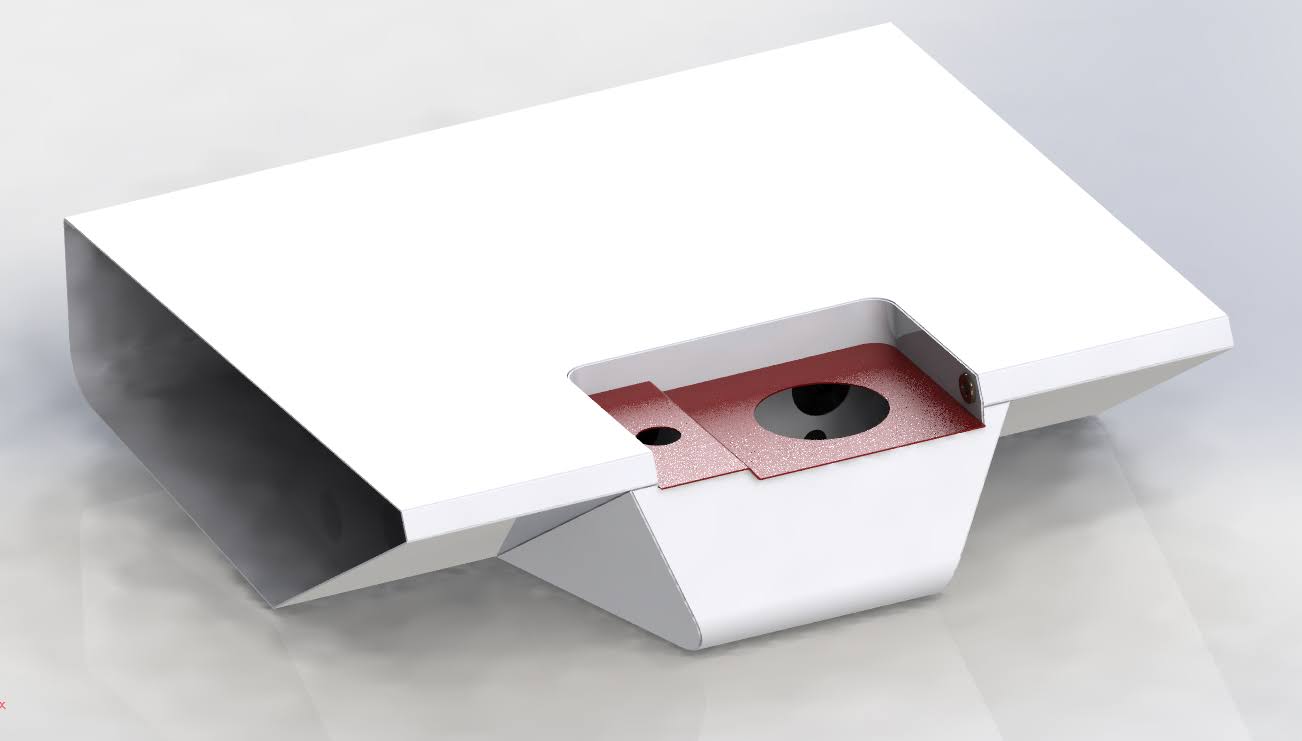
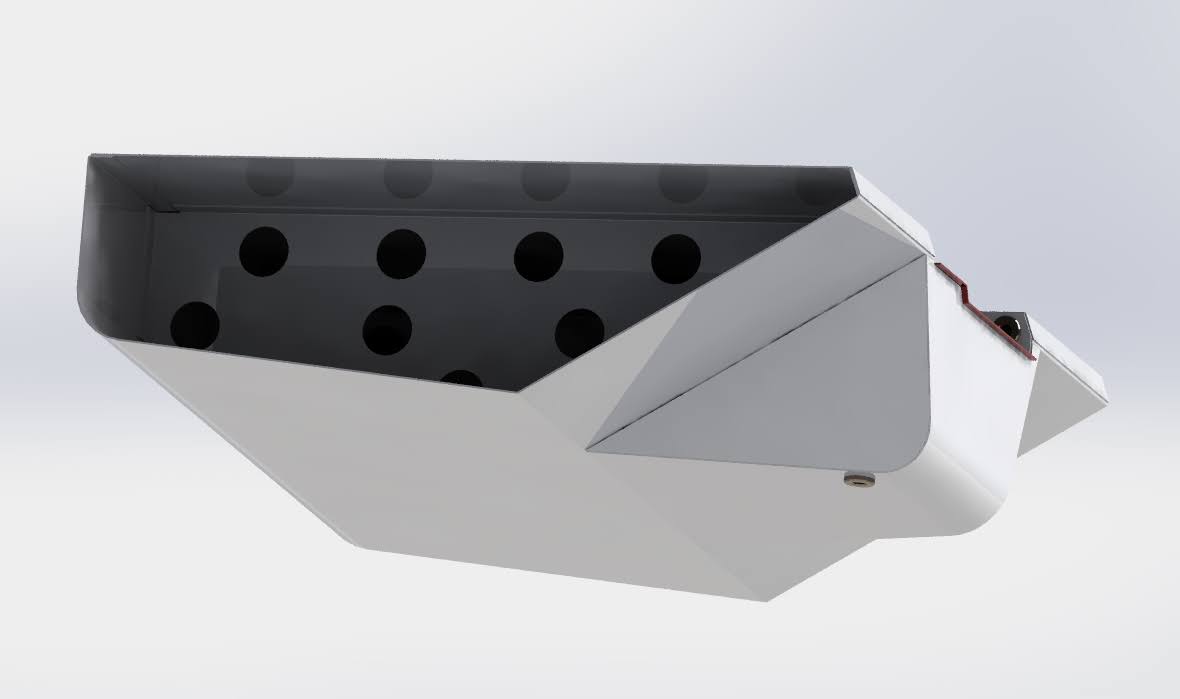
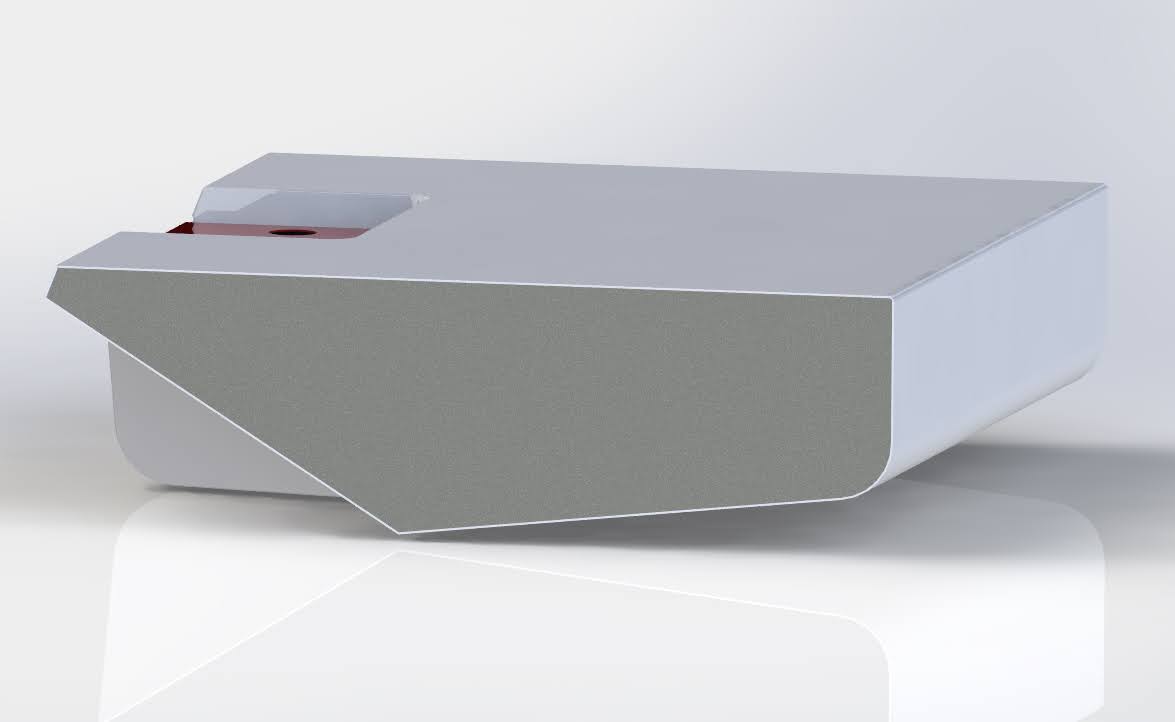
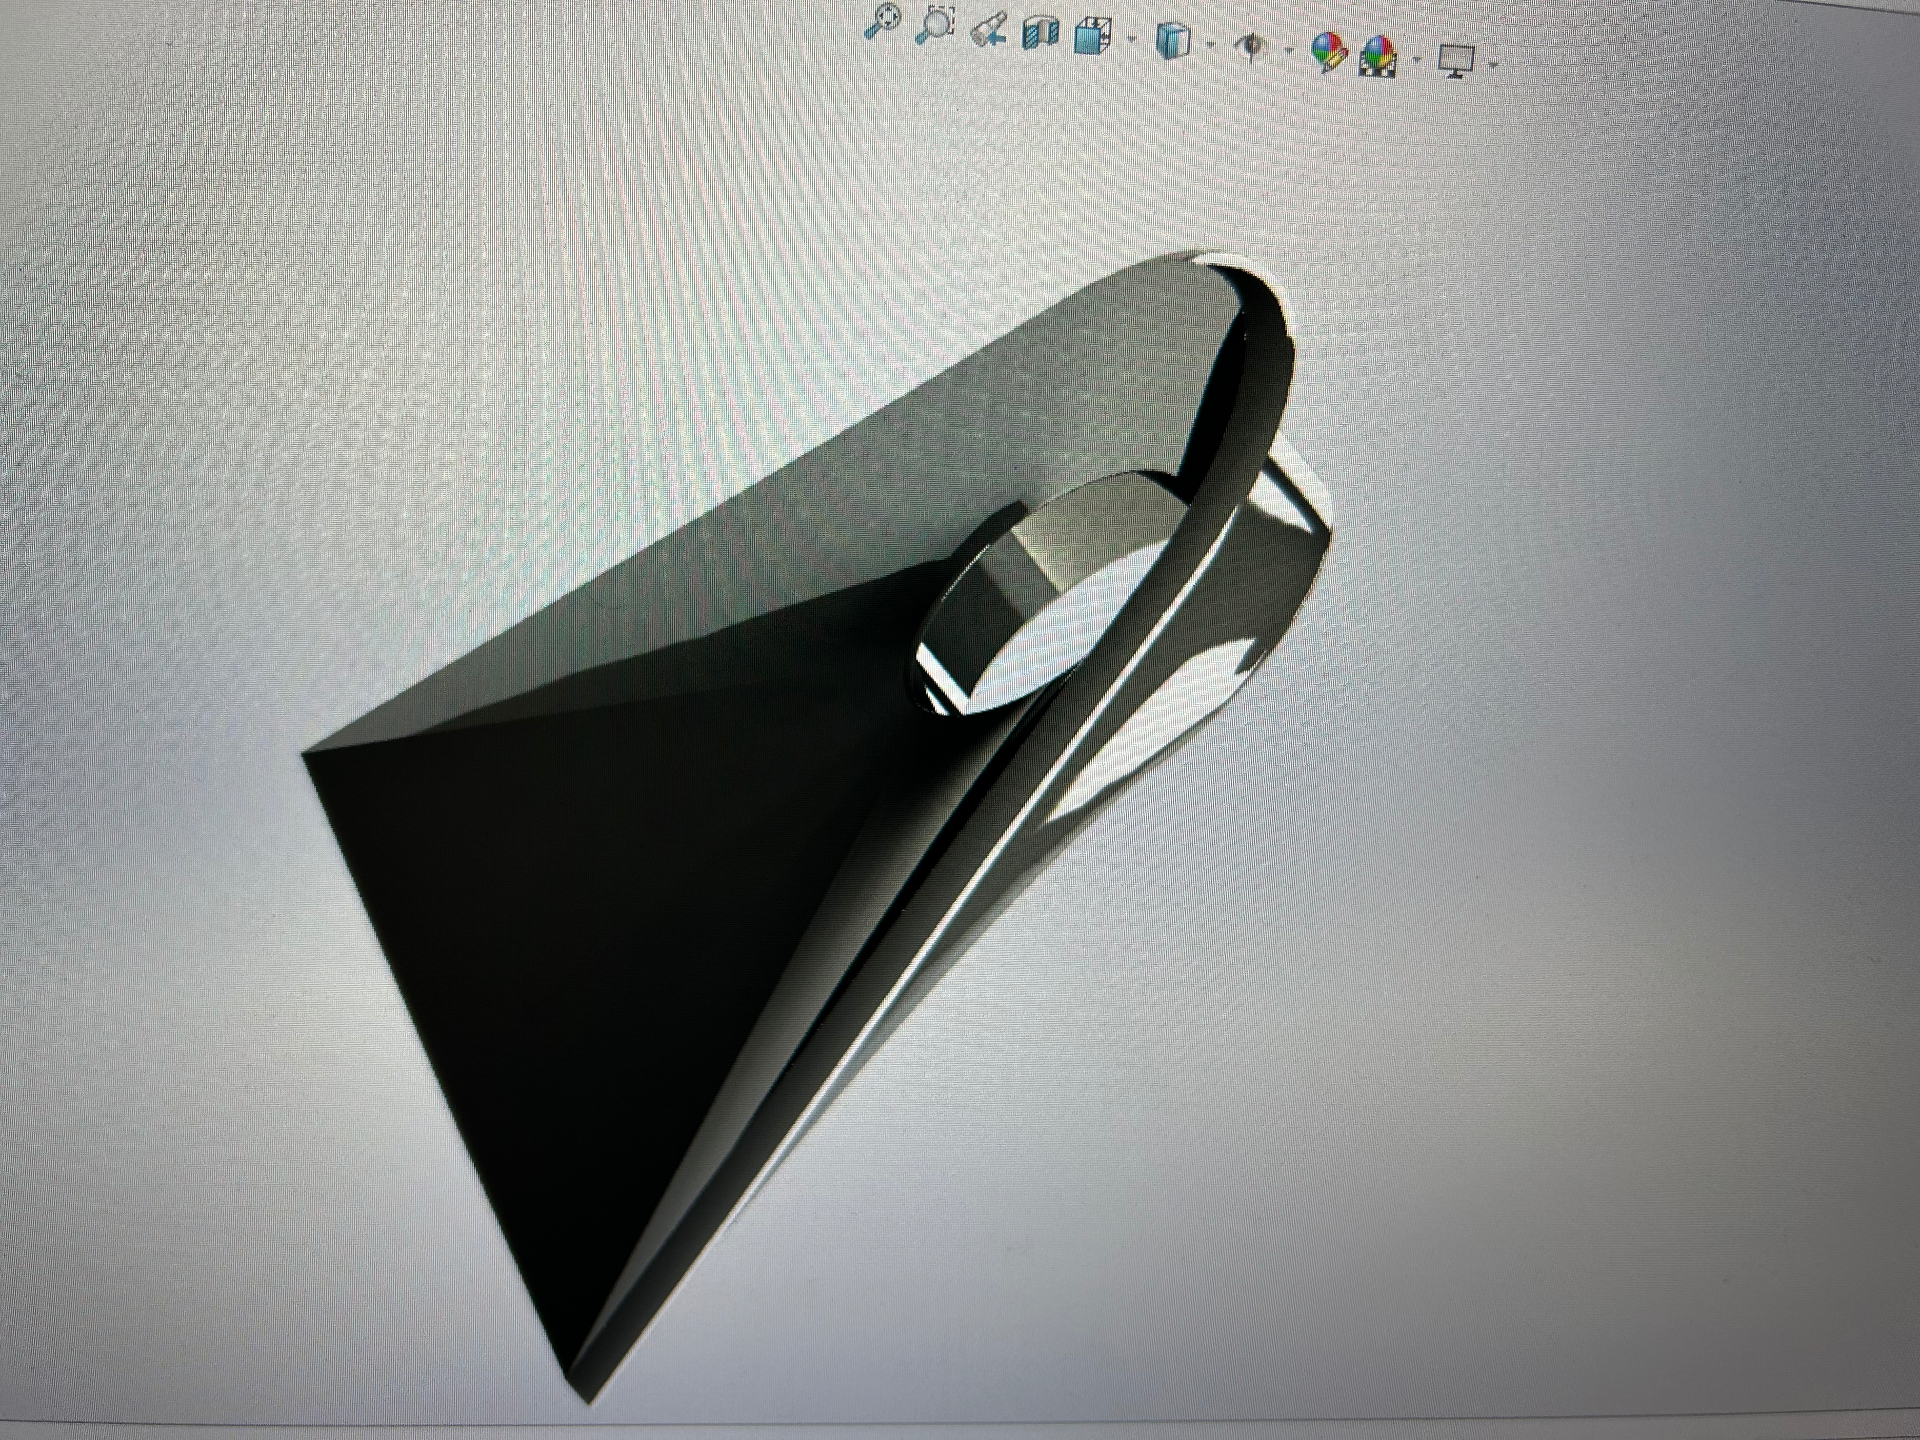
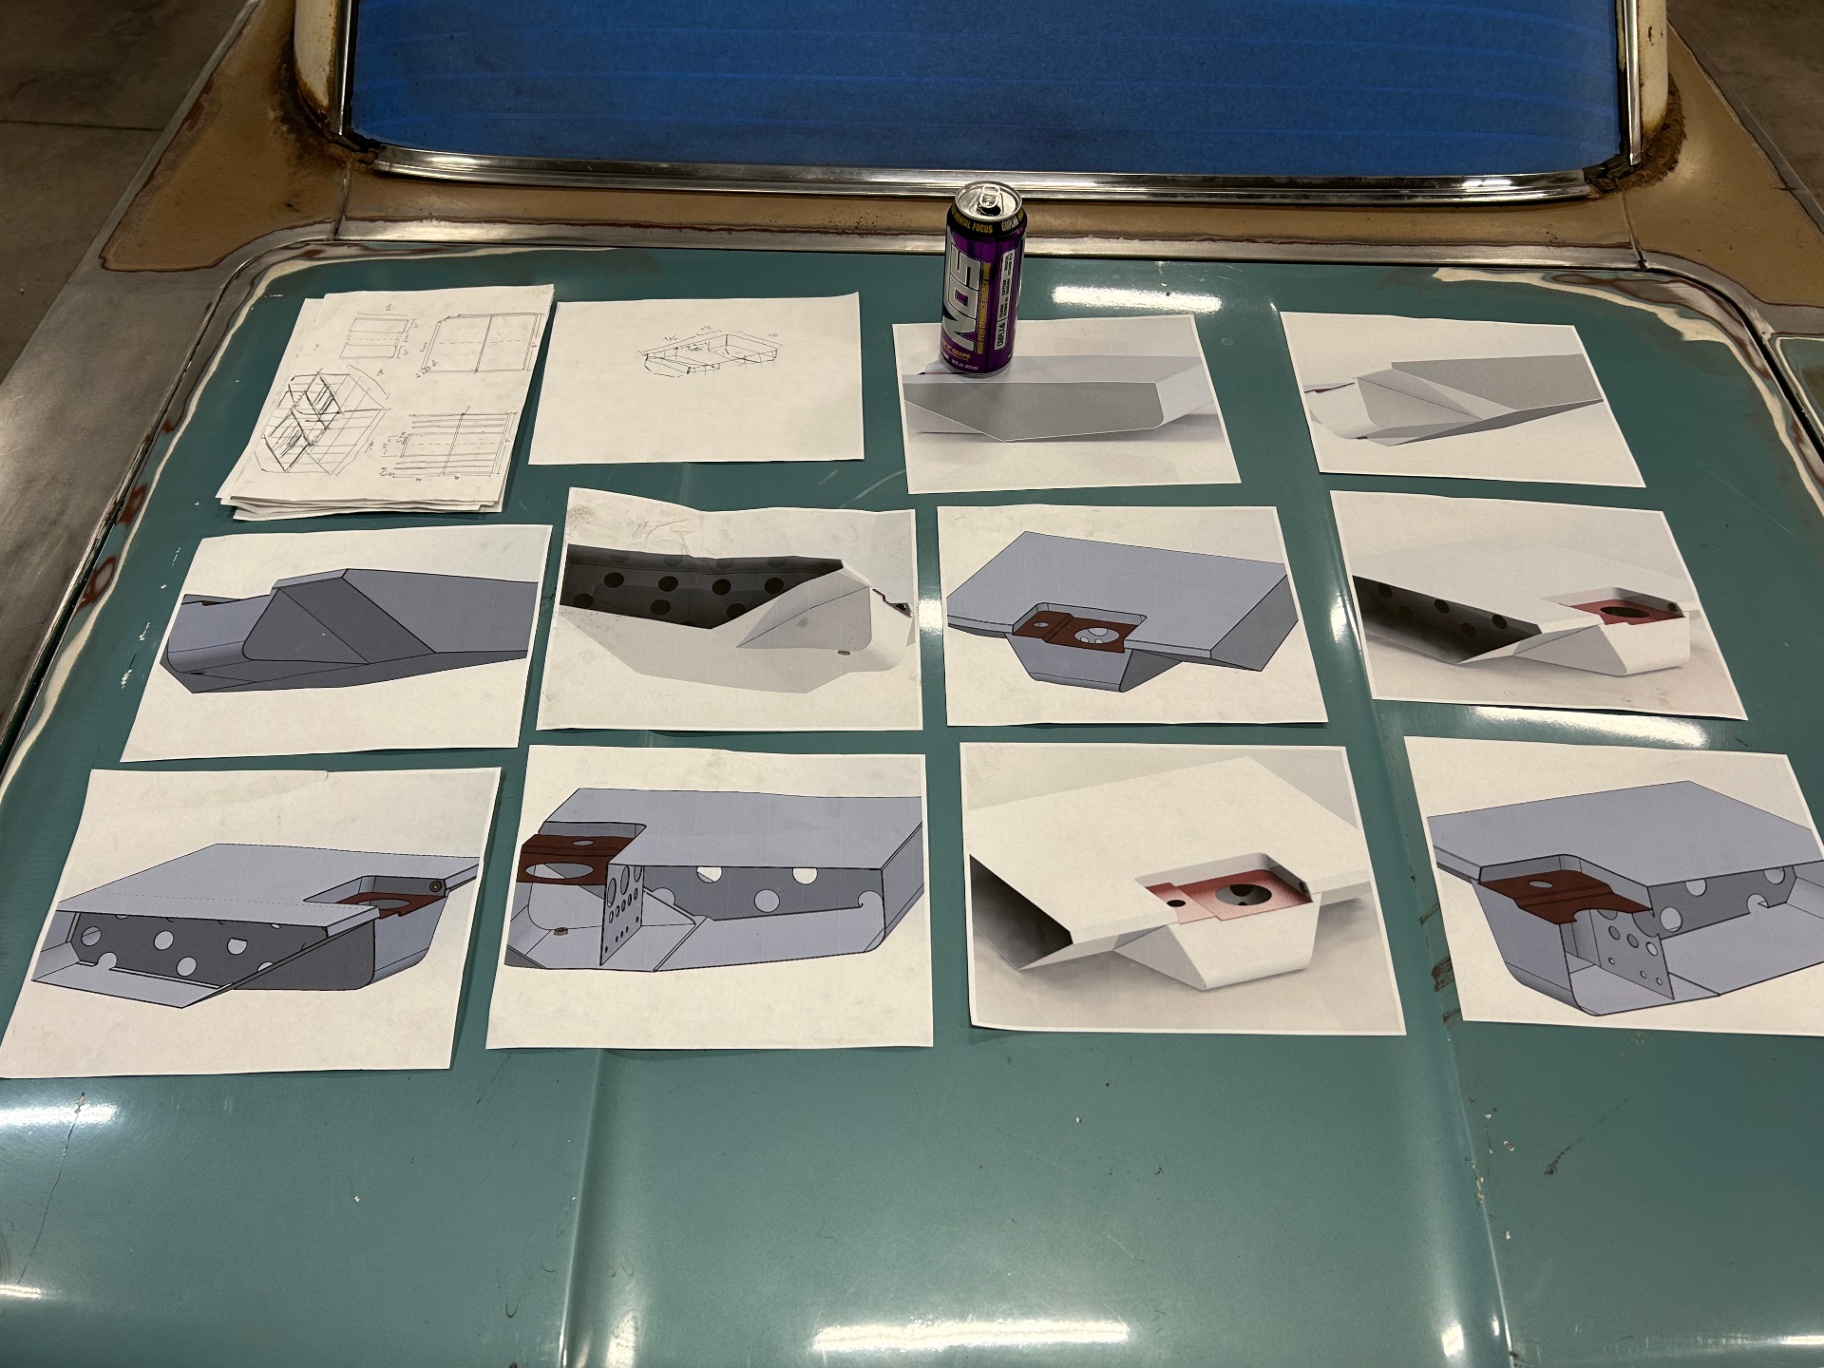
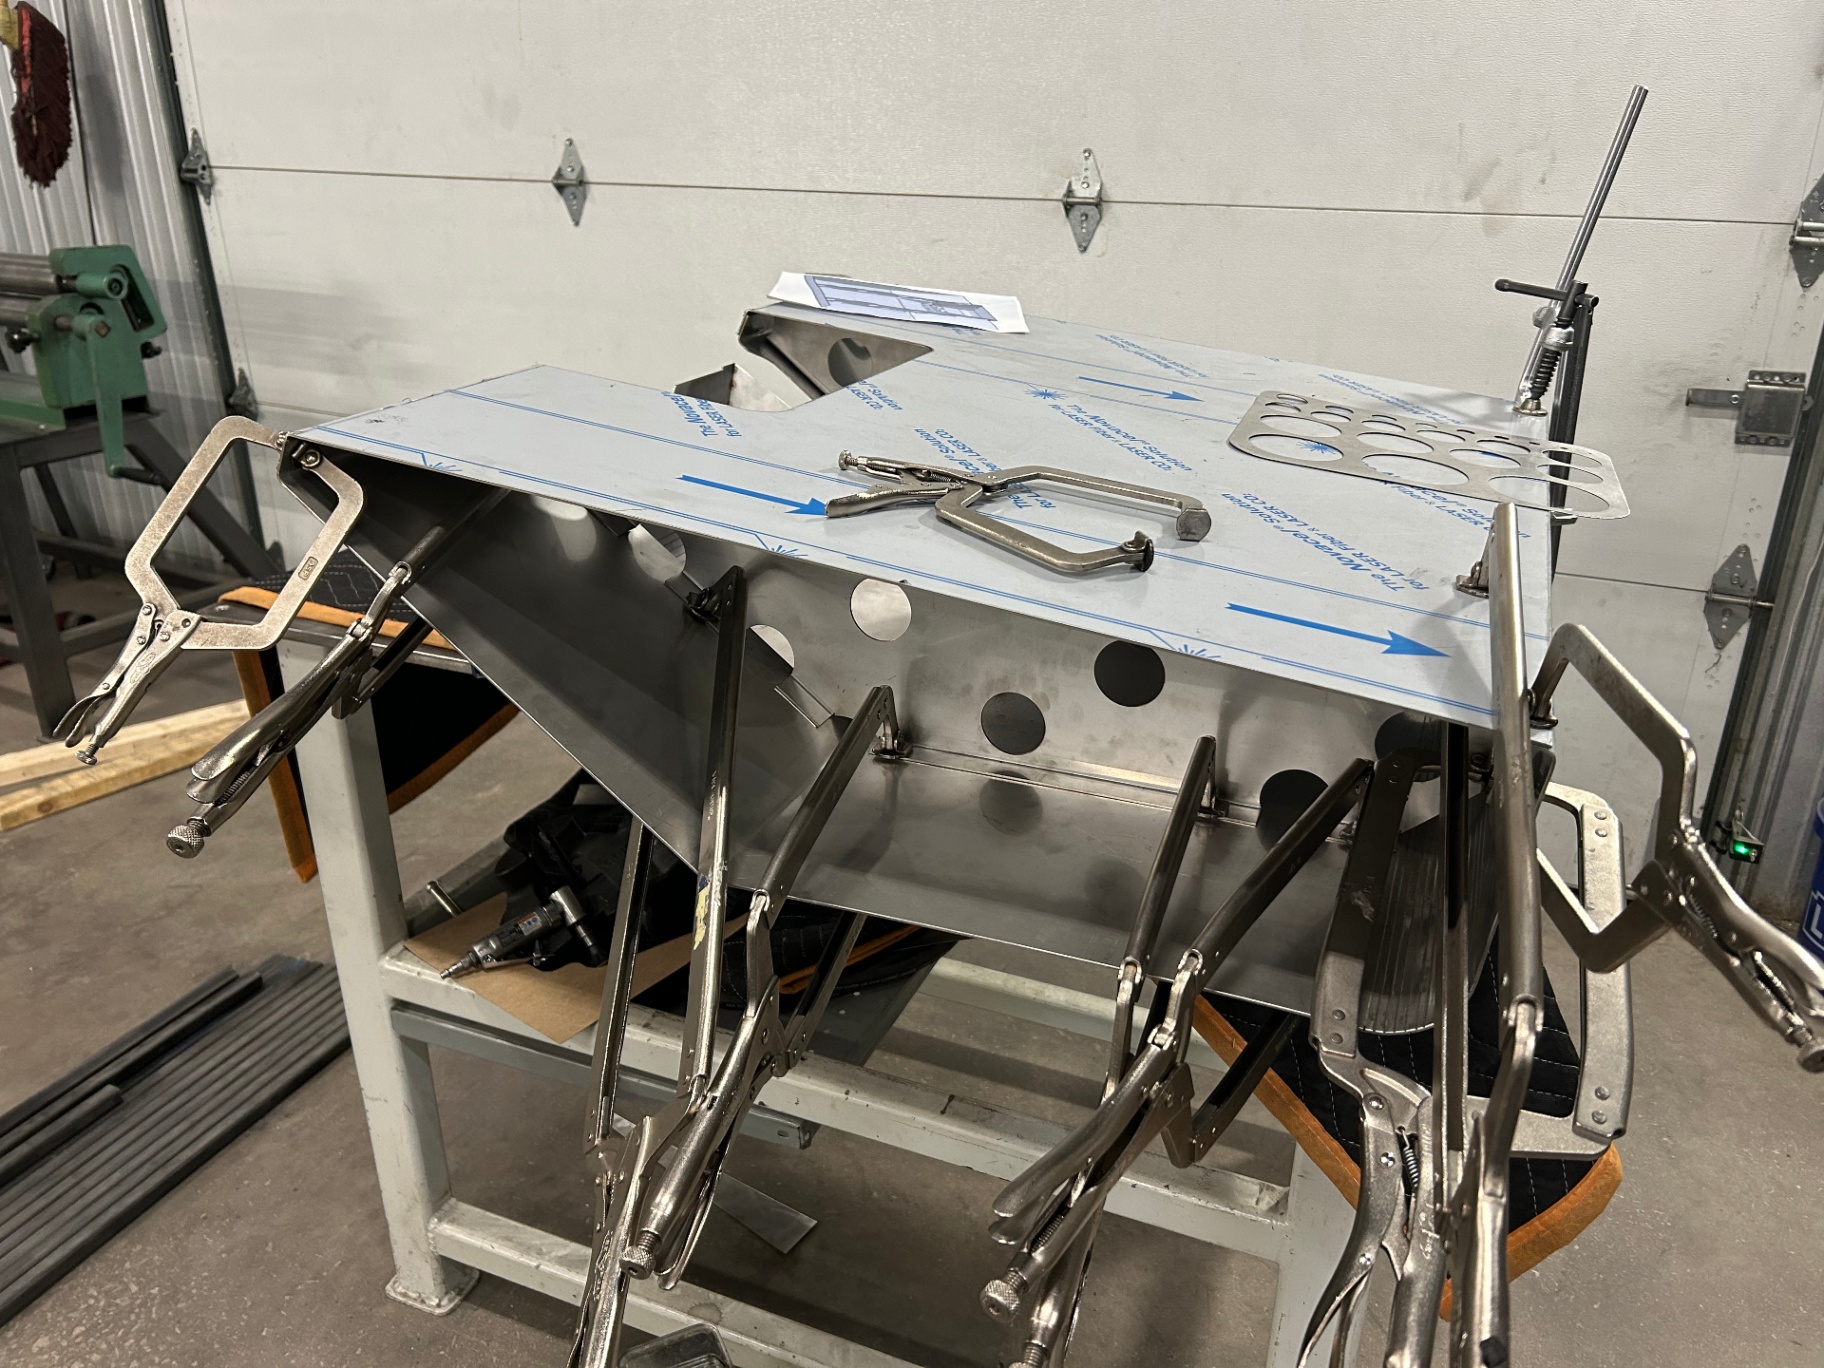
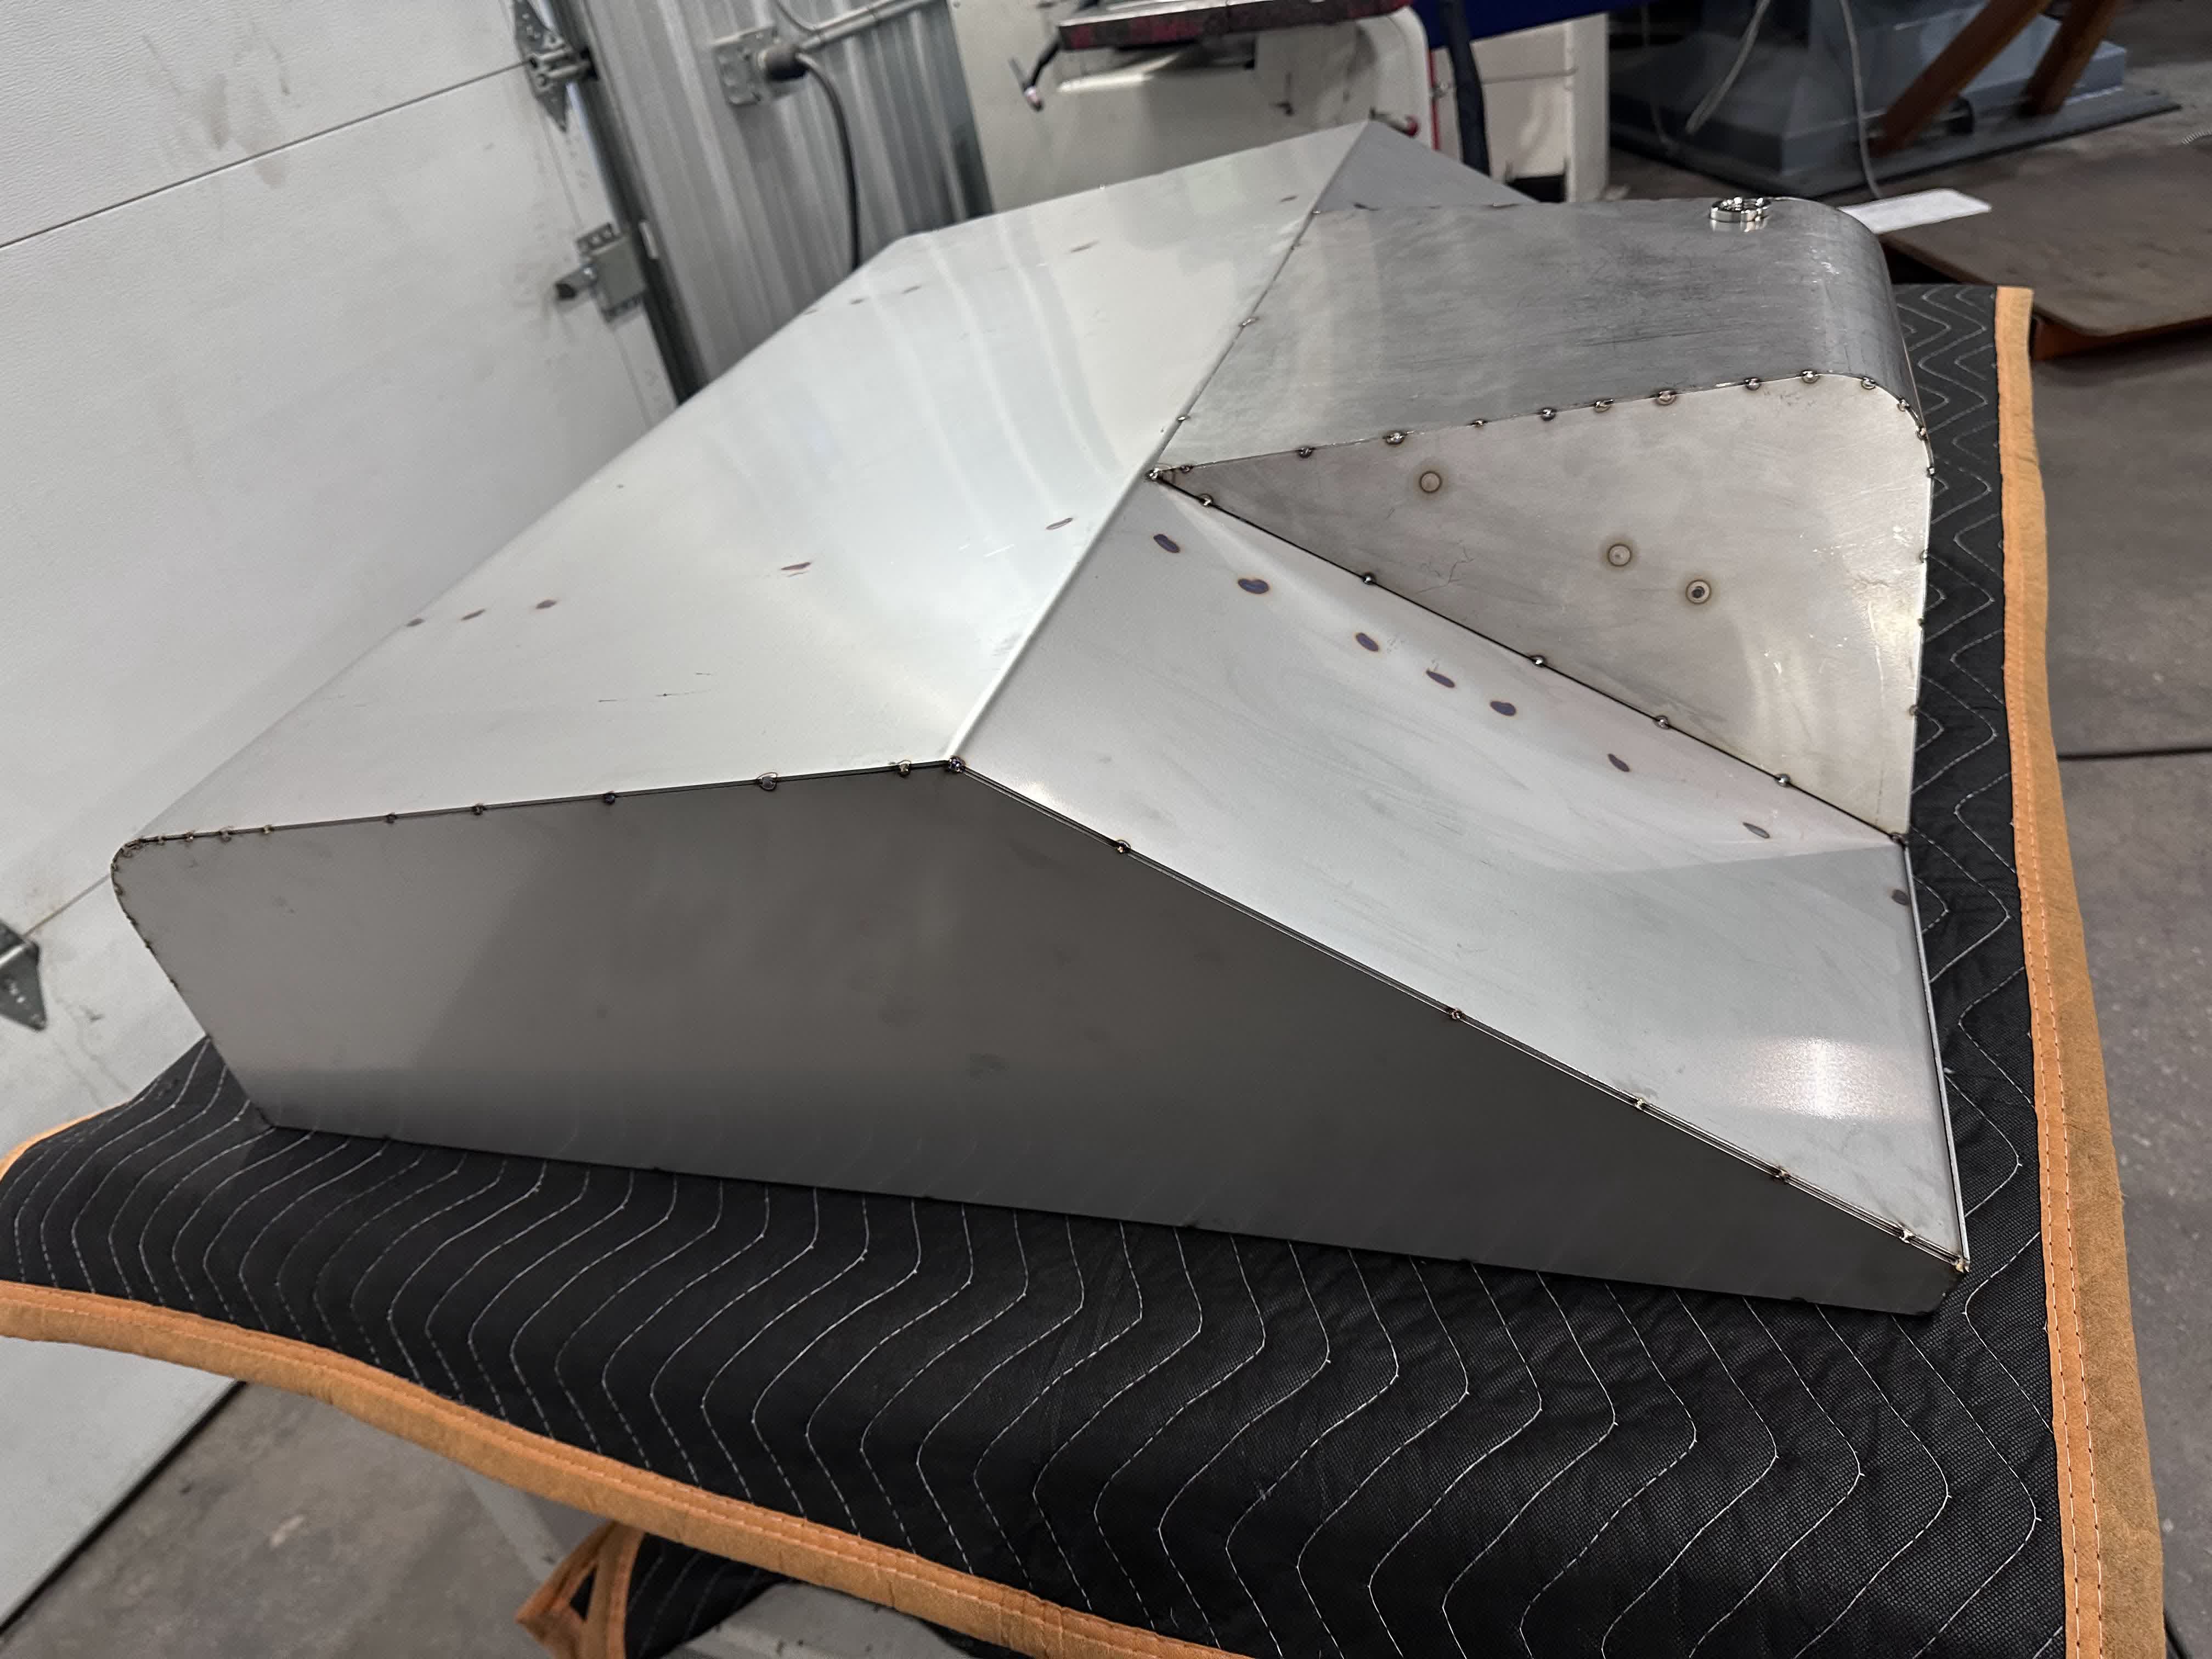
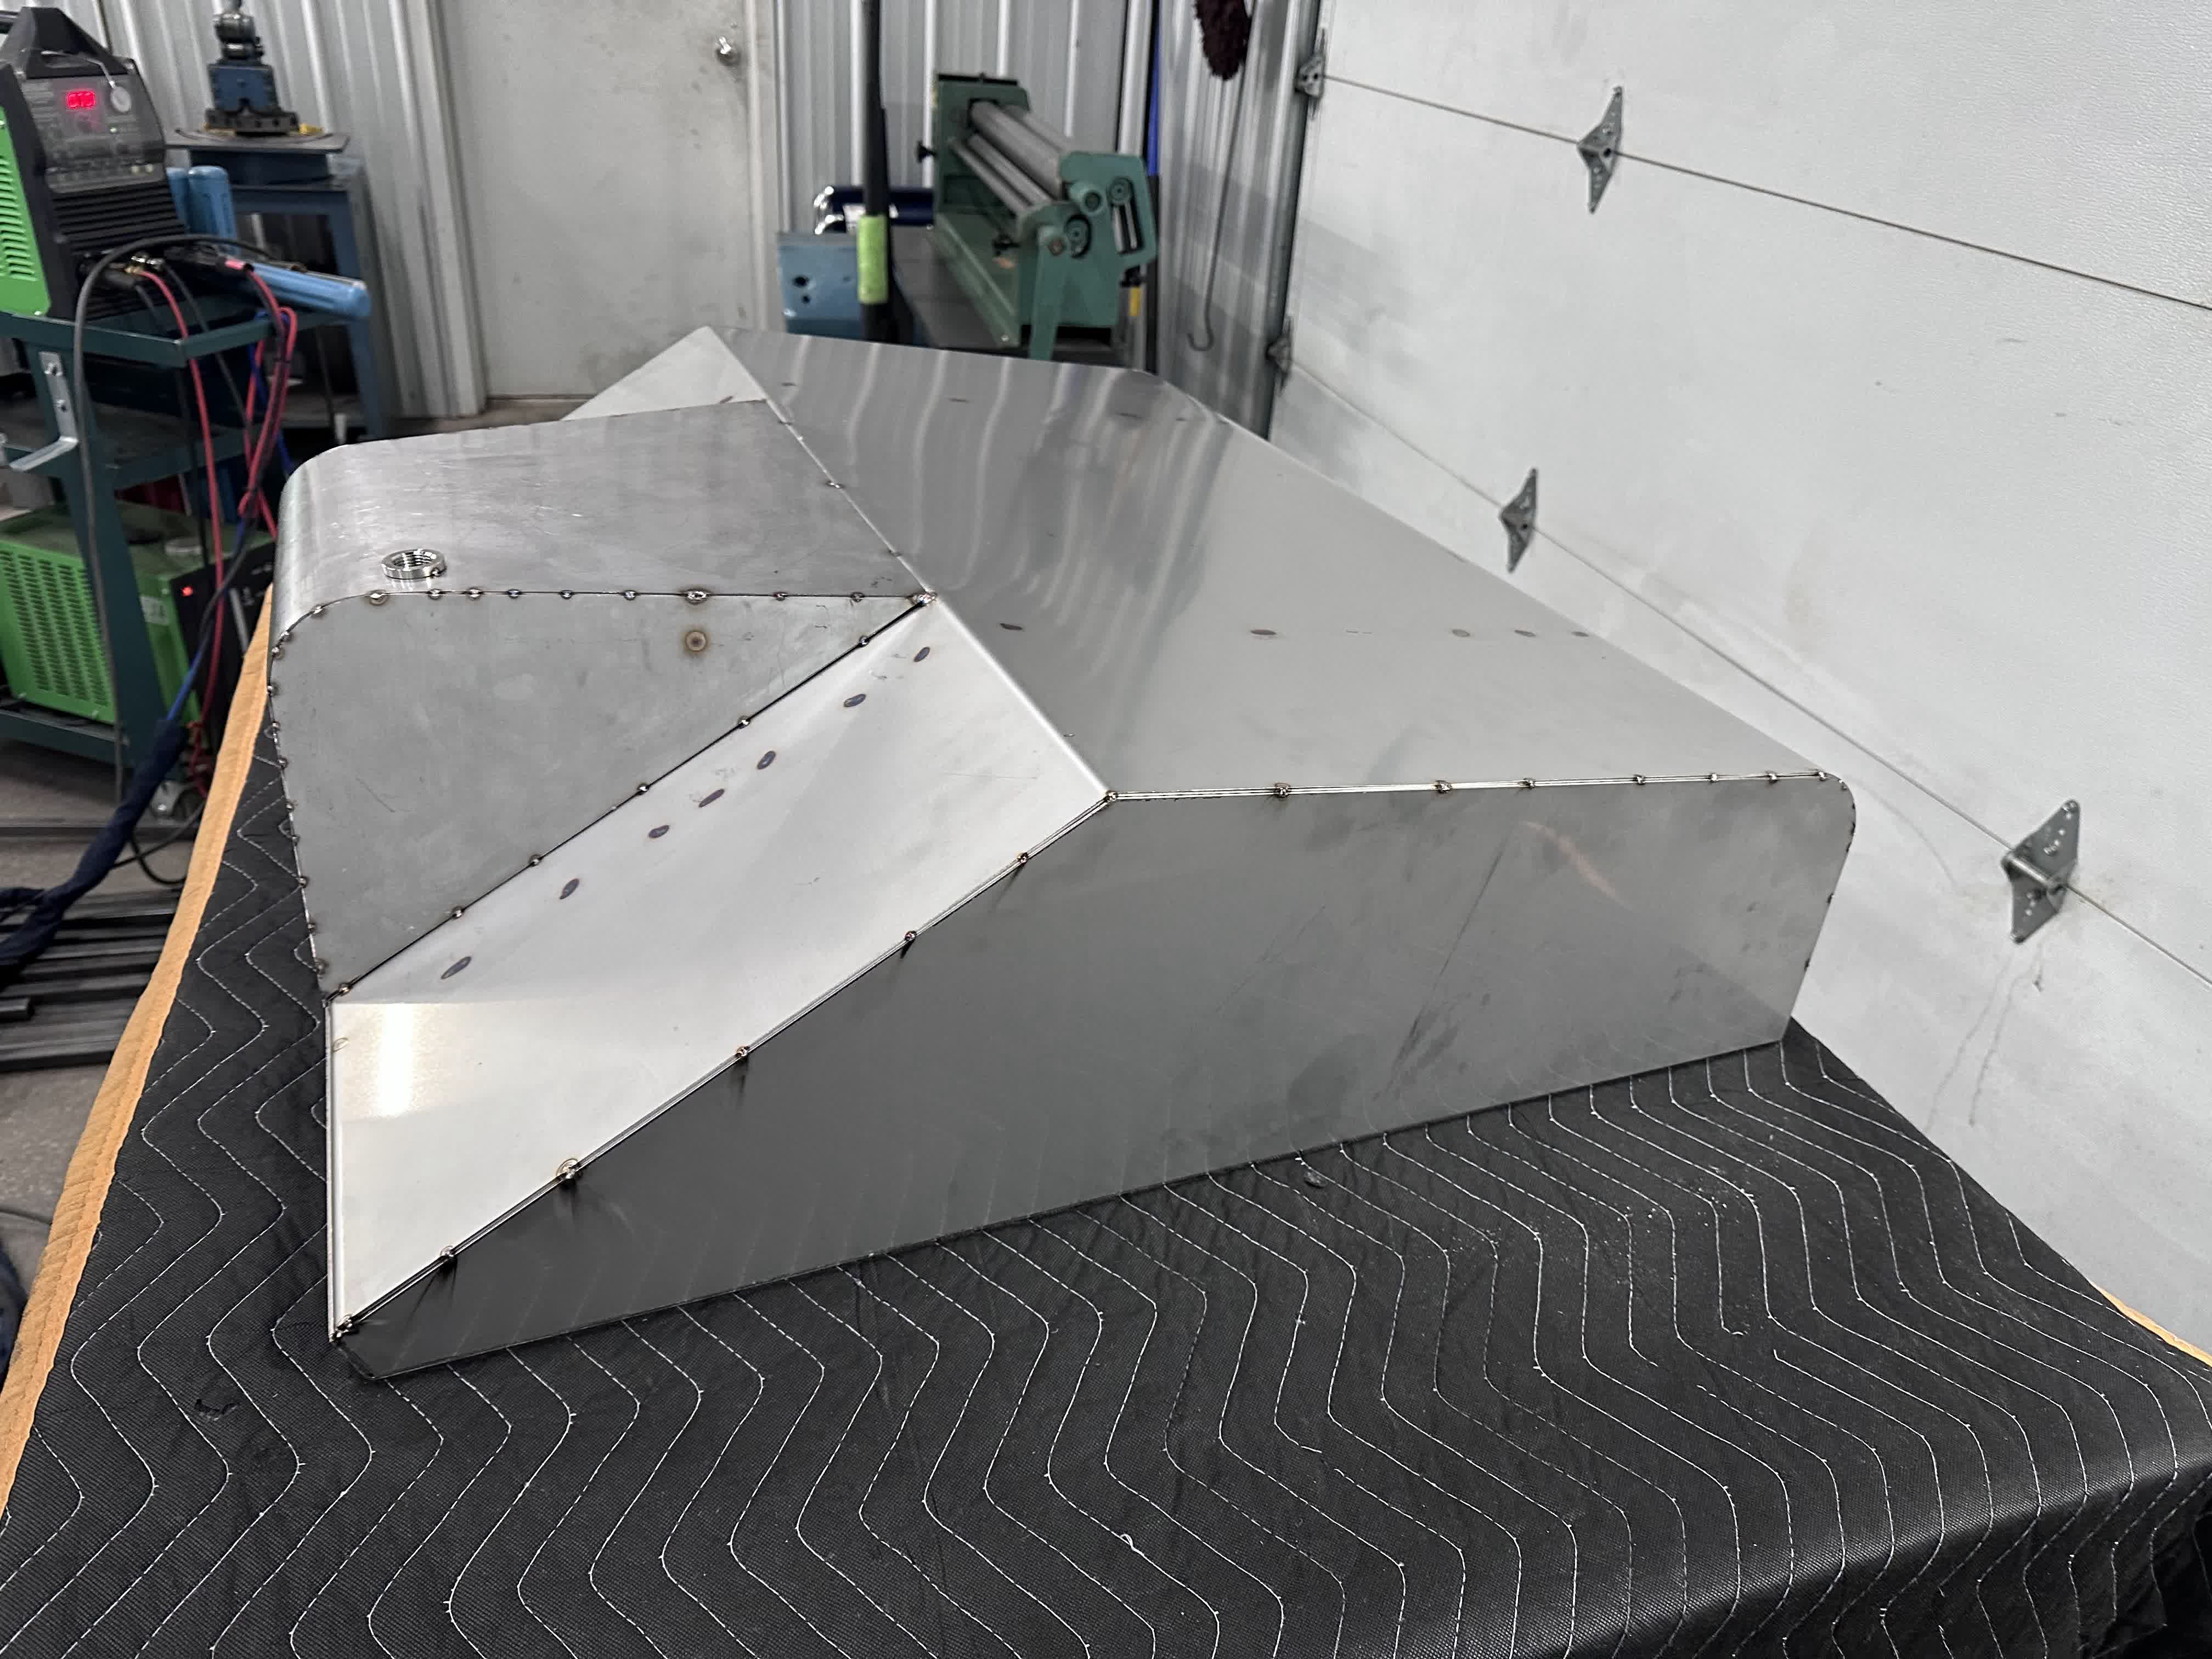
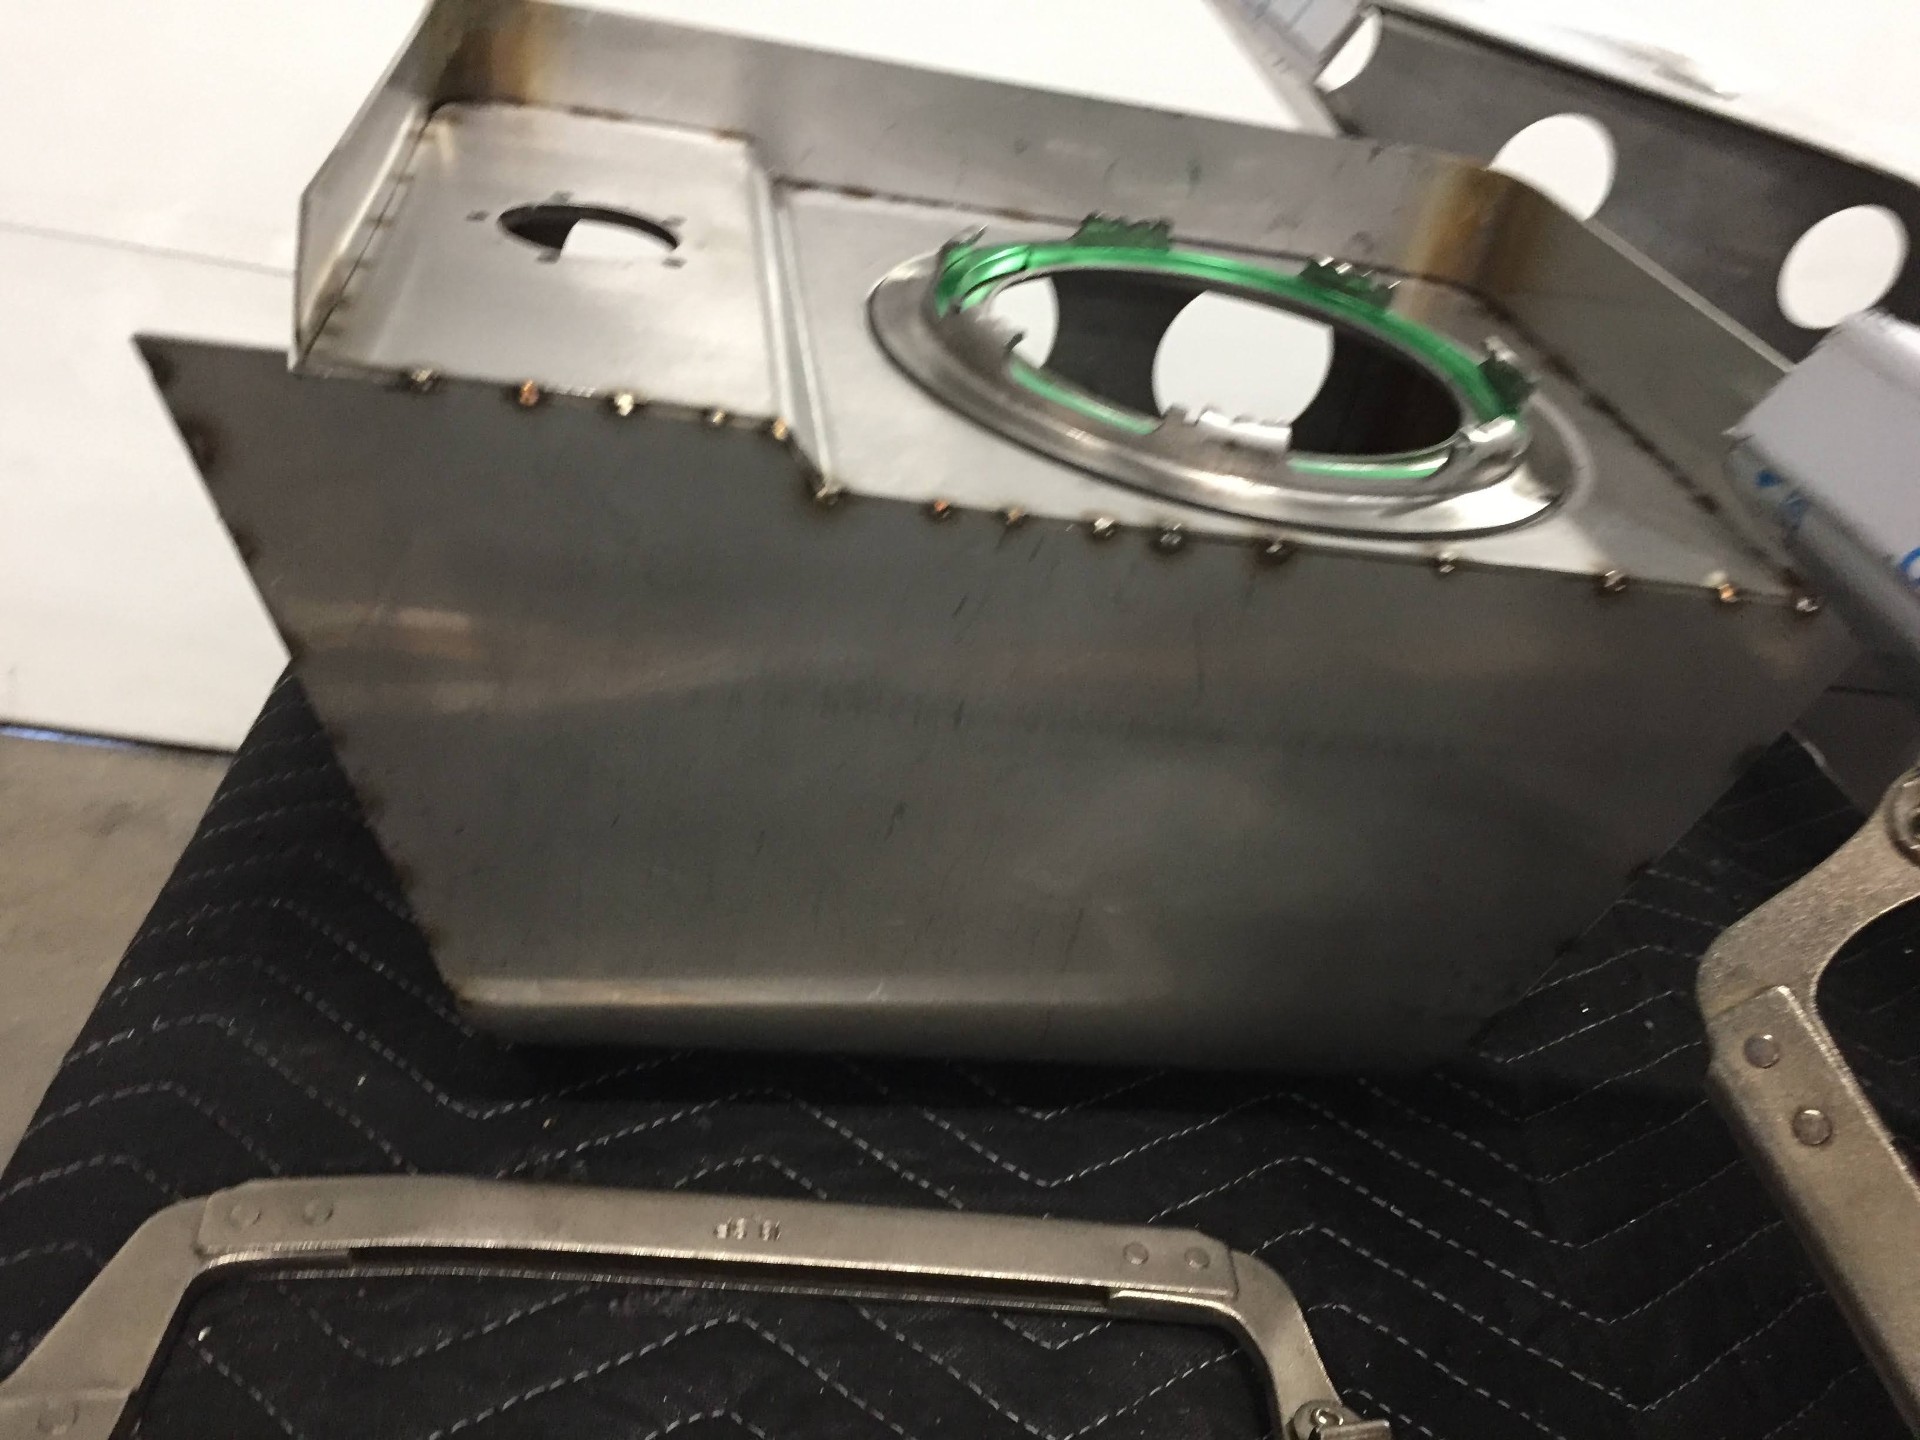
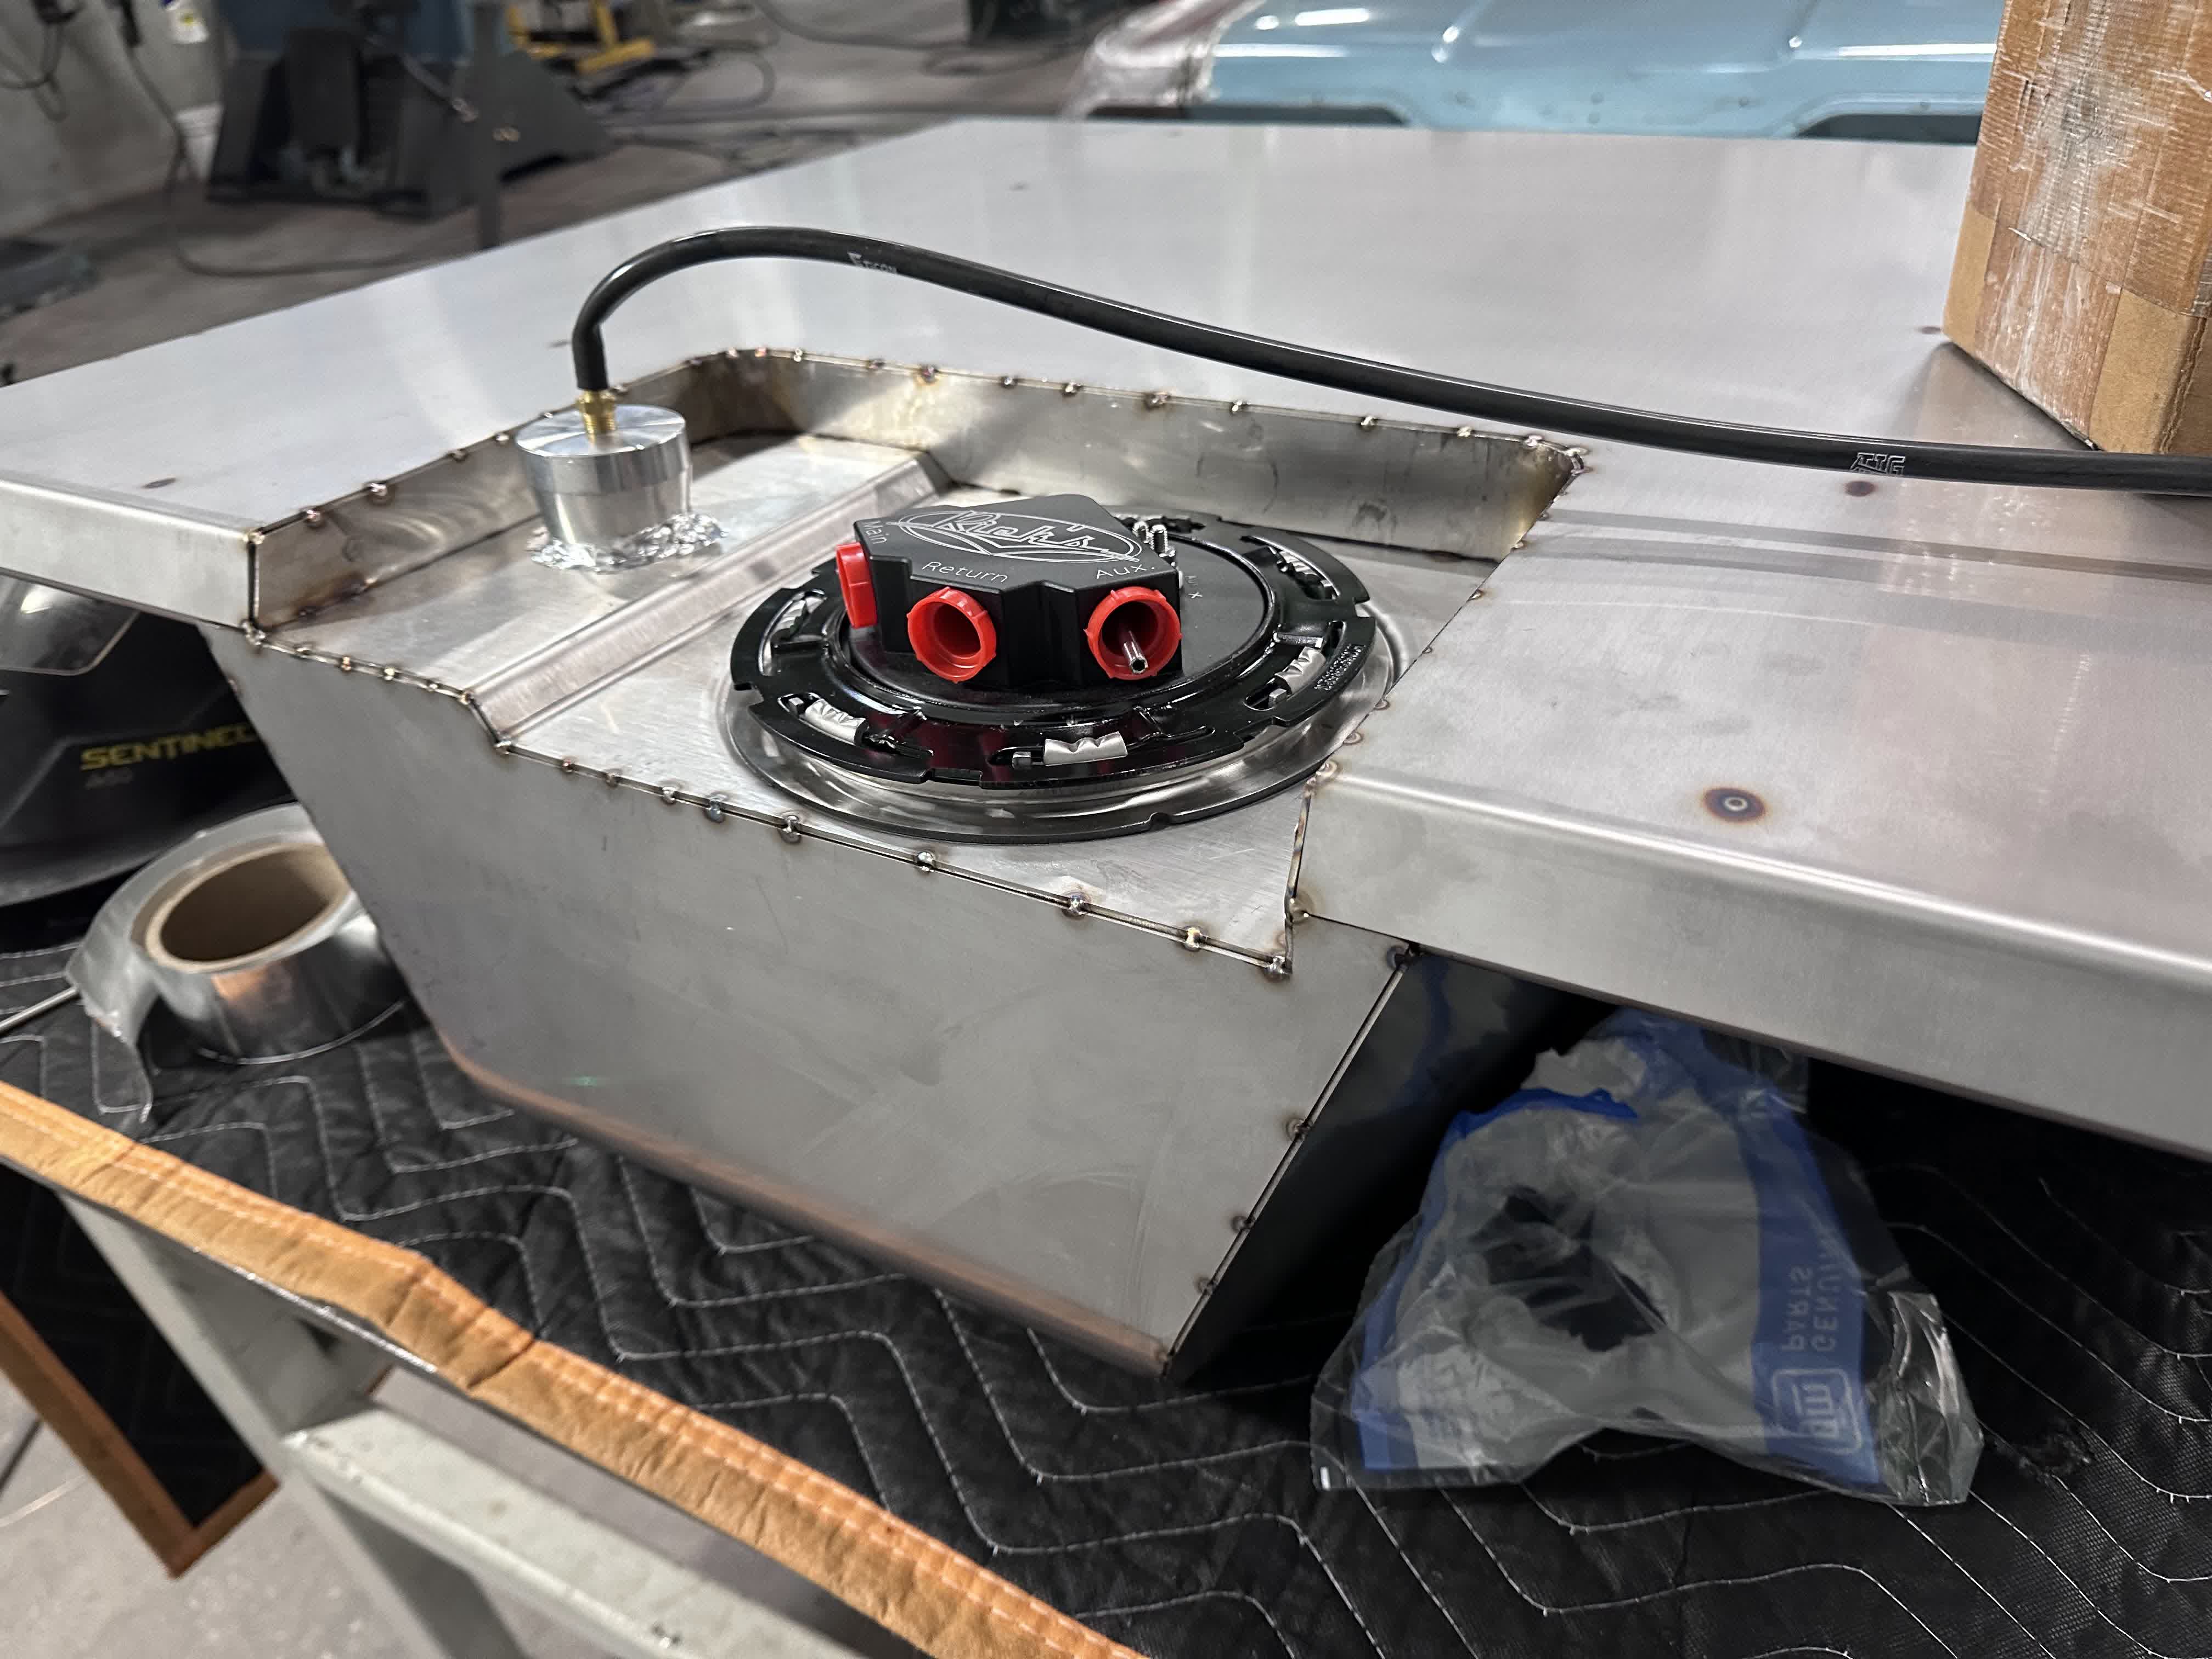
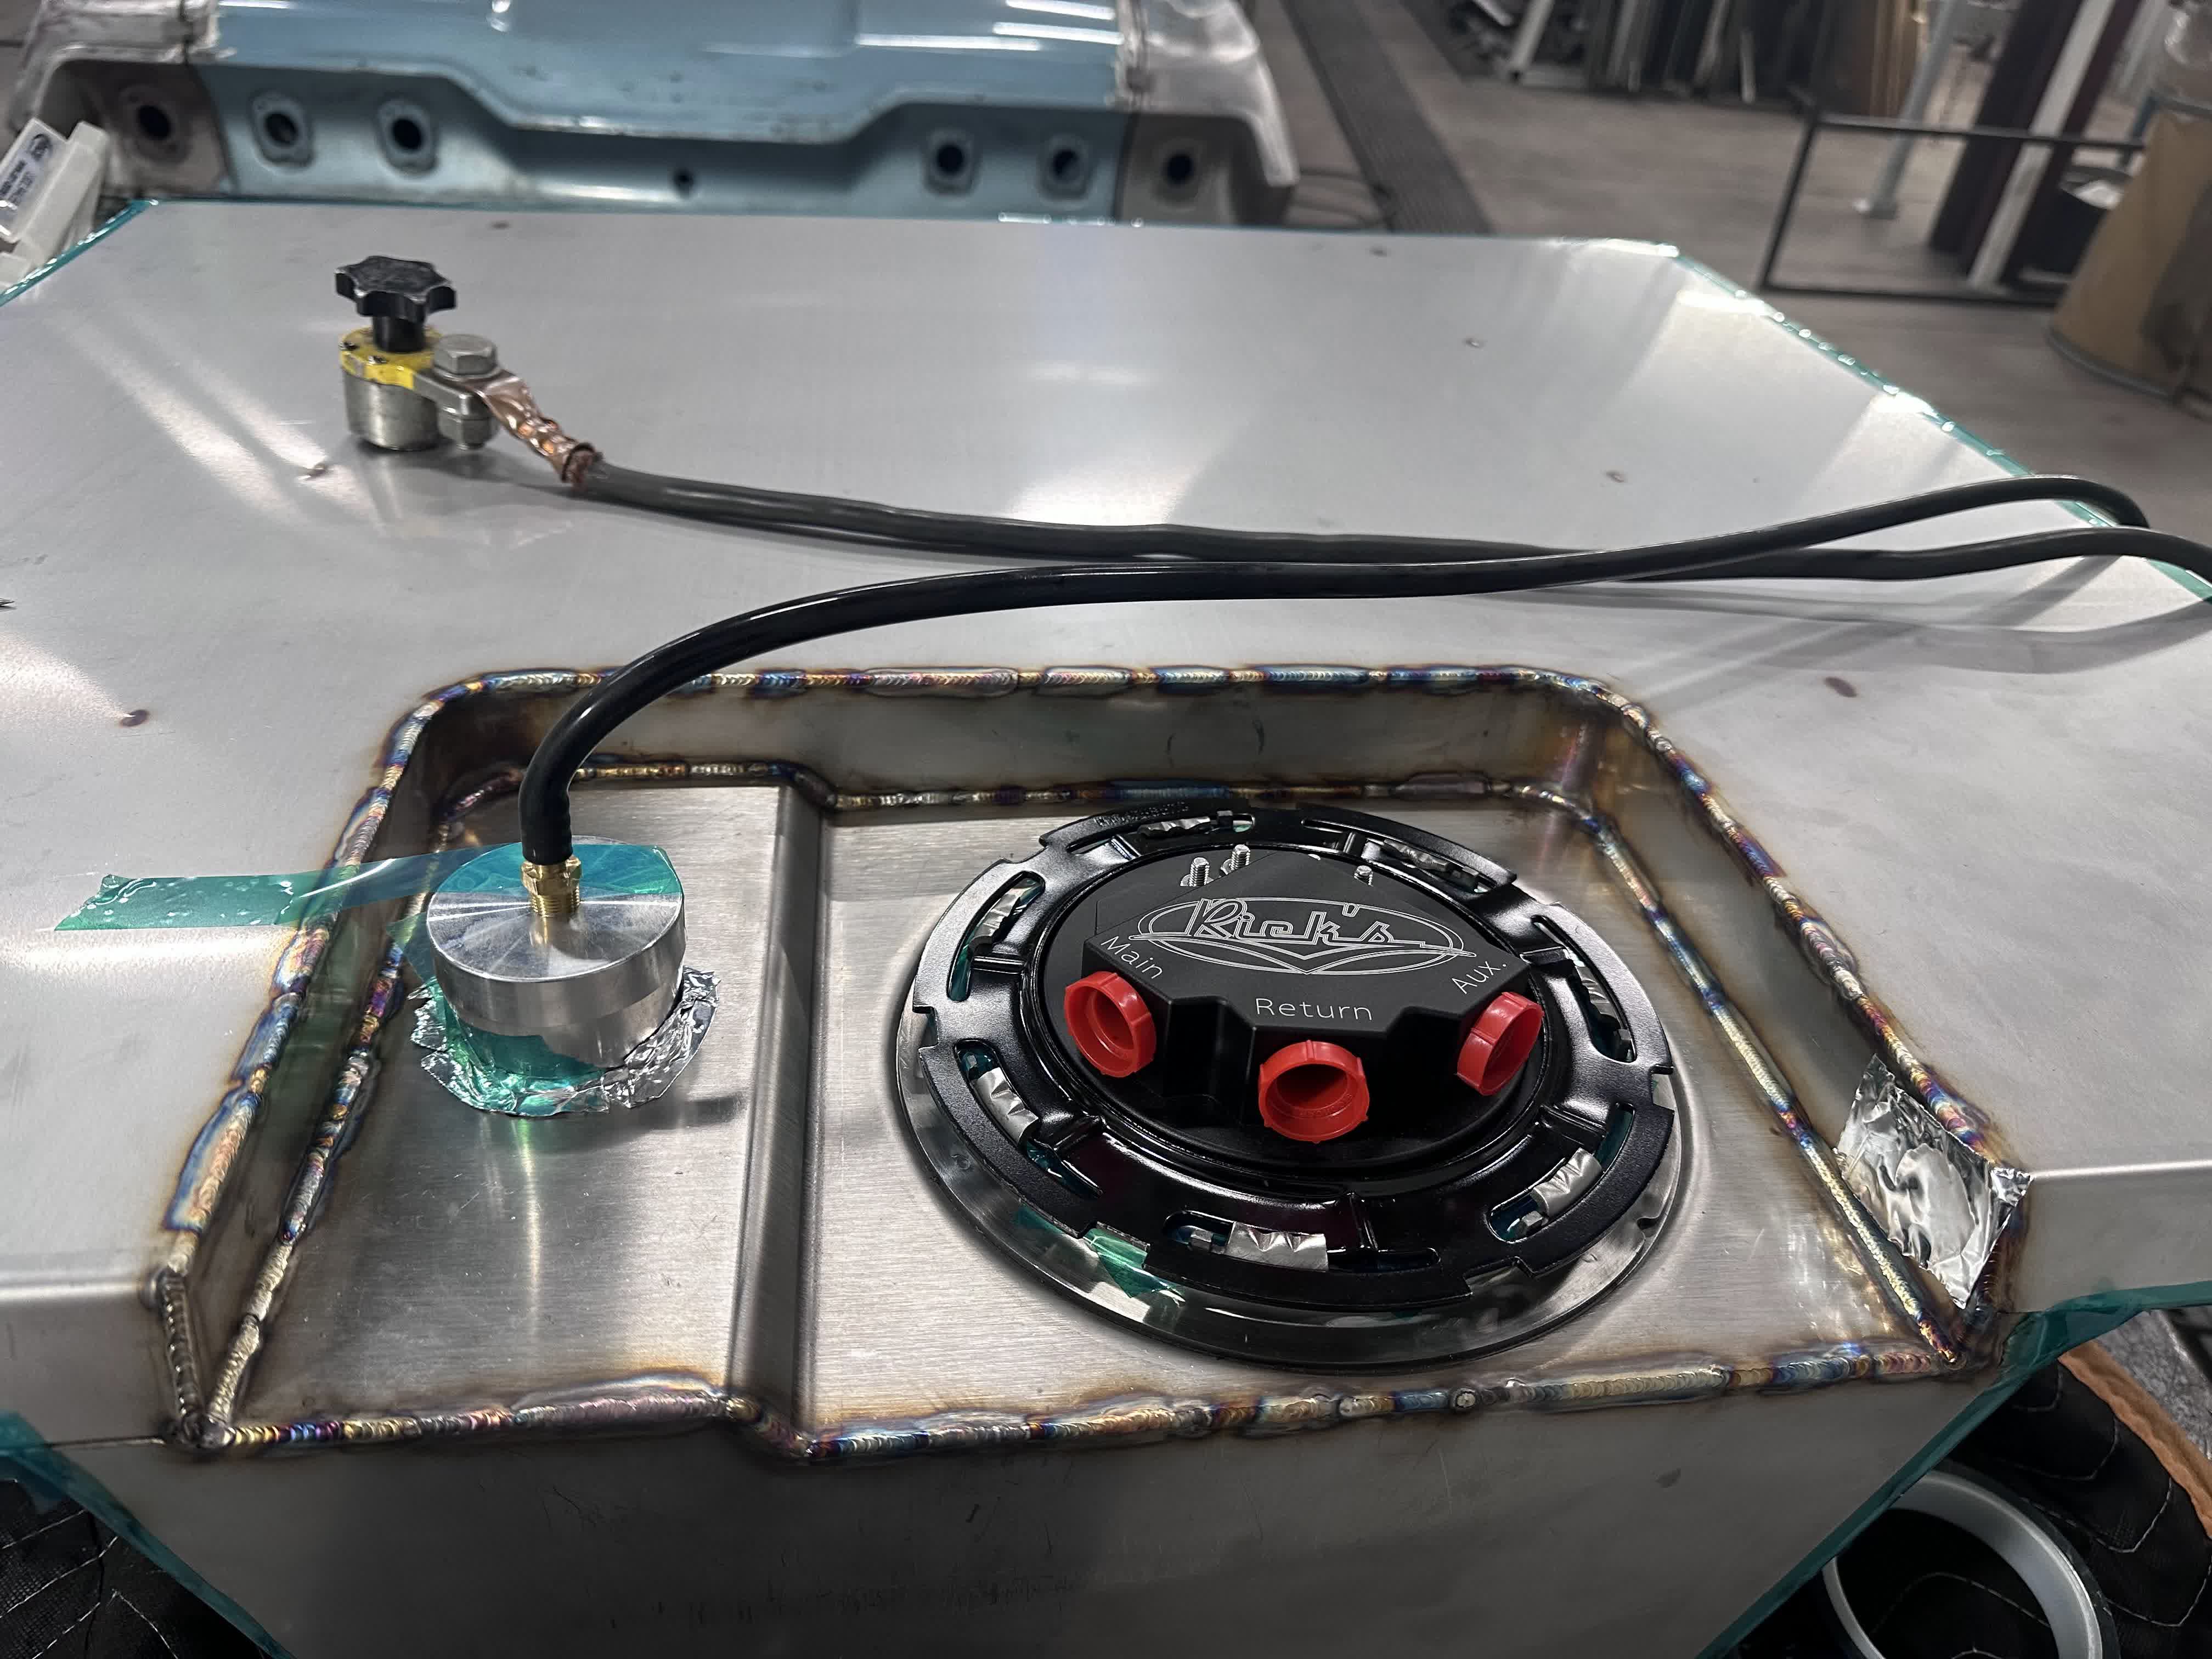
The 63's fuel tank started as a cardboard mockup shoved up into the trunk cavity to prove out the shape around the Morrison chassis, rear end, and exhaust routing. From there it was modeled in SolidWorks around the Rick's Tanks EFI sending unit, laser cut in stainless, folded and clecoed together for a dry fit, then fully TIG welded in the shop. Recessed pump/vent panels keep the top face clean and the tank tucked up tight to the trunk floor.

First-pass cardboard mockup taped up under the car to prove the overall envelope around the chassis and rear end.J014
First-pass cardboard mockup taped up under the car to prove the overall envelope around the chassis and rear end.
SolidWorks model — top view showing the main tank body and the recessed sender pocket.J015
SolidWorks model — top view showing the main tank body and the recessed sender pocket.
CAD view of the recessed sender pocket, vent bung, and sight-glass cutouts.J016
CAD view of the recessed sender pocket, vent bung, and sight-glass cutouts.
Underside CAD view — internal baffling and the angled kick to clear the driveshaft.J017
Underside CAD view — internal baffling and the angled kick to clear the driveshaft.
End view of the CAD model showing the tapered face that tucks up against the frame rail.J018
End view of the CAD model showing the tapered face that tucks up against the frame rail.
SolidWorks screen capture of the angled forward face — the geometry that clears the driveshaft tunnel.J019
SolidWorks screen capture of the angled forward face — the geometry that clears the driveshaft tunnel.
SolidWorks screenshots printed and laid out on the hood — every panel modeled before a single cut was made.J020
SolidWorks screenshots printed and laid out on the hood — every panel modeled before a single cut was made.
Laser-cut stainless panels clecoed together on the bench for a dry mockup.J021
Laser-cut stainless panels clecoed together on the bench for a dry mockup.
Fully clecoed stainless tank on the bench — every seam pinned before TIG welding.J022
Fully clecoed stainless tank on the bench — every seam pinned before TIG welding.
Side profile of the clecoed tank showing the angled forward face that tucks around the frame.J023
Side profile of the clecoed tank showing the angled forward face that tucks around the frame.
Sending-unit pocket and vent recess test-fit with the Rick's Tanks module.J024
Sending-unit pocket and vent recess test-fit with the Rick's Tanks module.
Rick's Tanks EFI hat and vent bung dropped into the recessed pocket before final welding.J025
Rick's Tanks EFI hat and vent bung dropped into the recessed pocket before final welding.
Finished tank with full TIG welds around the recessed sender panel and Rick's Tanks EFI module installed.J026
Finished tank with full TIG welds around the recessed sender panel and Rick's Tanks EFI module installed.

UPDATE 04 / 10

Feb 1, 2024

FABRICATION MILESTONE

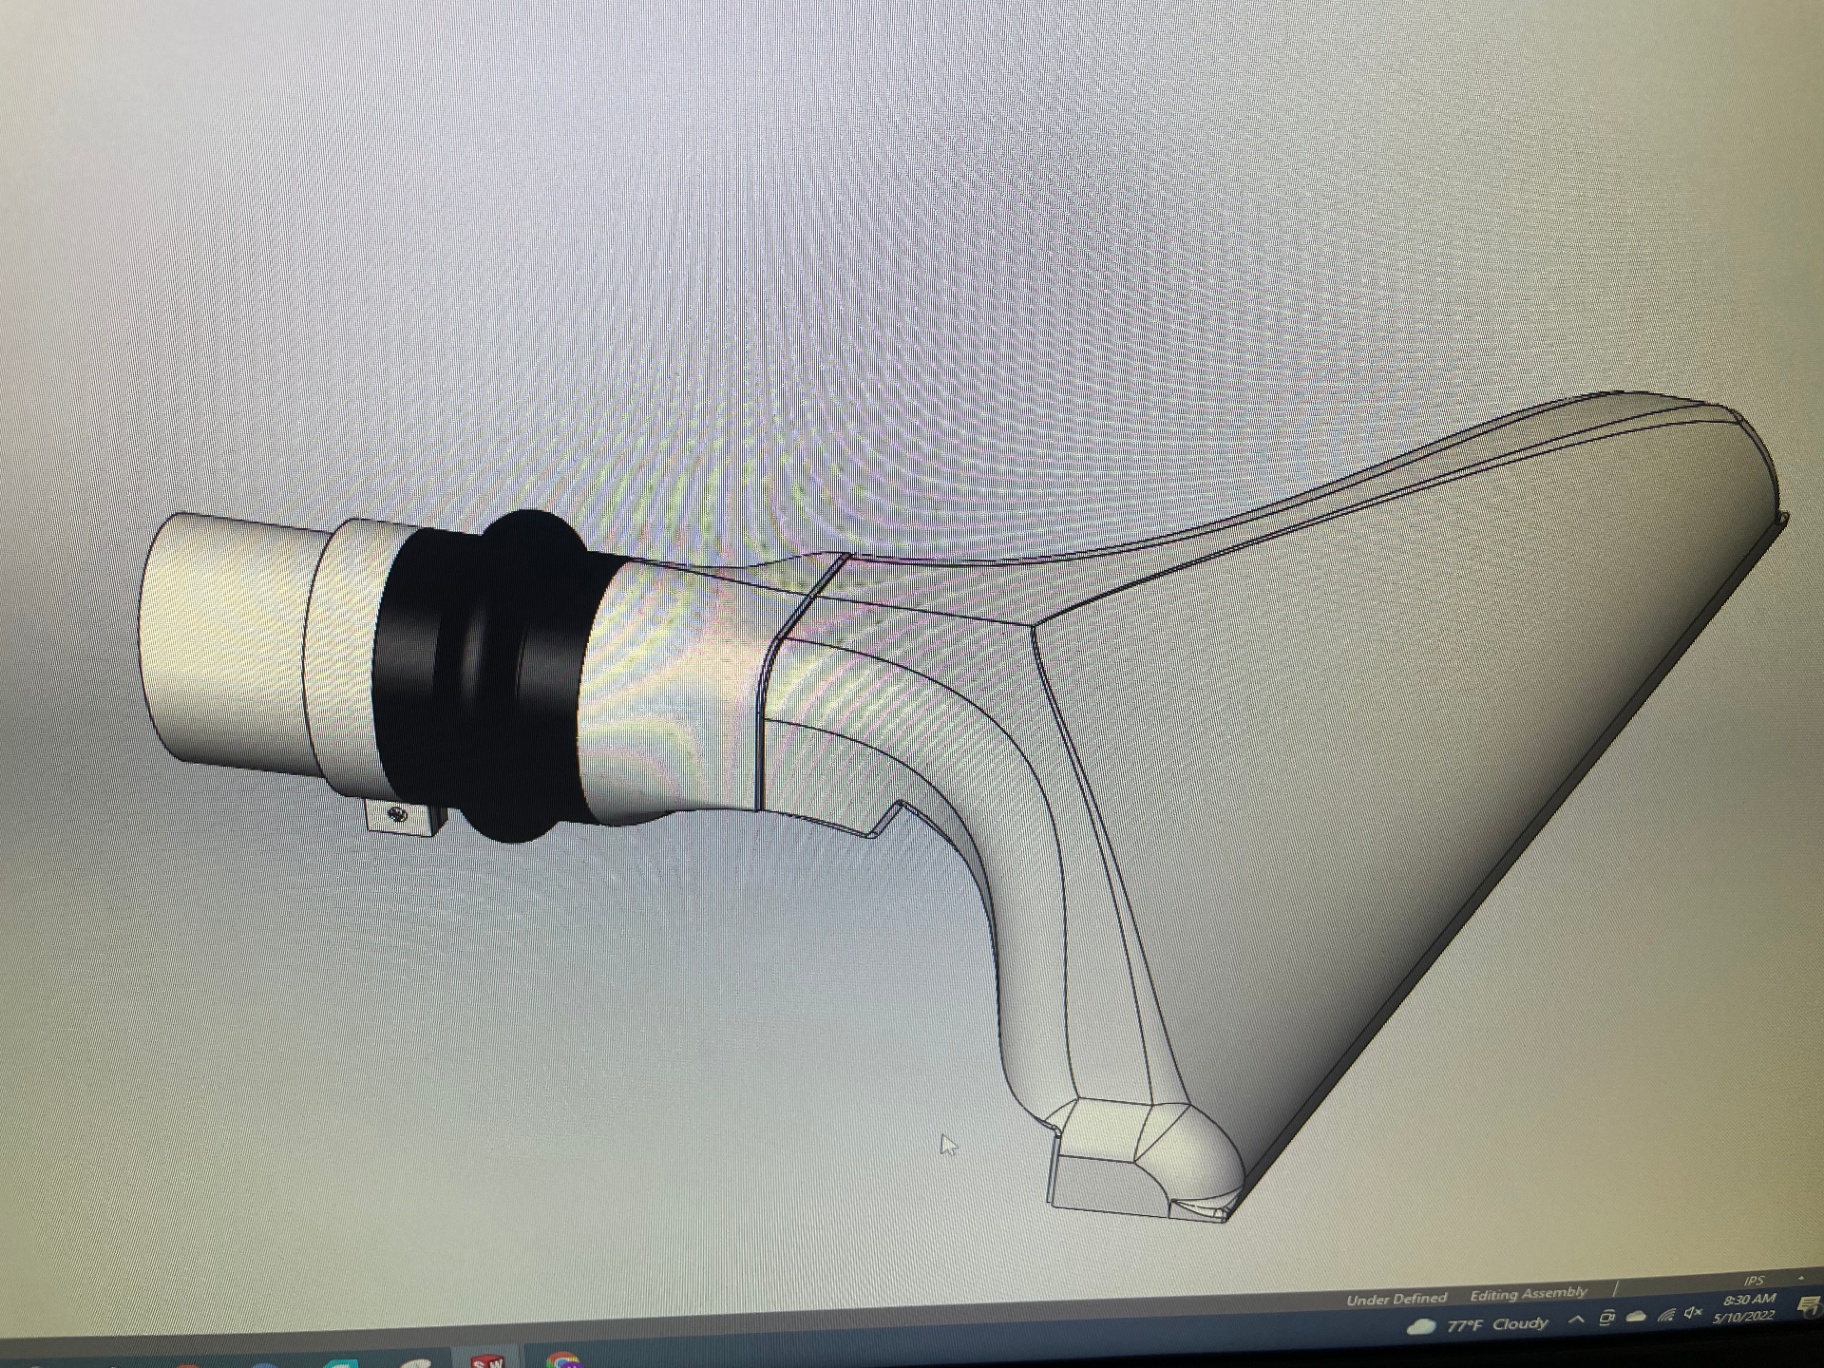
PWR intercooler and one-off billet intercooler funnel

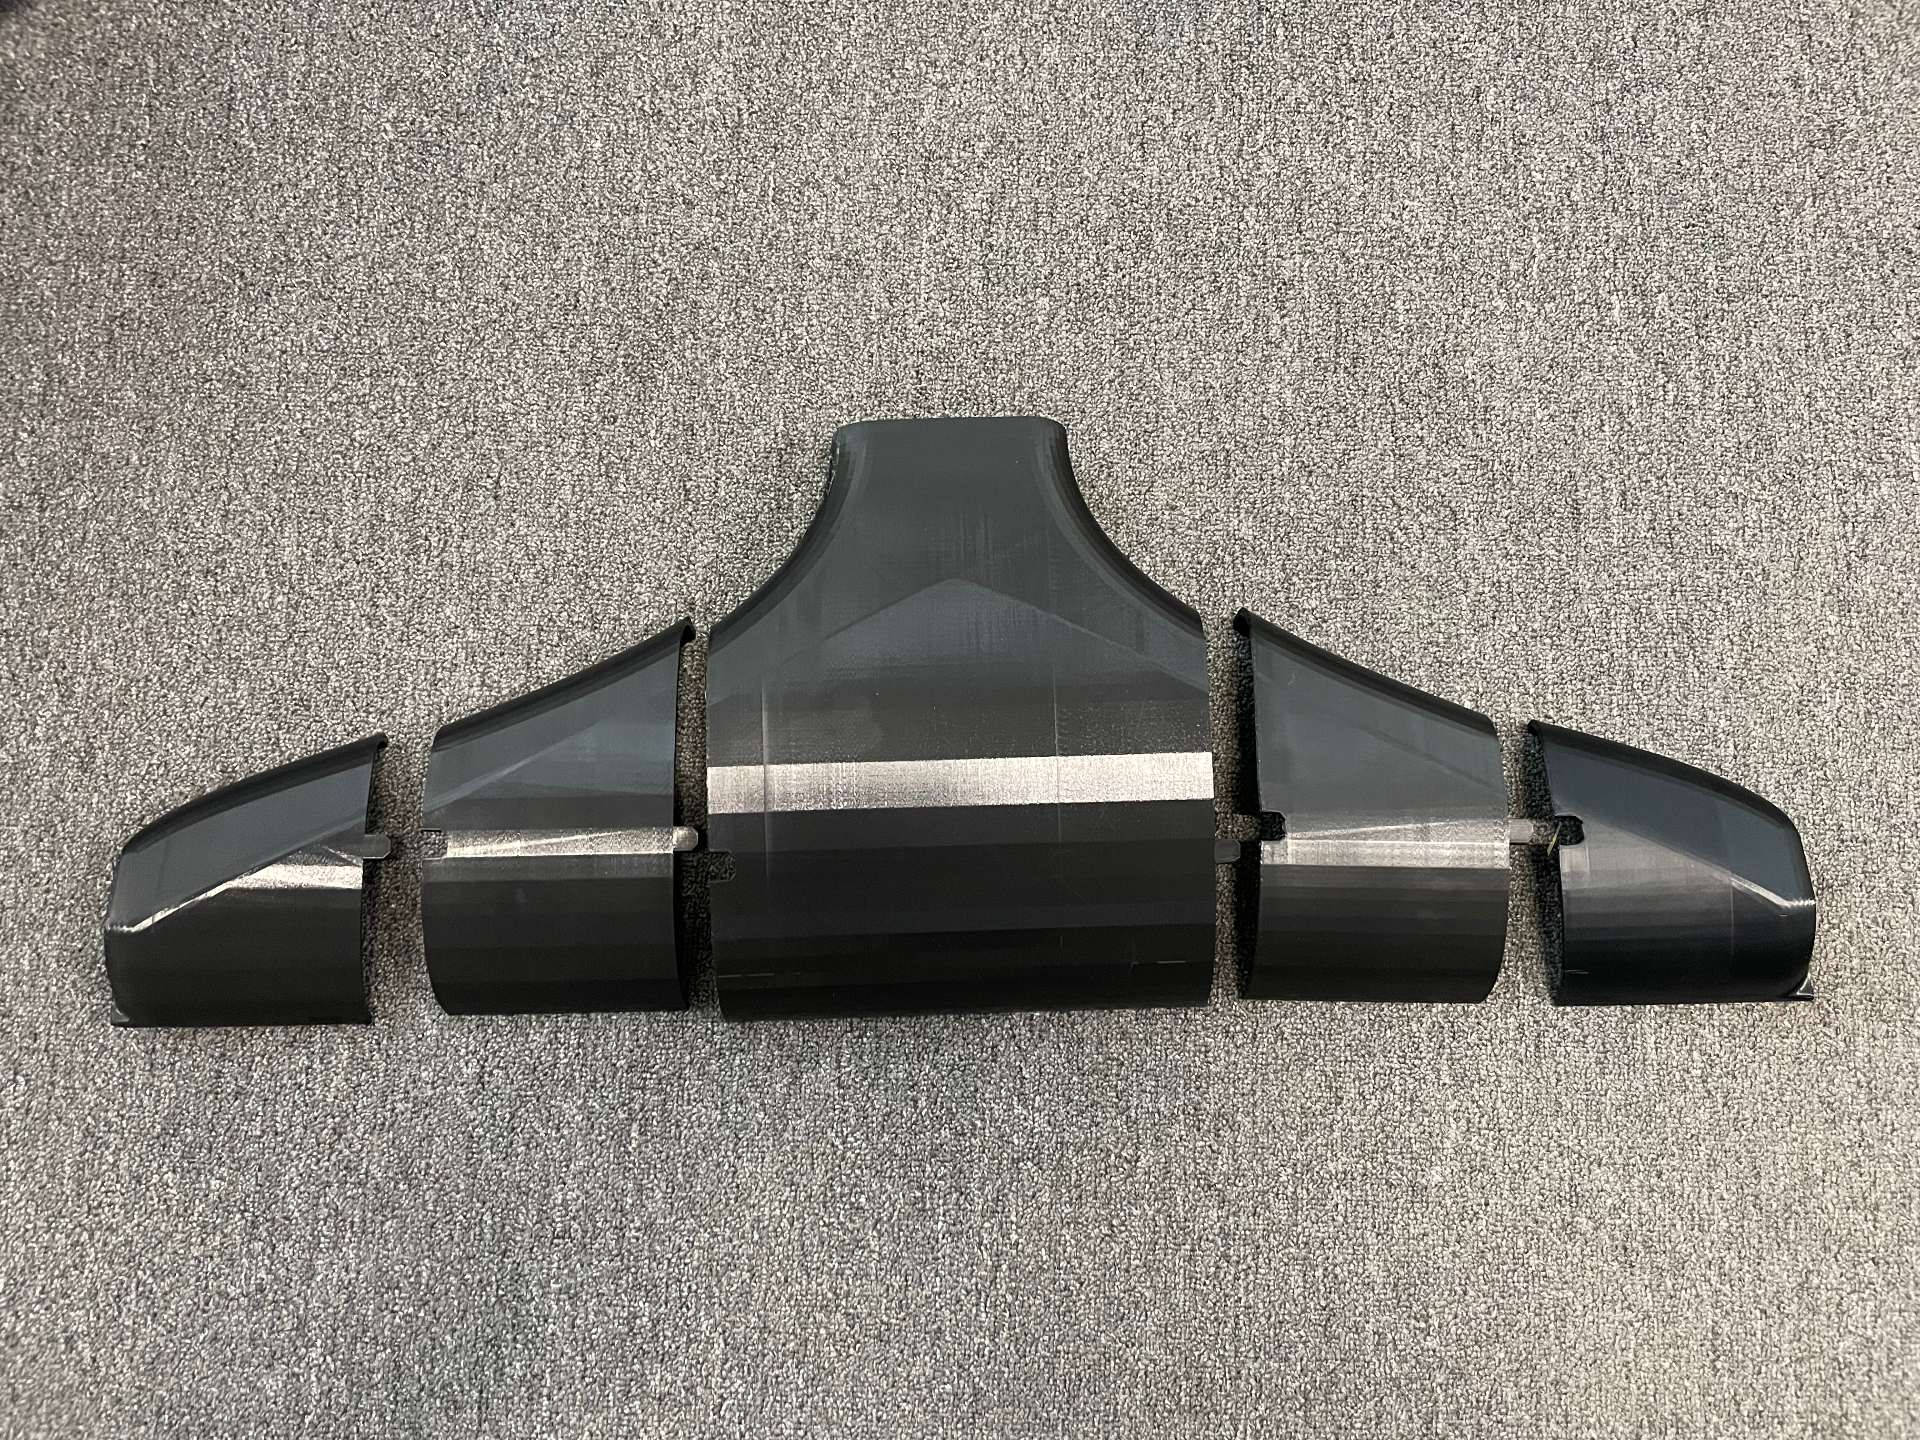
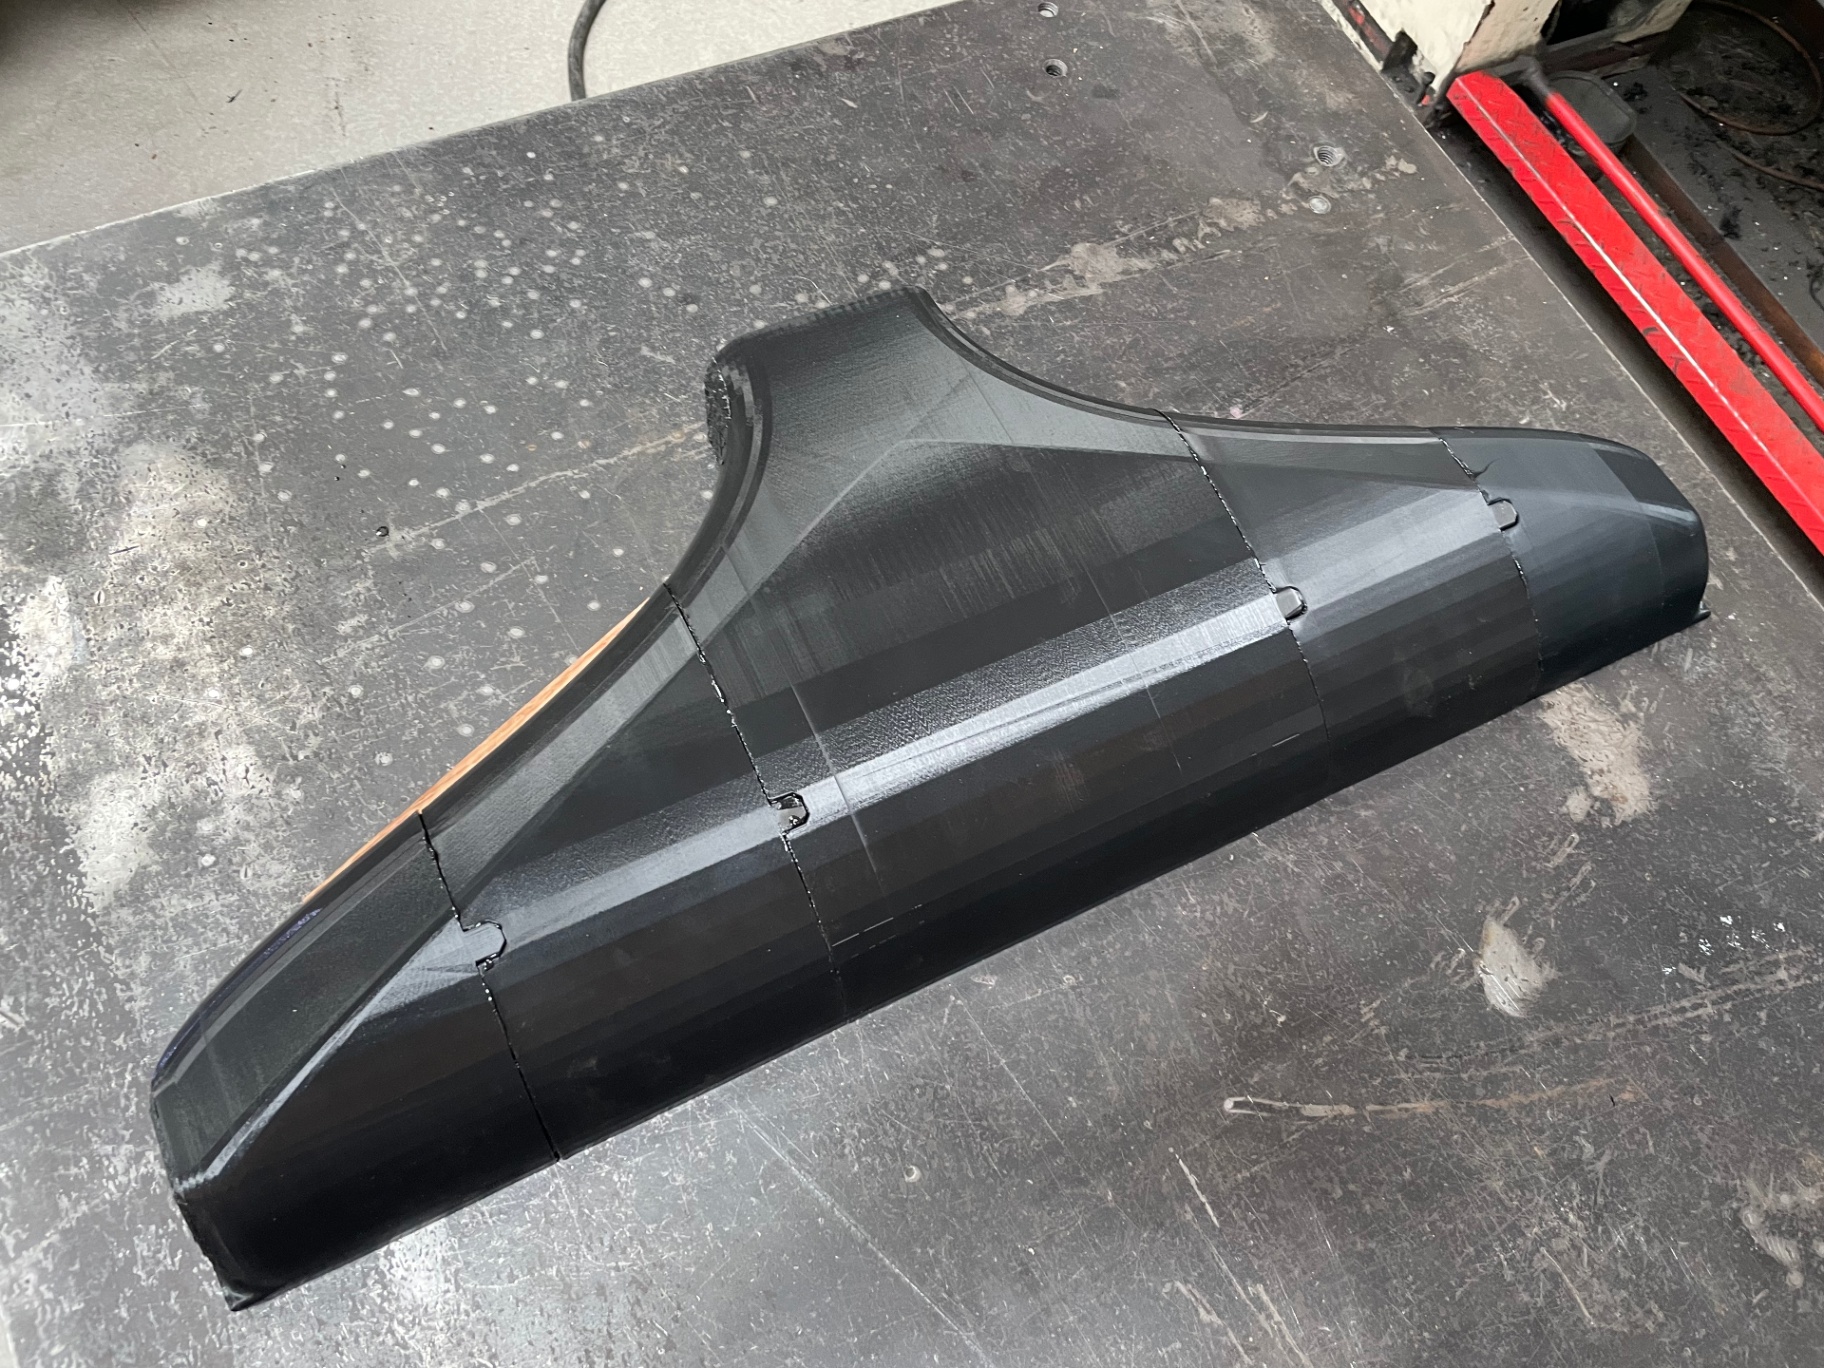
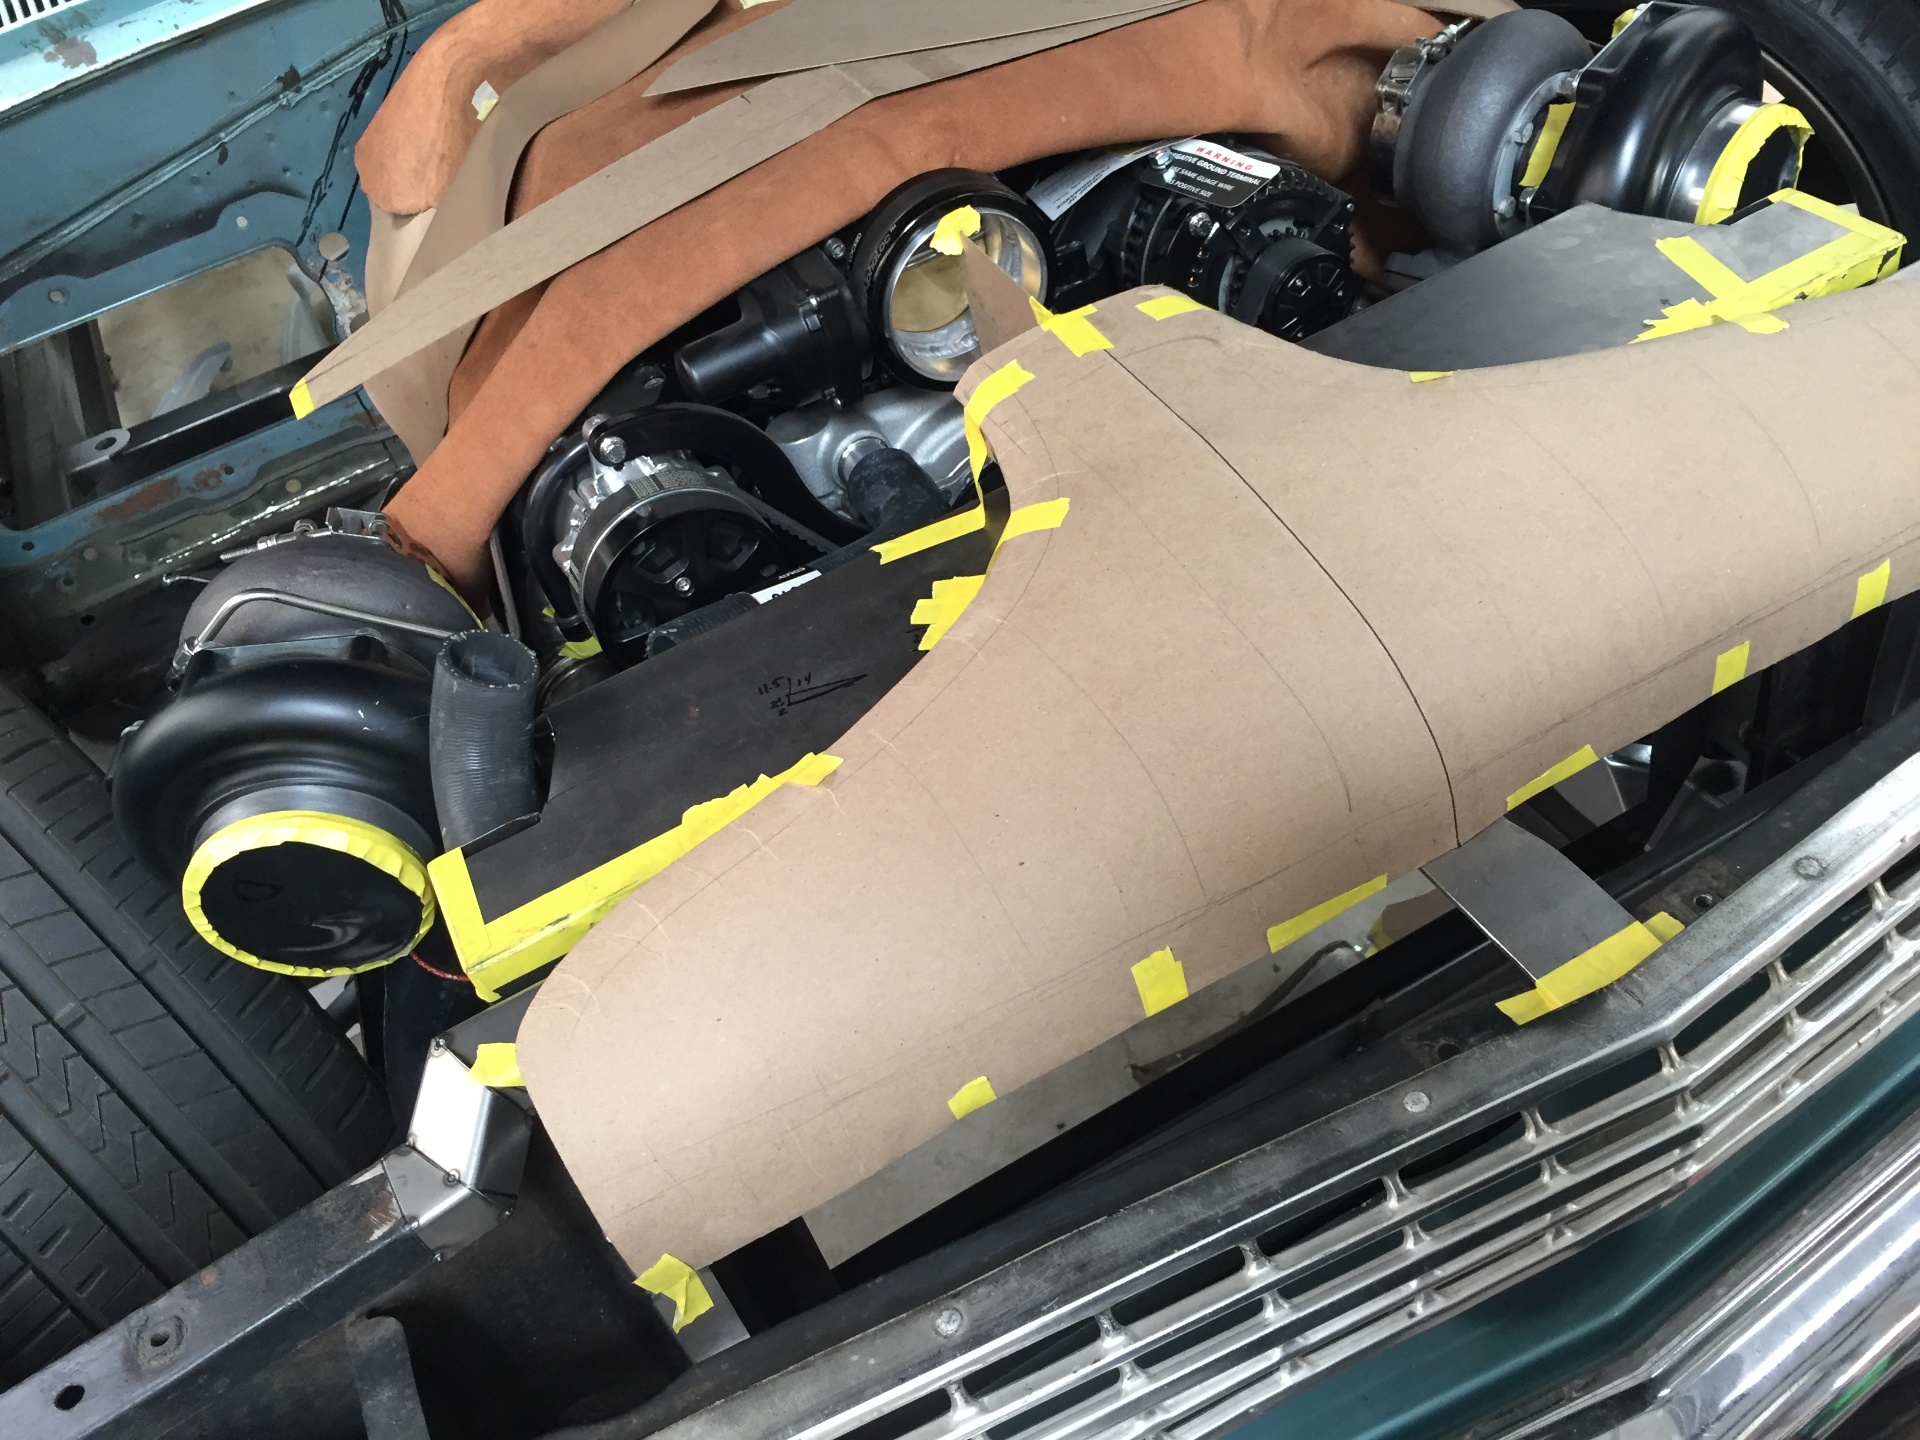
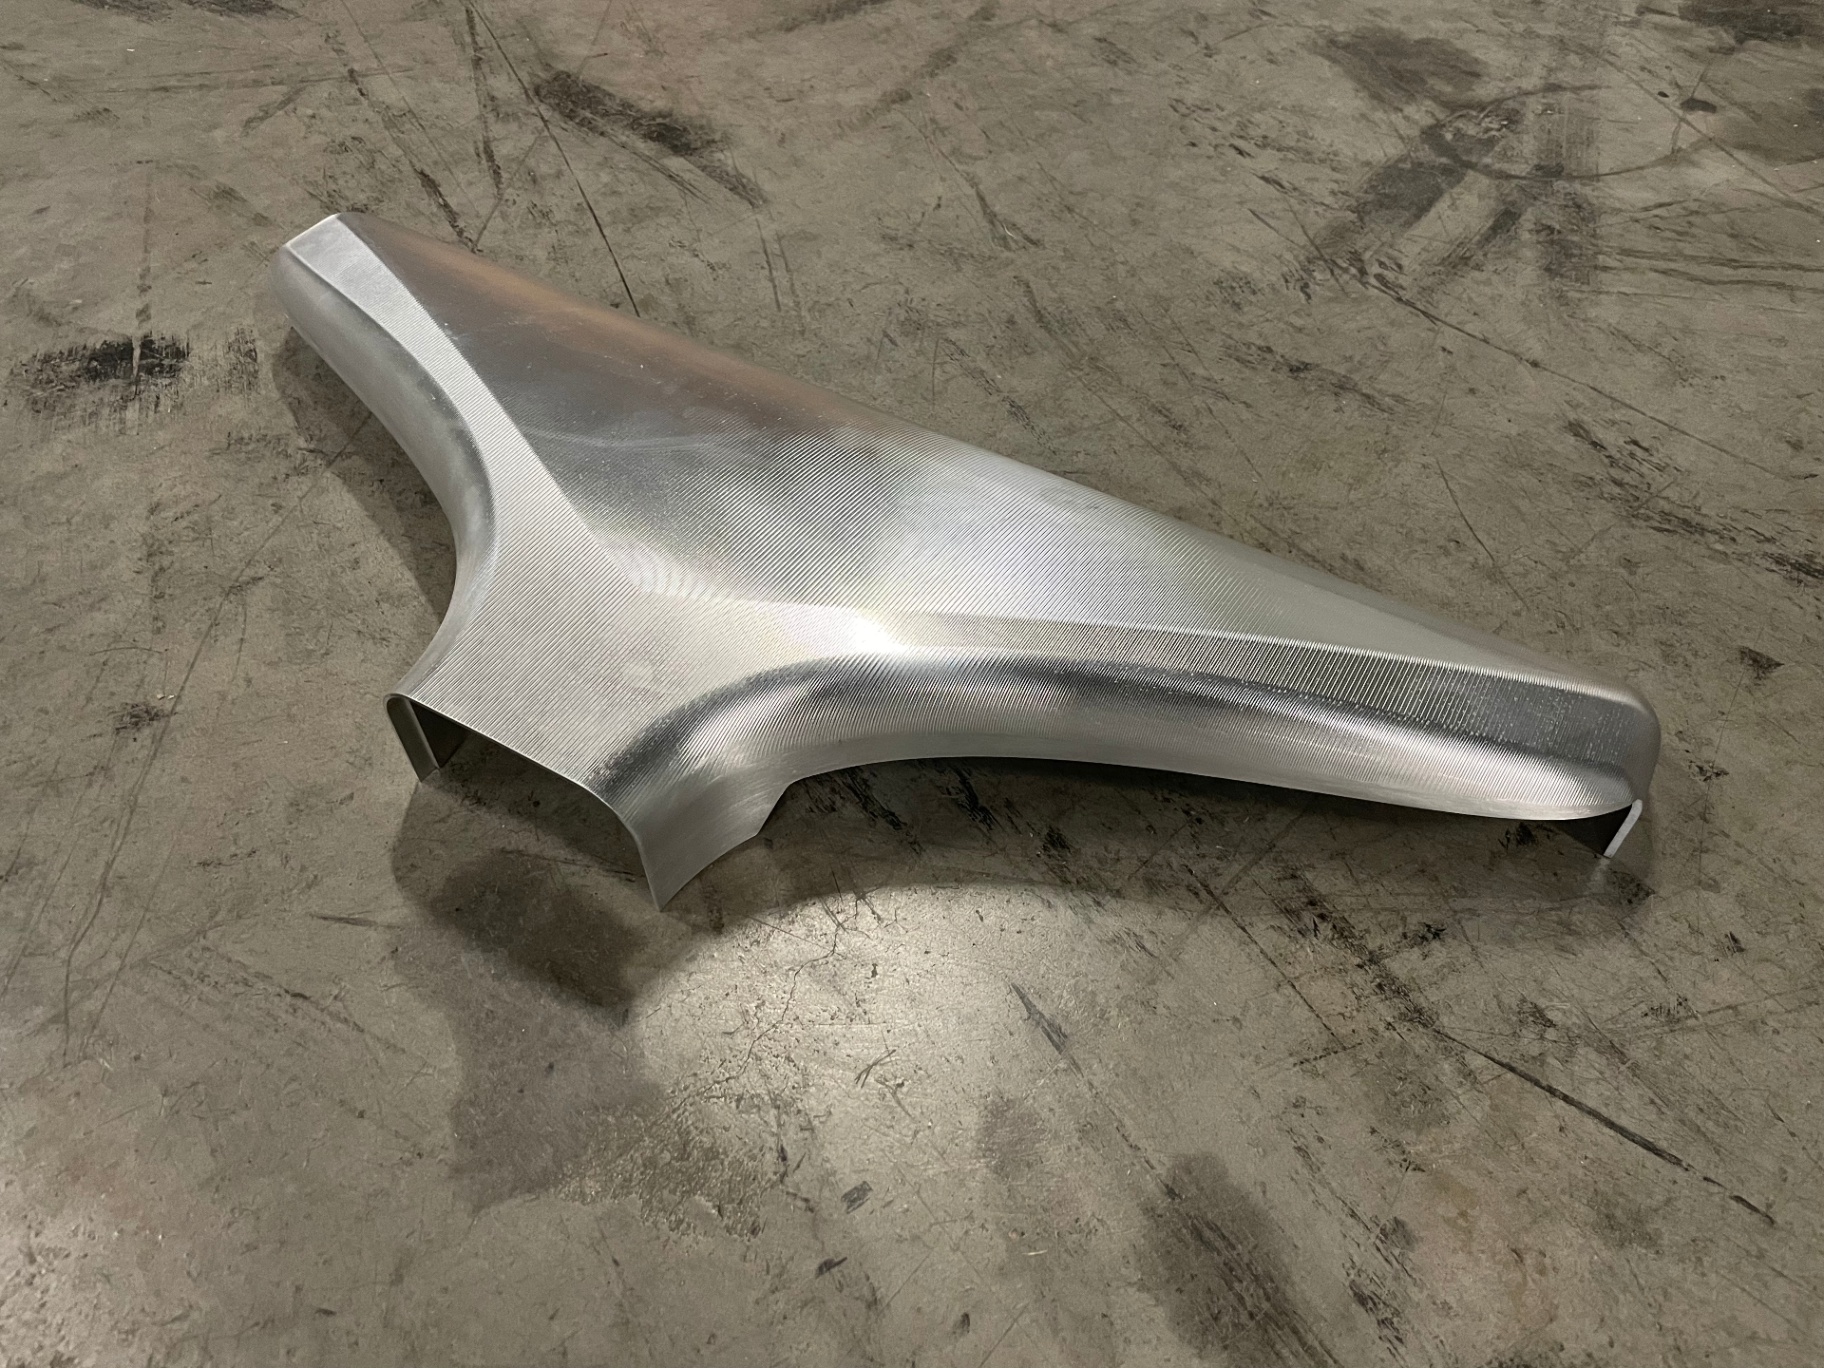
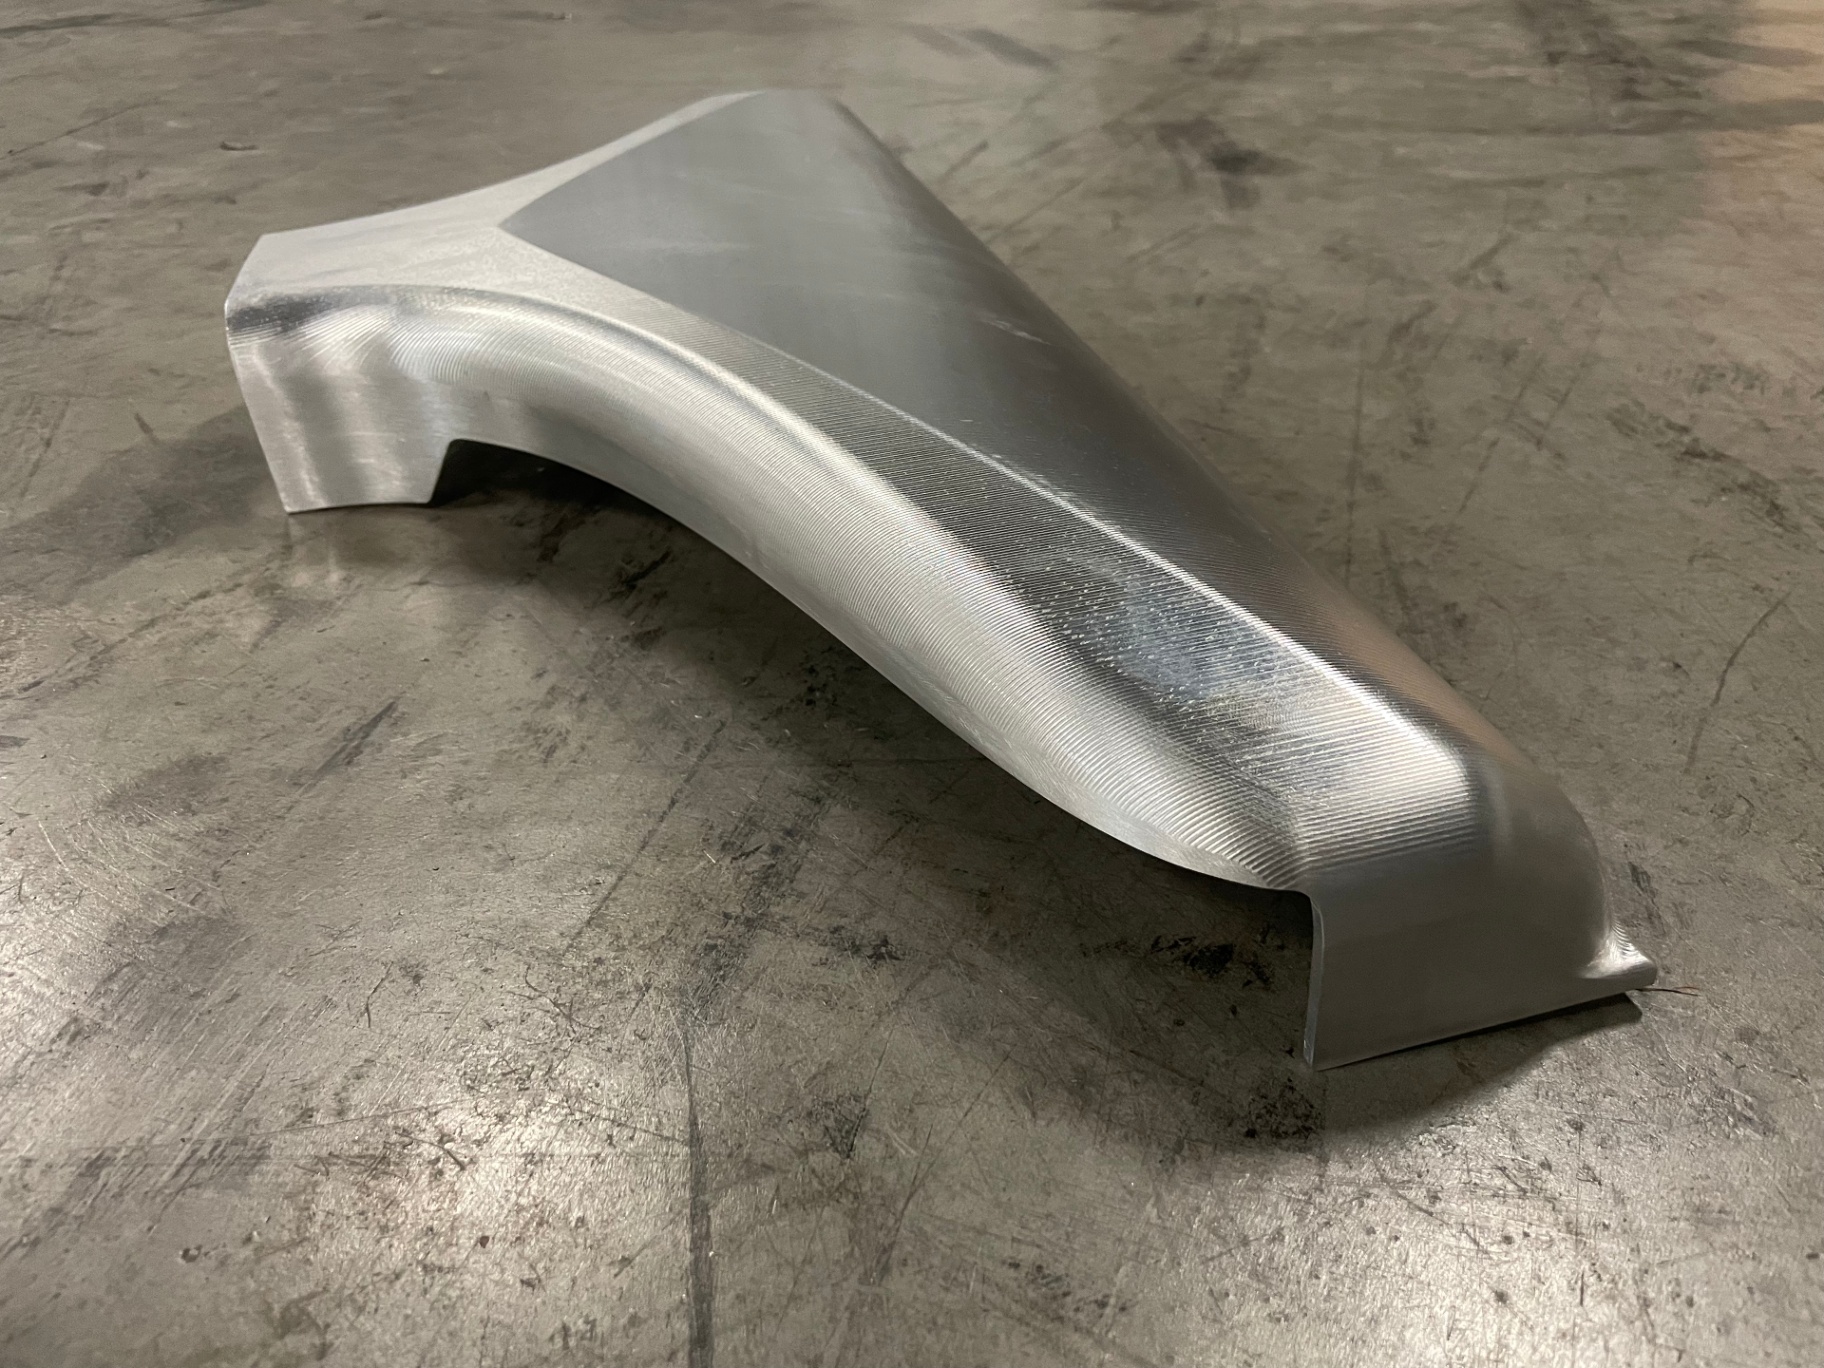
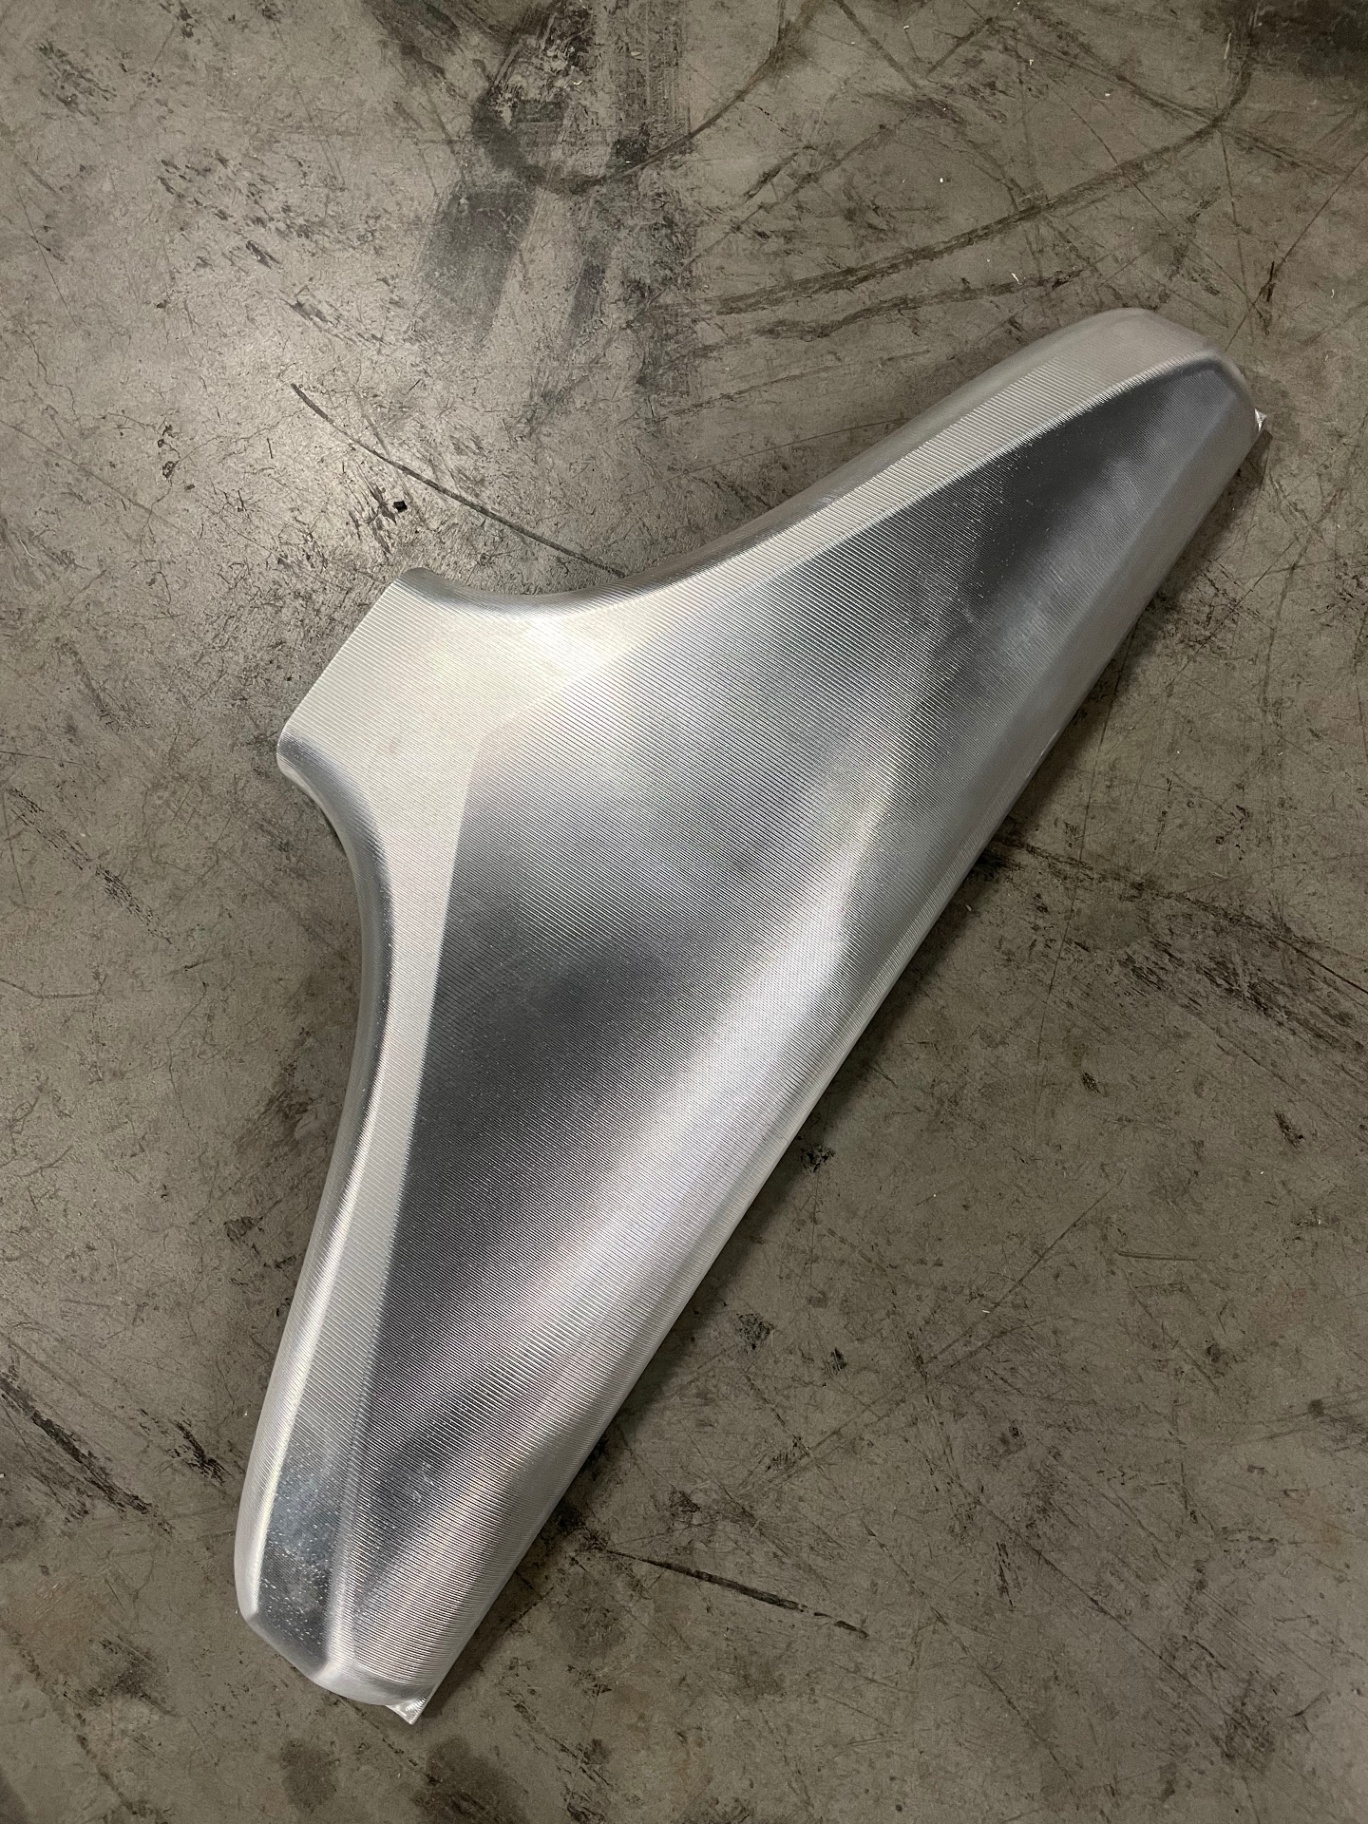
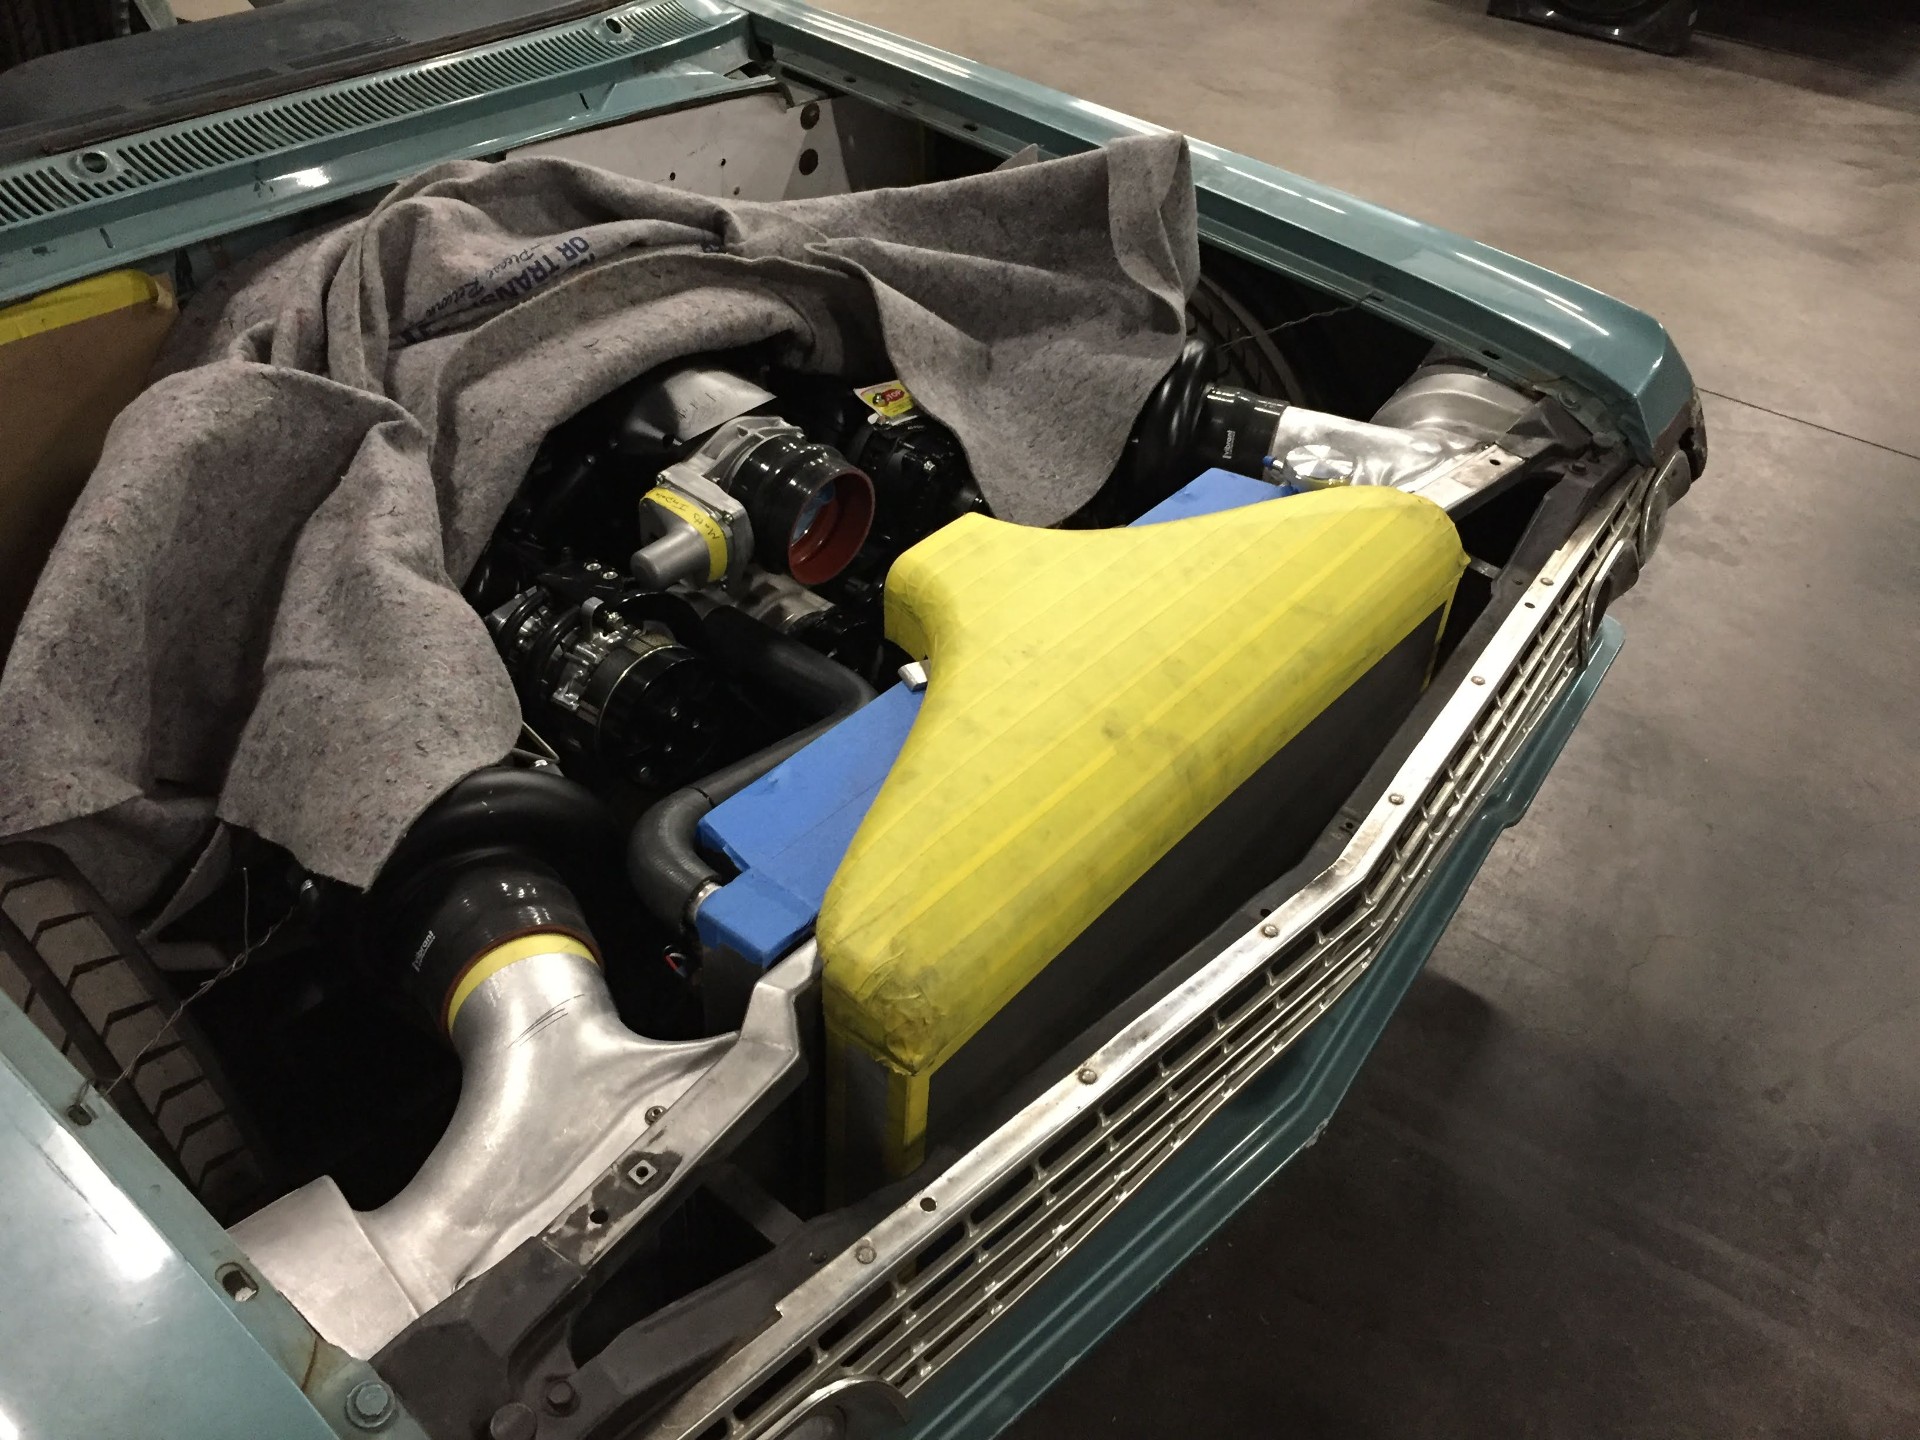
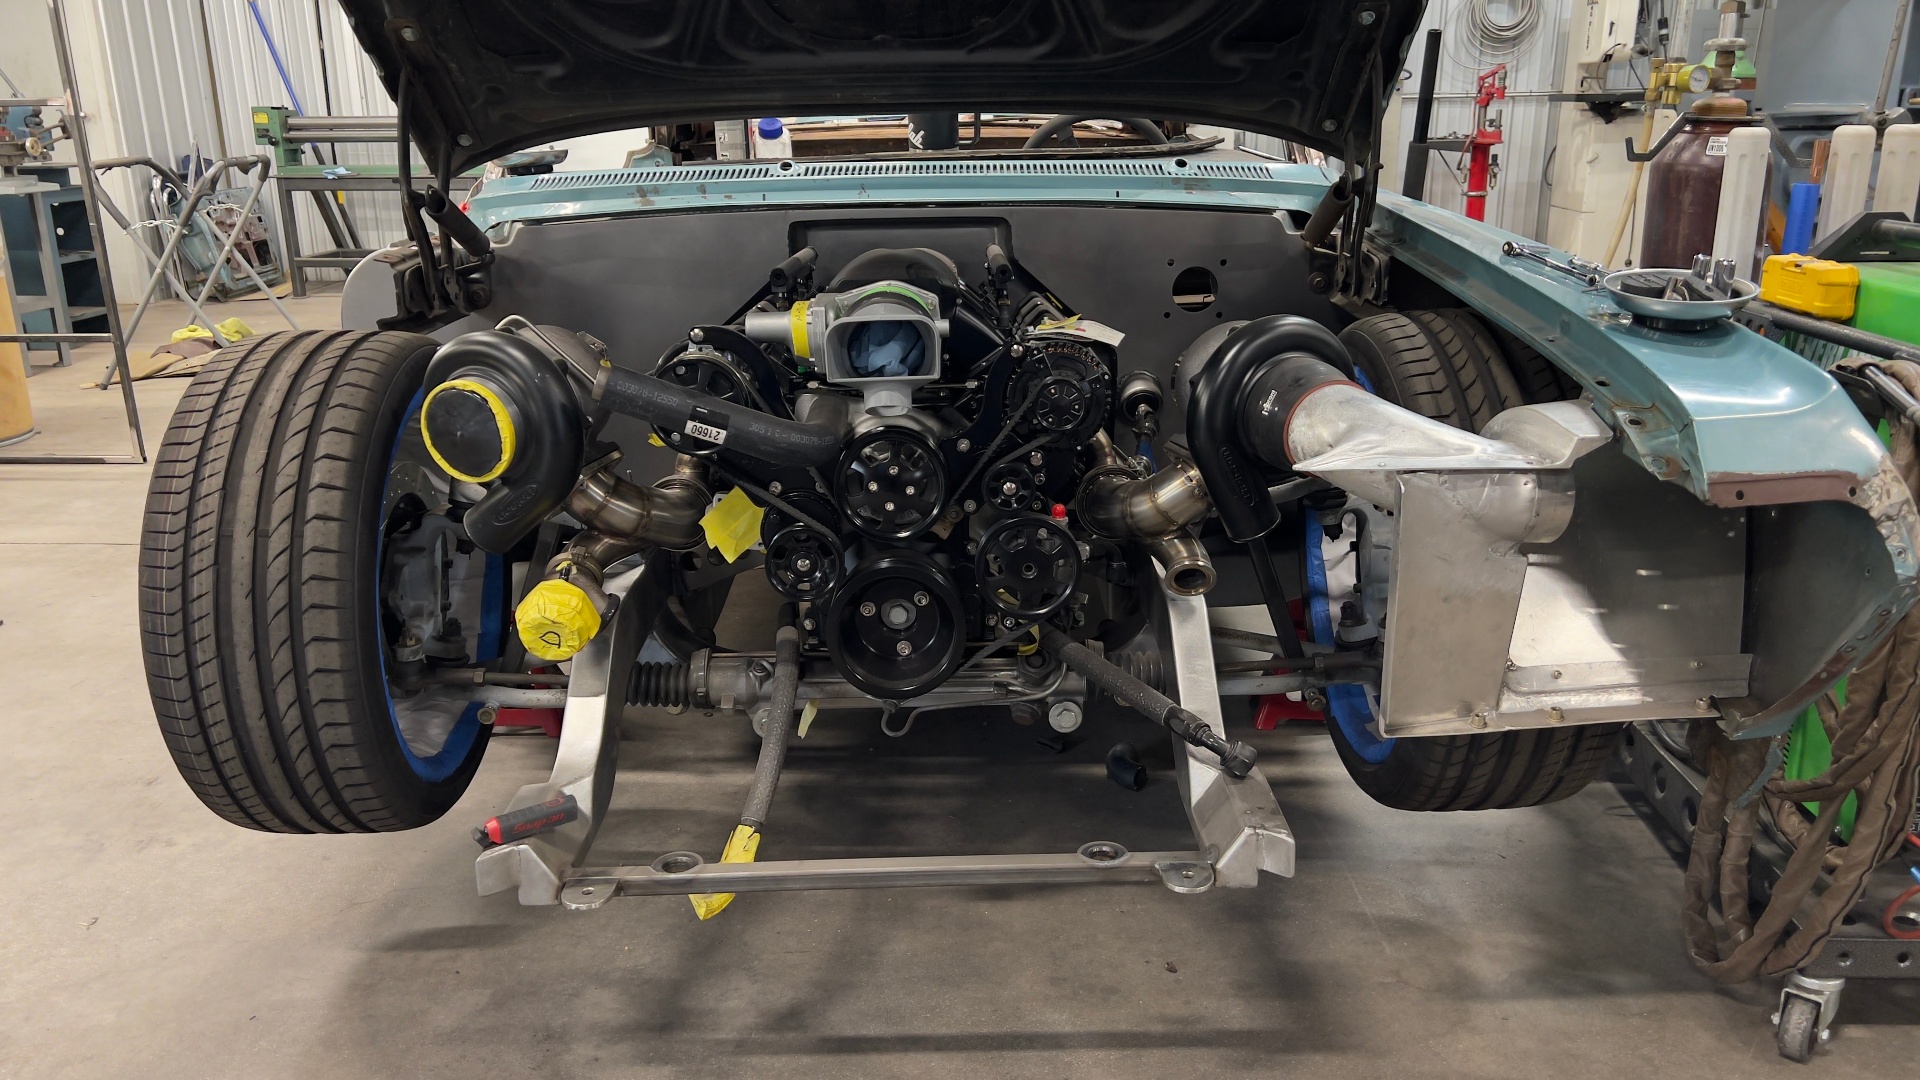
The cold side is anchored by a custom PWR bar-and-plate intercooler, but the real showpiece is the one-off intercooler funnel that transitions from the intercooler outlet up to the plenum. Designed in house at Hammer Fab, first 3D printed for fitment and flow testing, then CNC machined from a solid billet of aluminum by EVOD in California. It gets TIG welded to the top of the intercooler and — other than the twin turbos themselves — will be the first thing you see when the hood pops.
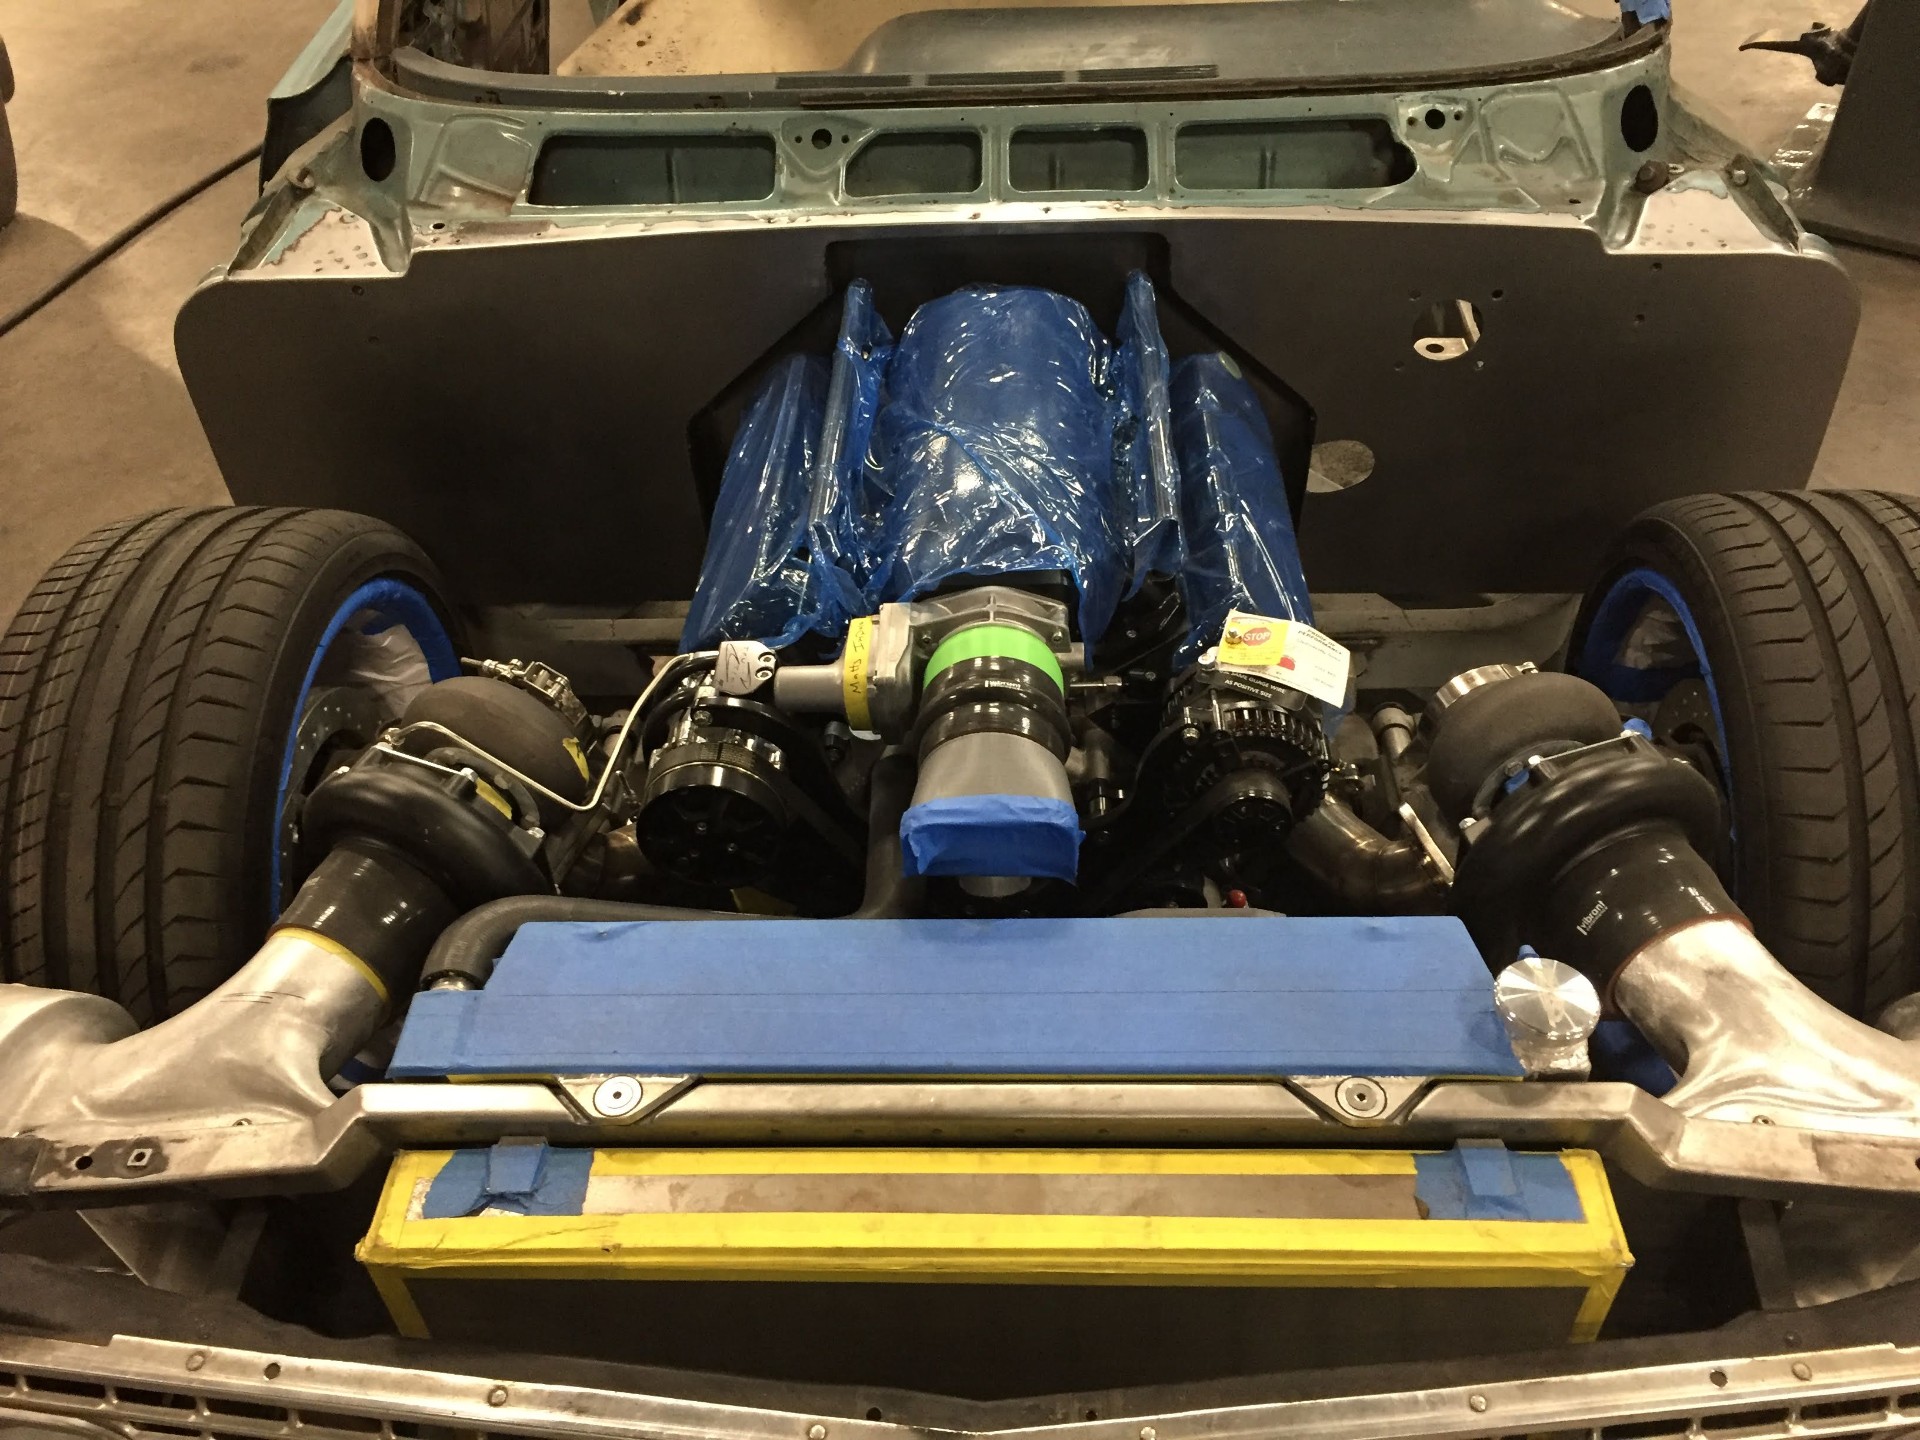
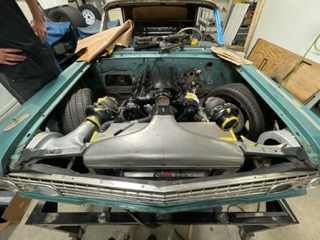
Front-end mockup — twin turbos in the fenders, PWR intercooler taped up on the front, plenum blank on top.J027
Front-end mockup — twin turbos in the fenders, PWR intercooler taped up on the front, plenum blank on top.
SolidWorks screen capture of the funnel — designed in house at Hammer Fab around the intercooler outlet and plenum inlet.J028
SolidWorks screen capture of the funnel — designed in house at Hammer Fab around the intercooler outlet and plenum inlet.
Full-size 3D-printed prototype broken into sections — printed at Hammer Fab to test-fit and flow-check before committing to billet.J029
Full-size 3D-printed prototype broken into sections — printed at Hammer Fab to test-fit and flow-check before committing to billet.
Assembled 3D print on the bench — the whole funnel geometry in one piece before it went out for CNC machining.J030
Assembled 3D print on the bench — the whole funnel geometry in one piece before it went out for CNC machining.
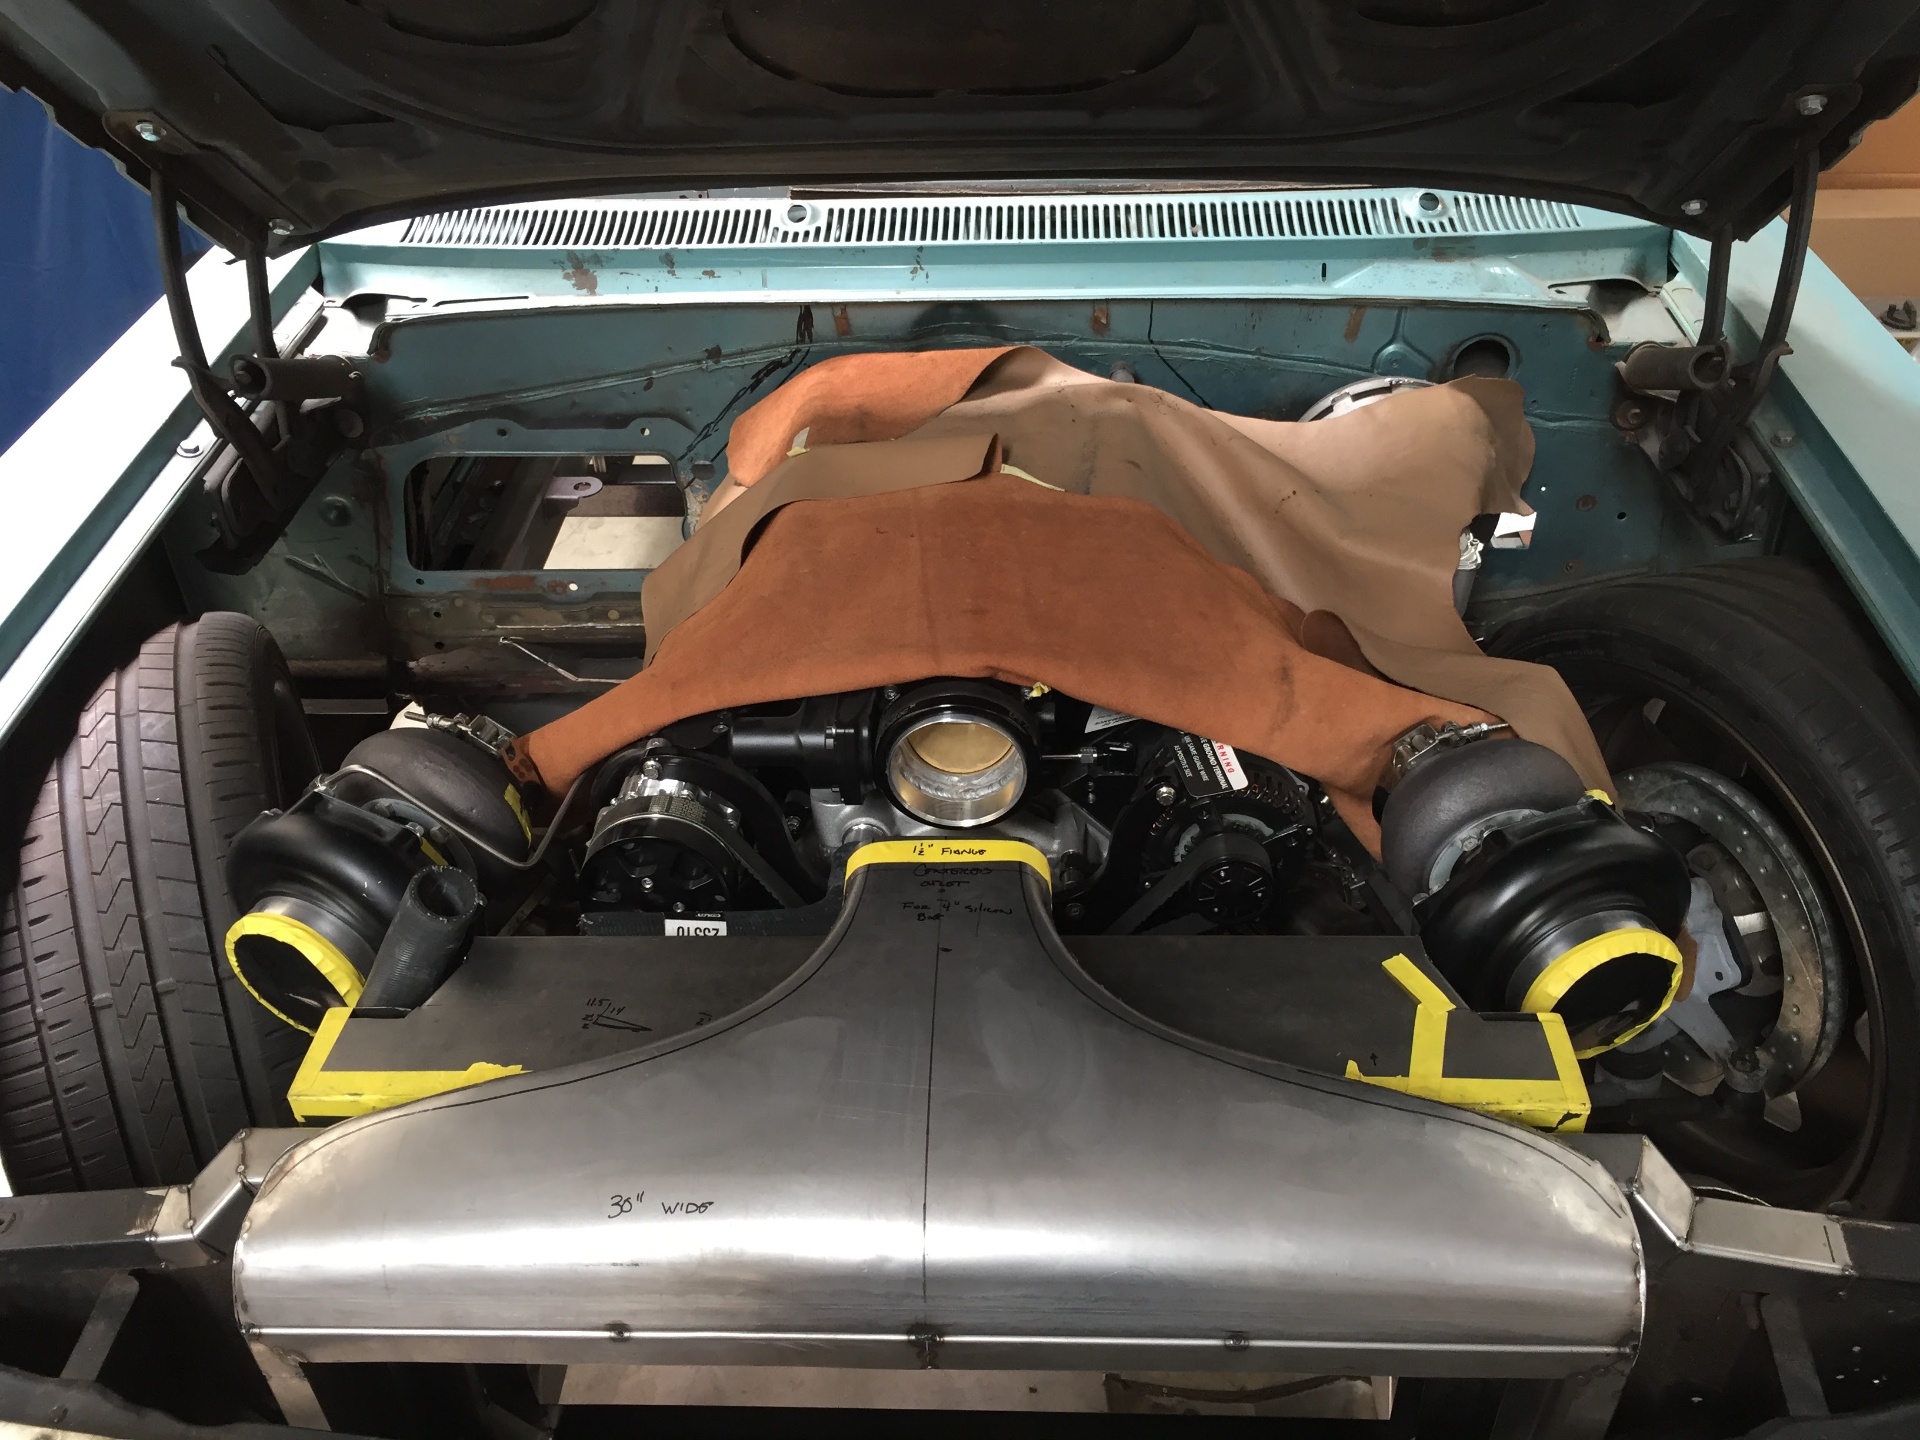
Cardboard mockup of the funnel and plenum taped in place under the hood to confirm clearance to the turbos and welding blankets protecting the paint.J031
Cardboard mockup of the funnel and plenum taped in place under the hood to confirm clearance to the turbos and welding blankets protecting the paint.
Front-on view of the mockup — twin Nelson turbos flanking the plenum blank, intercooler blank across the front.J032
Front-on view of the mockup — twin Nelson turbos flanking the plenum blank, intercooler blank across the front.
Grille-level view — the plumbing package inside the front clip is taking shape.J033
Grille-level view — the plumbing package inside the front clip is taking shape.
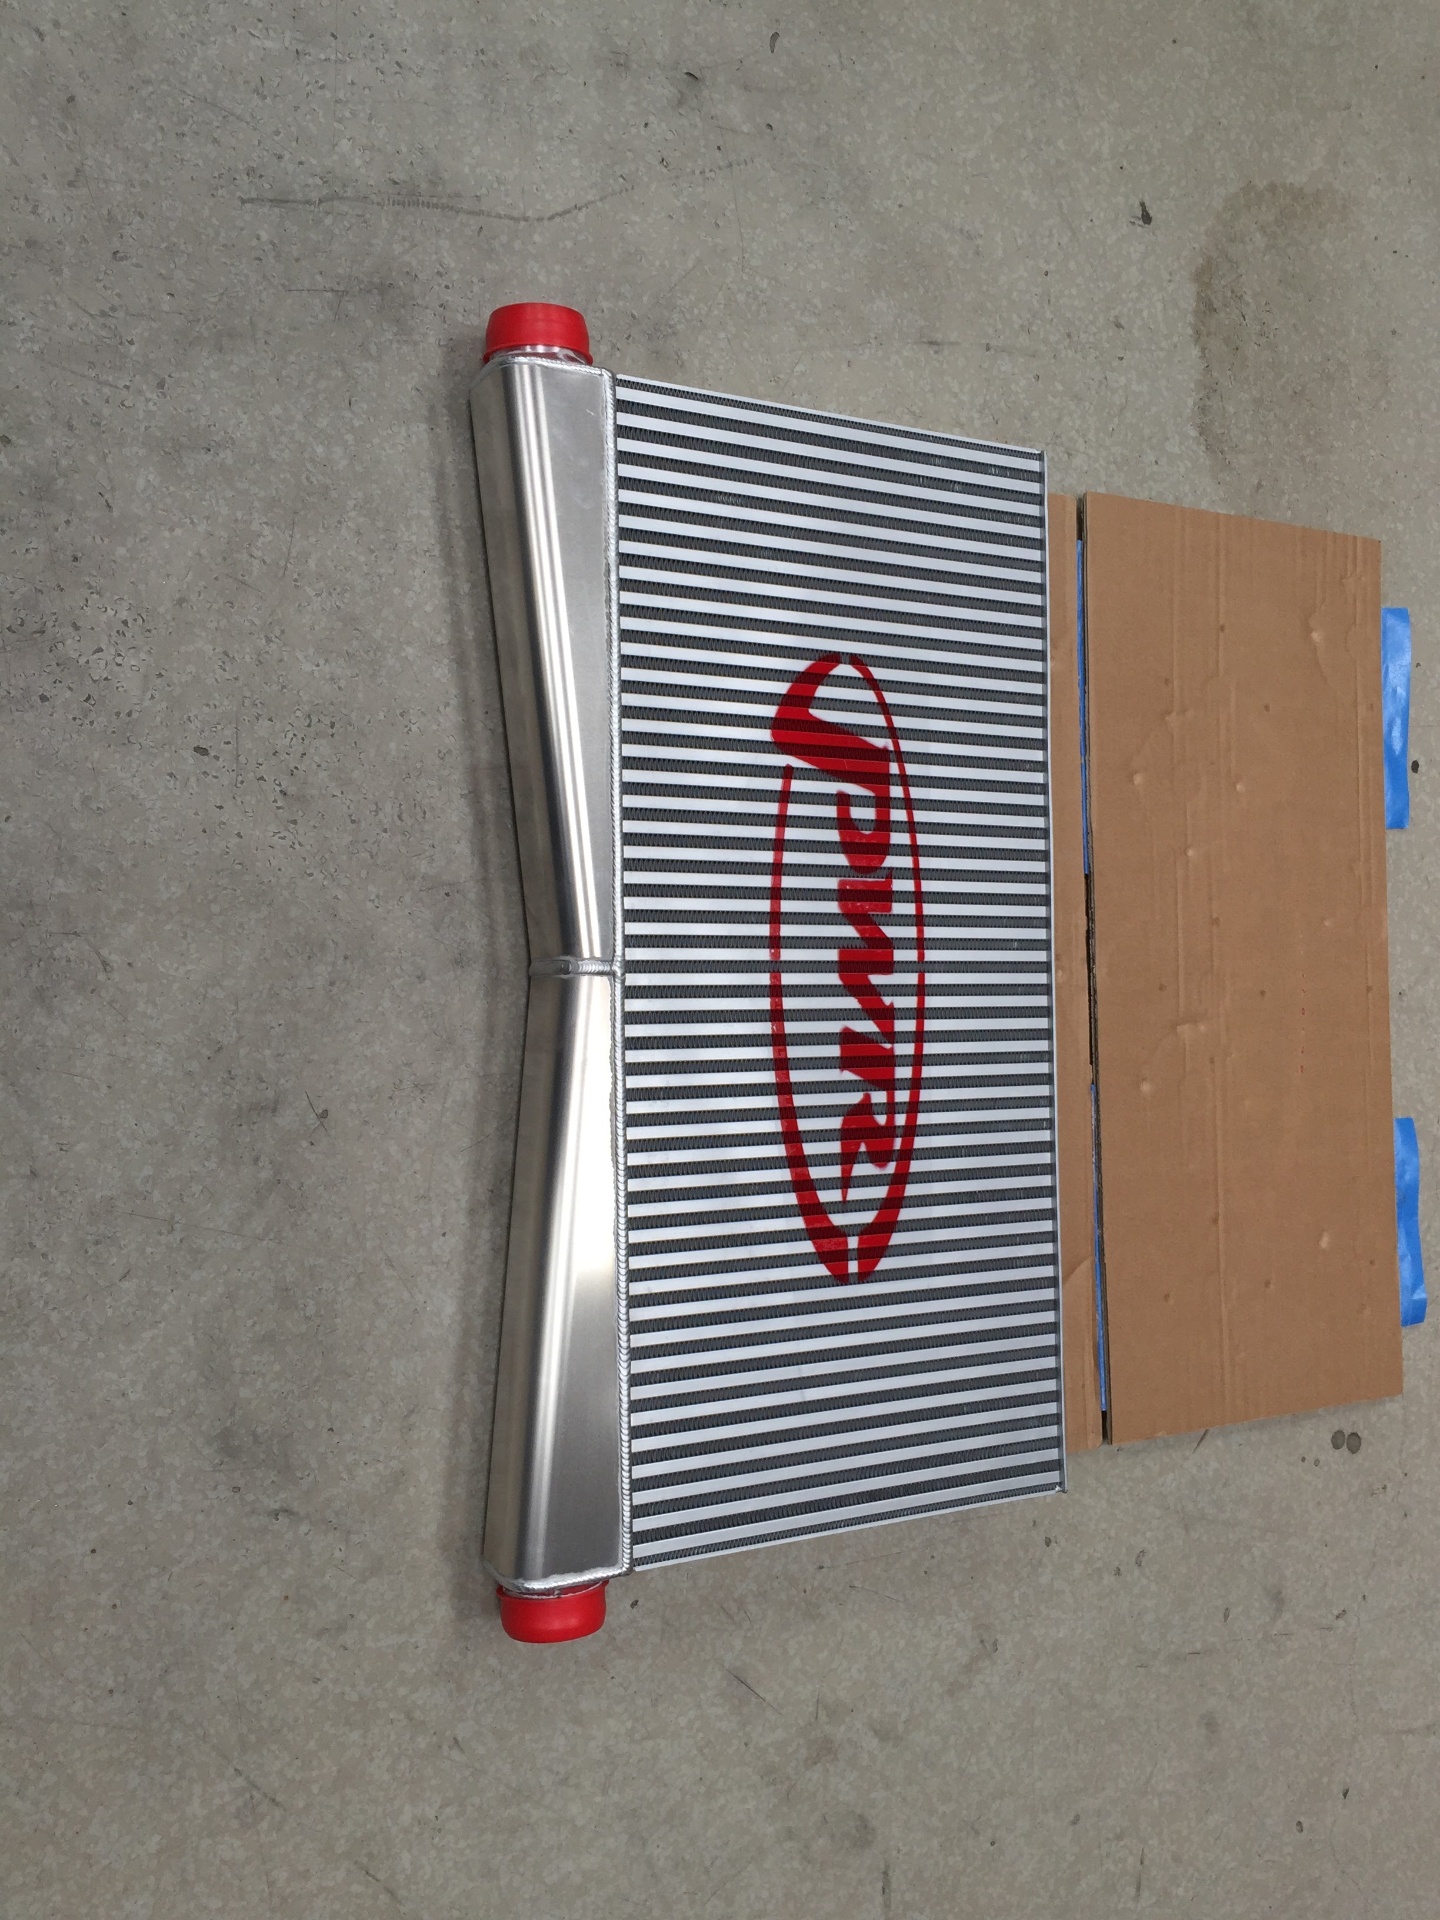
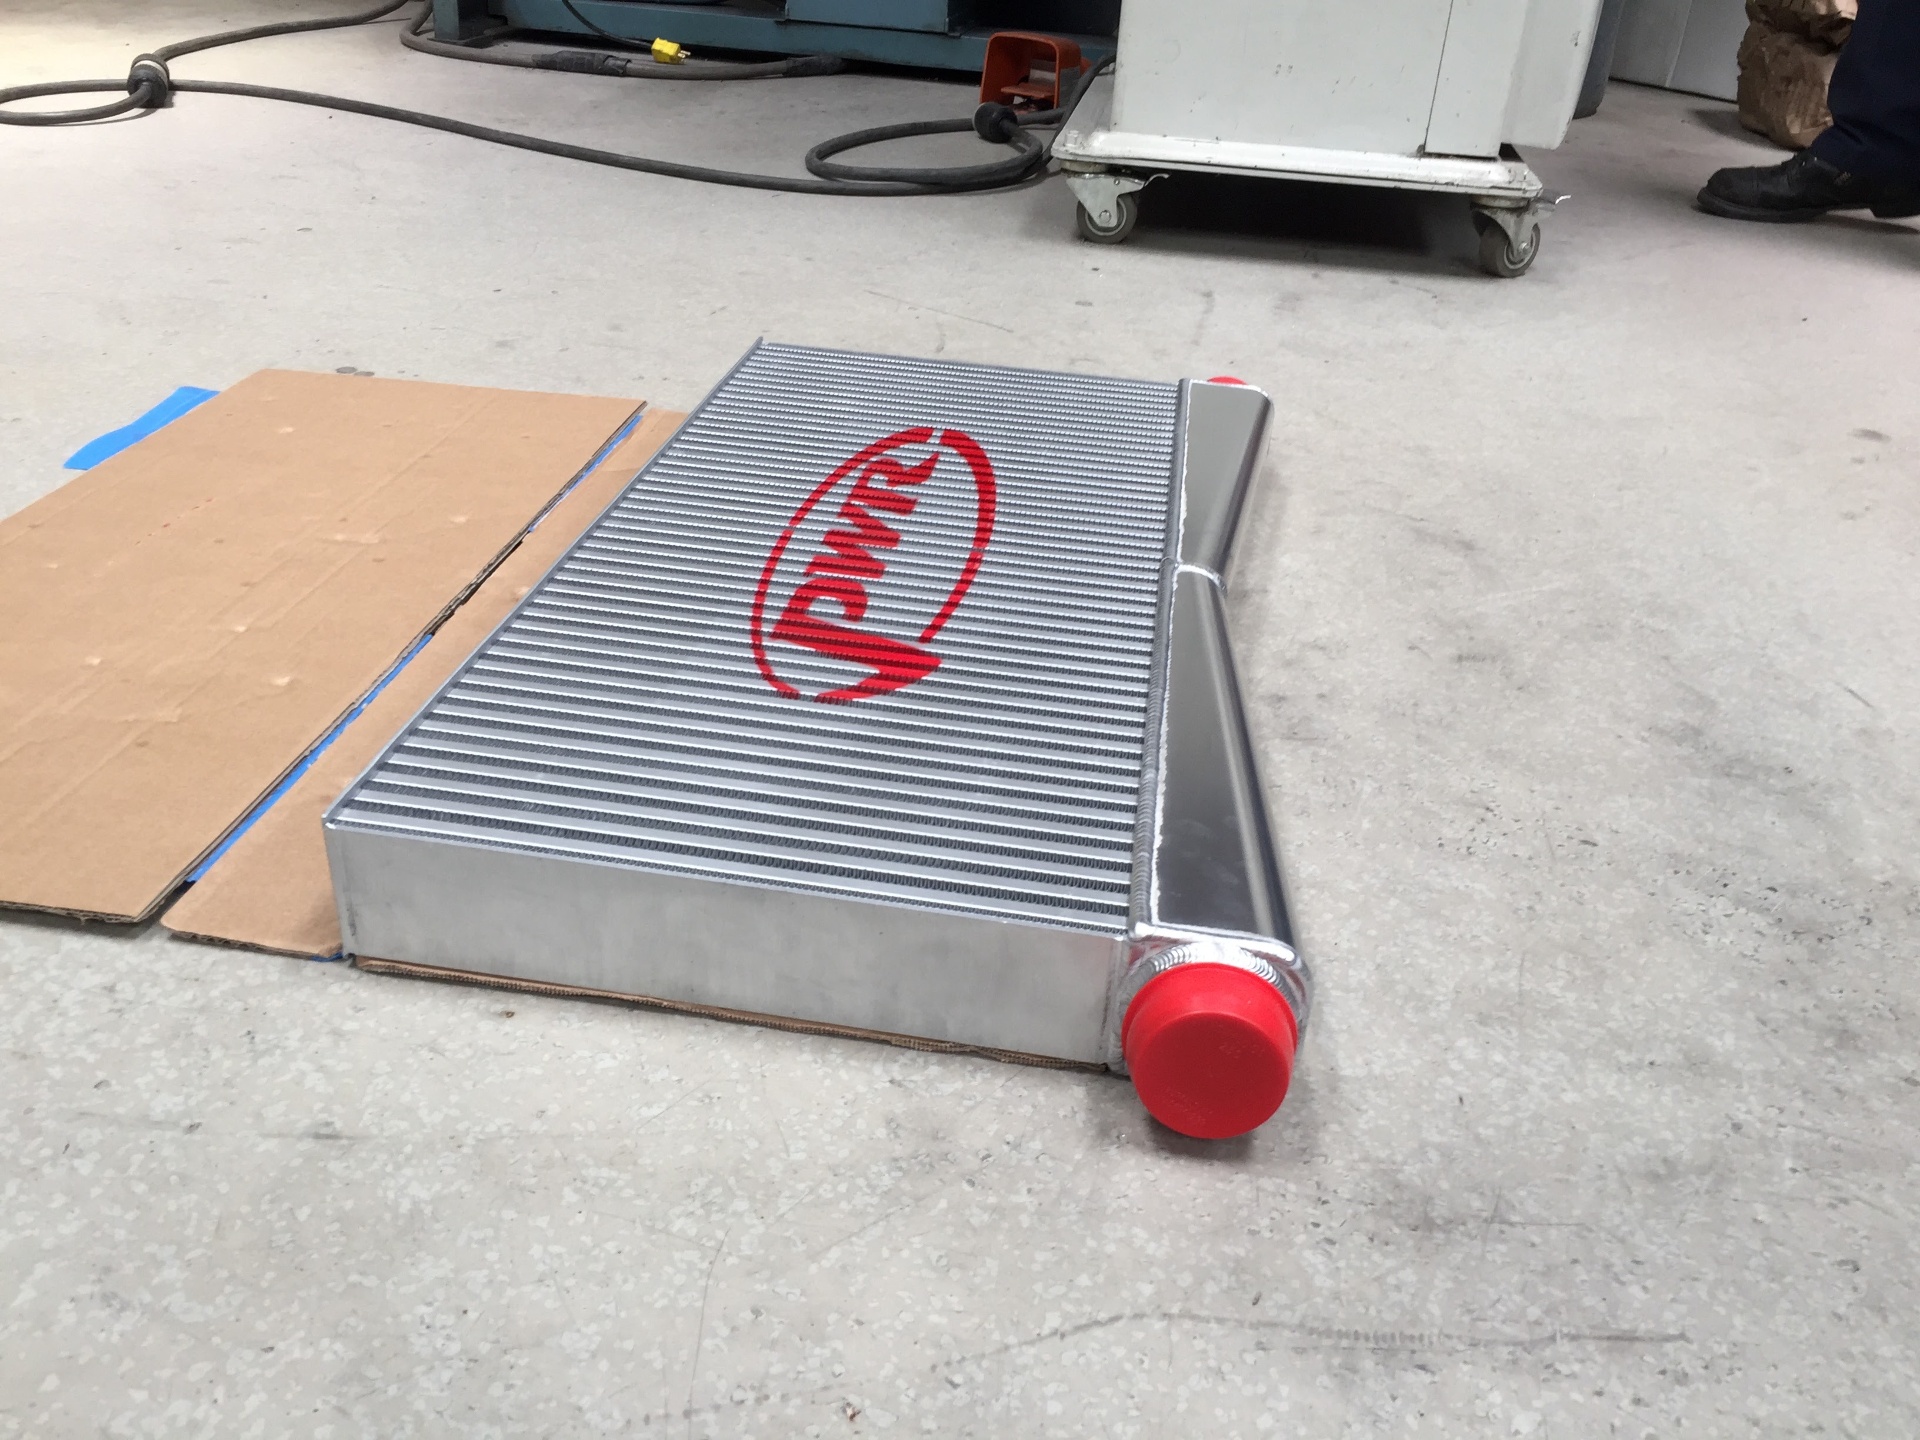
The custom PWR bar-and-plate intercooler on the shop floor.J034
The custom PWR bar-and-plate intercooler on the shop floor.
Second PWR core sized to fit between the frame rails behind the grille.J035
Second PWR core sized to fit between the frame rails behind the grille.
Finished billet funnel, CNC machined from solid aluminum by EVOD in California.J036
Finished billet funnel, CNC machined from solid aluminum by EVOD in California.
Angle view showing the sweeping transition from the intercooler face up into the plenum inlet.J037
Angle view showing the sweeping transition from the intercooler face up into the plenum inlet.
Side profile of the billet funnel — this piece TIG welds directly to the top of the intercooler.J038
Side profile of the billet funnel — this piece TIG welds directly to the top of the intercooler.
Earlier foam and tape mockup of the duct and plenum shape used to nail down the funnel geometry.J039
Earlier foam and tape mockup of the duct and plenum shape used to nail down the funnel geometry.

UPDATE 03 / 10

Oct 15, 2023

FABRICATION

Custom driveshaft tunnel and rocker fabrication

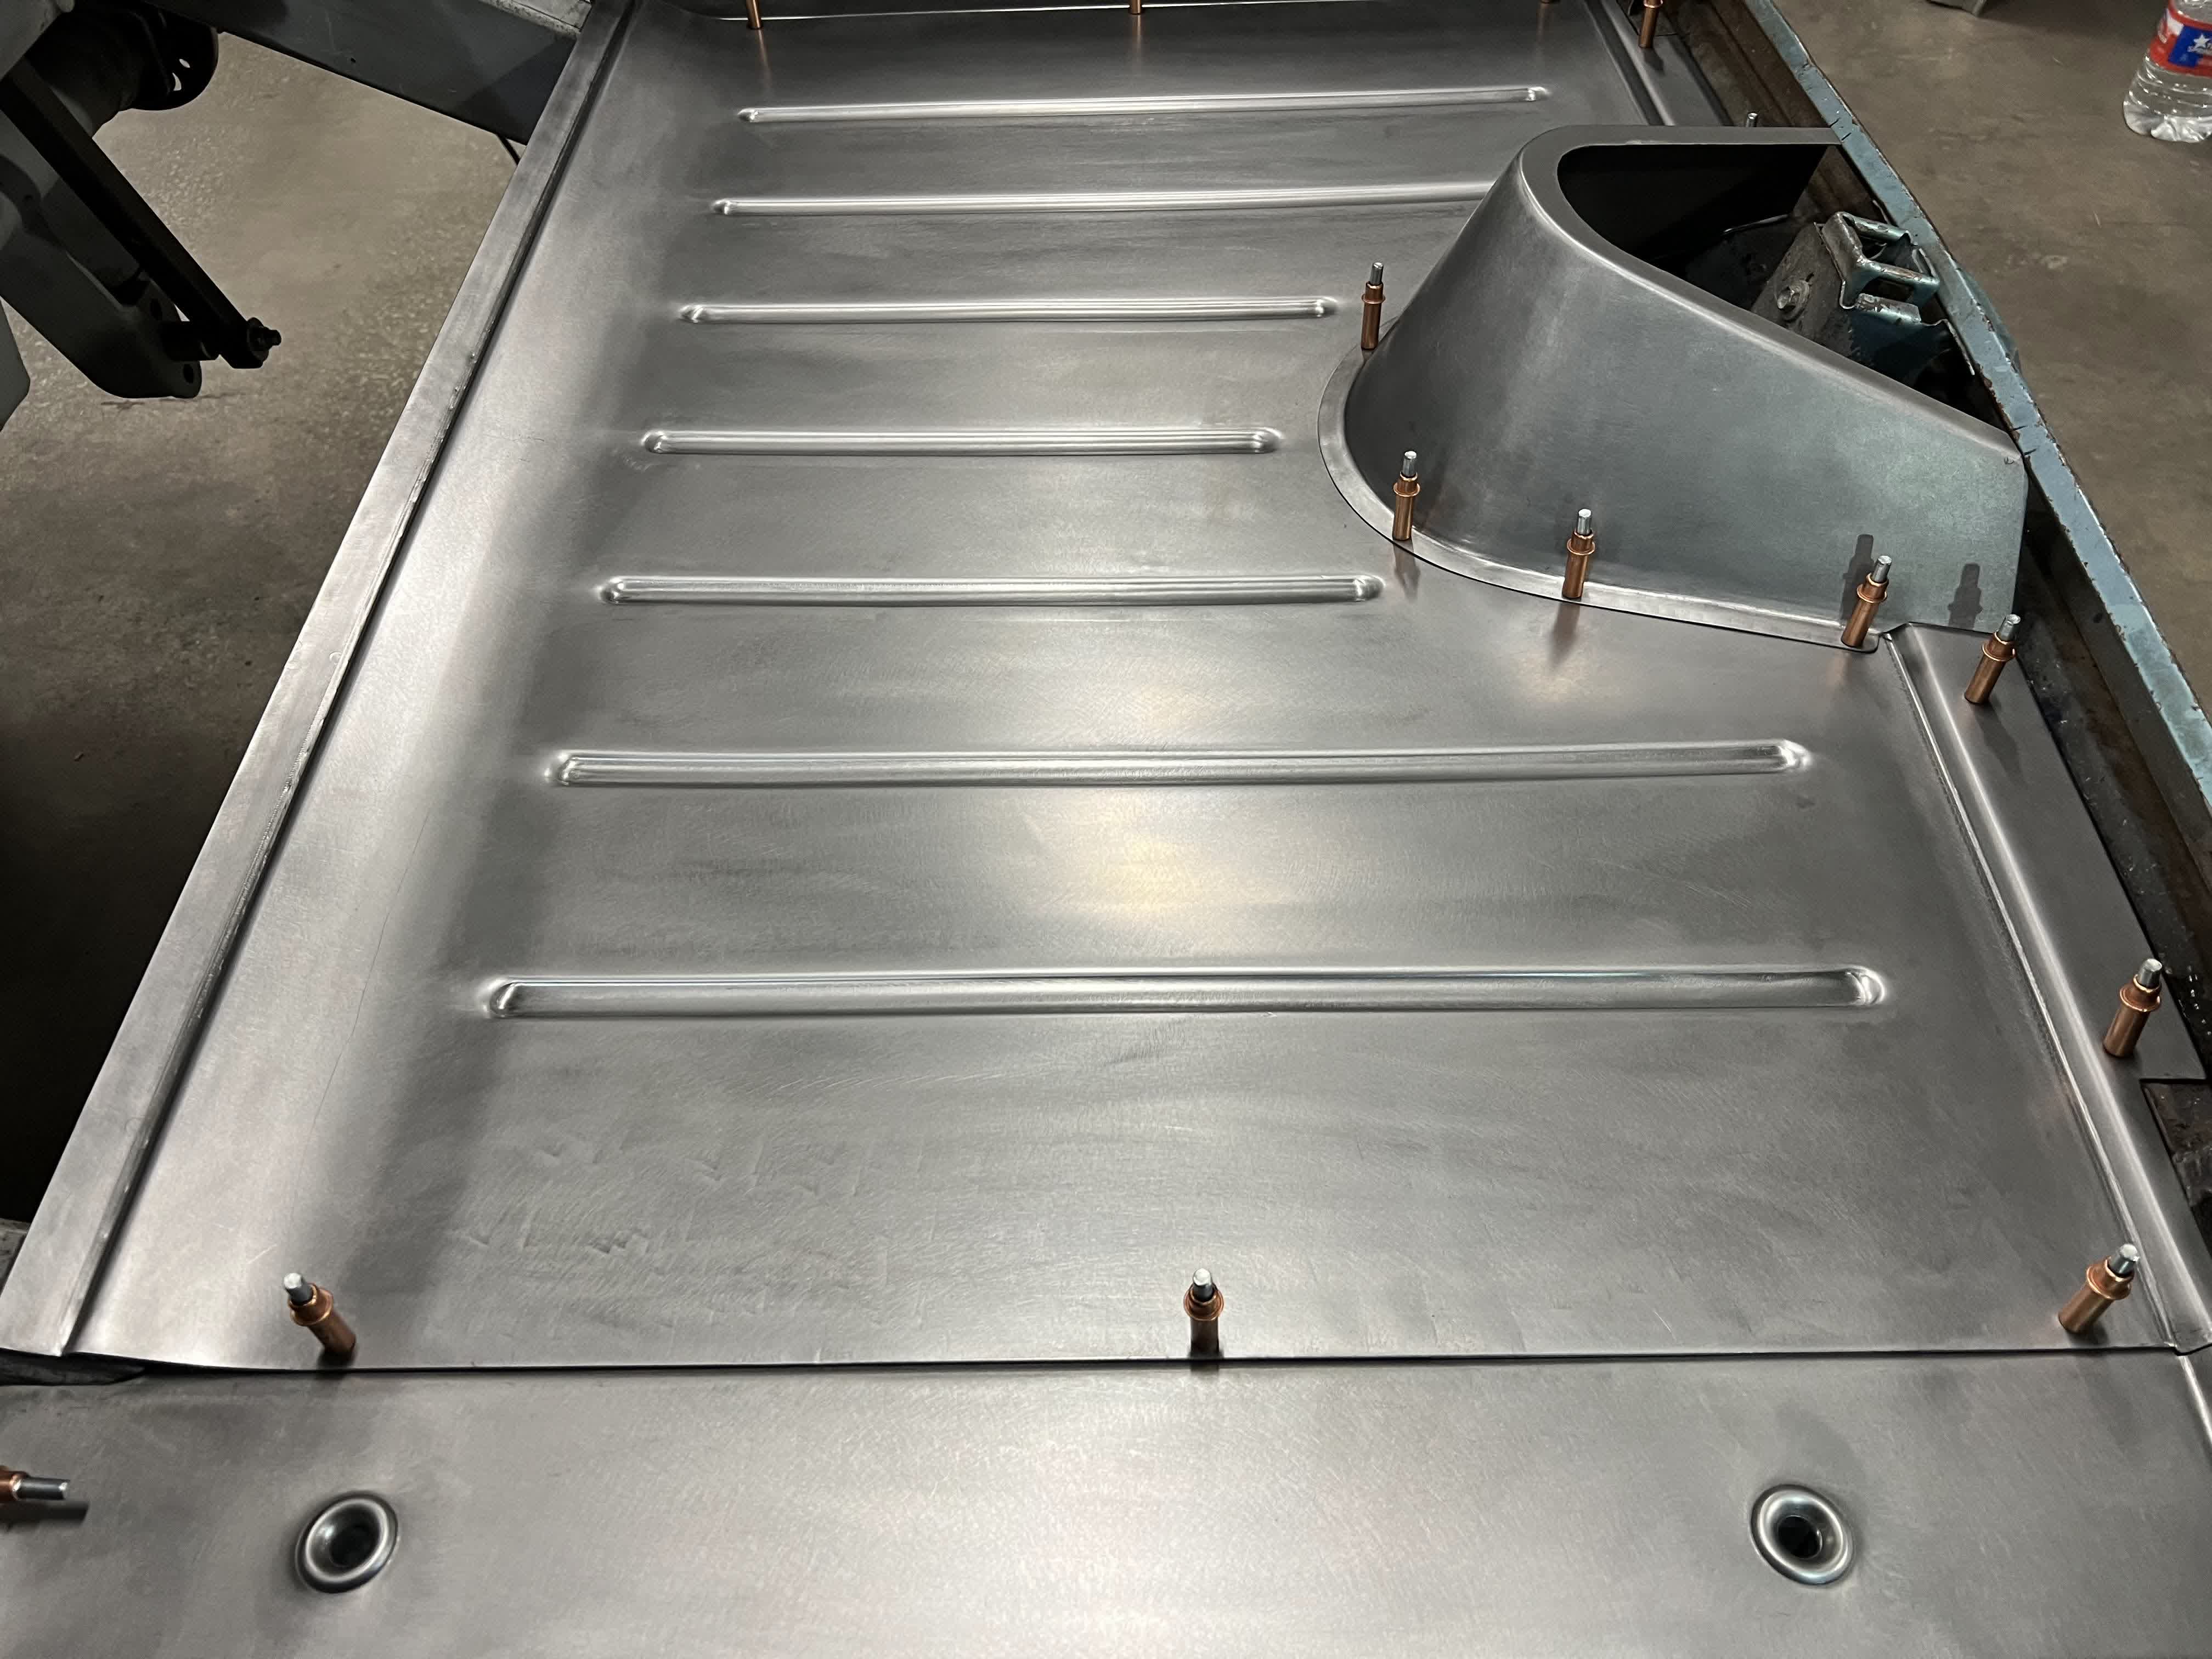
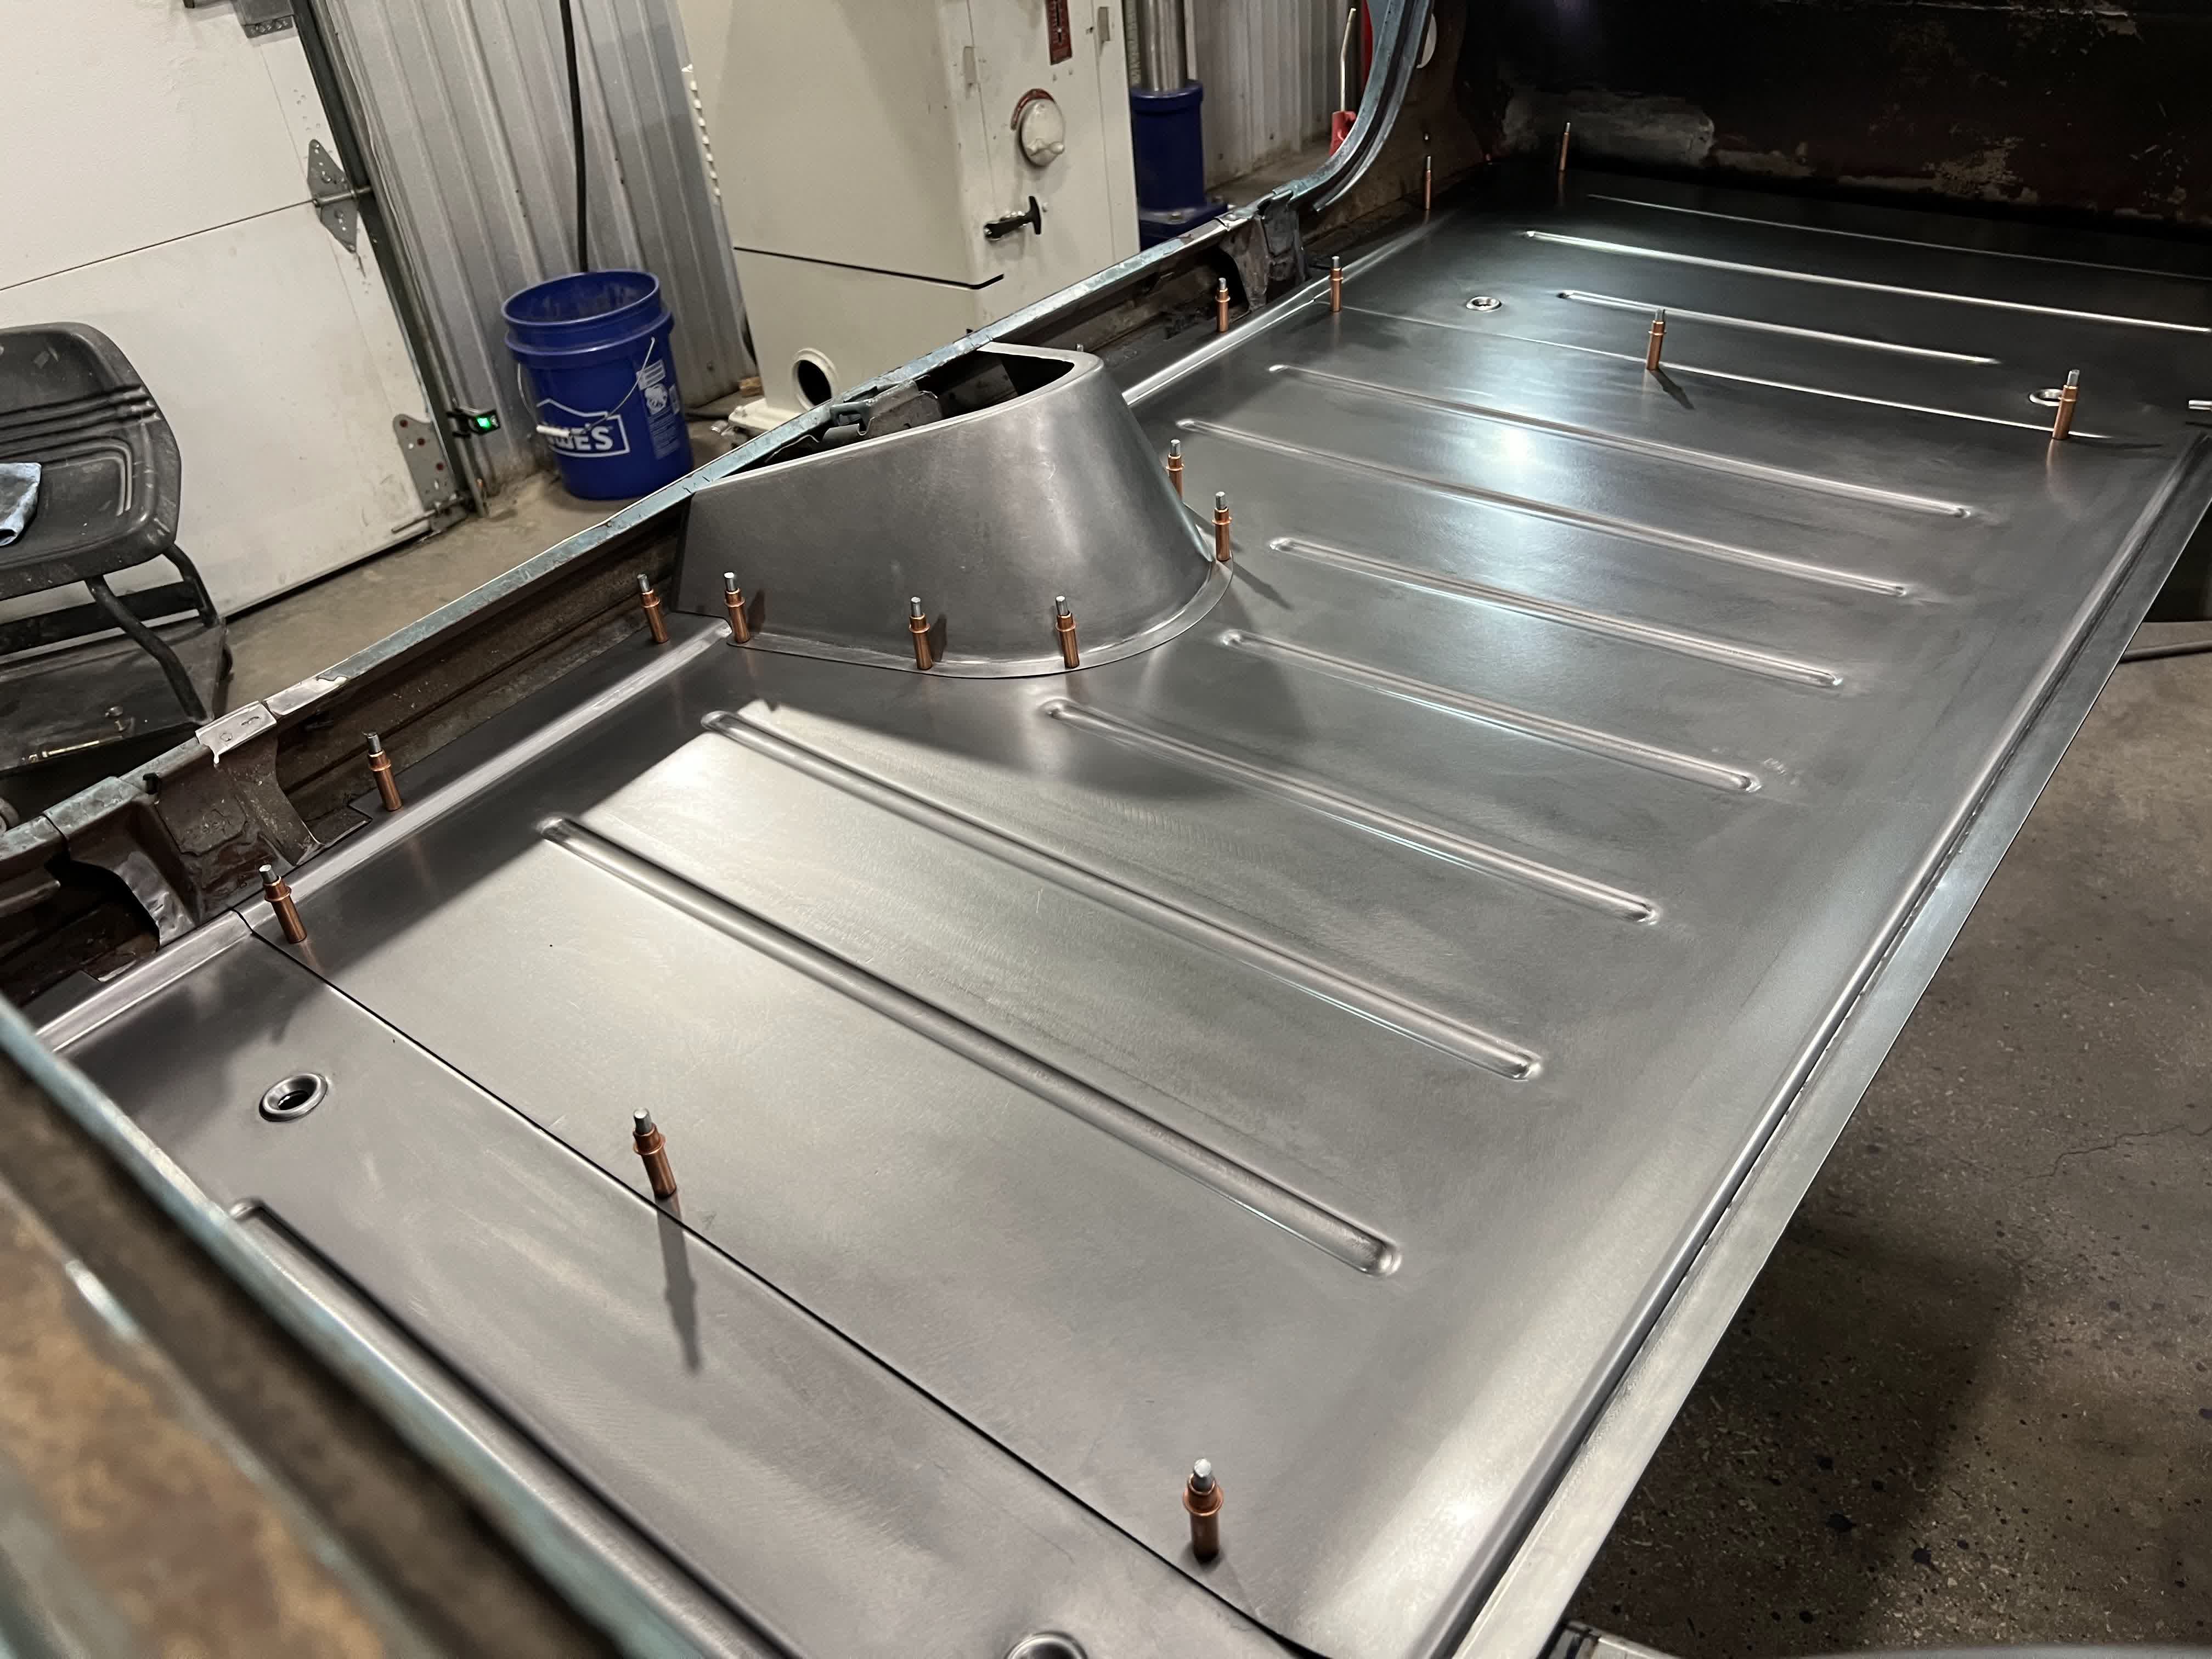
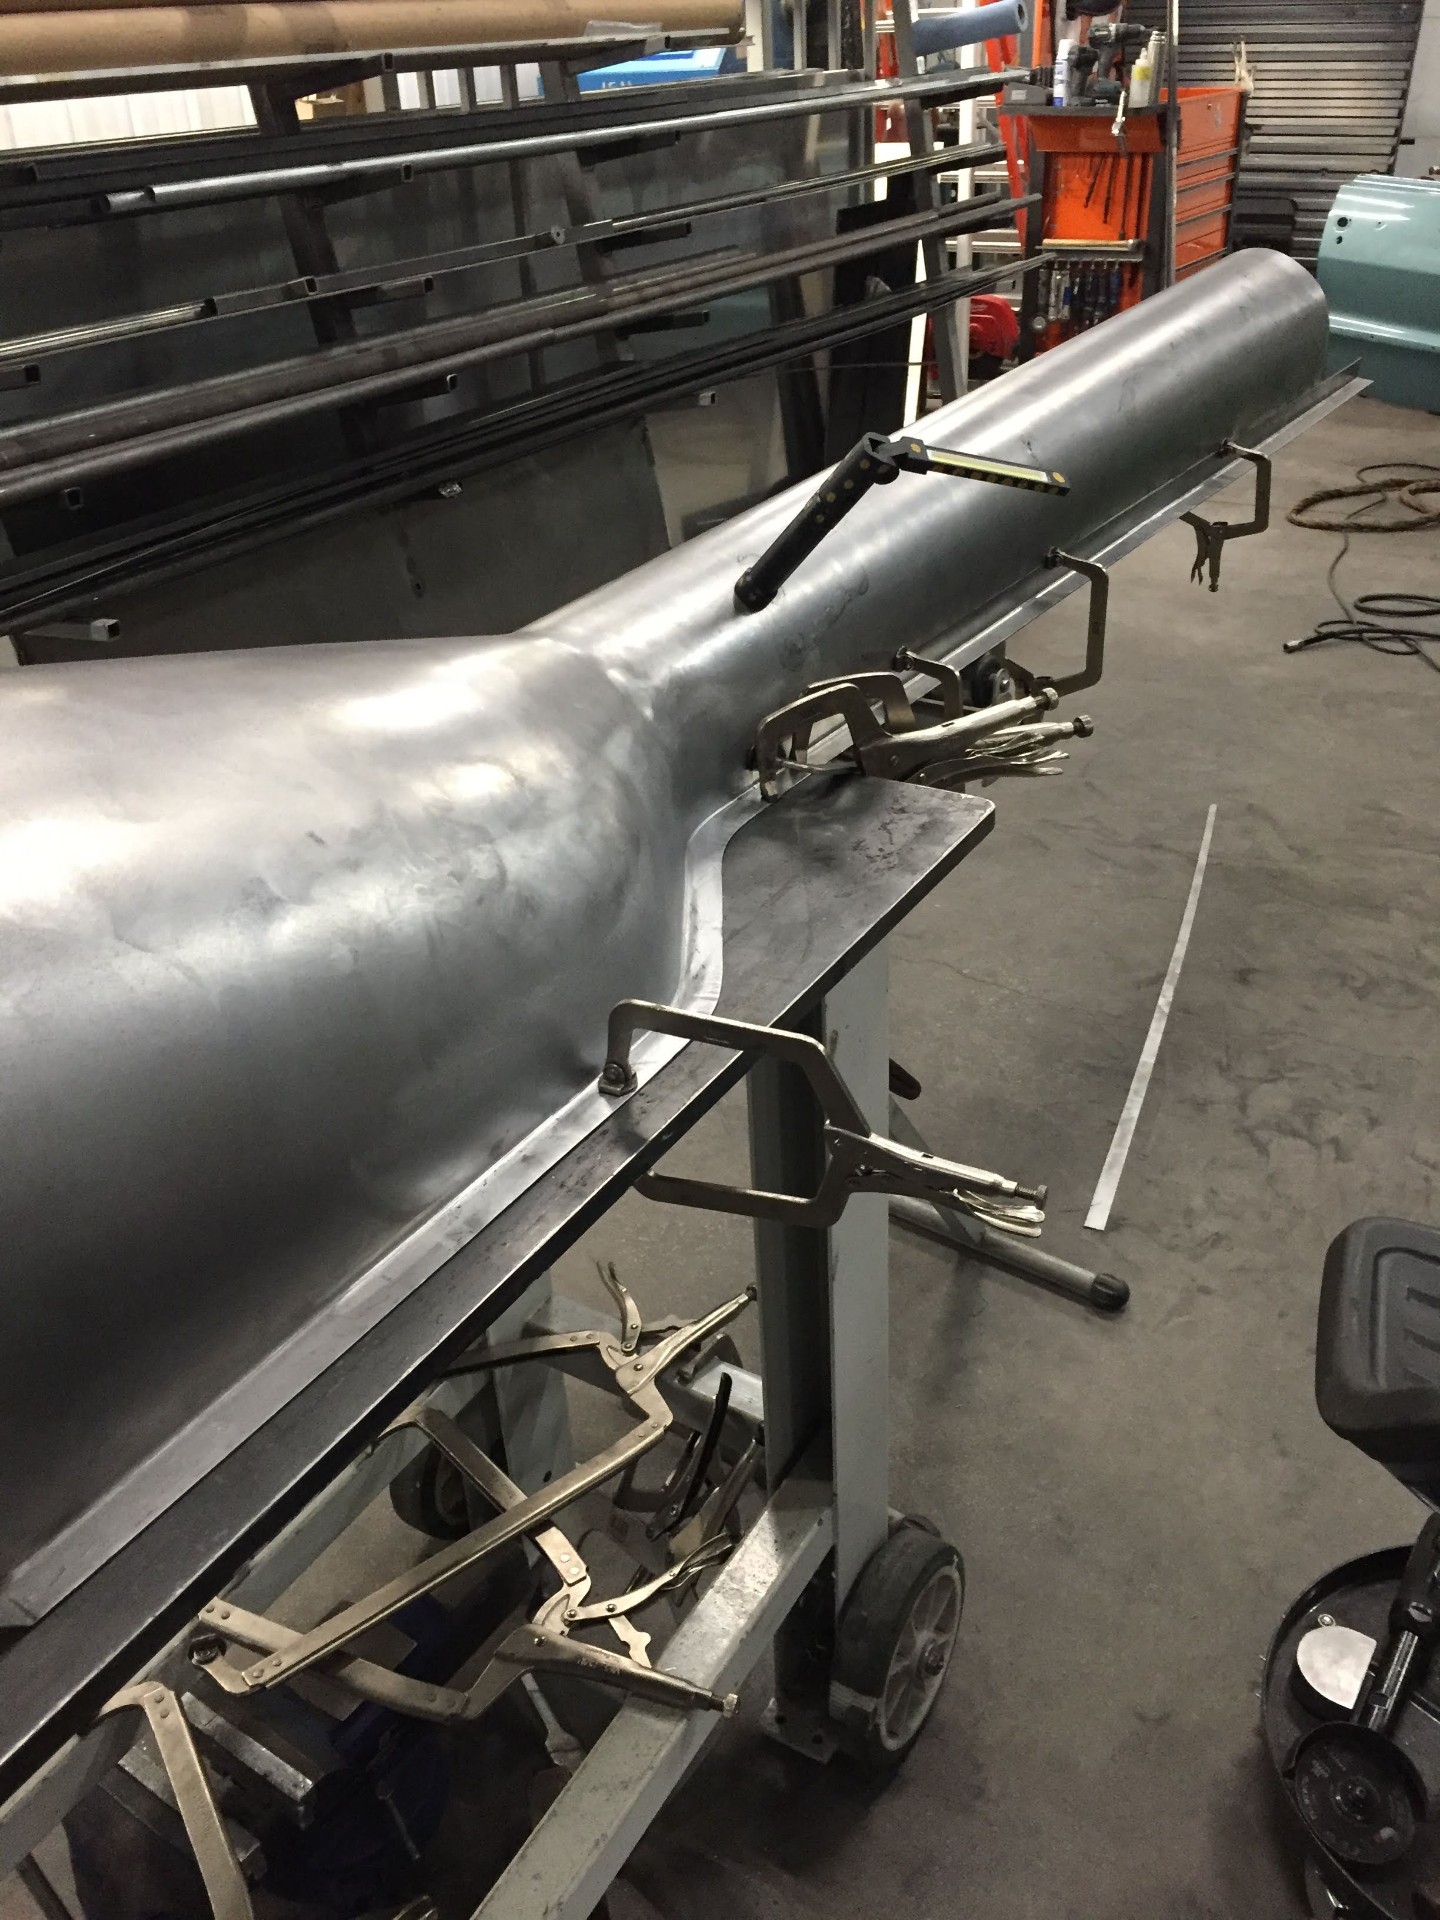
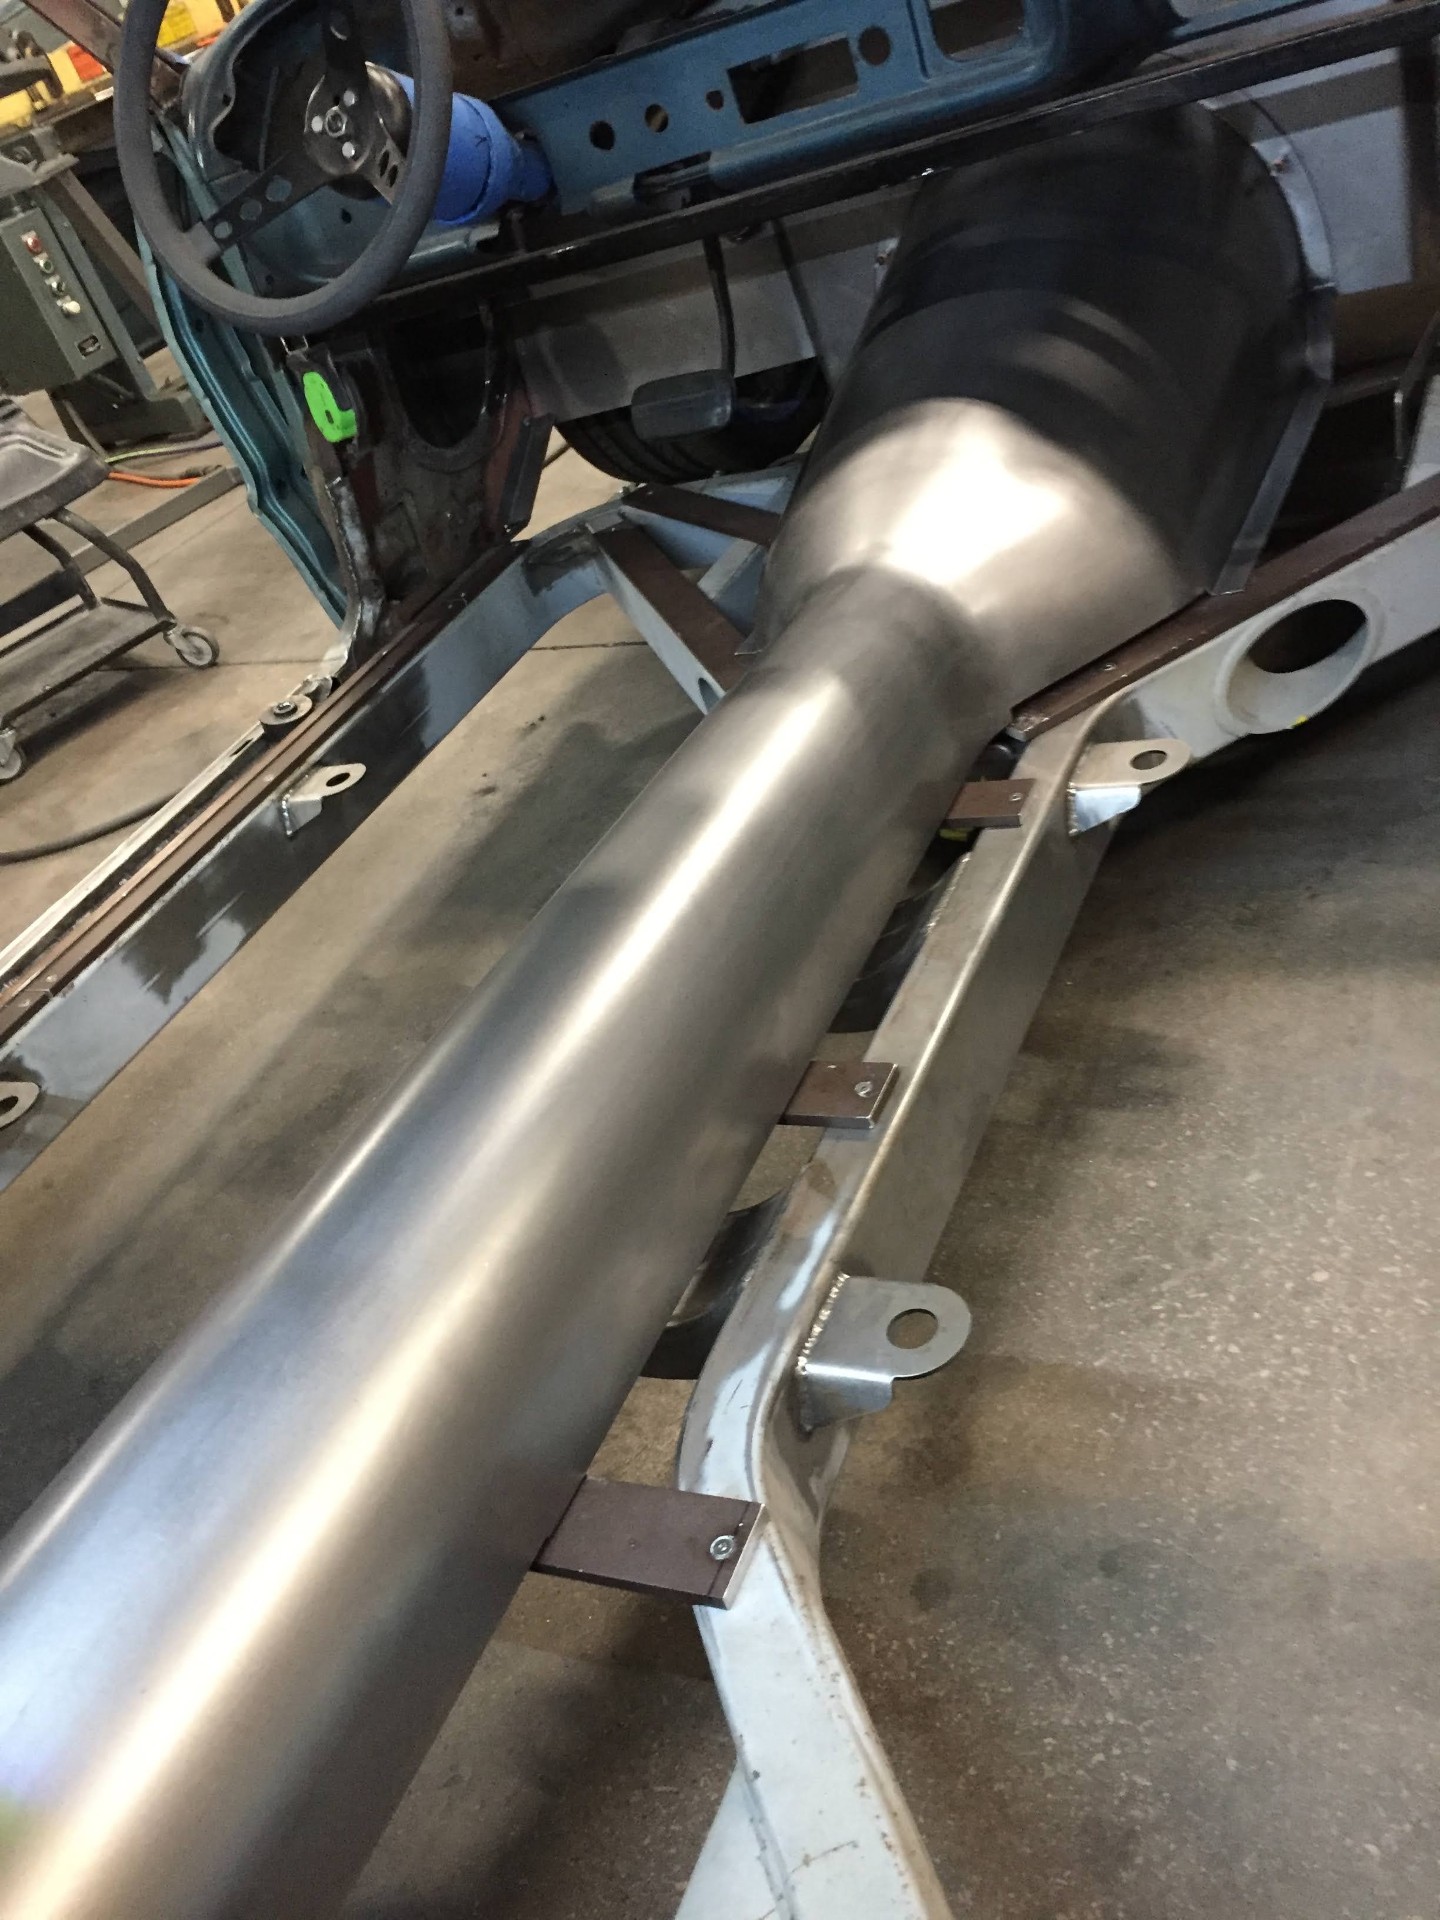
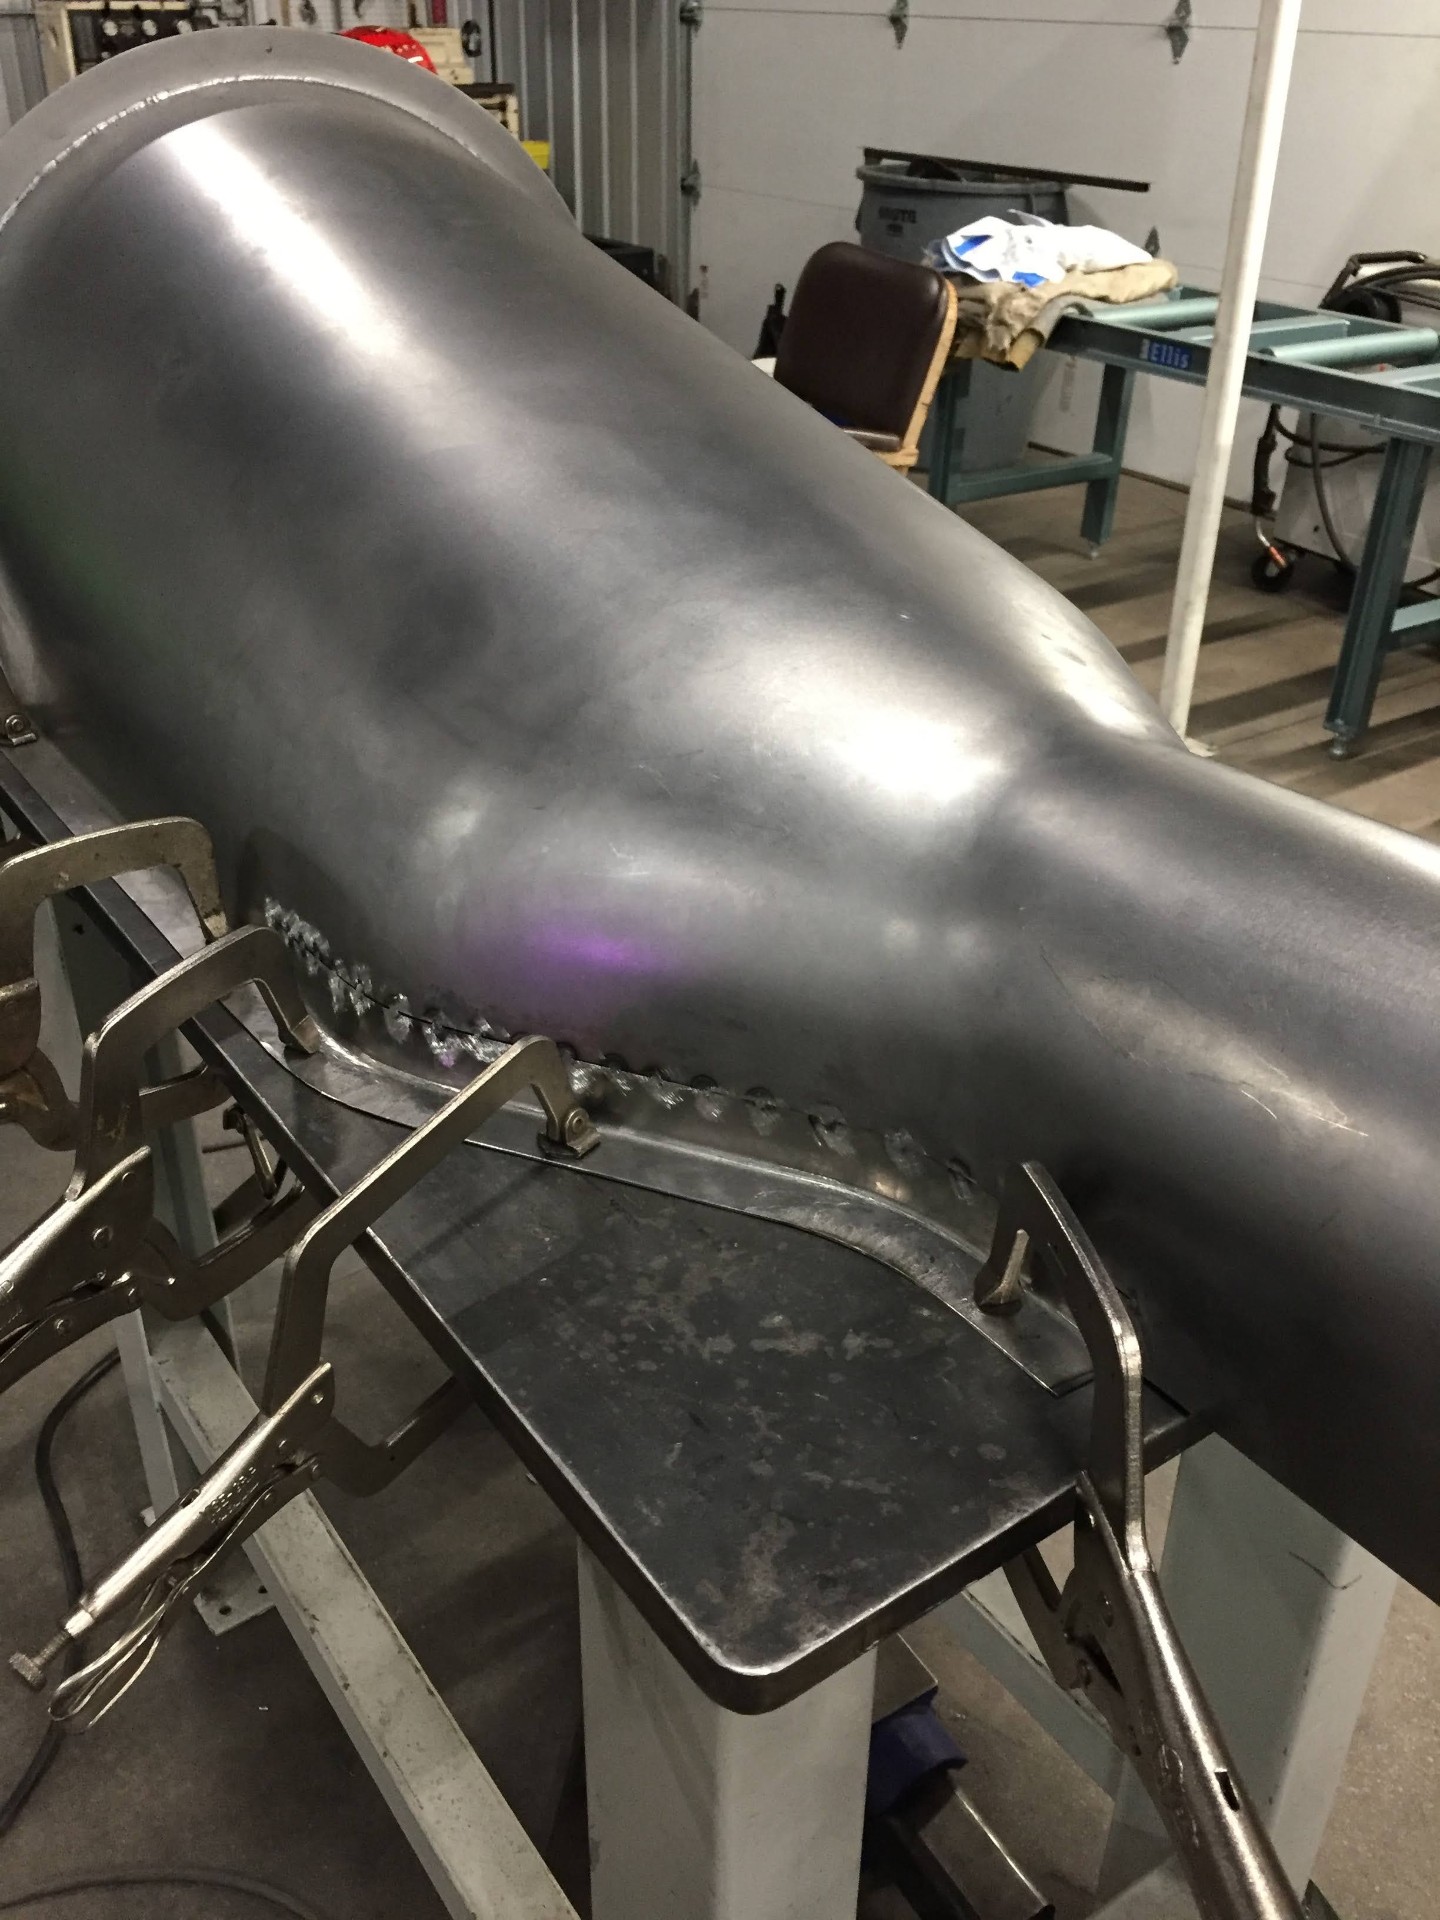
The stock trans tunnel wouldn't clear the new drivetrain or the raised chassis, so a full tunnel was rolled from scratch, welded to a new inner rocker, and blended into the fresh floor pans. Everything TIG welded from the underside so the finished cabin side stays smooth.

Rolled tunnel section on the bench with the rocker flange clamped for tacking.J040
Rolled tunnel section on the bench with the rocker flange clamped for tacking.
Tunnel dropped into the chassis for fit-up over the Morrison center section.J041
Tunnel dropped into the chassis for fit-up over the Morrison center section.
Full-length TIG weld running along the tunnel-to-rocker seam.J042
Full-length TIG weld running along the tunnel-to-rocker seam.
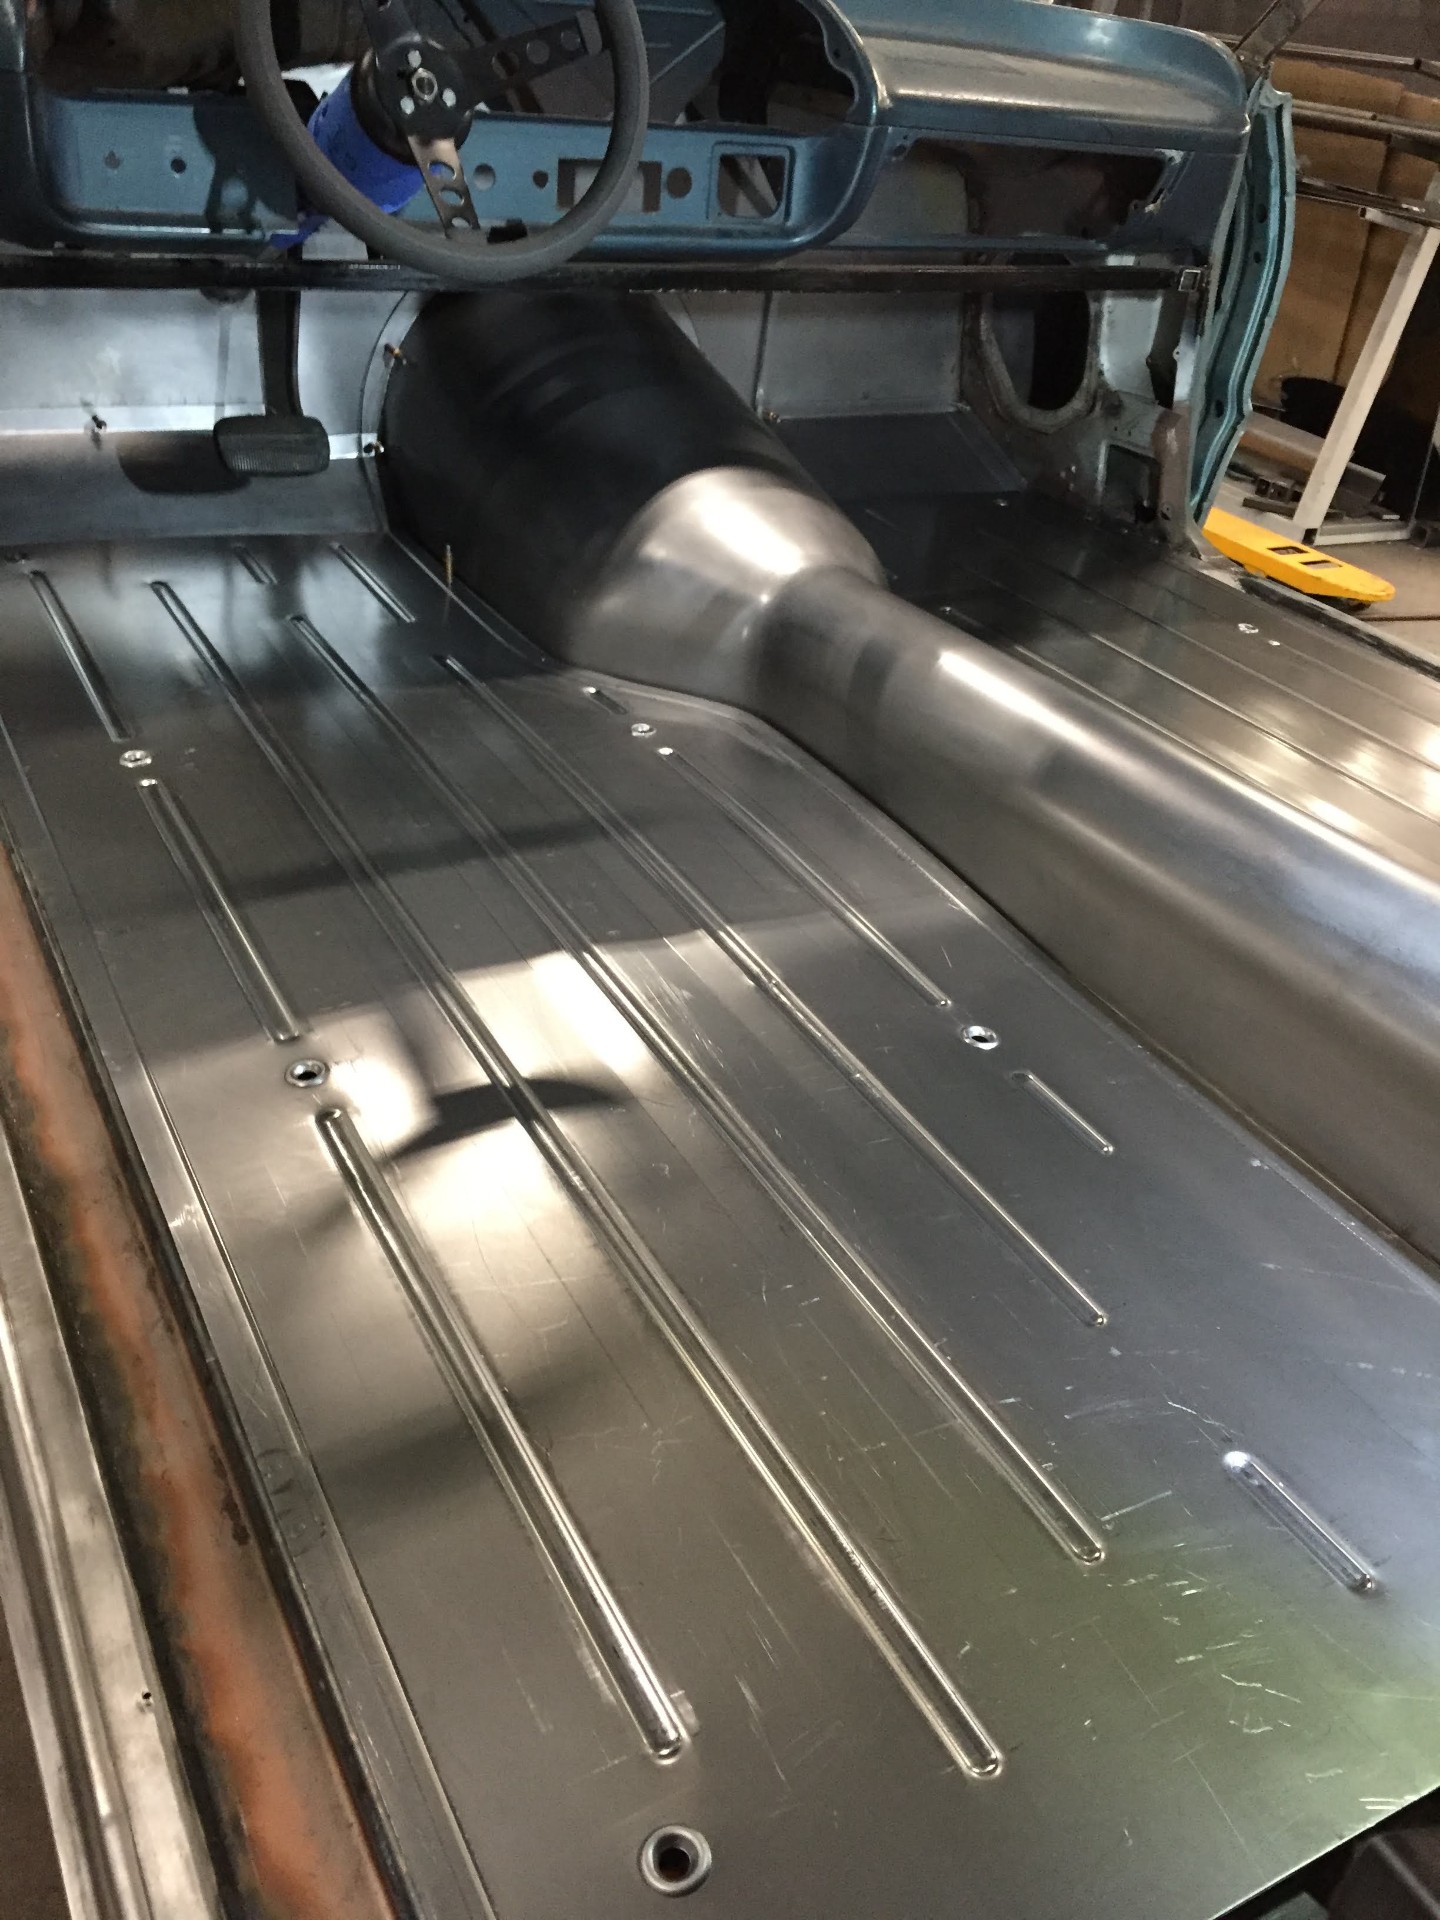
Finished cabin floor with the new tunnel blended into the beaded 14ga pans.J043
Finished cabin floor with the new tunnel blended into the beaded 14ga pans.

UPDATE 02 / 10

Nov 1, 2023

FABRICATION MILESTONE

Custom 14ga floors — beaded on the Pullmax

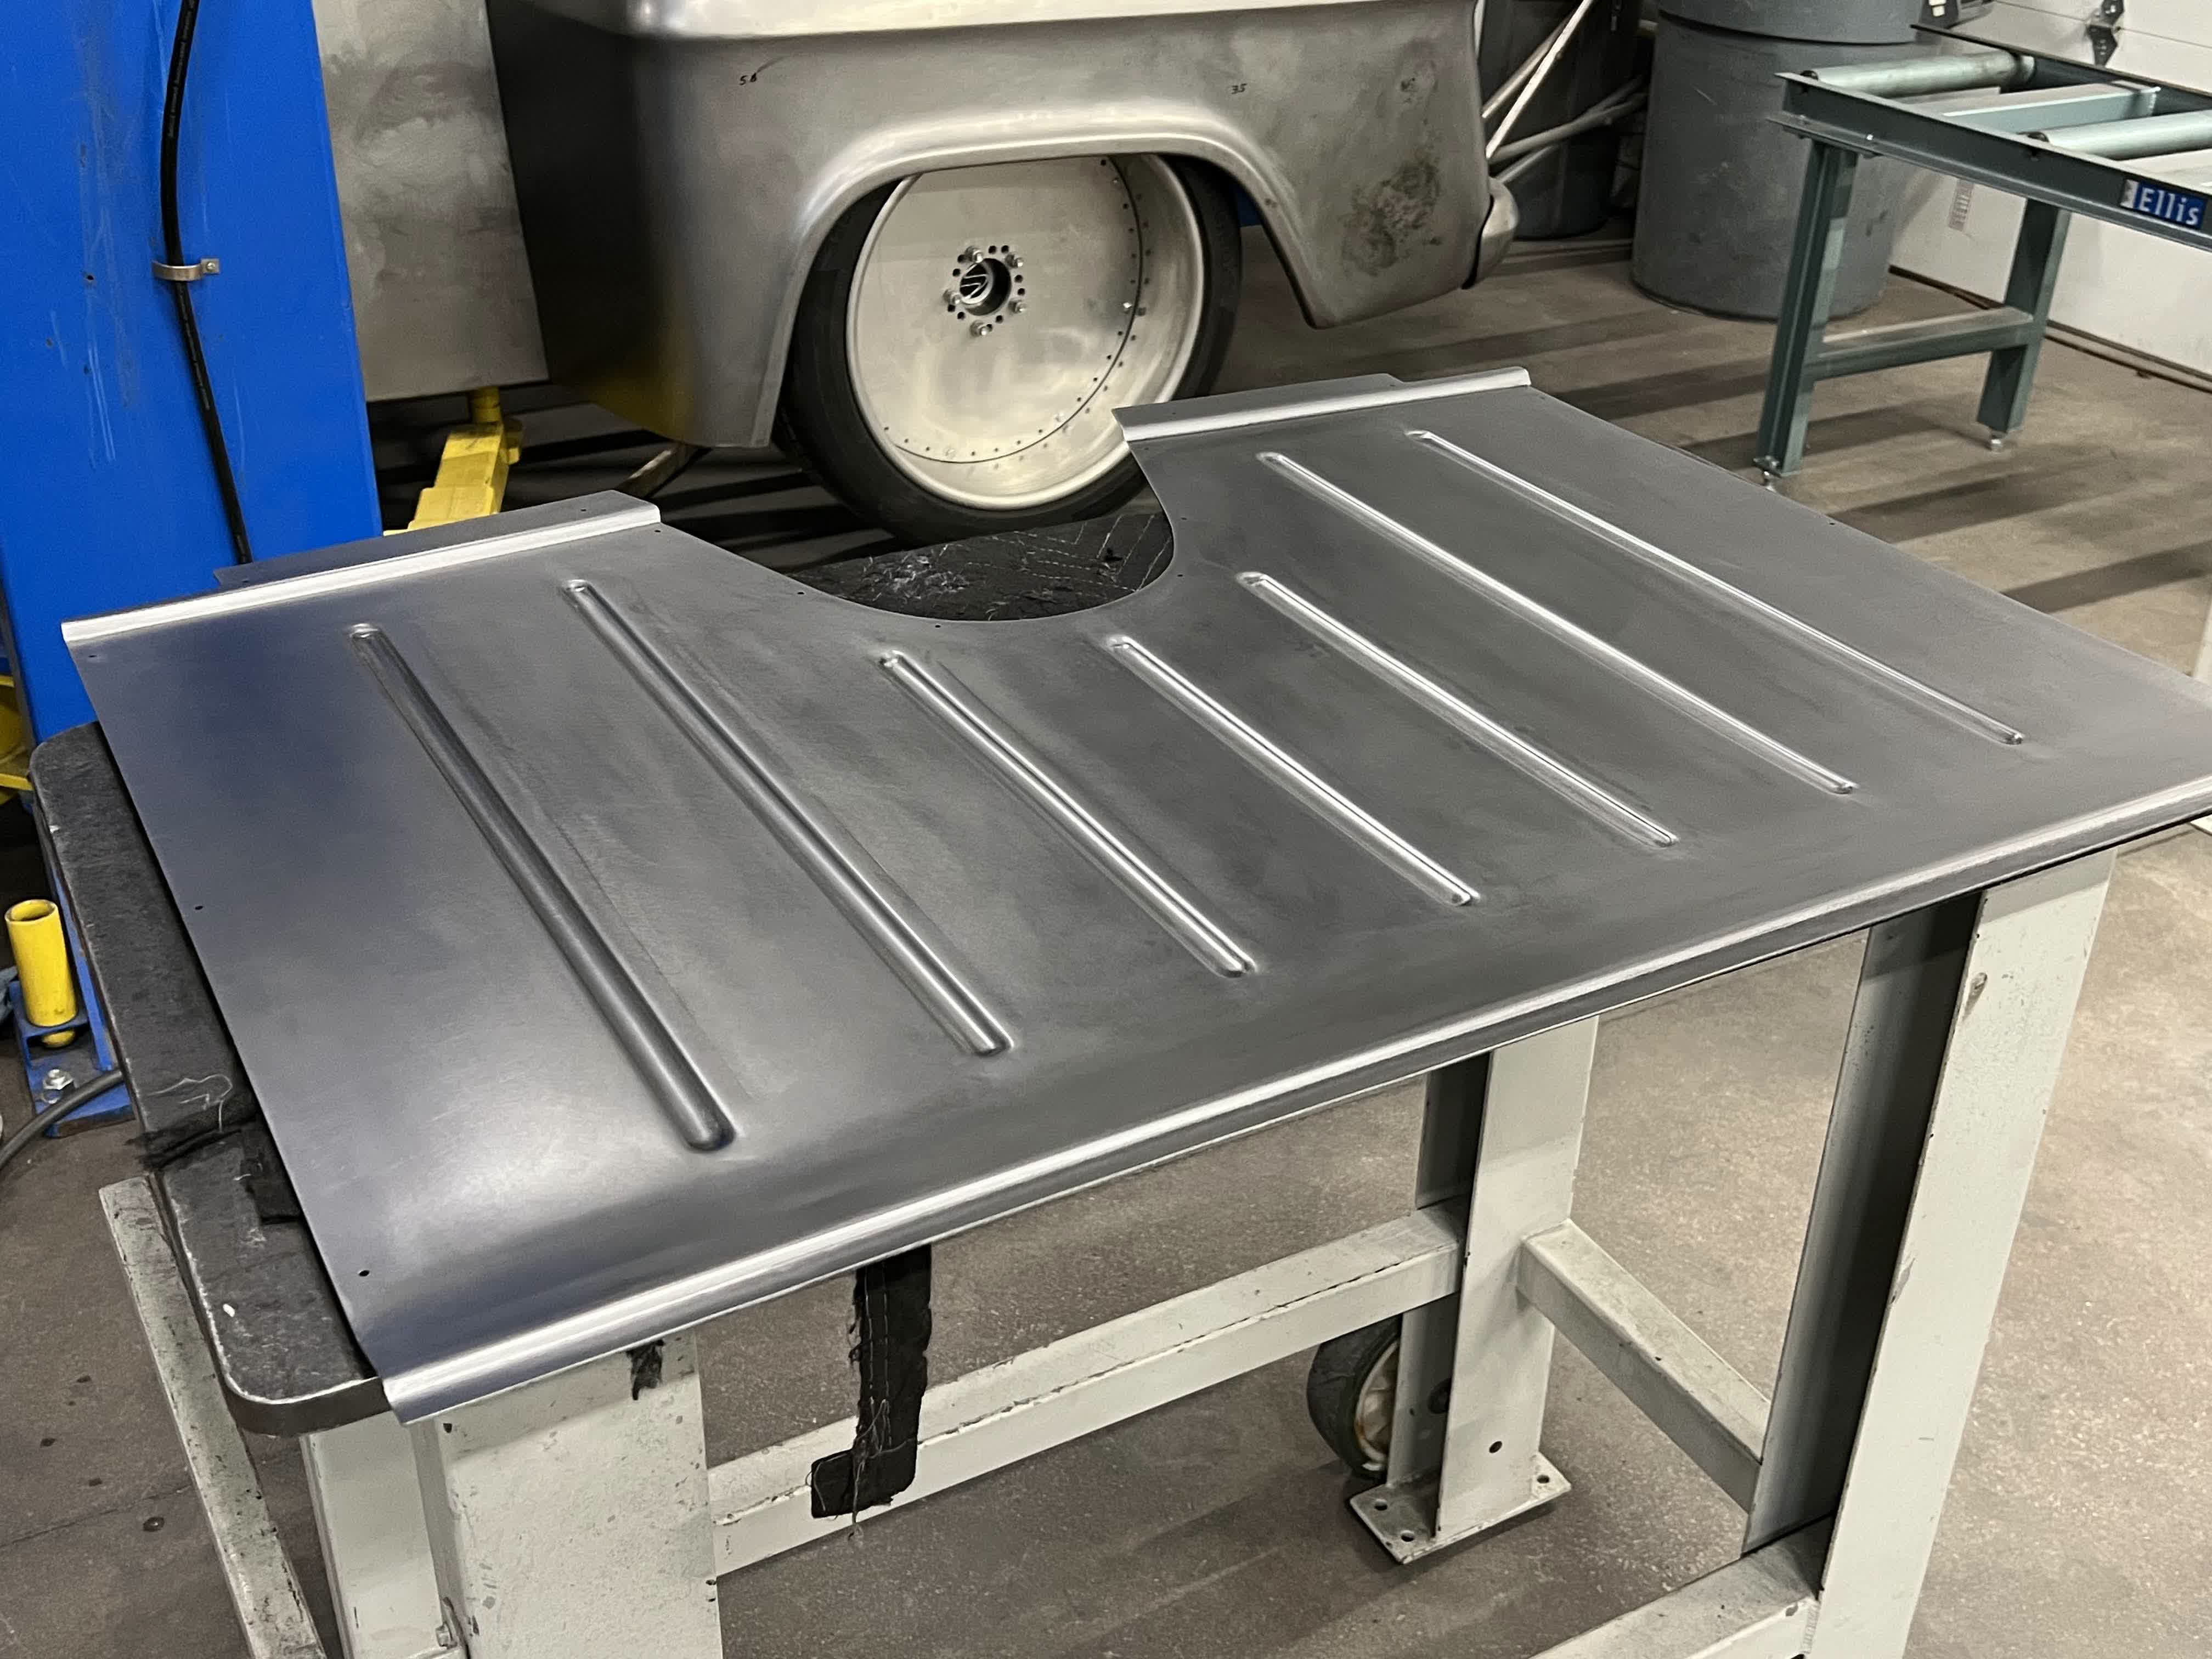
New floor pans were built from scratch in 14ga steel, then run through the Pullmax with a bead die to add long stiffening ribs across every panel. The result is a floor that's dramatically more rigid than the original stamping and clean enough to leave exposed underneath.
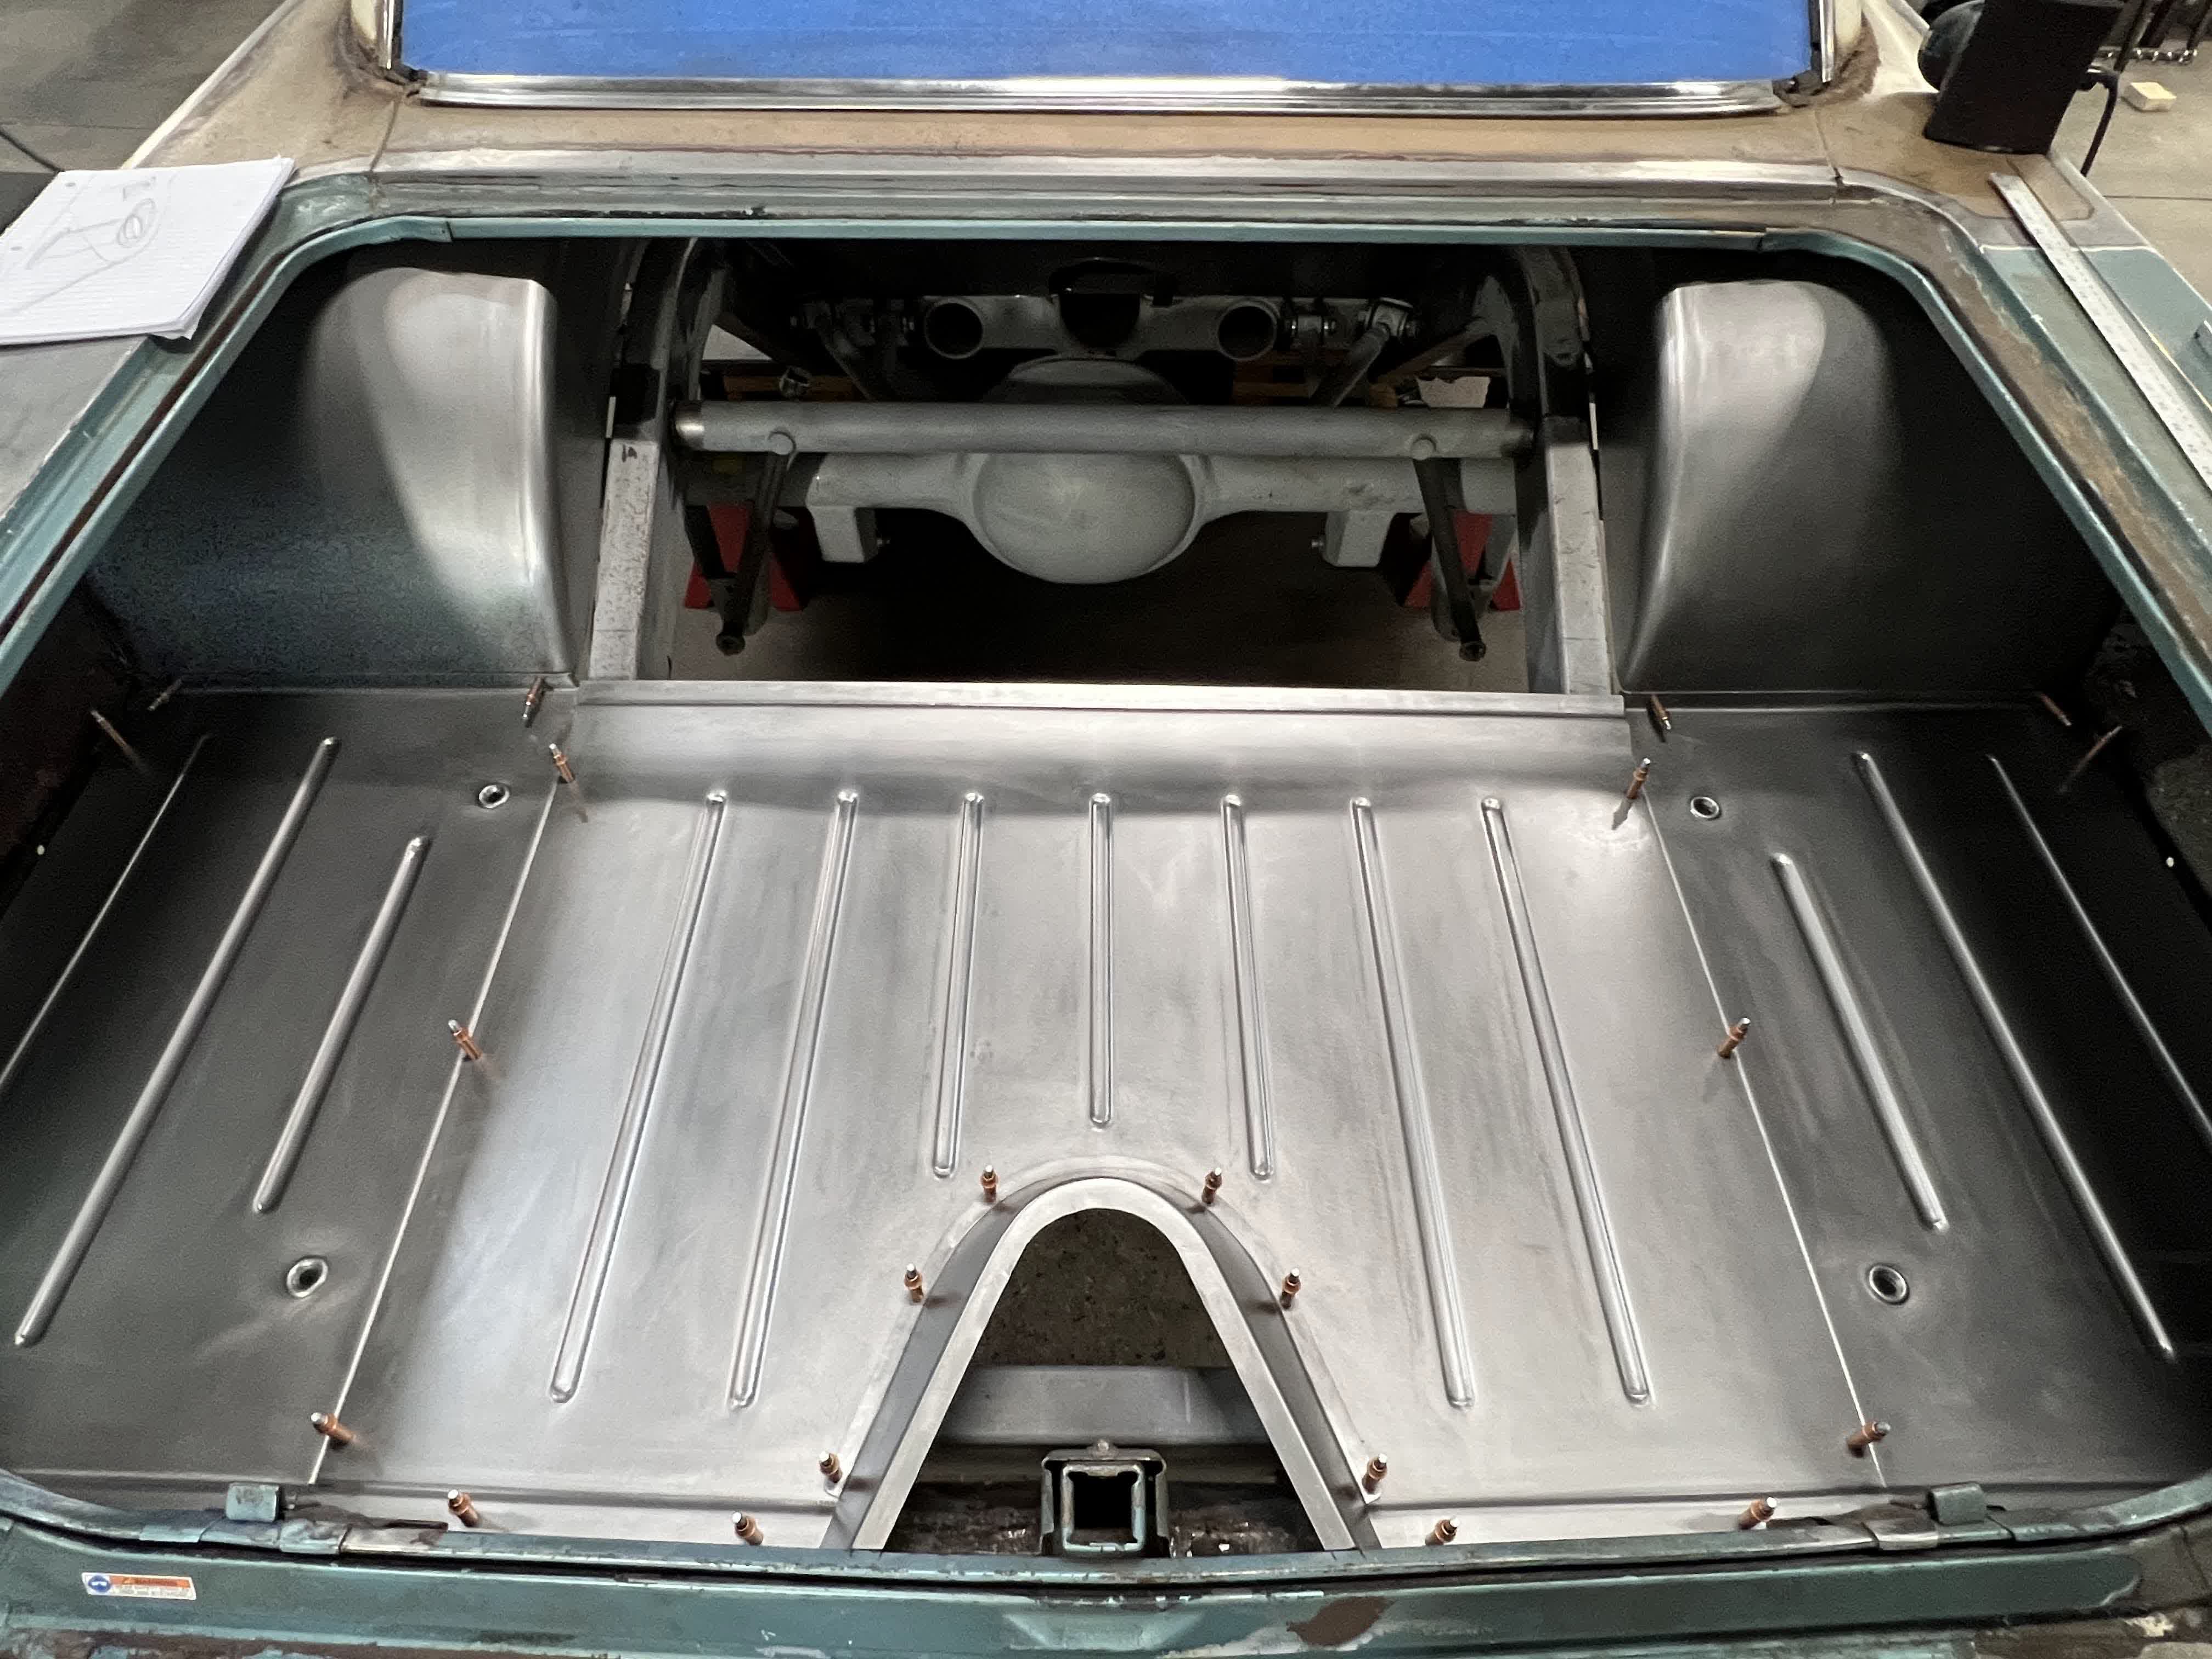
Trunk floor clecoed in place with the rear end and Panhard bar visible above.J044
Trunk floor clecoed in place with the rear end and Panhard bar visible above.
Detail of the beads rolled into a 14ga floor panel on the Pullmax.J045
Detail of the beads rolled into a 14ga floor panel on the Pullmax.
Fresh 14ga rear seat floor pan on the bench after being run through the Pullmax.J046
Fresh 14ga rear seat floor pan on the bench after being run through the Pullmax.
Full cabin floor with driveshaft tunnel cleco'd in — every panel stamped in-house.J047
Full cabin floor with driveshaft tunnel cleco'd in — every panel stamped in-house.

UPDATE 01 / 10

Feb 15, 2020

TEARDOWN

Build kickoff

The 1963 Impala hit the shop floor in February 2020 for M. Colavechio of Jupiter, FL. Direction was locked in from the rendering — laid-out pro-touring hardtop with serious boosted power.
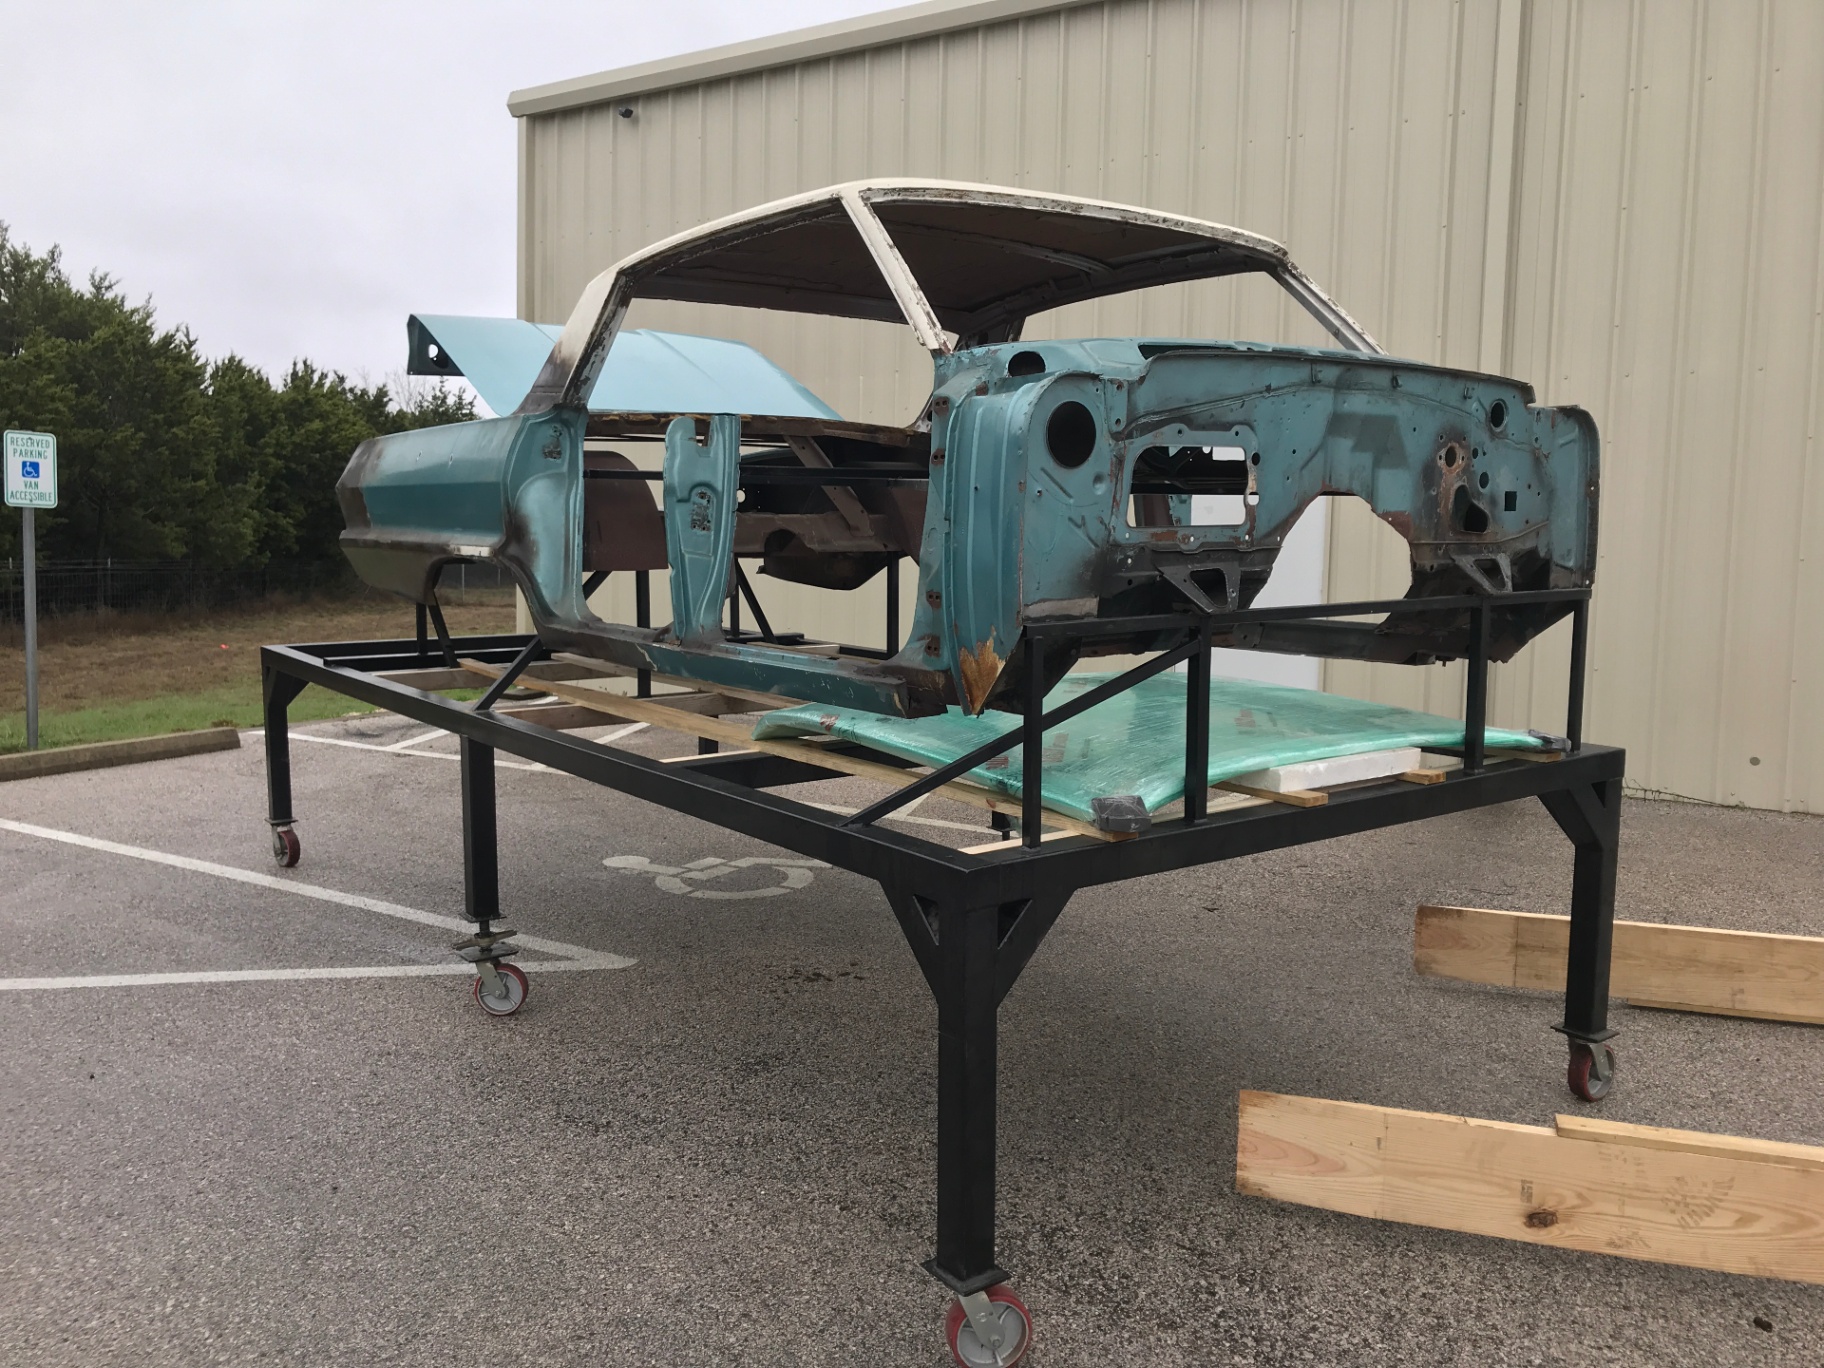
The 63 Impala on its build cart after teardown — original turquoise paint still visible.J048
The 63 Impala on its build cart after teardown — original turquoise paint still visible.

§ 04 — Process

Chapter by chapter.

Every build is documented as it moves through the shop. Here's how this one came together.

The renderingC049
CONCEPT COMPLETE — JAN 2020
01CHAPTER

The rendering

Completed January 2020, the rendering locks in the direction — soft metallic blue body, crisp white top, chrome trim retained, and a slammed stance on polished turbine-style wheels.

ENGINE DELIVERED — SEP 2021
02CHAPTER

Twin-turbo Nelson Racing power

The heart of the car is a twin-turbo V8 built by Nelson Racing Engines. It arrived at Hammer Fab in September 2021 and set the tone for the rest of the driveline and chassis work.

§ 05 — Gallery

Frame by frame.

39 FRAMES · SHOT IN-HOUSE

63 Impala — frame 1G051
001 / 039
63 Impala — frame 2G052
002 / 039
63 Impala — frame 3G053
003 / 039
63 Impala — frame 4G054
004 / 039
63 Impala — frame 5G055
005 / 039
63 Impala — frame 6G056
006 / 039
63 Impala — frame 7G057
007 / 039
63 Impala — frame 8G058
008 / 039
63 Impala — frame 9G059
009 / 039
63 Impala — frame 10G060
010 / 039
63 Impala — frame 11G061
011 / 039
63 Impala — frame 12G062
012 / 039
63 Impala — frame 13G063
013 / 039
63 Impala — frame 14G064
014 / 039
63 Impala — frame 15G065
015 / 039
63 Impala — frame 16G066
016 / 039
63 Impala — frame 17G067
017 / 039
63 Impala — frame 18G068
018 / 039
63 Impala — frame 19G069
019 / 039
63 Impala — frame 20G070
020 / 039
63 Impala — frame 21G071
021 / 039
63 Impala — frame 22G072
022 / 039
63 Impala — frame 23G073
023 / 039
63 Impala — frame 24G074
024 / 039
63 Impala — frame 25G075
025 / 039
63 Impala — frame 26G076
026 / 039
63 Impala — frame 27G077
027 / 039
63 Impala — frame 28G078
028 / 039
63 Impala — frame 29G079
029 / 039
63 Impala — frame 30G080
030 / 039
63 Impala — frame 31G081
031 / 039
63 Impala — frame 32G082
032 / 039
63 Impala — frame 33G083
033 / 039
63 Impala — frame 34G084
034 / 039
63 Impala — frame 35G085
035 / 039
63 Impala — frame 36G086
036 / 039
63 Impala — frame 37G087
037 / 039
63 Impala — frame 38G088
038 / 039
63 Impala — frame 39G089
039 / 039

§ 06 — Next steps

Have a project
like this?

Send us the story of the car and what you want it to become. We'll get back with a real assessment and a realistic timeline.

Start an inquiry
85 IROC-Z

NEXT IN THE LOG →

85 IROC-Z

HF-85-01